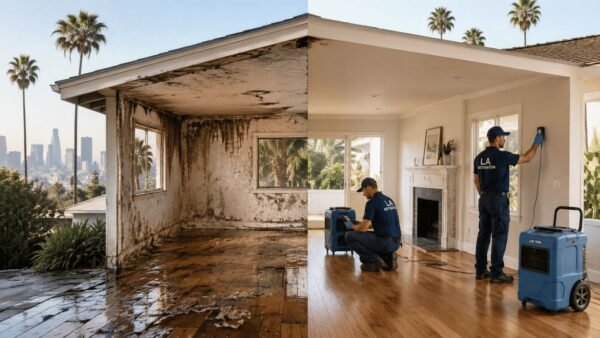
A lot of Los Angeles homeowners first think about asbestos tile testing at the worst possible time. A supply line leaks under the sink. A washing machine overflows overnight. Smoke damage sends a contractor pulling up flooring. Then someone notices the old tile underneath and asks the question nobody wanted during an emergency: “Could this be asbestos?”
That question matters most in older homes and small commercial buildings across Sherman Oaks, Mid-Wilshire, Burbank, Glendale, and the rest of LA’s older housing stock. Flooring that sat undisturbed for years can become a real hazard once water, demolition, scraping, or heavy foot traffic starts breaking it apart.
Asbestos was widely used in resilient flooring because it was durable, heat resistant, and moisture resistant. In practice, that means old floor tile can look ordinary right up until an emergency restoration job turns it into a contamination issue. The right move isn’t guessing, and it isn’t prying up a corner to “see what’s under there.” The right move is controlled, professional testing before anybody disturbs the material further.
That Old Flooring Might Be a Hazard What LA Homeowners Must Know
A common call starts like this: a homeowner in a 1970s Valley house has a plumbing leak, the laminate buckles, and an older layer of tile shows up underneath. The tiles are small, brittle, and stained from moisture. Somebody wants them out immediately so drying can continue.
That’s exactly where people get into trouble.
Asbestos was incorporated into U.S. manufactured resilient flooring starting in the 1920s, including 9" x 9" asphalt tiles, and remained embedded in flooring products for decades. It shifted into vinyl composite products after World War II, and vinyl-asbestos tile production did not cease entirely until 1986, as detailed by R&R Magazine’s history of asbestos in resilient flooring: https://www.randrmagonline.com/articles/91242-a-brief-history-of-asbestos-in-resilient-flooring

Why emergency damage changes the risk
Floor tile is often described as non-friable when it’s intact. Homeowners hear that and assume it means safe.
It doesn’t mean that.
It means the material is less likely to release fibers while it remains whole and undisturbed. Once water weakens the bond, or a crew starts scraping, breaking, sanding, or prying, the situation changes fast. In an emergency restoration setting, speed matters, but control matters more.
Practical rule: If old flooring appears during water, fire, or mold work, stop removal until the suspect tile and adhesive are assessed.
Why Los Angeles properties deserve extra caution
LA has a huge inventory of homes, apartments, schools, and mixed-use buildings built before modern material changes took hold. A flat-roof leak in West Hollywood, a slab leak in North Hollywood, or a kitchen backup in a Mid-City duplex can expose layers of older flooring that nobody knew were still in place.
The problem isn’t just the visible tile. It’s the whole flooring system, including the adhesive and the way emergency work can disturb it.
A calm response looks like this:
- Pause demolition: Don’t let a flooring crew “just get started.”
- Isolate the area: Keep occupants and pets out.
- Document what was found: Photos help with later scope discussions.
- Arrange professional asbestos tile testing: That gives the project a safe path forward.
That’s how you keep a water loss from turning into a health issue, a regulatory issue, and an insurance issue at the same time.
Identifying Potential Asbestos Floor Tiles in Your Property
You can’t confirm asbestos by sight alone, but you can learn when a floor deserves caution.
The first clue is often size and age. Asbestos became a common component in U.S. manufactured resilient flooring in the 1920s, particularly in 9" x 9" asphalt tiles. Its use in vinyl composite tile became widespread after WWII and was even mandatory under Federal Specification SS-T-312 until the mid-1970s. Production of vinyl-asbestos tile only ceased entirely by 1986, according to this industry history: https://www.randrmagonline.com/articles/91242-a-brief-history-of-asbestos-in-resilient-flooring

Visual clues that should put you on alert
In older LA homes, suspect flooring often shows up in kitchens, utility rooms, hallways, rental units, and converted garages. It may be hidden under newer vinyl, carpet, or laminate.
Look for these warning signs:
- Small-format tile: 9×9 is the classic red flag.
- Older installation era: Original flooring or lower layers in pre-1980s properties deserve caution.
- Black adhesive underneath: Dark mastic under tile should never be ignored.
- Brittle edges or cracking: Damage increases concern, especially after moisture exposure.
- Patterned legacy flooring: Marbled, speckled, or checkerboard styles often trigger further review.
What visual screening can and can’t do
Visual screening helps you decide whether to stop and test. It does not tell you the tile is safe.
That matters because many floors look similar across decades. Some non-asbestos tiles resemble asbestos-containing tile, and some asbestos-containing materials don’t look unusual at all. In the field, that’s why experienced inspectors don’t rely on color, shape, or brand memory alone.
A quick visual walkthrough can still help you make a safer decision:
| What you notice | What it means |
|---|---|
| Small older tiles in a pre-1980s area | Treat as suspect until tested |
| Water-damaged tile lifting from slab | Higher risk if disturbed |
| Black residue under tile | Adhesive may also need sampling |
| Multiple flooring layers | Each layer may affect restoration scope |
A short visual example helps:
A burst supply line in a Mid-Wilshire condo exposes one visible top layer and one older layer beneath. The top layer may be recent. The lower layer may not be. If a contractor only looks at the upper floor covering, they can miss the actual hazard in the work area.
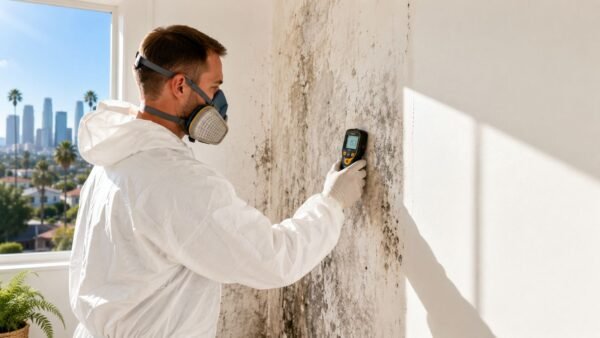
Later in the process, it helps to see what trained inspectors look for during field evaluation:
Old flooring should be treated like a decision point, not a demolition target.
The safest next move
If your property has suspect tile, don’t scrub it, don’t chip it, and don’t send a handyman to pull up “just a few pieces.” Mark the area, limit access, and arrange professional asbestos tile testing. That keeps a manageable project from becoming contamination work.
Why DIY Asbestos Sampling Is A Dangerous Mistake
Homeowners usually think DIY sampling will save time or money. In emergency restoration, it often does the opposite.
The main problem is simple. Taking your own sample means disturbing the exact material you’re worried about. Flooring that may have stayed relatively stable can start releasing fibers when someone snaps a tile, drills through it, or scrapes dried mastic off the slab.
Disturbance creates the risk
With older flooring, the hazard isn’t just what the material is made of. The hazard is what your actions do to it.
Water damage makes that worse. Saturation can weaken the binders that hold the material together. A tile that seemed solid yesterday may break differently after a leak, sewage backup, or long-term moisture exposure. Once a homeowner starts prying and bagging samples without containment, they’ve already created a preventable exposure path.
That’s why safety professionals focus on reducing exposure before the work starts. If you want a simple framework for that thinking, the hierarchy of controls is useful because it explains why “just be careful” is the weakest strategy when a hazard may be present.
DIY sampling can hurt the project, not just the person
A bad sample doesn’t just expose the person taking it. It can contaminate a hallway, a return air pathway, a work van, or a trash area. In occupied LA properties, that creates problems quickly.
The practical trade-offs are hard to justify:
- You may disturb more material than necessary.
- You may miss the adhesive entirely.
- You may collect a poor sample that doesn’t answer the actual question.
- You may complicate later cleaning, abatement, and documentation.
Some owners also forget that emergency projects involve multiple parties. Tenants, plumbers, mitigation crews, flooring installers, adjusters, and building managers all rely on the job file being defensible. A homeowner-collected sample rarely improves that file.
What works better in real jobs
Professional sampling is controlled. The inspector identifies suspect materials, isolates the sampling point, minimizes disturbance, and documents what was sampled and where it came from.
That documentation matters if the emergency project is already moving toward larger restoration work. If the damage also affects drywall, cabinetry, or framing, it helps to have a restoration team that understands how asbestos testing fits into the broader loss sequence. This overview of emergency restoration scope is a useful reference: https://onsitepro.org/restoration-pro/
If a material might contain asbestos, the cheapest mistake is to leave it alone until the right person tests it.
DIY sampling feels proactive. In practice, it’s often the moment a simple flooring question turns into a regulated cleanup problem.
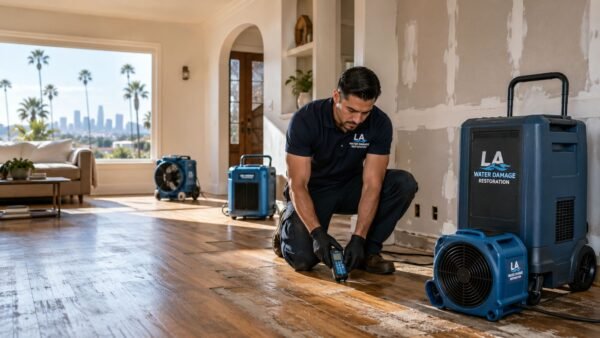
The Professional Asbestos Tile Testing Process Explained
Professional asbestos tile testing should feel methodical, not mysterious. Good inspectors follow a sequence that protects the property, preserves sample integrity, and gives the owner a report that can support next steps.

First the inspector defines the suspect materials
The visit usually starts with a site review. The inspector looks at age, location, visible layers, damage conditions, and whether demolition or drying work is planned.
In emergency settings, this part matters more than people expect. A kitchen flood may look like one flooring issue, but the inspector may identify separate suspect materials in the tile, the adhesive, and adjacent finishes.
The first questions are practical:
- What material is going to be disturbed?
- Which layers are original versus later additions?
- Has water, smoke, or prior demo already changed the condition?
- Does the work plan require removal, or can the material remain in place?
Then controlled sampling is performed
For water-damaged properties built before 1980, one restoration-focused protocol recommends sampling 3 to 5 spots per 100 square feet and notes that firms often work toward a 48-hour lab turnaround to stay aligned with emergency timelines, as discussed here: https://3westenviro.com/blog/asbestos-testing-after-water-damage/
The inspector doesn’t just grab a random piece. The sampling plan should reflect the actual flooring system and the likely disturbance area.
A professional approach often includes:
- Selecting representative points in the affected area.
- Collecting material carefully under controlled conditions.
- Capturing both tile and adhesive when needed.
- Sealing and labeling samples so the lab can identify each layer correctly.
Mastic testing is where many shortcuts fail
One of the biggest mistakes in asbestos tile testing is treating the tile as the whole story.
Mastic adhesive can contain asbestos even if the tile itself does not. Experts recommend collecting sufficient mastic, either on the back of tile samples or separately, and some black mastics contain up to 25% asbestos. Standard PLM analysis on flooring alone can risk false negatives, which is why some states mandate more sensitive TEM analysis to confirm results, according to EPA guidance: https://www.epa.gov/sites/default/files/documents/asbestosfaqs_0.pdf
That single detail changes real projects. If someone tests only the visible tile and ignores the adhesive, they can get a false sense of safety and start removal work under the wrong assumptions.
A negative tile result doesn't close the file if the adhesive was never properly tested.
Understanding PLM and TEM
Most owners don’t need to become lab specialists, but they should know the difference between the common test methods.
Here’s the plain-English version:
| Method | Typical role |
|---|---|
| PLM | Standard bulk material analysis for suspect flooring samples |
| TEM | More sensitive analysis, often used to confirm unclear or negative findings and for final clearance in some settings |
PLM is often the first-line lab method for flooring materials. TEM is used when greater sensitivity is needed or when the context demands stronger confirmation.
This distinction also matters after removal or abatement, when the question changes from “what is this material?” to “is the area safe for reoccupancy?”
Chain of custody is not paperwork for paperwork’s sake
A solid inspection includes a chain of custody. That’s the document tracking what was sampled, where it came from, how it was labeled, and how it moved to the lab.
Owners often overlook this until they need to prove something to an insurer, contractor, property manager, or attorney. If the project involves multiple vendors, chain-of-custody records help keep the findings defensible.
What happens while you wait for results
This is where discipline matters. If the affected area is under active restoration, crews may need to adjust their scope until the report comes back.
In some jobs, temporary engineering controls help keep adjacent areas protected while decisions are pending. For owners trying to understand what that equipment does during containment and air management, this reference on portable filtration equipment is helpful: https://onsitepro.org/air-scrubber-rental/
During that waiting period, what works is simple:
- Restrict access to the area
- Avoid dry disturbance
- Hold off on flooring removal
- Keep all parties working from the same scope notes
Professional testing doesn’t slow the job down for no reason. It keeps the job from moving in the wrong direction.
How to Choose a Certified Asbestos Inspector in Los Angeles
Not every person who offers “testing” brings the same level of training, independence, or documentation. In Los Angeles, that difference matters because these jobs often intersect with occupied buildings, insurance deadlines, and local air-quality enforcement.
Independence matters more than a low quote
The best testing setup is usually an independent inspector who does not profit from selling the abatement job. That reduces the chance of a conflict of interest.
If one company wants to test, write the remediation scope, and perform the removal without clear separation of roles, ask harder questions. In asbestos work, convenience can blur judgment.

Questions worth asking before you book
A good phone call tells you a lot. Ask direct questions and listen for direct answers.
What credentials do you hold in California
You want someone who can clearly explain their asbestos-related qualifications and field role.Do you test only, or do you also perform abatement
This helps you identify possible conflicts.Will you sample both tile and adhesive if needed
If the answer is vague, keep looking.How do you document sample locations and chain of custody
Clear reporting is part of the service, not an extra.What lab methods do you use for flooring materials
They should be comfortable discussing PLM and when added sensitivity may matter.Have you handled emergency water, mold, or fire losses in older LA properties
Emergency restoration creates different pressures than a planned remodel.
Red flags that show up early
Some warning signs appear before anyone arrives on site:
| Red flag | Why it matters |
|---|---|
| “We can tell by looking” | Visual-only opinions are not enough |
| No mention of mastic | Incomplete scope |
| Pushes removal before testing | Backward sequence |
| No discussion of documentation | Weak support for claims and compliance |
Local experience counts
Los Angeles jobs are rarely neat. You may have a condo association in play, a tenant schedule, a plumber waiting on access, and a mitigation crew trying to stay ahead of moisture. The inspector has to work inside that reality.
That’s also why property owners often coordinate asbestos concerns alongside other indoor environmental issues. If moisture has been present for any length of time, owners may also need to understand how separate mold sampling fits into the project file. This related resource is useful for that side of the decision: https://onsitepro.org/la-mold-testing/
In older LA properties, the best inspector is usually the one who asks more scope questions before sampling, not fewer.
What to expect on timing and cost discussions
Inspectors should be able to explain their pricing structure clearly. Some pre-purchase or specialty surveys in the LA market may add $300 to $1500 extra, as noted in RTK Environmental’s discussion of pre-sale testing constraints and due diligence gaps: https://rtkenvironmental.com/asbestos-testing/top-questions-on-asbestos-answered/
For emergency losses, speed is important, but a rushed answer without proper scope isn’t a bargain. The better value is a report that supports safe removal decisions and, if needed, insurance review.
What To Do If Your Asbestos Tile Test Is Positive
A positive result is serious, but it’s manageable when the next steps are handled correctly.
The key threshold is straightforward. If a material tests greater than 1% asbestos, it is treated as an asbestos-containing material for abatement purposes in the testing and restoration context described here.
First contain the issue
Don’t keep walking crews through the area. Don’t let a flooring installer “work around it.” Don’t start partial removal.
Instead:
- Stop disturbance immediately
- Keep occupants out of the work area
- Prevent dry sweeping or vacuuming with standard equipment
- Preserve the lab report and sample location notes
If the flooring was exposed during a water or fire job, update the restoration scope before anything resumes. Doing so ensures good coordination, which prevents expensive rework.
What Class II abatement looks like
If materials test positive above 1%, OSHA requires Class II abatement protocols. This includes using amended water to wet tiles, removing them in sections, and using HEPA-filtered equipment. Negative pressure enclosures maintained at -0.02 inches water column with frequent air changes can reduce airborne fiber excursions by 95%. Final air clearance testing must show levels below 0.01 f/cc via TEM before an area can be reoccupied, according to this restoration safety guide: https://www.randrmagonline.com/articles/91129-comprehensive-guide-asbestos-testing-and-safety-limits-for-restoration-companies
That’s a technical sentence, but the jobsite meaning is simple. Professional abatement controls dust, isolates the work area, removes the material in a planned way, and verifies that the space is ready for people to return.
What usually works best in flooring projects
Flooring abatement is detail-heavy. The best crews slow the physical removal down so the project can move forward safely afterward.
A typical sequence looks like this:
Containment goes up first
The work area is isolated from the rest of the home or building.Wet methods are used during removal
That helps reduce fiber release while tile and adhesive are handled.HEPA-equipped tools support cleanup
Standard shop vacs are not interchangeable with proper HEPA units.Waste is packaged and handled correctly
Disposal requirements are part of the job, not an afterthought.Clearance testing closes the loop
The area should not return to normal use without final verification.
Removal is not the only possible outcome
In some properties, intact material may remain in place if the scope allows it and a qualified professional recommends that route. In emergency restoration, though, the issue is often that water, fire, or demolition has already made disturbance unavoidable.
That’s why positive asbestos tile testing changes the work plan. Once the material is confirmed, the project stops being a standard flooring or mitigation issue and becomes a regulated hazard-management issue.
If your project reaches that point, you’ll want a contractor experienced in hazardous material response, containment, documentation, and coordination with the rest of the restoration scope. For broader context on that kind of work, this resource is helpful: https://onsitepro.org/hazardous-materials-cleanup/
Navigating Insurance Claims With Asbestos Testing Results
Insurance questions get messy fast when asbestos shows up in the middle of a water or fire claim.
Most property owners learn the hard way that asbestos removal isn’t always treated the same way as the original loss. The adjuster may ask whether the asbestos work is a direct consequence of a covered event, whether demolition is necessary to access damaged materials, and whether all required testing was done before the disturbance.
The documentation is what keeps the claim moving
For older water-damaged properties, EPA and SCAQMD Rule 1403 mandate sampling before demolition, and professional testing plus compliance with OSHA’s permissible exposure limit of no more than 0.1 f/cc as an 8-hour TWA are required for compliance. The same restoration source also warns that failure to provide this documentation can halt or invalidate an insurance claim when the work disturbs these materials: https://3westenviro.com/blog/asbestos-testing-after-water-damage/
That’s why the claim file needs more than a verbal warning from a contractor. It should include:
- The testing report
- Sample identification and location details
- The revised scope of work
- Containment and abatement records
- Final clearance documentation where applicable
Ask your adjuster direct questions
When asbestos is discovered during restoration, ask:
| Question | Why it matters |
|---|---|
| Is asbestos work covered if it was uncovered by a covered loss? | Clarifies causation |
| What testing records do you need before approval? | Prevents delays |
| Do you require independent lab reports? | Confirms documentation standard |
| What post-abatement documents must be submitted? | Helps close the file |
Property owners should also pay attention to who is assuming professional risk on the job. If you want a plain-language explanation of how service professionals manage errors-and-omissions exposure, this overview of professional liability insurance provides useful background.
A separate issue is policy language. Homeowners often don’t know what their policy says about pollutant exclusions, demolition access, or resulting damage. This guide can help frame those questions before you speak with the carrier: https://onsitepro.org/homeowners-insurance-policy/
The smoother asbestos claim is usually the one with the cleanest documentation, not the loudest argument.
Frequently Asked Questions About Asbestos Tile Testing
Can asbestos tile stay in place if it isn’t damaged
Sometimes, yes. Intact material may be safer left undisturbed if no demolition or flooring replacement is planned and a qualified professional agrees that condition and location support that decision.
Emergency restoration changes that analysis. If water, fire, mold work, or required access means the material will be disturbed, testing and regulated handling become far more important.
Should tile and black adhesive always be tested separately
They should both be considered in the sampling plan.
One of the most common mistakes in older flooring jobs is assuming the tile result answers the adhesive question. It doesn’t. A flooring system can contain different materials with different findings, and the adhesive can drive the abatement scope even when the tile result is less concerning.
Can a home inspector tell me whether floor tile has asbestos
Not reliably through a standard inspection.
A major due diligence gap exists in Los Angeles real estate because standard home inspections exclude invasive asbestos testing, sellers often resist destructive sampling before a sale, and California is moving toward stricter disclosure pressure for older properties, according to RTK Environmental’s discussion of pre-sale asbestos questions: https://rtkenvironmental.com/asbestos-testing/top-questions-on-asbestos-answered/
That means buyers often discover the issue later during repairs, remodeling, or damage restoration.
What if I already removed a few tiles before realizing the risk
Stop immediately and restrict access to the area.
Don’t keep lifting tiles to “finish the job.” Don’t sweep the debris. Don’t run standard air movers across the area. A qualified asbestos professional should evaluate what was disturbed and what the next containment or cleanup step should be.
Does water damage make old asbestos tile more dangerous
It can.
Water can weaken the binders and adhesive layers that keep fibers locked in place. The bigger issue is usually what happens next. Once the material is wet and loose, removal efforts, scraping, and demolition create more opportunity for release than if the floor had remained intact.
Is pre-purchase asbestos tile testing practical in Los Angeles
Sometimes, but not as part of a normal non-invasive home inspection.
If the seller allows targeted destructive sampling, a separate specialist can perform it. In many transactions, that approval doesn’t happen. Buyers should treat older flooring as a due diligence issue and plan for the possibility that hidden asbestos may affect renovation or future loss recovery.
Will asbestos tile testing delay emergency drying work
It can change the sequence, but it usually prevents worse delays later.
A controlled pause is better than contaminated demolition, failed clearance, or a disputed insurance file. In real restoration work, the fastest path is often the one that identifies regulated materials early and scopes the loss correctly the first time.
If old flooring has been exposed by a leak, smoke damage, mold work, or demolition in your Los Angeles property, don’t guess. Onsite Pro Restoration helps property owners coordinate safe next steps during emergency losses, from containment and documentation to restoration planning that aligns with compliance and insurance requirements.