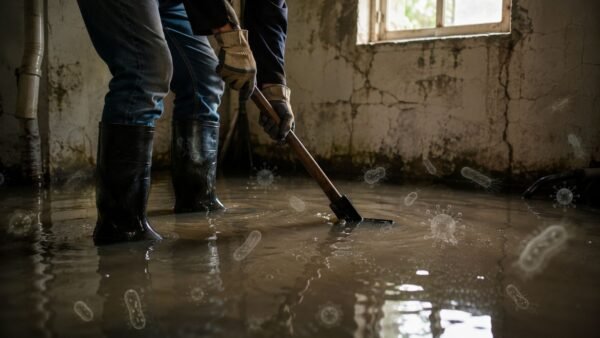
When you find a wet spot on your drywall, the clock starts ticking. Whether it’s a small damp patch from a slow leak in your Sherman Oaks condo or a completely soaked wall from a burst pipe in your Beverly Hills home, your first moves are the most critical.
Acting within the first 24-48 hours is non-negotiable. This is your window to stop mold before it starts and prevent much bigger, more expensive structural headaches down the road.
Don't wait for the problem to get worse. If you're facing water damage, call our IICRC-certified team now for immediate help.
Call (818) 336-1800 for an Emergency Assessment
What to Do Immediately When Your Drywall Gets Wet
That sinking feeling you get when you discover water damage is universal. But panic won’t help—a clear, rapid-response plan will. It all starts with one absolute priority: making the area safe.
Ensure the Area Is Safe
Before you even think about touching that wet wall, you have to deal with the risk of electrical shock. Drywall can easily hide live wiring, and water is an excellent conductor.
- Shut Off the Power: Go straight to your circuit breaker panel and kill the power to the affected room. If you're not sure which breaker it is, play it safe and shut off the main breaker for the whole house.
- Stop the Water Source: Next, stop more water from coming in. This could be as simple as turning a valve under a sink. For a major pipe burst, you’ll need to shut off the main water supply to your property. If you're struggling to find it, our guide on where to find the main water shut-off valve can help you locate it fast.
Identify the Water Type
Not all water damage is created equal. In the restoration world, we classify water into three categories, and this determines whether drywall can be salvaged or if it's a total loss.
- Category 1 (Clean Water): This comes from a sanitary source, like a broken water supply line. If you act quickly, drywall hit with clean water can often be dried and saved.
- Category 2 (Grey Water): This is contaminated water from sources like a washing machine overflow or a dishwasher leak. It contains bacteria and poses a health risk, meaning materials it touches need professional cleaning or removal.
- Category 3 (Black Water): This is the worst-case scenario. It’s grossly unsanitary water from sewage backups or outdoor flooding. Any porous material it touches, especially drywall, is considered a biohazard and must be removed and disposed of by certified professionals.
The infographic below breaks down the decision-making process, which always starts with these crucial first steps.

As you can see, the path forward—DIY drying versus calling in the pros—hinges entirely on safety and the cleanliness of the water source.
Perform an Initial Damage Check
Once the area is safe, you can get a better sense of the damage. Water is sneaky and can travel much farther than you think.
Use this table to quickly assess the water affecting your drywall and determine the safest next step.
Quick Water Damage Assessment Checklist
| Damage Level | Visual Signs | Recommended First Action |
|---|---|---|
| Minor | Small, contained damp spot; no discoloration; firm to the touch. | Isolate the area and begin DIY drying with fans. |
| Moderate | Swelling or sagging; peeling paint; darkening or water stains. | Cut a small opening to check for hidden moisture inside the wall. |
| Severe | Wall feels soft or mushy; visible mold; came from a flood or sewage. | Do not touch. Call a professional restoration company immediately. |
This checklist is a starting point. Remember, what you see on the surface is often just the tip of the iceberg.
Research shows that moisture can wick up to 30 inches above the visible water line inside a wall cavity where it can’t evaporate. This hidden saturation is why fast action is so important. Letting it sit can lead to secondary damage, increasing your final repair bill by 10-20%. For significant water intrusion, understanding the full scope of professional flood damage restoration is key to a successful recovery.
How to Find the Full Extent of Water Damage in Walls
That small, discolored spot you see on your drywall is almost never the whole story. Think of it as the tip of the iceberg. Water is deceptive—it wicks upward and sideways inside the wall, soaking insulation and creeping along studs far beyond where you can see or feel any dampness.
Before you can even think about how to dry drywall, you have to play detective and find out exactly how far the water has traveled.

Just touching the wall won’t cut it. Trying to dry only what’s visibly wet is a surefire way to end up with musty odors, wood rot, and a serious mold problem down the road. To get ahead of the damage, you need to see what’s happening behind the scenes. This is where a professional’s toolkit makes all the difference.
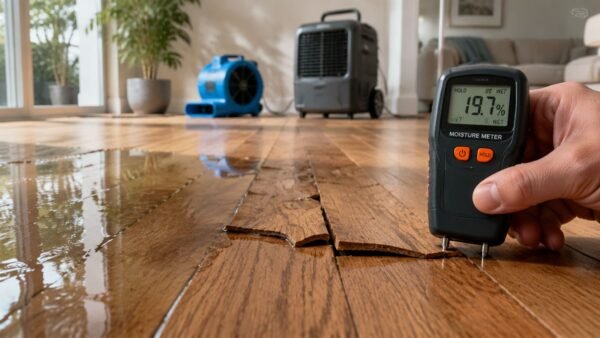
Using Moisture Meters For Precision
The most essential tool in our arsenal is the moisture meter. It takes all the guesswork out of assessing damage by giving us hard data. We use two main types, and each has a specific job.
- Pinless (Non-Invasive) Meters: These are fantastic for the initial sweep. They use electromagnetic signals to find moisture below the surface without leaving a single mark. We can glide one across a large wall and quickly map out the problem zones.
- Penetrating (Pin-Type) Meters: Once we've found a wet area, we switch to a pin-type meter for exact numbers. Its two small probes insert into the drywall to measure the actual moisture content percentage. This is the data that dictates our entire drying strategy.
Pro Tip: We always establish a "dry standard" first. This means taking a reading from an identical, unaffected wall somewhere else in the house. That gives us a target moisture level, so we know for sure when the wall is truly dry and back to its pre-loss state.
Seeing Behind Walls With Thermal Imaging
A moisture meter tells you what is wet, but a thermal imaging camera can show you where it is. These cameras are incredible—they detect tiny temperature differences on a surface. Because wet spots are colder from evaporation, they appear as distinct blue or purple patterns on the screen.
Imagine a slow leak from a pipe in a Sherman Oaks condo kitchen. To the naked eye, everything looks fine. But a thermal camera can instantly show a cold plume spreading down from the plumbing line, revealing the water's entire path inside the wall.
This technology is a game-changer for:
- Finding Hidden Leaks: We can pinpoint the source without needlessly tearing into walls.
- Checking Insulation: Wet insulation is a huge red flag for deep-seated moisture that won’t dry on its own.
- Verifying Drying: We use it to confirm the cold spots are gone and the wall is back to a uniform temperature.
Properly assessing the damage isn't just step one; it’s the foundation for the whole job. It defines the scope of work, tells us what equipment we need, and provides the solid proof your insurance carrier requires. For a deeper dive, our guide on how to detect water leaks in walls breaks down these professional techniques even further.
DIY Drying Methods for Minor Water Damage
So, you've checked things out and confirmed it's a minor leak from a clean water source (what we in the industry call Category 1 water). If you're confident in the scope and ready to act fast, you might be able to handle the drying process on your own. Getting this right is all about creating a powerful, targeted drying environment right inside your home.

Your success will boil down to two core principles: getting as much air as possible moving across the wet surfaces and aggressively pulling that moisture out of the air. Let's walk through how to create this professional-style drying system using equipment you can probably rent from a local hardware store.
Harnessing Airflow to Evaporate Moisture
The most important thing you can do is get the air moving. Stagnant, humid air is a recipe for disaster. Just opening a window won’t cut it; you need to generate a constant, rolling current of air that literally scrubs the moisture off the drywall.
This is a job for high-volume fans, often called "air movers" or carpet dryers. These are not your typical household fans. They're built to move a massive amount of air at high speed.
- Strategic Placement: Don't just point fans directly at the wall. Place them along the affected area and angle them at roughly 45 degrees. The goal is to create a circular, vortex-like airflow that covers the entire wet surface.
- Create a Swirl: Get the fans working together. On a wet wall, you might have one air mover pushing air along the baseboards while another is aimed a bit higher, keeping the air rolling up and across the wall.
- Run Them Constantly: These fans need to run 24/7. No breaks. If you turn them off overnight, humidity will spike, and you’ll lose all the progress you made.
This intense airflow is what pulls water molecules out of the drywall and suspends them in the air. But that's only half the job. Now you have to capture that airborne moisture.
The Critical Role of Dehumidification
Running fans without a dehumidifier is like trying to mop up a huge spill with a sponge that’s already dripping wet. The fans will load the air with moisture, but without a dehumidifier to capture it, that humid air will just settle elsewhere, potentially causing secondary damage. The dehumidifier is what "wrings out the sponge."
Choosing the right type of dehumidifier is key, especially here in Southern California, where the climate can swing from bone-dry in the valleys to damp and cool near the coast.
Dehumidifier Types & Los Angeles Climates
| Dehumidifier Type | How It Works | Best For Los Angeles Areas |
|---|---|---|
| Refrigerant | Cools coils to condense water from the air. Works best in warm, humid conditions (above 65°F). | Inland areas like the San Fernando Valley, Burbank, and Glendale, especially during warmer months. |
| Desiccant | Uses a chemical absorbent to pull water from the air. More efficient in cooler, less humid conditions. | Coastal communities like Santa Monica or Malibu, where damp, foggy air can be cooler. Also good for unheated garages. |
Whichever type you use, make sure it can drain continuously through a hose into a sink or tub. If the collection bucket fills up, the machine will shut off, and the entire drying process will grind to a halt.
Key Takeaway: The combination of high-velocity fans and a powerful dehumidifier creates a dynamic drying system. The fans force moisture into the air, and the dehumidifier captures and removes it. One without the other is far less effective.
Getting Air Inside the Wall Cavity
Even with the best equipment, drying the inside of a wall is tough. The paper backing on insulation and the dead air space between studs are perfect for trapping moisture, which is an open invitation for mold. To get around this without tearing out the whole wall, professionals use a minimally invasive technique to force air directly into the wall cavity.
This is a smart way for how to dry drywall without kicking off a major demolition project.
- Remove Baseboards Carefully: Start by scoring the caulk line along the top of the baseboard with a utility knife. Gently work a putty knife behind it, then use a small pry bar (with a scrap piece of wood to protect the wall) to carefully pull the baseboard away.
- Drill Small Ventilation Holes: Grab a drill with a ½-inch bit. In the space between each wall stud, drill a hole about two inches up from the floor. This creates an entry point for dry air and an exit for moist air.
- Direct the Airflow: Now, aim your air movers right at these holes. This will force dry air into the wall cavity, pushing the trapped, damp air out.
This "cut-and-dry" method drastically accelerates the drying of the studs, insulation, and the back of your drywall. It’s a targeted attack on hidden moisture. Once you’ve confirmed everything is completely dry, patching these small holes is simple, and they'll be completely hidden when you reinstall the baseboard.
How Professionals Dry Severely Saturated Walls
A few fans and a rental dehumidifier might work for minor water spots. But when a wall is completely soaked—from a burst pipe in your Beverly Hills home or a major roof leak after a storm—DIY methods just aren't going to cut it.
At that point, professional structural drying isn't a luxury; it's a necessity. You're no longer just drying a surface. You're performing a targeted intervention to save the very bones of your house.
When our Onsite Pro Restoration team shows up, we’re not just bringing bigger fans. We're deploying a scientific system to aggressively pull trapped moisture from deep inside your wall cavities. We call this structural drying. It's not about hoping for the best; it’s about using data, specialized equipment, and a deep understanding of psychrometrics—the science of how air, temperature, and moisture interact.

The Power of Injection Drying Systems
The cornerstone of modern structural drying is the injection drying system. This equipment is a true game-changer because it lets us dry walls from the inside out, often without needing to tear them down. Instead of messy demolition, we can preserve the wall and get your life back to normal much, much faster.
The process is methodical and surprisingly clean:
- Strategic Hole Placement: We start by carefully removing your baseboards. Then, we drill a series of small, precisely placed holes—usually only about a quarter-inch wide—at the base of the wall between each stud.
- Pressurized Air Delivery: Next, a network of tubes is connected from a powerful drying unit right into those small holes. The system then forces highly pressurized, warm, and extremely dry air directly into the wall cavity.
- Forced Evaporation: This constant flow of air creates a high-pressure zone inside the wall, which dramatically speeds up evaporation. It literally forces trapped moisture out of the wood studs, the insulation, and the paper backing of the drywall.
This method is incredibly effective. It’s like creating a powerful wind tunnel inside your wall, actively pulling moisture out rather than just passively waiting for it to escape. This is a core part of what professional water mitigation services accomplish.
Why This Technology Is So Effective
The science behind this approach is what makes it so much better than anything you can do on your own. For anything beyond surface-level dampness, injection drying systems have transformed the way professionals approach how to dry drywall, turning a destructive process into a restorative one.
Industry data shows these systems can slash wall cavity drying times by as much as 60%. By pumping heated air at volumes of 100-200 CFM straight into the voids, we create an environment where moisture simply has to evaporate. The process is so efficient that it has been shown to reduce the need for secondary mold remediation by 35% in major US markets between 2020 and 2025. Following strict protocols like the IICRC S500 standard ensures the job is done right and accepted by your insurance company.
Beyond Airflow: Advanced Dehumidification
While the injection systems handle the walls, all that moisture they force out has to go somewhere. This is where professional-grade dehumidifiers come into play. These aren't the small units you buy at a big-box store; they're industrial powerhouses.
- Low-Grain Refrigerant (LGR) Dehumidifiers: These are the workhorses of our industry. They can pull massive amounts of water vapor from the air, dropping the relative humidity in the room and creating the perfect drying environment.
- Desiccant Dehumidifiers: For colder Los Angeles days or specialty materials, we sometimes use desiccant dehumidifiers. These use a chemical absorbent that works efficiently even in low temperatures where LGRs would struggle.
By combining injection drying with powerful dehumidification, we create a closed-loop system. Pressurized air forces moisture out of the walls, and the dehumidifiers immediately grab it from the air, preventing it from settling somewhere else. This is the professional standard for how to dry drywall quickly, thoroughly, and safely.
Confirming Your Drywall Is Completely Dry
So, how do you know when the job is actually done? Just touching the wall to check for coolness or damp spots is a recipe for disaster. Moisture is sneaky. It loves to hide deep inside wall cavities, silently waiting for the right conditions to explode into a full-blown mold problem.
The only way to know for sure that your home is safe is to verify it with data. Professionals don't guess—we measure. The final step of any real water damage job isn’t just turning off the fans; it’s proving the structure is back to its normal, pre-loss condition. This is the crucial step that protects your property and gives you the concrete proof your insurance adjuster needs to see.
Setting The Drying Goal
Before we even start the drying process, we have to establish a clear target. This isn't just a random number we pull out of thin air; it’s a specific moisture level based on the unique materials in your home. We call this setting the drying goal.
To get this number, a restoration pro will find an identical but completely unaffected area of your home—think a drywall panel in a closet on another floor. We'll take a moisture reading from that spot, and that number becomes our "dry standard." The job simply isn't finished until every single affected material meets that exact goal.
Professional Insight: While drywall is generally considered dry when its moisture content is below 15%, the real goal is always to match the "dry standard" of your specific property. This scientific approach removes all the guesswork and ambiguity.
Daily Monitoring With Professional Tools
Once the drying equipment is up and running, the job shifts to meticulous, daily monitoring. A certified technician will be at your property every day to track progress and make any necessary adjustments to the equipment setup. This isn't just a quick peek; it’s a scientific assessment using specialized instruments.
Here’s what that daily check-in looks like:
- Moisture Meter Readings: We use penetrating moisture meters to get readings from the drywall, the wood studs behind it, and the subfloor below. These numbers are logged daily to create a clear data trail showing exactly how the materials are drying.
- Psychrometric Readings: Using a hygrometer, we measure the temperature and relative humidity of the air in the room, as well as the air coming directly out of the dehumidifier. This tells us exactly how efficiently our equipment is pulling moisture out of the environment.
This daily data collection ensures the environment is perfectly optimized for fast, thorough drying. If you're curious about the details, our guide explains more about how to read moisture meter readings and what those numbers actually mean.
Busting The Three-Day Drying Myth
There’s a dangerous myth floating around that all water damage jobs dry out in three days flat. It's one of the most common—and costly—misconceptions in our industry. While a very minor, straightforward job might finish that quickly, it is absolutely not the standard.
The IICRC S500, which is the official rulebook for professional water damage restoration, is crystal clear: structures must be dried to their pre-loss moisture levels. The standard completely debunks the myth that everything dries in just 3-4 days. In reality, only 10-20% of jobs actually finish that fast.
Here in Los Angeles, factors like insulated walls, multiple layers of drywall, or even the humid coastal fog in a place like Santa Monica can significantly extend the timeline. A true professional from Onsite Pro Restoration will use daily moisture readings to continue the drying process for as long as it takes to hit that pre-determined drying goal—whether it’s three days or ten. Poor monitoring leads to rework rates as high as 25%, but our structured, data-driven process drops this to under 5%. You can learn more about the in-depth article on drying science to see why this is so critical.
Completing this process isn't just about turning off fans; it's your ultimate proof that the job was done right.
Your Questions About Drying Wet Drywall, Answered
After our crews finish a job, Los Angeles homeowners often have lingering questions about the drywall drying process. We get it. You want to be sure the job was done right. Here are the answers to the questions we hear most often.
Can Wet Drywall Be Saved?
In many cases, yes. The real question comes down to two things: where the water came from and what the wall looks like now.
If the leak was from a clean water source, like a burst supply line (Category 1 water), and you caught it fast, there’s a very good chance we can dry the wall without tearing it out.
But if the drywall is physically falling apart—crumbling, sagging, or showing massive, dark stains—it's lost its structural integrity. It has to go. The same goes for any wall soaked with contaminated grey or black water; that’s an automatic removal for safety reasons.
How Long Does It Take for Drywall to Dry Completely?
A small damp spot might feel dry to the touch in a day, but that’s incredibly misleading. For a professionally managed drying job on a saturated wall, you’re looking at 3 to 5 days with our industrial-grade equipment running.
Several things can slow that down:
- Insulation: An insulated wall is like a wet sponge. It traps moisture and always takes longer to dry than an empty wall cavity.
- Humidity: The higher the humidity in your home, the slower the drying. This is a common challenge here in coastal areas like Santa Monica.
- Saturation Level: A wall that sat wet for a day will take far longer to dry than one where the leak was stopped in minutes.
A wall isn't dry just because it feels dry. We only consider a wall fully dry once our moisture meters confirm it’s back to its "dry standard"—the normal moisture level for other, unaffected materials in your home.
Will a Dehumidifier and Fan Be Enough to Dry My Wall?
For a tiny, superficial wet spot on the paint, maybe. But if water has actually soaked into the drywall, a household fan and dehumidifier just won't cut it. It’s a common mistake we see people make.
Here's the problem: your home equipment doesn't have the power to pull moisture out from deep inside the wall cavity, the insulation, and the wood studs. Our professional air movers create a powerful vortex of airflow, while our industrial dehumidifiers can pull gallons of water vapor out of the air every day. Anything more than a minor surface issue needs the right equipment to truly prevent mold. Knowing how to prevent mold in your basement and behind your walls follows the same principles of aggressive moisture removal.
What Happens if You Don't Dry Wet Drywall Properly?
Cutting corners on drying is basically rolling out the welcome mat for some serious, long-term problems. The most immediate threat is mold growth, which can start colonizing a damp, dark wall cavity in as little as 24 to 48 hours.
But it gets worse. That lingering moisture can also lead to:
- Structural Rot: Wood studs and the bottom plates of your walls will start to decay, weakening your home's structure.
- Peeling Paint and Damaged Finishes: Moisture will eventually wick its way to the surface, causing paint to bubble, blister, and peel.
- Persistent Musty Odors: That damp, mildew smell will permeate the entire room and is incredibly difficult to get rid of once it sets in.
- Pest Infestations: Termites and other destructive pests love damp, soft wood.
Failing to dry your drywall completely always ends up costing more in complex, invasive repairs down the line. To get ahead of this, check out our guide on how to prevent mold after water damage.
If you’ve had water damage and you're not 100% sure your walls are dry, don't guess. Call the IICRC-certified professionals at Onsite Pro Restoration. We'll give you a definitive answer with a comprehensive moisture inspection and make sure your property is safe.