A lot of Los Angeles homeowners first notice a chimney leak the same way. Rain passes, the sky clears, and then a brown ceiling stain shows up near the fireplace. Sometimes it’s a damp wall edge. Sometimes it’s peeling paint on the chimney breast. Sometimes the firebox smells musty even though nobody has used it in weeks.
That kind of stain gets dismissed all the time. People assume it’s a one-off from a hard storm, or they wait to see if it comes back. That delay is where the substantial cost starts. In the United States, chimney-related incidents, including leaks, average 5,000 reports annually, and neglected leaks can turn a simple $800 flashing fix into a repair bill exceeding $6,000 when water reaches drywall, insulation, and framing, according to this statistical report on chimney accidents in the U.S..
In Los Angeles, the problem isn’t just rain entry. It’s what happens after water gets inside. Moisture hides in wall cavities, darkens framing, feeds mold, and spreads beyond the fireplace area before the leak source is confirmed. If you’re already seeing staining near a fireplace, it’s smart to treat it like a building-envelope problem, not a cosmetic one. If the stain appears near the roofline too, this guide on roof leak warning signs can help you understand how chimney leaks often overlap with surrounding roof failures.
If you’re dealing with that mystery damp spot right now, the right next step is a professional assessment focused on source identification first. Good chimney leak repair starts with diagnosis, not guesswork.
Introduction: That Mysterious Damp Spot After the Rain
The timing is usually the clue. A rare LA downpour hits overnight, and the next morning the ceiling near the fireplace looks blotchy. By afternoon, the drywall tape starts lifting, or the paint takes on that soft bubbled look that tells you water got behind the finish.
IICRC restoration work teaches one lesson quickly. Visible damage is often smaller than the wet area behind it. Water runs along framing, masonry, vent paths, and roof decking before it ever shows itself indoors. That’s why chimney leaks confuse people. The stain may be at the fireplace, but the entry point might be higher at the flashing, across the crown, through porous masonry, or even from a venting issue that only looks like a leak.
Practical rule: If water appears near a chimney after rain, assume there may be hidden moisture until inspection proves otherwise.
Los Angeles properties add their own complications. Older homes in neighborhoods like Sherman Oaks, Glendale, and West Hollywood often have aging masonry paired with later roof work. That creates weak transitions where materials move differently over time. Add seasonal rain, high winds, and mild but repeated moisture exposure, and small defects become recurring intrusions.
Waiting rarely saves money. It usually moves the repair from one trade to three. What starts as targeted chimney leak repair can turn into drywall replacement, insulation removal, mold remediation, and insurance documentation.
Signs and Causes of a Leaking Chimney
A leaking chimney leaves patterns. The trick is knowing which patterns point to the chimney itself, and which ones point to the roof system around it.

Indoor signs that deserve attention
Start with what you can see and smell inside the house:
- Ceiling staining near the fireplace: This often points to water entry where the chimney meets the roof.
- Peeling paint or swollen drywall: Moisture may be traveling down masonry or framing before surfacing.
- Musty odor near the hearth: That’s a warning that damp materials have stayed wet long enough to support microbial growth.
- Drips inside the firebox: Water may be entering from above through the crown, cap, or flue opening.
- White residue on brick: Efflorescence means water has moved through masonry and left mineral deposits behind.
If you’re seeing wall staining beyond the fireplace area, this guide to signs of water damage in walls is useful because chimney leaks often spread laterally before they show up clearly.
The usual failure points
Most chimney leak repair jobs come back to four culprits.
Flashing failure
Flashing is the sheet metal system that seals the joint where roof and chimney meet. When that metal rusts, separates, or was installed poorly, rain gets into one of the most vulnerable transitions on the house.
Cracked or failed crown
The crown is the top surface that sheds water away from the chimney structure. When it cracks, absorbs water, or pulls away at the flue edge, moisture starts entering from above.
Worn masonry
Brick and mortar don’t stay weather-tight forever. Once masonry becomes porous or joints open up, the chimney starts absorbing water instead of shedding it.
Missing or damaged chimney cap
A cap blocks direct rain entry and helps keep debris out of the flue. If it’s missing, loose, or undersized, water and debris can enter from the top.
A white stain on brick is not the problem itself. It’s evidence that water is already moving through the masonry.
What the symptom usually suggests
| Symptom | Likely source |
|---|---|
| Ceiling stain near chimney | Flashing or roof transition |
| Drips in firebox | Crown, cap, or flue opening |
| Efflorescence on exterior brick | Masonry absorption |
| Musty smell after storms | Hidden moisture in wall or chase |
| Bubbling paint on nearby wall | Ongoing seepage behind finishes |
One caution matters here. Not every “chimney leak” is structural. Some moisture problems come from appliance venting and condensation, which needs a different fix entirely. I’ll get to that later because it’s one of the most expensive misdiagnoses I see.
What You Can Do Now: Inspection and Temporary Mitigation
The first job is to limit damage safely. Not to solve it from a ladder, not to smear roof cement over everything, and not to guess.

Start from the ground
Walk the exterior and look up. You’re checking for obvious clues:
- Loose or missing cap
- Visible cracks at the crown
- Staining on brick below the roofline
- Gaps where chimney meets roofing
- Damaged shingles around the chimney base
If you want a roofing-specific visual reference for what trained inspectors look for around penetrations and transitions, Paletz Roofing for inspections offers a useful example of how roof-adjacent leak points are evaluated.
Protect the interior
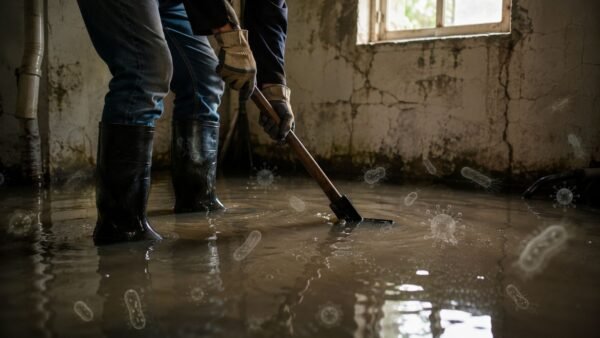
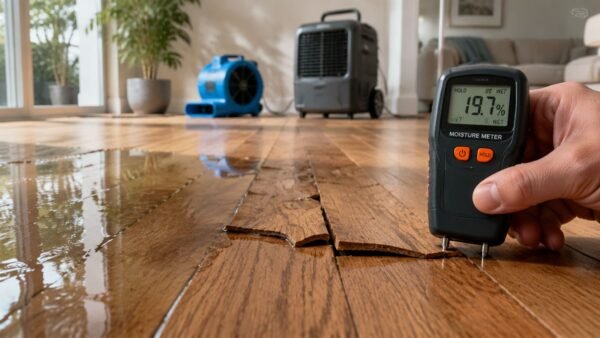
If water is actively entering, contain it. Put a bucket in the firebox or under attic drips if the area is safe to access. Move rugs, furniture, and anything absorbent away from the affected wall. If drywall is saturated, don’t assume opening windows will solve it. Wet cavities need proper drying strategy.
For homeowners using a meter or trying to make sense of damp readings, this page on how to read moisture meter readings helps you understand why surface dryness can be misleading.
Field note: Temporary protection is about slowing damage, not approving the repair in your mind. Containment and diagnosis are separate steps.
What not to do
A few common homeowner moves make later repair harder:
- Don’t climb onto a wet roof. Chimney areas are high-risk transitions even in good weather.
- Don’t caulk every crack you see. Random sealant often traps water or hides the actual failure path.
- Don’t repaint stains yet. Fresh paint can conceal active moisture and complicate documentation.
A short visual can help if you’re trying to understand how leak paths around masonry and roofing intersections are assessed:
If another storm is coming and there’s clear top-entry exposure, a tarp may reduce water entry, but only if someone qualified can place it safely. That’s a stopgap. Real chimney leak repair means identifying the exact pathway and correcting the assembly.
Permanent Chimney Leak Repair Methods Explained
Permanent repair depends on where water enters. Different defects need different scopes of work, and mixing them up is why many chimney leaks return after “repairs.”

Flashing replacement
This is the repair I pay the closest attention to because it fails often and gets patched badly. Chimney flashing failure accounts for 80 to 90 percent of water penetration issues, and proper repair requires flashing to extend at least 4 inches up the chimney face with counter-flashing lapped over it by at least 3 inches for a 20+ year service life, as detailed in SaverSystems' guide to fixing leaky chimney flashing.
That matters because cosmetic sealant at the roof line isn’t the same as rebuilt flashing. A proper job usually means removing surrounding roofing materials as needed, replacing failed metal, integrating new step and counter flashing, and sealing the system so water sheds instead of pooling.
Crown repair versus crown rebuild
A hairline surface issue and a failed crown are not the same thing.
- Minor surface defects: These may be repairable if the crown is still structurally sound and sloped correctly.
- Widespread cracking or separation: That usually calls for reconstruction, not another surface patch.
- Recurring top-entry leaks: Repeated patching rarely holds if the crown geometry is wrong.
In Los Angeles, seismic movement matters. Small shifts over time open old repairs and expose weak mortar at the top of the stack. For that reason, long-term work usually beats repeated patching.
Patch material has a role. It just shouldn’t be asked to do the job of a rebuild.
Masonry repair and waterproofing
When brick and mortar start taking on water, repair often includes tuckpointing and then breathable waterproofing. Tuckpointing removes deteriorated mortar joints and replaces them with new mortar compatible with the chimney. Waterproofing comes after the masonry is sound. It helps reduce water absorption while still allowing vapor to escape.
Shortcuts in this context cause significant damage. Paint-like coatings can trap moisture inside the brick. That often makes spalling worse.
Chimney cap installation
A cap is simple, but it matters. It helps block direct rain, debris, and animal entry into the flue. If the current cap is loose, rusted, or poorly sized, replacing it is usually part of a complete scope.
Here’s the practical comparison:
| Repair method | Best for | What doesn’t work well |
|---|---|---|
| Flashing replacement | Roof-to-chimney leak paths | Surface caulk as a stand-alone fix |
| Crown rebuild | Top slab cracks and water entry from above | Repeated patching on a failing crown |
| Tuckpointing and waterproofing | Absorptive masonry and open mortar joints | Sealing over damaged mortar |
| Cap installation | Direct flue rain entry and debris | Leaving flue exposed |
A good scope solves the pathway, not just the symptom.
Costs, Insurance, and When to Call a Restoration Pro
Most property owners ask the same question first. Is this a masonry repair bill, a roof bill, or a restoration bill? Sometimes it’s one. Often it becomes two when water has already moved indoors.
The cost spread can be wide because chimney leak repair isn’t one repair. Verified market data for chimney repair services notes common ranges such as waterproofing at $600 to $1,800, partial rebuilds at $4,000 to $9,000, and flue liner replacements at $350 to $550 per foot, within the broader chimney repair services market analysis. In practice, the final cost depends on access, roof type, extent of hidden moisture, and whether interior drying or material removal is needed.

Why delay gets expensive
The biggest mistake is pricing only the leak entry point and ignoring secondary damage. The hidden cost of delayed detection is severe. Undetected leaks can cause unseen damage to HVAC systems and structural framing, turning a simple repair into a $10,000+ restoration project, and a 24 to 48 hour professional response can often prevent that escalation, according to this discussion of common chimney leak repair questions.
That’s why a restoration assessment matters when you see:
- Saturated drywall or insulation
- Mold-like odor near the fireplace wall
- Staining spreading into ceilings or adjacent rooms
- Wet attic framing near the chimney chase
- Damage affecting vents, registers, or nearby mechanical components
Insurance usually turns on one issue
Insurance carriers often look closely at whether damage appears sudden and accidental or whether it developed from long-term maintenance neglect. The leak source matters, but so does your documentation.
Take photos before cleanup. Save a timeline of when staining appeared and after which storm. Keep contractor findings separate by trade if roofing, chimney, and interior drying are all involved. If you’re trying to understand how that process usually unfolds, this overview of the home insurance claim process gives a practical starting point.
For homeowners who want another plain-language overview of repair pathways, Penn Ohio Roofing & Siding Group has a straightforward article on how to fix a chimney leak.
When ceiling stains spread beyond the chimney line, stop thinking only about repair and start thinking about mitigation, documentation, and drying.
When to call immediately
Call a restoration pro without delay if water is active, drywall feels soft, there’s visible microbial growth, or the leak has reached insulation, framing, or HVAC-adjacent areas. At that point, the job is no longer just chimney leak repair. It’s also damage control.
The Condensation Misdiagnosis: Is It a Leak or Your Furnace?
One of the most expensive chimney mistakes in Los Angeles happens when condensation gets mistaken for rain intrusion.
Older masonry chimneys were often built for wood-burning appliances or older venting conditions. Then the home gets updated with a newer gas furnace or water heater. The venting characteristics change, moisture forms inside the flue, and that moisture starts damaging masonry. Homeowners see dampness, staining, or deterioration and assume the roof or crown is leaking.
The problem is real, but the fix is different.
According to this explanation of the most common reasons chimneys leak, condensation issues in older masonry chimneys are increasingly misdiagnosed as structural leaks as homes switch to modern gas appliances. Distinguishing condensation, which may require a liner, from masonry failure, which may require flashing or crown work, is critical if you want to avoid paying for repairs that don’t solve the source.
Clues that point toward condensation
Structural leaks usually show a relationship to rain events. Condensation problems may behave differently.
- Moisture appears without recent rain
- Damage is concentrated inside the flue path
- Appliance upgrades happened years after the chimney was built
- Masonry repairs were done before, but moisture returned
A heating contractor may need to be part of the diagnosis. If the house has broader venting or furnace performance issues, a general heating reference like Al-Air's guide for heating issues can help you understand why venting problems often masquerade as building leaks.
Why this matters financially
If condensation is the cause, exterior waterproofing alone won’t fix it. Neither will repeated crown patching. You can spend serious money on visible masonry defects and still have the same moisture problem because the flue liner or vent configuration was the root issue all along.
If the indoor symptom is ceiling dampness rather than visible chimney damage, this page on condensation on ceiling is useful because it helps separate moisture behavior caused by building systems from rain entry through the envelope.
Correct diagnosis saves more than the repair itself. It prevents the second repair.
Preventive Maintenance for LA Chimneys
Los Angeles doesn’t have the freeze-heavy climate that punishes chimneys in colder regions, but local owners still deal with enough rain, wind, roof aging, and building movement to justify regular inspection. Preventive maintenance is cheaper than reopening a ceiling.
Properly executed repairs also last long enough to make planned upkeep worthwhile. Chimney caps can last 15 to 20 years, new flashing 20 to 30 years, and professional waterproofing 5 to 10 years, making preventive care the more cost-effective path over time.
A practical maintenance routine
Before rainy season
Schedule inspection before fall and winter storms. This is the best time to catch crown cracks, loose caps, failed sealant, and roof-to-chimney separation while everything is dry and easy to evaluate.
After high winds
Look up from the ground and check that the cap is still seated properly. Wind-driven rain exploits cap and flashing weaknesses fast.
During routine roof or gutter service
Ask whoever is already on the roof to flag visible movement, corrosion, missing mortar, or roof wear around the chimney. That doesn’t replace a chimney-specific inspection, but it catches obvious defects early.
Small defects are manageable when the repair is targeted. They become expensive when moisture gets a season head start.
What owners should keep an eye on
- Interior staining after storms: Don’t repaint first.
- Musty odor near the fireplace: Moisture may be trapped in finishes or framing.
- Powdery white brick residue: Water is moving through masonry.
- Cracked top surface: The crown may be failing.
- Recurring “fixed” leak: The original diagnosis may have been wrong.
For property managers, one point matters most. Treat chimney leak repair as part of the building envelope, mechanical venting, and interior drying conversation. The right response isn’t always one trade. It’s the right sequence of trades.
If you’ve noticed staining near a fireplace, musty odor after rain, or signs that moisture has spread beyond the chimney itself, Onsite Pro Restoration can assess the damage, document hidden moisture, and help you move from guesswork to a clear restoration plan.