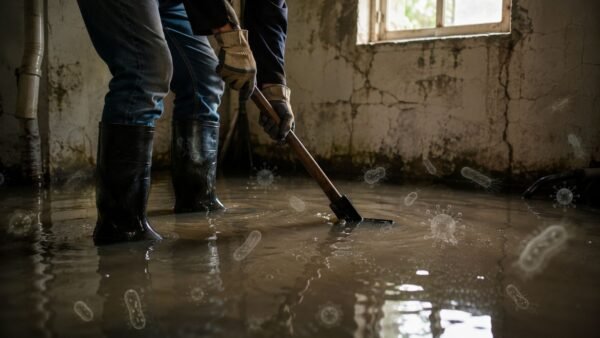
That cloudy ring on your coffee table or the dark blotch on your hardwood floor isn't just an eyesore—it’s a signal that moisture has compromised your wood's protective finish. A light, hazy 'white' stain typically means moisture is trapped only in the surface finish, while a deep, 'black' stain is a red flag that water has soaked directly into the wood itself, creating a much bigger problem. This guide will show you how to tackle any water stain on wood and when to call for professional help.
If you're dealing with a stubborn stain or suspect a hidden leak, don't wait. Onsite Pro offers 24/7 emergency services across Los Angeles.
Get a Free Damage Assessment Now
Diagnosing a Water Stain on Wood

When you find a water stain, your first job is to figure out what kind it is. This initial diagnosis is everything; it determines your entire plan of attack for removal and repair. The stain's color and appearance tell a story about how deep the moisture has gone, pointing you to the right solution and helping you avoid making things worse.
These incidents are incredibly common. We see them all the time in Los Angeles homes—a drink spills during a party in a Silver Lake apartment, leaving a milky ring on a vintage end table. Or a window seal fails during a rare rainy day in Sherman Oaks, creating a dark, ugly splotch on the hardwood floor underneath. In each case, the wood is sending a very different signal.
To make it easier, here's a quick reference guide to help you identify what you're dealing with.
Quick Guide to Identifying Wood Water Stains
| Stain Appearance | What It Means | Typical Cause | Your First Action Step |
|---|---|---|---|
| White, hazy, or milky rings/spots | Moisture is trapped in the top finish layer only (lacquer, varnish). | Condensation from a cold glass, a hot pizza box, a brief spill. | Gentle surface-level removal methods (e.g., iron and cloth, mayonnaise). |
| Dark brown or black blotches | Water has penetrated the finish and soaked into the wood fibers. | Leaky planters, pet accidents, persistent drips, long-term spills. | Deeper repair is needed, often requiring sanding, bleaching, and refinishing. |
Understanding these differences is the key to a successful repair. White stains are often a quick DIY fix, while black stains signal a more involved restoration process.
The Two Main Types of Water Stains
Not all water stains are created equal. Getting a handle on the two main categories is crucial for any homeowner who wants to tackle the problem correctly.
White or Light-Colored Stains: These show up as cloudy, milky, or hazy marks on the surface. This is generally good news. It means the moisture is trapped within the wood's finish—like the lacquer or varnish—and hasn't reached the wood fibers yet. These are almost always caused by brief contact with moisture, like the condensation from a cold glass left overnight.
Black or Dark-Colored Stains: A dark or black stain means you have a more serious issue. This discoloration tells you water has bypassed the protective finish entirely and soaked deep into the wood itself. The dark color is a chemical reaction between the water and the tannins in the wood. This kind of stain usually comes from prolonged water exposure, like a leaking planter, a slow drip from a ceiling, or a pet accident that wasn't cleaned up right away.
Why Acting Quickly Matters
A water stain is more than just a cosmetic flaw. It’s a visible warning sign of water damage, a problem affecting thousands of homeowners daily. In fact, data shows that over 14,000 people in the U.S. deal with some type of water damage every single day, and wood surfaces are especially vulnerable.
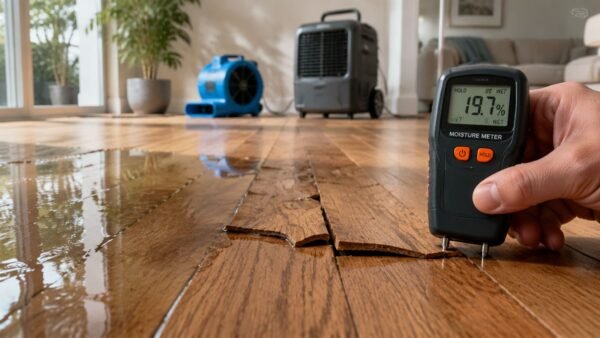
Those stains are a clear indicator that retained moisture could lead to mold growth in as little as 24-48 hours. If you’re ever worried about moisture you can’t see, you should know how to read moisture meter readings. Ignoring these early signs can turn a simple fix into a major, costly restoration project.
How to Fix Light White Water Stains on Wood
When you see that dreaded milky, white ring on a beautiful wood table, your first instinct might be to panic. Don't. That water stain on wood is often just moisture trapped in the top layer of the finish—the lacquer or varnish—not in the wood itself.
The good news is these surface-level blemishes are usually the easiest to fix. You can often handle them with things you already have around the house. The key is to always start with the gentlest method first to avoid damaging the finish.
Before you try anything, always test your chosen method on a small, hidden spot. The underside of a table or the back of a furniture leg is perfect for this.
The Gentle Heat Method
One of the most effective tricks for coaxing out trapped moisture is applying a bit of gentle heat. The idea is to warm the finish just enough to let the water vapor escape. Your standard hairdryer is the perfect tool for the job.
- Set your hairdryer to its lowest heat setting. Too much heat can soften or even melt the finish, creating a much bigger problem.
- Hold the dryer several inches away from the water stain on wood, moving it continuously back and forth across the area. Never let it linger in one spot.
- Keep the warm air moving until you see the milky stain start to fade. This can take a few minutes, so be patient. The white haze should slowly disappear as the moisture evaporates.
Using a Mild Abrasive Paste
If heat doesn’t quite get the job done, the next step is to gently buff the stain out of the finish with a very mild abrasive. You can make a simple, safe paste right in your kitchen. This technique works by lightly "scrubbing" the very top of the finish without scratching the wood.
A go-to paste is a simple mix of baking soda and water. You want a consistency similar to toothpaste. For a little more power, some people have success mixing non-gel, white toothpaste with baking soda.
Pro Tip: Steer clear of gel toothpastes or any that have aggressive whitening crystals. They can be too harsh and often contain chemicals that could damage the wood’s finish.
Put a small amount of the paste on a soft, clean cloth (an old t-shirt or microfiber towel works well). Rub it gently into the stain, always moving with the wood grain. Use light pressure and check your progress every few seconds. Once the stain is gone, wipe the area clean with a fresh, slightly damp cloth and then dry it completely.
The Iron and Cloth Technique
This is another classic heat-based method for releasing trapped moisture, and it's especially useful for larger or more stubborn white rings. All you need is a clean, dry cotton cloth (like a plain dishtowel or t-shirt, no prints or dyes) and a regular household iron.
- Set your iron to its lowest heat setting and make sure the steam function is off. Steam will just add more moisture, which is exactly what you’re trying to remove.
- Lay the dry cotton cloth flat over the entire water stain.
- Press the warm iron onto the cloth for just a few seconds at a time. Lift the iron frequently to check on the stain.
- Repeat this process until the stain vanishes. It’s absolutely critical to keep the iron moving and not let it rest in one spot, or you risk scorching the finish and the wood beneath it.
These simple fixes can be incredibly effective, but they only work if the stain is superficial. If you've tried these methods and the mark isn't budging, it could be a sign that the water came from a more persistent source than a simple spill.
If you’re worried about a hidden issue, our guide on how to detect water leaks in walls can help you investigate further. A stain that won't go away often means the problem runs deeper than the surface.
How to Tackle Stubborn Dark Water Stains on Wood
When you see a dark or black water stain on wood, you’re looking at a much bigger problem than a simple white ring. Those stubborn marks are a dead giveaway that moisture has punched right through the finish and soaked deep into the wood fibers. This triggers a chemical reaction with the wood's natural tannins, leaving a deep discoloration that you can't just wipe away.
Tackling these stains means graduating from simple home remedies to some serious DIY restoration. It takes patience, the right stuff, and a methodical approach. The goal here isn't just to lift the stain but to do it without creating more damage, getting the wood ready for a seamless refinish.
The methods for light stains, like those in the diagram below, are all about coaxing moisture out of the finish. For dark stains, it's a whole different ballgame—we have to strip that finish off and treat the wood itself.

Preparing the Wood Surface
First things first: you can't treat the wood until you get rid of the finish. Varnish, lacquer, polyurethane—it all has to go. Trying to treat a stain through the topcoat is like trying to wash your hands with gloves on.
- Strip the Finish: A chemical stripper is usually your best bet. Follow the manufacturer's directions, brushing it on and letting it sit until the old finish bubbles up. Then, use a plastic putty knife—never metal—to gently scrape it away without gouging the wood.
- Neutralize and Clean: After stripping, the area needs a thorough cleaning with a neutralizer like mineral spirits. This gets rid of any leftover stripper residue. If you skip this, your new finish won't stick properly.
Safety is non-negotiable here. Make sure you're working in a well-ventilated space and wearing chemical-resistant gloves and eye protection.
Call (818) 336‑1800 For a Free Estimate
Applying Wood Bleach to Lift the Stain
With the wood bare and dry, it's time to go after that discoloration. This is absolutely not a job for household bleach. That stuff will damage the wood fibers and won't touch this kind of stain anyway. You need a product made for wood, and the industry standard is oxalic acid.
Oxalic acid usually comes in crystal form, which you'll mix with hot water. Apply the solution right on the dark stain, feathering it out at the edges to help blend the repair. You might need a few applications. Let it dry completely between each one until the stain lifts. Once you're done, you have to neutralize the acid with a simple mix of water and baking soda.
Important Takeaway: Wood bleach doesn't really "whiten" the wood. It works on a chemical level to reverse the reaction that caused the dark stain in the first place, bringing the wood back to its natural color.
The Art of Sanding and Refinishing
Once the stain is gone, the final step is to make the wood look like nothing ever happened. This starts with some careful sanding to smooth the surface for its new finish.
Begin with fine-grit sandpaper, something around 120-grit, and sand the whole area lightly. Always sand with the grain. You're just trying to create a uniform texture, not remove a lot of wood. When you’re done, a tack cloth will get rid of all the dust.
Matching the new stain to the rest of the wood is where the real skill comes in. I always recommend testing your stain color on a hidden spot or a scrap piece of the same wood. Apply the stain evenly, wipe off the excess, and let it dry.
Finally, apply a new topcoat—lacquer, varnish, or polyurethane—to seal and protect your work. It will probably take several thin coats to match the sheen of the existing finish. A light sanding with 220-grit sandpaper between coats is key.
The complexity of these repairs is a big reason why industry trends have shifted. Homeowners used to handle about 80% of these issues, but now we're seeing a 65% shift toward calling in professionals. People are more aware of underlying problems like mold, which the CDC notes can be linked to 10 million allergy cases a year. In older Los Angeles homes, where pipe failure rates can hit 22%, a dark stain often points to a much bigger issue.
When you're dealing with tough discoloration, understanding how to remove hard water stains can offer some useful techniques that apply to these stubborn dark spots, too. And if you notice a musty smell along with that dark stain, you need to address the risk of mold immediately. Our guide on the steps necessary to kill mold on wood will walk you through keeping your home safe.
When a Stain Signals a Bigger Problem in Your Los Angeles Home
That little ring on your coffee table is one thing. But the dark spot spreading from the baseboard? That’s another story entirely. Sometimes, a water stain on wood isn’t just an eyesore; it’s a warning sign from your house that something is seriously wrong.
While you can fix a simple spill with a little effort, ignoring the red flags of a deeper issue can lead to structural damage, hidden mold, and repair bills that make you wince.
You have to learn to read the signs. A stain that won't go away, wood that feels mushy, or floors that are starting to look like a funhouse mirror—these are all clues that you've got a persistent moisture problem.
When the Stain Comes Back
So you spent your weekend sanding and refinishing that dark spot on the hardwood, only to watch it reappear a few weeks later. It's frustrating, and it’s one of the clearest signs of an active leak. That returning stain means the source of the water was never actually stopped.
In our experience, this almost always points to a slow, hidden leak. We see it all the time with Los Angeles homeowners—a pinhole leak in a pipe behind the drywall, a bad seal on a window, or a brittle hose on an old appliance. A DIY fix on the wood stain itself is pointless until you find and stop the water at its source.
Changes in the Wood’s Texture and Shape
A stain is a visual problem. Physical changes to the wood, however, are a structural emergency. If the area around the water stain on wood feels soft, weak, or spongy when you press on it, you’re looking at wood rot. The wood's integrity is compromised, and it can no longer support weight properly.
Keep a close eye on your floors for these tell-tale signs of serious water absorption:
- Warping: When the boards start to twist or bend out of their original shape.
- Cupping: The edges of a floorboard rise higher than the center, creating a "U" shape.
- Buckling: This is the most dramatic, where the flooring pulls away from the subfloor entirely.
These issues don’t happen from a spilled glass of water. They’re evidence of a major water event, like a slab leak under the foundation or a pipe that burst inside a wall. If you're seeing this, you need to know about the other common signs of water damage in walls.
That musty, earthy smell you can’t get rid of? Your nose is telling you what your eyes can’t see: you probably have mold. The odor comes from gases (MVOCs) released by active mold colonies growing in a hidden, damp space.
DIY vs. Professional Help: When to Make the Call
It can be tempting to try and handle a water stain yourself, but knowing when to call for backup is crucial. A small, self-contained spill is one thing; a persistent or spreading stain points to a problem that a hairdryer and some sandpaper just can't fix. Delaying a professional assessment often leads to more extensive damage and higher costs.
This table breaks down common symptoms to help you decide on the right course of action.
| Symptom | Is a DIY Approach Suitable? | When to Call a Professional | Potential Risk of Delay |
|---|---|---|---|
| Small, light-colored ring from a glass | Yes. This is a surface-level stain on the finish. | If DIY methods (mayonnaise, iron) don't work after a few tries. | Minor cosmetic issue; low risk. |
| Dark stain that reappears after cleaning | No. This signals an active, ongoing leak. | Immediately. The source of the water must be located and stopped. | Structural rot, mold growth, escalating water bills. |
| Wood feels soft, spongy, or weak | No. This is a clear sign of wood rot and decay. | Immediately. The structural integrity of the material is compromised. | Potential for floor or structural collapse, widespread mold. |
| Flooring is warping, cupping, or buckling | No. This indicates a significant amount of moisture has been absorbed. | Immediately. This is evidence of a major water event, like a burst pipe or slab leak. | Permanent damage to flooring, subfloor rot, high repair costs. |
| A persistent musty or earthy smell | No. This is the classic signature of hidden mold growth. | Immediately. A mold remediation expert is needed for safe removal. | Poor indoor air quality, health risks, and spreading contamination. |
Ultimately, if you see any of the "When to Call a Professional" signs, don't wait. The sooner an expert can get in there with the right tools, the better your chances of preventing a small problem from turning into a full-blown restoration project.
The Financial Impact of Ignoring the Signs
Trying to save a few dollars by putting off a professional inspection is a gamble that rarely pays off. In fact, it almost always leads to much higher costs. The data doesn't lie: water damage is a massive issue, fueling a global disaster restoration industry where North America holds a 38.56% market share.
Here in Los Angeles, burst pipes are a constant threat, causing 23% of water loss incidents that ruin the beautiful hardwood floors in so many homes. If you let that moisture sit, you're looking at 15-20% cupping or warping, which can increase the final repair bill by as much as 40%. You can read the full research about the disaster restoration market to see the full scope.
When you spot these bigger warning signs, it’s time to call in a pro. A restoration expert uses tools like thermal cameras and moisture meters to find the water source without needless destruction. They have the equipment to dry the structure correctly, fix the hidden damage, and make sure your home is safe and mold-free.
Proactive Tips for Preventing Future Water Stains

The old saying holds true: an ounce of prevention is worth a pound of cure. While getting a water stain out is one thing, stopping it from happening in the first place saves you time, money, and a whole lot of frustration.
Building a few simple habits into your daily life is the best defense you have. It doesn't take much, but consistency is everything when it comes to protecting beautiful wood surfaces from the most common culprits behind a water stain on wood.
Creating Everyday Barriers
Most water stains aren't from a burst pipe; they’re from sweating glasses, forgotten plant waterings, and hot takeout containers. A simple physical barrier is your most effective tool.
- Coasters and Placemats: Make them a house rule for every drink and hot dish. Coasters are non-negotiable for preventing those classic condensation rings.
- Waterproof Plant Trays: A pot sitting directly on a wood floor or table is a ticking time bomb. Always use a deep, waterproof saucer underneath to catch overflow. Check it often for cracks.
And remember, good prevention goes beyond just stopping spills. Following some general wood cleaning and maintenance tips will keep your wood's finish strong and more resistant to damage in the first place.
Managing Your Home's Environment
Moisture isn't just from spills; it's in the air. Keeping an eye on your home's indoor climate is a huge part of protecting your wood, especially here in Los Angeles where microclimates change everything.
For homes in coastal areas like Santa Monica or Malibu, the persistent marine layer can elevate indoor humidity. Conversely, inland areas like Sherman Oaks can experience dry spells that affect wood differently. A balanced environment is key.
Running a dehumidifier during those damp, foggy months can stop moisture from slowly weakening your wood's finish. On the flip side, a humidifier can prevent wood from drying out and cracking during a Santa Ana wind event, which would make it even more vulnerable to the next spill.
Performing Routine Maintenance Checks
The really destructive water stains—the ones that cause buckling floors and rotted subfloors—rarely come from a spilled glass. They come from slow, hidden leaks you don't notice until it's too late. A quick check every few months can save you a fortune.
Zero in on these common trouble spots:
- Under Sinks: Look for any drips, corrosion, or faint water marks in your kitchen and bathroom cabinets.
- Appliance Hoses: The hoses on your dishwasher, washing machine, and refrigerator ice maker are notorious for failing. Give them a quick inspection for bulges or cracks.
- Window and Door Seals: Make sure the seals are intact. A cracked or peeling seal is a welcome mat for rainwater.
By making these habits part of your routine, you drastically cut the risk of finding a new water stain on wood. If you do find a stain that signals a bigger leak, act fast. Moisture always brings the risk of mold, so it's critical to know how to prevent mold after water damage to protect your home and your health.
FAQs About Removing a Water Stain on Wood
Over the years, we've heard just about every question there is when it comes to dealing with a water stain on wood. Here are some of the most common ones we get, with straight answers from our restoration pros.
Can I Use Vinegar to Remove a Water Stain on Wood?
A: We strongly advise against using vinegar on wood finishes. Vinegar is an acid and can easily eat through or dull the protective finish on your furniture or floors, creating a more noticeable blemish than the original water ring. For light, cloudy stains, stick to gentler methods like a hairdryer or a baking soda paste. For dark stains, vinegar is ineffective as the damage is in the wood itself.
How Quickly Do I Need to Act on a Water Stain?
A: The faster, the better. Period. For a fresh white ring, acting within hours gives you the best chance of easy removal. For any water stain, the primary concern is mold, which can begin growing in just 24-48 hours. Your first priority should always be to get the area completely dry to prevent a much larger problem. Speed is essential to make stain removal easier and avoid mold growth.
My Hardwood Floor Is Cupping Around a Stain. Will It Flatten Out?
A: It depends. Cupping happens when wood planks absorb moisture, causing the edges to swell. Minor cupping might settle down if the leak is stopped and the area is dried professionally and quickly. However, significant or prolonged water exposure often causes permanent warping that won't correct itself. Cupping is a clear sign to call a professional restoration company to properly manage drying and assess if the floor can be saved.
Does Homeowners Insurance Cover Repairing a Water Stain on Wood?
A: Often, yes—but the cause of the damage is everything. Homeowners insurance typically covers damage from "sudden and accidental" events, like a burst pipe or an overflowing dishwasher. In these cases, the cost to repair the stained wood would likely be covered. However, policies almost never cover damage from slow leaks or poor maintenance, such as a stain from a faucet that's been dripping for months.
If you're dealing with a stubborn water stain, worried about hidden moisture, or cleaning up after a leak, don't let the problem get worse. The IICRC-certified experts at Onsite Pro Restoration are on call 24/7 to give you a free assessment and restore your home and your peace of mind.