When you find soot on your walls, your first move is absolutely critical. You have to start with a dry cleaning method before a single drop of liquid touches the surface.
The best way to tackle it is a two-part dry process. First, use a HEPA-filtered vacuum with a brush attachment to gently lift away all the loose soot particles. After that, you'll go over the area with a specialized dry chemical sponge, always wiping in careful, downward strokes. This dry-first approach is non-negotiable because it stops the oily soot from smearing and getting permanently ground into porous surfaces like drywall—a common mistake that makes a small problem a thousand times worse. For homeowners in Los Angeles dealing with anything from a small candle mishap to wildfire residue, knowing how do you clean soot off walls correctly is essential.
What to Do Immediately After Finding Soot on Your Walls
Spotting ugly black streaks on your walls is always a shock. It doesn't matter if it's from a candle you forgot about in your Encino home, a small kitchen fire, or even smoke that drifted in from a nearby wildfire—your next few minutes will determine whether this is a simple cleanup or a massive repair job.
The most important rule? Fight the instinct to grab a wet rag and start scrubbing. Seriously. Don't do it.
Why Dry Removal Comes First
Soot isn't like regular dust. It's a greasy, acidic residue left over from incomplete combustion. The moment you add water, you’re creating a muddy slurry that smears instantly and soaks deep into porous materials like paint, plaster, and drywall.
What was a surface-level problem just became a permanent stain. That’s why professionals always start with dry removal to lift off as much loose soot as possible. It's the only way to get a clean finish.
Key Takeaway: Always start with dry cleaning methods. Introducing moisture prematurely will smear the oily soot residue, drive it deeper into the wall's surface, and make permanent staining almost inevitable.
Soot Removal Do's and Don'ts: Initial Response
To avoid making things worse, here’s a quick guide on what to do—and what not to do—in those first critical moments. Getting this right prevents deeper damage and makes the entire cleanup process much more effective.
| Action | The Right Way (Do) | The Wrong Way (Don't) |
|---|---|---|
| Initial Cleaning | Use a HEPA vacuum and a dry chemical sponge first. | Grab a wet cloth and start scrubbing. |
| Airflow | Open windows to ventilate the area and clear the air. | Turn on ceiling fans or the HVAC system, which spreads soot particles. |
| Protection | Wear gloves, a mask, and eye protection. | Handle soot with bare hands, exposing skin to acidic residue. |
| Surface Contact | Avoid touching the walls to prevent smudging. | Lean against or wipe walls, embedding soot into the surface. |
| Inspection | Assess the type of soot (dry vs. oily) to plan your cleaning. | Assume all soot is the same and use a one-size-fits-all method. |
Remember, that initial response sets the stage for everything that follows. A calm, correct approach saves you headaches, time, and money down the line.
Understanding the Types of Soot
Not all soot is created equal, and the type you're facing will shape your entire cleanup strategy. In a Los Angeles home, you’ll typically run into one of two kinds:
- Dry, Powdery Soot: This usually comes from burning natural materials like wood or paper. It’s lighter, fluffier, and generally easier to lift off with a HEPA vacuum and a dry sponge.
- Oily, Greasy Soot: This is the nasty stuff that comes from burning plastics, rubber, or kitchen grease. It's sticky, smudgy, and leaves behind a stubborn film that almost always requires a powerful degreasing agent later in the process.
Dealing with widespread soot damage from a fire is a serious undertaking. Across the U.S., nearly 500,000 structure fires leave this kind of mess behind every year. For anything beyond a small patch, knowing what comes next is crucial. Our guide on what to do after a house fire is an invaluable resource for navigating that process.
If the damage is significant, you’ll also need to get a handle on the financial side by navigating home insurance claims to see what your policy will cover. Getting that initial response right is your first line of defense—it stops the damage in its tracks and sets you up for a successful restoration.
Preparing Your Home for Safe Soot Removal
Before you grab a sponge, stop. The first and most critical step in any soot cleanup is protecting yourself and containing the mess. Soot isn't just dirty ash; it's a nasty cocktail of fine carbon particles, acids, and toxic chemicals. If you breathe it in or get it on your skin, you're turning a property problem into a serious health hazard.
This is especially true here in Los Angeles, where airborne particles from even a small cleanup can quickly affect your family or neighbors in the next apartment over. Proper prep isn't just a good idea—it's non-negotiable.
Personal Protective Equipment You Cannot Skip
Your health has to come first, period. Walking into a soot-damaged room requires the right Personal Protective Equipment (PPE). A simple dust mask or cloth covering is completely useless against the microscopic particles in soot, which can get lodged deep in your lungs.
Here’s the essential gear you'll need:
- Respirator Mask: Get an N95 or, even better, a P100-rated respirator. These are specifically designed to filter out the fine particulate matter found in soot.
- Safety Goggles: Full-seal safety goggles are a must. They keep acidic soot particles from getting into your eyes. Your everyday glasses won't cut it.
- Chemical-Resistant Gloves: Use nitrile or other heavy-duty gloves to protect your skin from the corrosive stuff in soot.
- Long-Sleeved Clothing: Wear old clothes that cover your arms and legs completely. For bigger jobs, disposable coveralls are a smart investment.
Safety First: Soot contains known carcinogens and can cause severe respiratory issues. Never attempt to clean soot without wearing a properly fitted N95 or P100 respirator and full-seal eye protection.
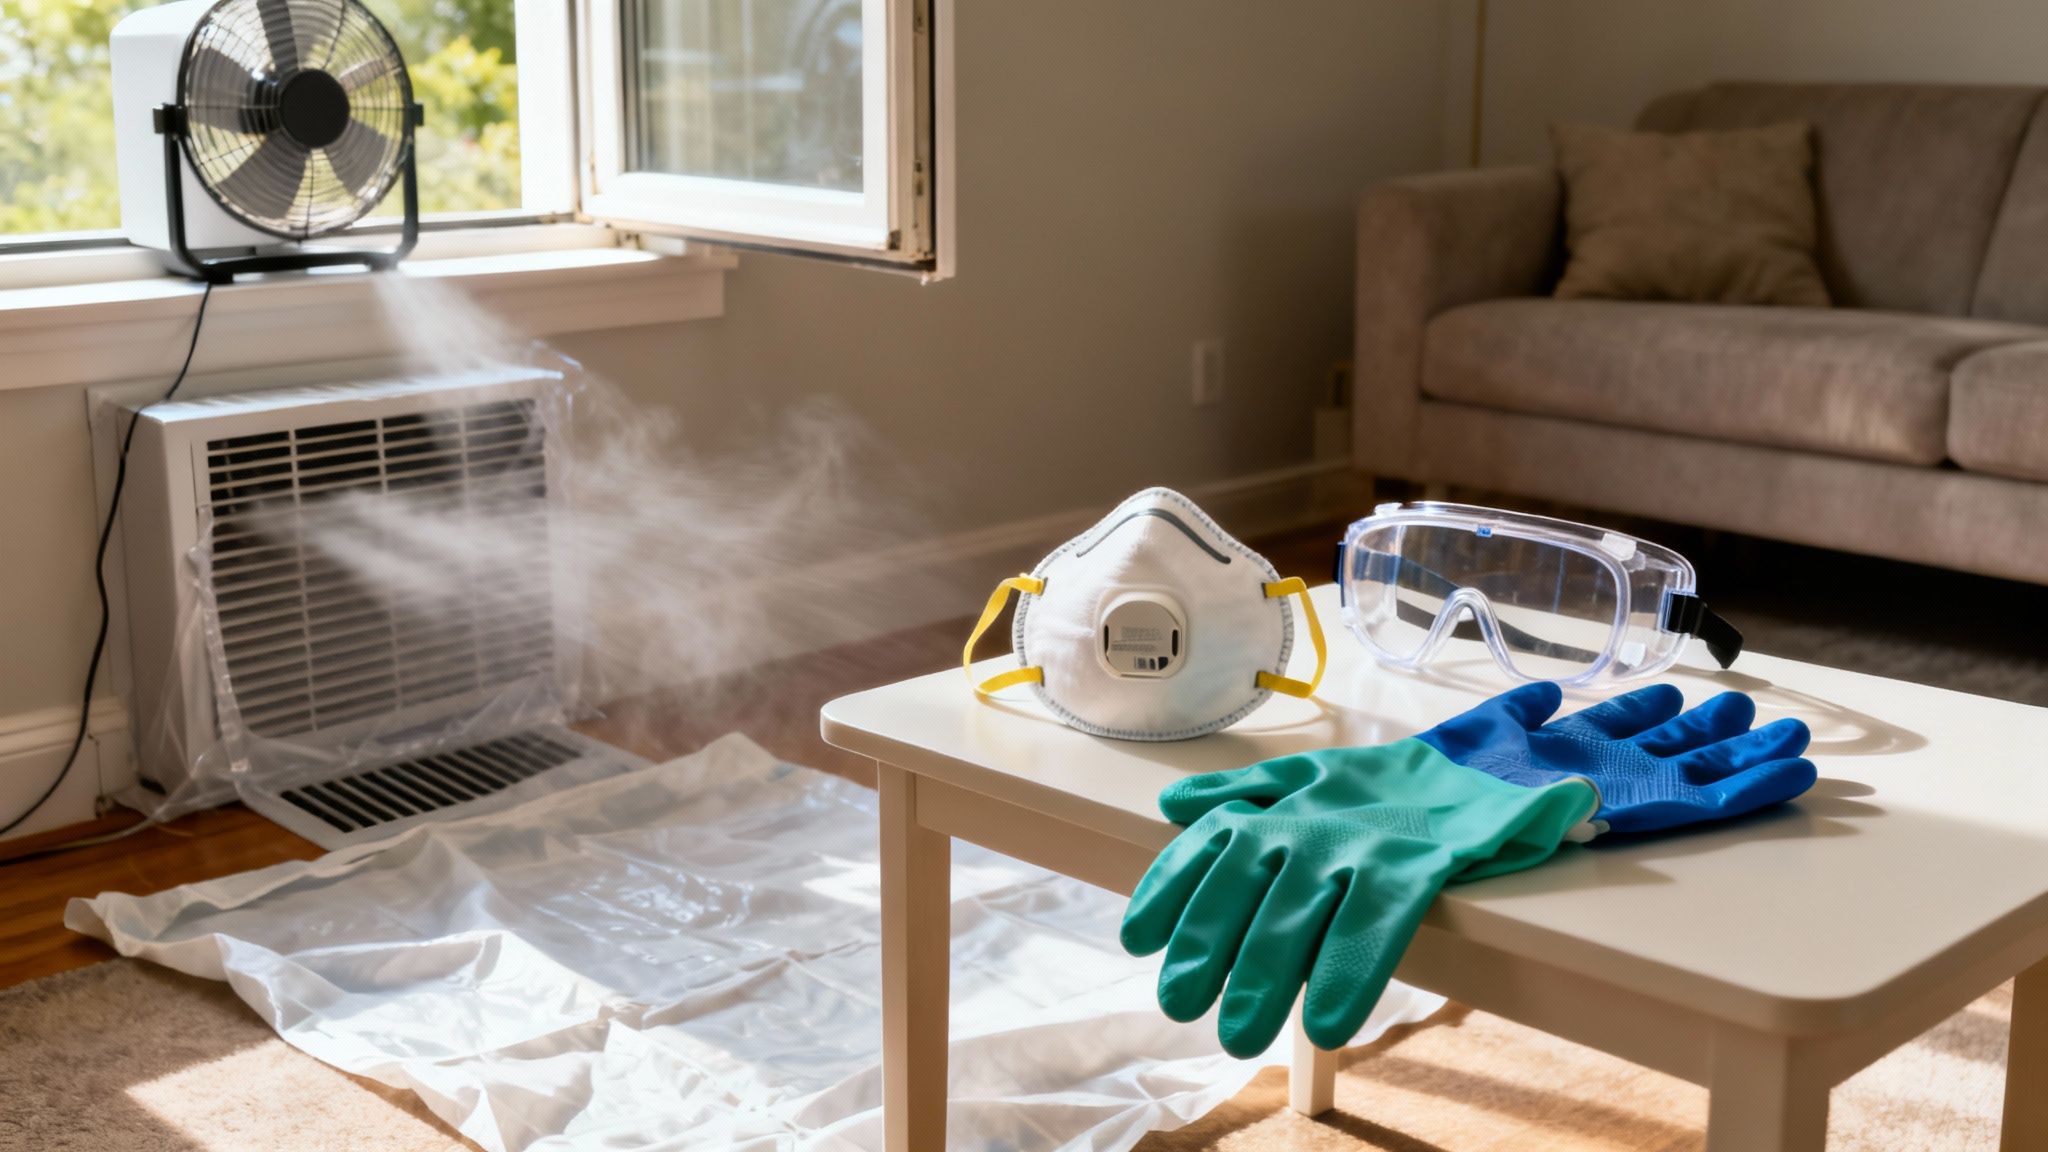
How to Prepare the Room for Cleanup
Once you're geared up, the next step is to prep the room itself. The goal is to isolate the area so you don't track soot through the rest of your home. A cleanup in a Sherman Oaks condo, for example, demands careful containment to avoid impacting shared ventilation systems.
Here's how to create a controlled work zone:
- Turn Off HVAC Systems: Shut down your furnace and air conditioner right away. Running them is the fastest way to spread soot throughout your entire house through the ductwork.
- Protect Floors and Furniture: Cover all your floors with plastic sheeting or thick drop cloths. Do the same for any furniture you can't move out of the room. Tape the sheeting down to the baseboards to create a good seal.
- Set Up Ventilation: Open the windows in the affected room. Place a box fan in one window, facing out, to push the contaminated air outside. This creates negative air pressure, which helps pull airborne soot out instead of letting it drift into other parts of the house.
- Seal Doorways and Vents: Use plastic sheeting and painter's tape to completely seal off doorways to other rooms. Don't forget to cover any air vents connected to your central HVAC system.
Handling these materials the right way is critical. For more complex situations involving soot from a fire or other hazardous substances, it’s important to know the protocols for professional hazardous materials cleanup. Taking these prep steps creates a safe and controlled environment, setting you up for a much more effective cleaning process.
Mastering the Dry Cleaning Method to Remove Soot from Walls
Now that the room is prepped and you’re in your safety gear, it’s time to tackle the most important step: dry cleaning the walls. This is where you’ll lift the bulk of that loose, powdery soot before a single drop of liquid touches the surface.
Get this part wrong, and you’ll create a bigger, smeared-in mess. It’s like trying to clean up an oil spill with a wet rag. The goal isn't perfection just yet; it's to get as much of that loose carbon off the walls as you can, so the next wet-cleaning phase actually stands a chance.
First Pass: The HEPA Vacuum
Your first tool on deck should be a High-Efficiency Particulate Air (HEPA) vacuum. Don't even think about using your regular household vacuum. Its filter isn't fine enough to trap microscopic soot particles—it will just suck them in and shoot them right back out, spreading contamination everywhere.
Attach a soft-bristle brush to the hose. The secret here is finesse, not force.
- Hover the brush just off the wall. Don't grind the bristles into the surface. Let the suction do the heavy lifting, not the brush.
- Work from top to bottom. Always start at the ceiling line and move down in slow, steady strokes. This simple habit keeps dislodged soot from raining down on areas you’ve just cleaned.
- Be methodical. Cover every single inch of the affected surface. This first pass alone can pull off up to 60-70% of the loose soot, which makes all the difference for the next step.
The Magic of the Dry Cleaning Sponge
After vacuuming, you'll still see a greasy film clinging to the walls. This is where the real star of the show comes in: the dry-cleaning sponge, sometimes called a chemical sponge or soot sponge.
These are not your average kitchen sponges. Made from vulcanized natural rubber, they have a unique porous structure designed specifically to grab and hold onto fine, dry particles like soot without smearing. Think of them as giant erasers for smoke damage.
Pro Tip: Whatever you do, do not get this sponge wet. Its cleaning power comes from its dry, slightly tacky surface. Water will instantly ruin it and turn the soot into a permanent, smeared stain.
The Correct Wiping Technique
How you use the sponge is just as critical as the tool itself. Scrubbing is your worst enemy here; aggressive circular motions will only grind the oily soot deeper into the paint or drywall pores.
Instead, the proper technique is all about straight, single-direction strokes.
- Start at the top of the wall again.
- Press the sponge firmly but gently against the surface.
- Wipe straight down in a single, clean line.
- Lift the sponge completely off the wall at the end of the stroke.
- Start the next stroke right next to the first, overlapping it just slightly.
This method ensures you’re lifting the soot off the wall instead of just pushing it around. You'll see the sponge turn black as it fills up with soot—that's a good sign it’s working.
When dealing with a lot of soot, the air quality can get bad, fast. For bigger jobs, you might need more than just open windows. Exploring an air scrubber rental can make a huge difference in pulling those airborne particles out of the room, creating a much safer and cleaner workspace.
Keeping Your Sponge Surface Fresh
As the face of the sponge gets saturated with soot, it loses its ability to pick up more particles. If you keep using a clogged surface, you’ll start smearing the very mess you're trying to remove.
The fix is easy. Grab a utility knife and carefully slice off the dirty, used layer of the sponge. This reveals a fresh, clean surface underneath. A single sponge gives you multiple sides and layers to work with, so you can keep slicing away until it gets too small to handle. This simple trick makes sure you're always cleaning with maximum lifting power.
By the time you finish the entire dry-cleaning process, the walls should look dramatically better. You will have removed the vast majority of the loose soot, perfectly setting the stage for the next phase: wet-cleaning the stubborn, oily stains left behind.
Tackling Stubborn Stains with Wet Cleaning
After you’ve handled the initial dry-cleaning, you've probably cleared away all the loose, powdery soot. But what’s left behind is often a stubborn, oily film that seems almost baked onto the wall. This is where wet cleaning is essential—it’s the step that dissolves and lifts the greasy residue that dry methods just can't touch.
Jumping to this stage too soon is a recipe for disaster, as you'll just smear soot everywhere. But now that the loose particles are gone, it's time to bring in the right cleaning solutions. The goal is to find something strong enough to cut through that oily grime without stripping your paint or damaging the wall itself.
Choosing the Right Soot Cleaning Solution
Not just any cleaner can handle oily soot. Your standard household sprays or vinegar mixes simply don't have the degreasing muscle needed. In fact, they can sometimes react with the soot and set the stain permanently. You need a solution specifically designed for fire and smoke damage.
Here are the top choices the pros rely on:
- Trisodium Phosphate (TSP) Alternatives: While traditional TSP is a powerhouse degreaser, it's pretty harsh stuff and is regulated in many areas. Modern TSP substitutes are a fantastic, safer alternative. They're phosphate-free but still incredibly effective at breaking down greasy soot on painted surfaces.
- Commercial Degreasing Soot Removers: Your best bet is a product specifically labeled for fire restoration. These are formulated to tackle the complex chemistry of soot without destroying the surface underneath.
- Mild Dish Soap (For Minor Cases): For a very small, isolated smudge—think from a candle—a simple mix of warm water and a good degreasing dish soap might do the trick. Just know this approach is rarely enough for anything more serious.
Always follow the manufacturer's instructions for dilution. A mix that's too potent can strip paint right off the wall, while one that's too weak won't do much of anything.
Before you even think about getting the walls wet, make sure you've completed the dry-cleaning phase first. This flowchart breaks down those critical initial steps.
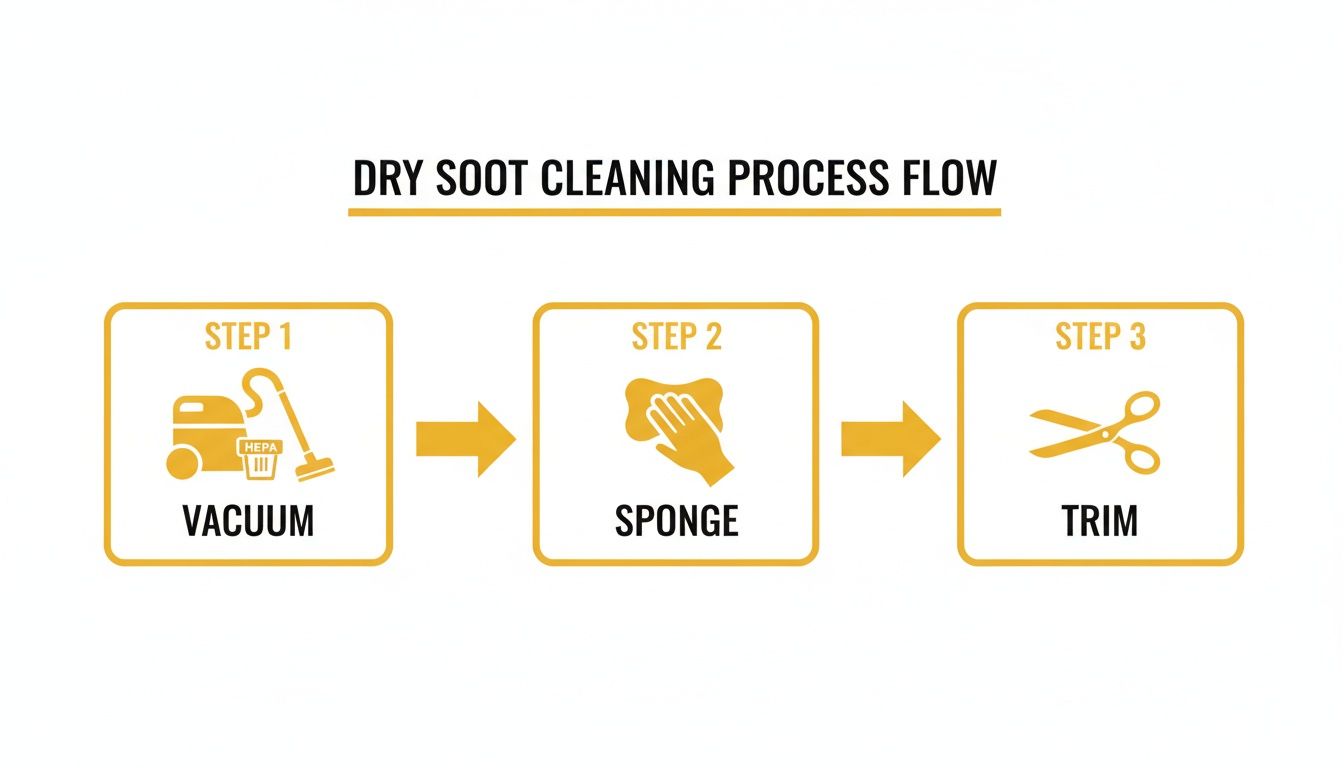
This process isn't optional. Vacuuming and using a dry sponge are the non-negotiable prep work that makes successful wet cleaning possible.
The Professional Two-Bucket Method
One of the biggest rookie mistakes is cleaning with a single bucket. You inevitably dip your dirty sponge back into the clean solution, contaminating it. Before you know it, you're just spreading a thin film of grime all over the wall. To stop this from happening, pros always use the two-bucket method.
It’s a simple trick, but it makes a world of difference:
- Bucket One (Cleaning Solution): This holds your diluted degreasing cleaner.
- Bucket Two (Rinse Water): This is filled with plain, clean water.
Here’s the process: Dip your sponge in the cleaning solution, wipe a small section of the wall, and then—this is the important part—rinse the dirty sponge completely in the rinse water bucket. Then you can dip it back into the cleaning solution. This keeps your main cleaner uncontaminated and stops you from redepositing soot.
Proper Washing and Rinsing Techniques
How you apply and remove the cleaner is just as crucial as the product you choose. Using the wrong technique will leave you with ugly streaks running down your walls.
Crucial Technique: Always wash walls from the bottom up and rinse from the top down. It sounds counterintuitive, but this method prevents "clean runs"—streaks of cleaner running down and creating lines on the dirty surface below.
Start by applying your solution to a small, manageable section at the base of the wall and work your way up. Once a section is clean, grab a fresh sponge, dip it in your clean rinse water, and wipe the area from the ceiling down. This ensures every bit of soapy residue is gone.
Soot is a complex beast, and different types require specific tactics. For instance, oily soot is prevalent in 35% of cases involving burnt plastics or synthetics. In those situations, we pair HEPA vacuums with air scrubbers to slash airborne particulates by 95%. We often use specialized solutions boosted with an oxygen-based additive, which can improve stain removal by 40%. As IICRC data shows, this level of expertise can cut restoration time in half, saving homeowners a fortune compared to DIY attempts. For tough stains on resilient surfaces, utilizing soap injectors for pressure washing can provide the extra power needed for a deep clean.
Even after the walls are spotless, you might still notice that lingering smoke smell. That means particles have seeped deep into the surfaces. For a complete fix, check out our guide on how to remove smoke smell from a house to get your home's air quality back to normal.
When to Call a Professional Los Angeles Restoration Company
It’s one thing to clean up a small puff of smoke from a candle. That’s a weekend project. But there are clear signs when a soot problem has moved beyond a DIY fix and into professional territory.
Trying to handle a large-scale soot issue yourself is a recipe for disaster. It often spreads the contamination, creates bigger health risks, and ends up costing you far more in the long run. Recognizing the red flags is key to protecting your home and your health.
When the Soot Damage Is Widespread
The first and most obvious sign is the scale of the problem. If soot isn't just on one small patch but covers an entire wall, has crept into multiple rooms, or settled on ceilings, it's time to put down the sponge and pick up the phone.
Think about these real-world scenarios:
- Large Surface Area: Trying to clean more than a 10×10 foot section is a massive job. Without the right equipment, you’re likely to just smear the soot and grind it deeper into the surface.
- HVAC System Contamination: See black streaks on your air vents? Smell smoke every time the AC or heater kicks on? That means soot is in your ductwork. Cleaning this requires specialized tools to avoid blowing contaminants into every corner of your home.
- Multi-Room Impact: If soot from a kitchen incident has found its way into the living room and hallway, it’s a sign of a significant event. A professional assessment is needed to find all the hidden spots you can't see.
If the Soot is Oily or Greasy
The type of soot makes all the difference. As we've covered, dry, powdery soot is manageable. Oily, sticky residue from a kitchen grease fire or burning plastics? That's a completely different animal.
This type of soot is notorious for a reason. It smears at the lightest touch, bonds like glue to surfaces, and laughs at store-bought cleaners. Using the wrong product can permanently set the stain, forcing a full prime-and-repaint job. A small kitchen fire in a West Hollywood apartment can quickly escalate into a full-blown restoration if not treated with the correct professional-grade degreasers from the start.
Key Insight: A persistent smoke odor is a definitive sign that microscopic soot particles have penetrated deep into porous materials like drywall, wood studs, and insulation. At this point, surface cleaning is no longer enough to solve the problem.
When a Stubborn Smoke Odor Lingers
Maybe the most telling sign you need professional help is a smoke smell you just can’t get rid of. The walls might look clean, but that lingering odor means invisible soot particles are trapped deep inside your home’s structure.
These particles will continue to off-gas—releasing that awful smell for months or even years, especially when it gets humid. Professionals don't just cover this up with air fresheners; they eliminate it at the molecular level with advanced tech:
- Thermal Foggers: These machines turn a deodorizer into a fine, heated mist that acts just like smoke, penetrating the same deep, hidden areas to neutralize odors at the source.
- Hydroxyl Generators: This is a powerful and safe technology that uses UV light to create odor-destroying hydroxyl radicals, which break down smoke molecules in the air and on surfaces.
- Air Scrubbers: These are basically super-powered air purifiers with HEPA filters that run continuously to capture any lingering airborne particles that cause smells.
Navigating the Insurance Claims Process
If the soot damage is bad enough to file an insurance claim, trying to go it alone is a huge mistake. Handling a fire and smoke damage claim for a home in Beverly Hills, for instance, requires meticulous, professional-level documentation.
A certified restoration company acts as your partner. We provide the detailed reports, moisture readings, photos, and accurate estimates that insurance adjusters need to see. This documentation is crucial for streamlining the claim and ensuring you get the full coverage you're entitled to. To get a better sense of what's involved, check out our overview of the professional restoration process to see how we manage these projects from start to finish. This partnership is often the key to a smooth and successful recovery.
Frequently Asked Questions About Cleaning Soot Off Walls
Even after you've scrubbed everything down, some questions always pop up. Getting the right answers can be the difference between a fully restored wall and a stain or smell that keeps coming back. Here are the direct answers to what we hear most often from Los Angeles homeowners dealing with the aftermath of smoke and fire.
Q: Can I just paint over soot on my walls?
A: Absolutely not. This is the single most common—and most expensive—mistake homeowners make. Painting over soot hides the problem for a short time, but the oily, acidic residue will eventually bleed through the new paint, creating ugly yellow or brown stains. It also traps the smoke odor, which can be released during humid weather. The wall must be thoroughly cleaned and sealed with a stain-blocking, odor-sealing primer before you can even think about applying a topcoat of paint.
Q: Are household cleaners like bleach or vinegar going to work on soot?
A: No, these are the wrong tools for the job. Bleach is a disinfectant, not a degreaser, and it can damage or discolor your paint. Vinegar is not strong enough to cut through the greasy film left by burning plastics or synthetic materials. Using the wrong cleaner can sometimes have a chemical reaction with the soot, setting the stain permanently. Always use a dedicated degreasing cleaner designed for fire damage restoration.
Q: What’s the difference between a regular and a HEPA vacuum for cleaning soot?
A: The difference is critical for your health and the cleanliness of your home. Soot particles are microscopic, and a regular vacuum's filter is not fine enough to trap them. It will simply suck them up and shoot them back into the air through its exhaust, spreading contamination. A HEPA (High-Efficiency Particulate Air) vacuum is certified to capture 99.97% of these tiny particles, ensuring they are removed from your home for good.
Q: My walls look clean, but I still smell smoke. What now?
A: A lingering smoke odor is a clear sign that microscopic soot particles have penetrated deep into porous materials like drywall, wood studs, and insulation. Surface cleaning cannot reach them. This is no longer a cleaning issue but a deodorization problem that requires professional intervention. Restoration companies use advanced technology like thermal foggers and hydroxyl generators to neutralize odors at a molecular level, something no amount of scrubbing can achieve.
Soot and smoke damage can be tricky, and doing it right the first time is crucial. If you're looking at a cleanup that feels overwhelming or fighting a smoke smell that just won't quit, don't wait. The experts at Onsite Pro Restoration are on call 24/7 to give you a professional assessment and get your home restored safely. Contact us for immediate assistance at https://onsitepro.org.