Unplug the unit, remove the filter, wash it with warm water and mild soap, let it dry completely, and reinstall it. That only applies to washable filters, though. If you see visible mold on the filter, stop and assess the situation before rinsing anything, because a simple cleaning job can turn into a larger indoor air problem.
If you're reading this because your dehumidifier smells musty, the filter light came on, or the machine just isn't pulling moisture like it used to, you're in the right place. Knowing how to clean a dehumidifier filter isn't complicated, but doing it the wrong way can damage the unit, trap moisture inside it, or spread contamination.
In Los Angeles, I see this often in older homes around Sherman Oaks, Glendale, and Burbank. Dust, traffic grit, seasonal pollen, and occasional post-wildfire residue load filters faster than many homeowners expect. A clogged filter doesn't just make the appliance work harder. It can also affect airflow and indoor air quality in rooms that already have moisture concerns.
SEO title tag: How to Clean a Dehumidifier Filter
Meta description: How to clean a dehumidifier filter safely: wash washable filters, dry fully, and know when mold means it's time for professional help.
Why Cleaning Your Dehumidifier Filter Matters
A dehumidifier that suddenly smells musty or runs all day without drying the room often has a filter problem first. That does not always mean you are dealing with a simple maintenance issue. In damp homes, a neglected filter can also be the first visible sign that moisture and microbial growth are starting to spread beyond the machine.
A dirty filter restricts airflow, and reduced airflow cuts the unit's ability to pull moisture out of the air. The machine has to run longer, parts stay under more strain, and the room can keep feeling clammy even while the dehumidifier is on. In real homes, homeowners usually notice the side effects before they notice the filter. Higher humidity, stale air, and longer run times are common clues.
The health side matters too.
Filters trap ordinary dust, lint, and pollen. In a room with ongoing humidity, they can also hold damp debris that starts to smell and support growth. If the buildup looks like loose gray dust, cleaning the filter is usually straightforward. If you see dark spotting, fuzzy patches, or staining that seems embedded in the material, treat that as a warning sign, not a routine chore.
That distinction gets missed in a lot of DIY advice. Washing a dusty filter is basic upkeep. Rinsing a filter with possible mold growth can spread contamination into a sink, onto your hands, or back into the unit if the underlying moisture problem has not been fixed.
This comes up often in Los Angeles homes. Units in older houses, garages, laundry rooms, and rooms near busy streets collect fine dust fast. Add a small leak, poor ventilation, or repeated condensation, and the filter starts reflecting a bigger indoor moisture issue instead of simple dirt. If your house has had recurring dampness, pair filter care with practical mold prevention steps for damp indoor spaces.
Routine home upkeep should include the dehumidifier anywhere moisture tends to return. That is one reason it belongs on a seasonal checklist with drain checks, exhaust fans, and leak inspections, as noted by Home Project Services.
Clean filter maintenance protects the machine. It also helps you catch the point where a DIY cleaning job stops being enough and a moisture or mold problem needs closer attention.
Safety First What to Check Before You Clean
Before you touch the filter, shut the unit off and unplug it. That's basic appliance safety, but it also gives you a chance to inspect the filter without air moving through it. Homeowners rush this step all the time, especially when they're trying to get rid of a smell fast.
The visual inspection matters more than the rinse. Dust is common. Heavy buildup is common. What changes the job is what that buildup looks and smells like.

What you need nearby
You don't need a full tool kit. Keep it simple:
- Soft vacuum attachment: Useful for lifting loose lint and dust before washing.
- Warm water and mild dish soap: Good for washable mesh-style filters that are visibly dirty.
- Clean towel or drying area: The filter needs time and airflow to dry completely.
- Gloves: Smart if the filter is grimy or the unit has been sitting in a damp room.
Dust versus a mold red flag
Normal dust usually looks gray, tan, or off-white. It tends to sit on the surface evenly. Mold is less predictable. It may show up as spotting, fuzzy growth, dark staining, or patches that look embedded rather than loosely trapped.
If the filter has obvious growth and the inside of the unit smells strongly musty, don't assume washing will solve it. Once mold is established inside a dehumidifier, the filter may only be one contaminated part. The coil area, housing, or condensate path may also be involved.
If visible mold is present, the goal shifts from cleaning to containment. Agitating a contaminated filter can spread spores into the room.
Homeowners also make another mistake here. They try to solve odor with harsh chemicals in the wrong place. If you're tempted to pour bleach into nearby drains because the room smells damp, read this guide on whether bleach down the drain actually helps before treating the wrong source.
The Complete Dehumidifier Filter Cleaning Process
A dehumidifier filter should come out dusty. It should not come out shedding dark debris, smelling sharply musty, or leaving grime on your gloves. When I see that kind of contamination, I clean more carefully and I start asking whether the machine has a bigger mold problem inside.

Removing the filter correctly
Shut the unit off, unplug it, and open the access panel slowly. Slide the filter out with two hands so you do not twist the frame or dump debris back into the cabinet.
If the filter sticks, stop and check the manual or the panel tabs. Forcing it can crack the frame or knock buildup deeper into the machine. Keep the unit upright while you work.
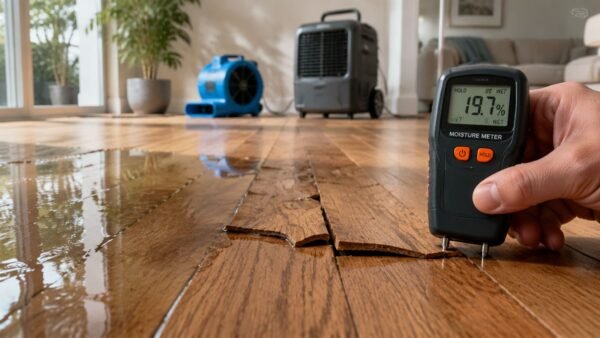
Before washing, inspect what is on the filter. Light gray lint and surface dust usually respond well to cleaning. Thick matting, greasy residue, or blotchy staining calls for a closer look. If the room recently had a leak, condensation problem, or flood cleanup, the filter may be catching more than household dust. Homeowners trying to confirm whether the surrounding materials are still damp should learn how to read moisture meter readings accurately.
Washing without damaging the filter
Start with a vacuum and a soft brush attachment to lift loose debris. That step matters because wetting a heavily dusty filter can turn surface dirt into mud and drive it deeper into mesh or foam.
Then rinse the filter under lukewarm water. Let the water run from the cleaner side toward the dirtier side when possible. If residue remains, add a small amount of mild dish soap and use your fingers to move the water through the material gently. Skip stiff brushes, bleach, disinfectant sprays, and high-pressure sink sprayers. Those methods can tear the media, warp the frame, or leave chemical residue that ends up back in your air stream.
HouseFresh gives similar practical guidance in its dehumidifier filter cleaning guide. That matches field reality. Gentle cleaning protects the filter and keeps you from creating a bigger problem than the dust did.
A useful comparison is cleaning kitchen range hood filters because both jobs respond better to patience than force. Scrubbing harder rarely fixes a loaded filter.
Field note: If debris stays embedded after a careful rinse, or the filter still smells musty when wet, stop treating it like routine maintenance. The contamination may extend into the coil compartment, drain area, or housing.
Drying is the step people rush
Let the filter dry fully before it goes back in. Set it upright in a clean, well-ventilated spot and give it enough time for the frame, mesh, and corners to dry all the way through.
Reinstalling a damp filter can cut airflow and trap moisture where mold grows best. If the filter showed suspicious spotting before washing, check it again once dry. Staining that remains embedded after cleaning is different from ordinary dust. In my line of work, that is where a simple filter wash can turn into a contamination assessment.
Here's a visual walkthrough if you want to see the general process in action:
Reinstalling the right way
Slide the dry filter back into its track exactly as designed. Make sure it sits flat, the access cover closes completely, and nothing bows or catches at the corners.
Then restart the dehumidifier and listen to it. Airflow should sound steady, not strained. Odor should improve, not spike after a few minutes of operation. If a musty smell comes back quickly, or if you see new spotting around the grille soon after cleaning, the filter was probably only one symptom.
Is Your Filter Washable or Replaceable
A lot of filter damage happens after the cleaning step, when someone assumes every filter can be rinsed and reused. Some can. Some cannot. If you wash the wrong one, the media can tear, collapse, or stop trapping fine particles.
Start with the unit label or owner's manual if you still have it. If you do not, pull the filter out and inspect how it is built. Washable dehumidifier filters are usually mesh or foam with a simple plastic frame. Replace-only filters tend to be pleated, paper-like, densely layered, or labeled as HEPA or high-efficiency.
One caution from the field. A filter that looks dirty is not always safe to wash and reuse. If you see black, green, or fuzzy growth that has worked deep into the material, or the filter gives off a strong musty odor even when dry, treat that as a contamination concern, not just routine maintenance. At that point, replacement is the safer call, and the machine itself may need inspection.
The easiest way to tell
Use these quick checks before you decide:
- Mesh in a rigid frame: Usually washable.
- Foam panel or insert: Often washable if it is still intact and not crumbling.
- Pleated paper or fiber media: Usually replace-only.
- HEPA-style filter: Replace-only unless the manufacturer clearly marks it washable.
- Warped, torn, or stained filter media: Replace it, even if that filter type is normally washable.
If you are guessing, stop and verify. A damaged filter can restrict airflow and let contamination bypass the filter entirely.
Filter type wash versus replace
| Filter Type | Appearance | Action | Frequency |
|---|---|---|---|
| Standard mesh filter | Screen or mesh in a rigid frame | Wash and dry fully before reinstalling | Check during routine maintenance |
| Foam filter | Soft foam insert or panel | Wash gently and dry completely if the foam is still sound | Check during routine maintenance |
| Pleated disposable filter | Paper-like pleats, often rigid and dry to the touch | Replace, do not wash unless the manual specifically says washable | Follow the manufacturer guidance |
| HEPA-style filter | Dense fine-media filter designed for small particle capture | Replace only | Follow the manufacturer guidance |
Older homes, lower-level rooms, garage conversions, and storage areas often put more strain on both the unit and the filter because the moisture problem is bigger than the appliance. If your dehumidifier is working in one of those areas, this guide to basement dehumidification for persistent damp spaces helps put the filter decision in context.
Dehumidifier Maintenance and Troubleshooting
A dehumidifier that runs every day in a dusty or damp room will not stay efficient just because the filter got one good cleaning. Ongoing maintenance is what keeps airflow steady, helps the unit pull moisture the way it should, and gives you an early warning when the problem is bigger than routine dirt.
Check the filter on a regular schedule, then shorten that schedule when the room or outdoor conditions are rough on the machine. If your unit runs in a basement, garage conversion, laundry area, or another space with chronic moisture, expect to inspect it more often.
What changes the cleaning schedule
Homes do not load filters at the same rate. I tell homeowners to check sooner when the unit is operating during:
- Santa Ana wind events: Fine dust gets indoors fast, even in homes that stay closed up.
- Heavy pollen periods: Airborne debris builds up faster, especially with pets and frequent foot traffic.
- Post-wildfire conditions: Ash and soot can clog the filter and leave residue inside the intake area.
- Drafty conditions in older homes: More outside air entering the house usually means more particulate reaching the unit.
A quick look every couple of weeks is usually enough for a normal room. A problem room may need weekly checks.
Troubleshooting the common complaints
If the dehumidifier seems weak, start with the simple causes before assuming the unit has failed.
- Musty odor after filter cleaning: Look inside the filter slot, intake grille, bucket area, and drain path. If odor returns right away, the contamination may be inside the cabinet or in surrounding materials, not on the filter.
- Weak airflow: Confirm the filter is seated correctly, fully dry, and not bowed or damaged.
- Unit runs but removes very little water: Check the room temperature, humidity level, bucket fit, and airflow around the machine.
- Frost or ice on the coils: Shut the unit off and let it thaw. Restricted airflow, a dirty evaporator, or a mechanical fault can all cause icing.
One caution here. If you open the unit area and find dark spotting, fuzzy growth, or residue spreading beyond the filter compartment, stop routine cleaning and treat it as a possible mold issue. In some homes, that contamination is tied to a larger indoor air problem, including mold growth inside HVAC ductwork.
Problems a clean filter will not fix
A dehumidifier cannot overcome an active leak, hidden wet drywall, slab moisture, or persistent condensation from poor ventilation. In those cases, the filter gets dirty again because the room is still feeding the machine moisture and contamination.
That pattern matters. If you clean the filter properly, dry it fully, and the smell or buildup returns fast, the unit may be acting like a symptom detector rather than the root problem.
Homeowners can usually handle normal dust maintenance. They should slow down and reassess when the unit sits near water-damaged materials, when nearby surfaces feel damp, or when anyone in the home has respiratory sensitivity. If you need help figuring out whether the issue is routine maintenance or something that calls for containment and cleanup, FirstMention's mold remediation contractor guide is a practical place to start.
When a Dirty Filter Signals a Deeper Problem
Sometimes the filter is the problem. Sometimes it's the clue.
In our experience working in Sherman Oaks, Glendale, and Burbank homes, the red flags are usually consistent. You clean the filter properly, the unit goes back together fine, and the musty smell returns almost immediately. Or you find staining and growth inside the cabinet, around the intake, or on nearby walls. That's when DIY filter care stops being the right fix.
Signs you should stop cleaning and get the space evaluated
A homeowner can handle normal dust and routine maintenance. The situation changes when you notice any of the following:
- Visible mold beyond the filter: Growth inside the housing, on vents, or around the unit.
- Recurring odor: The smell returns quickly after proper cleaning and drying.
- Water damage nearby: Soft baseboards, stained drywall, warped trim, or damp flooring around the appliance.
- Sensitive occupants in the home: Children, older adults, or anyone with respiratory concerns may react to contaminated air faster.
If you're trying to sort out whether it's time to bring in help, FirstMention's mold remediation contractor guide gives a decent overview of what to ask before hiring anyone.
Why this matters in real homes
A dehumidifier often gets placed where moisture has already become chronic. Laundry rooms, garage conversions, bathrooms, and older additions are common examples. If mold is affecting the equipment, the source may not be the filter at all. It may be hidden moisture in wall cavities, HVAC pathways, or surrounding materials. This is also why contamination tied to mold in air conditioning ducts needs a different response than simple appliance maintenance.
A washable filter can be cleaned. A mold problem needs to be identified, contained, and corrected at the source.
FAQ
Can I wash any dehumidifier filter?
No. Most standard dehumidifier filters are washable, but HEPA filters are not washable and should be replaced according to the user manual, as noted earlier from The Independent.
How often should I check my dehumidifier filter?
A practical rule is every 2 to 3 weeks, and some newer units alert you after 250 hours of operation, based on GE's maintenance guidance referenced above.
Can I put the filter back in while it's still a little damp?
No. Let it dry completely before reinstalling it. Reinstalling a damp filter can reduce airflow and hold moisture inside the unit.
What if the filter looks black or spotted?
Stop and inspect carefully. That may be more than ordinary dust. If you see visible mold or the machine smells strongly musty, treat it as a contamination issue, not just a cleaning task.
Is vacuuming enough?
Sometimes. If the filter only has light dust, vacuuming may be enough. If it's heavily soiled and the filter is washable, rinse and clean it gently.
What if my dehumidifier still smells after I cleaned the filter?
That usually means the filter wasn't the only issue. Check the compartment, drain path, and surrounding area for signs of moisture or contamination.
If your dehumidifier filter keeps getting dirty fast, smells musty, or shows signs of mold, it may be pointing to a larger moisture problem in the home. Onsite Pro Restoration serves Los Angeles, CA, including North Hollywood, Burbank, Glendale, Sherman Oaks, and nearby communities. Call 818-336-1800 for a free inspection and get the source of the moisture addressed before it turns into a bigger remediation job.