home restoration
A Homeowner’s Guide to Mold and Water Damage Remediation in 2026
When you find a leak or flood in your Los Angeles home, you’re officially in a race against the clock. The first 48 hours are critical for preventing a minor

When you first spot a leak, flood, or any water where it shouldn’t be, it’s easy to feel overwhelmed. But what you do in the first 30 minutes is absolutely critical. Think of it as first aid for your property—your quick actions can stabilize the situation, prevent a bad problem like a slab leak in your Sherman Oaks home from getting worse, and pave the way for a smooth water damage restoration. This guide provides Los Angeles homeowners with a clear roadmap from initial shock to full recovery.
Get a Free Water Damage Inspection Now
The moments after you find water damage are often a blur of stress and adrenaline. Having a clear, step-by-step plan helps you protect your family, minimize the damage, and get ready for the professionals to take over. This is your emergency checklist.
Your first priority is always safety. Water and electricity are a lethal mix, and hidden structural damage can create immediate hazards.
Before you do anything else, take these precautions:
Once the immediate dangers are handled, it’s time to become a detective. Grab your smartphone and thoroughly document the scene. This evidence is invaluable when it comes time to file your insurance claim. Take as many photos and videos as you can, capturing the damage from different angles.
Make sure you get shots of:
This initial documentation creates a clear baseline that shows your insurance adjuster exactly what happened.
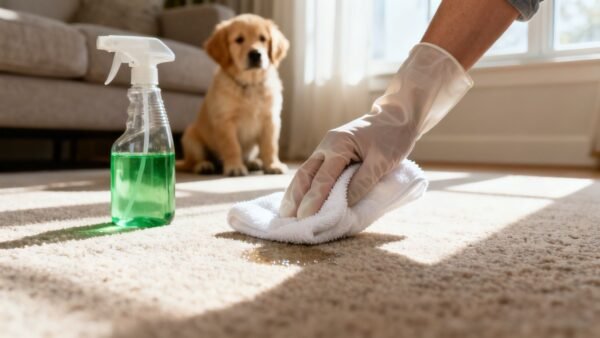
While you wait for professional help to arrive, you can take a few small steps to limit the damage. Carefully remove any items you can safely lift out of the wet area—things like area rugs, furniture, and cardboard boxes. A simple trick is to place aluminum foil or small wood blocks under the legs of heavy furniture. This stops the finish from staining your carpet and prevents moisture from wicking up into the wood.
The goal here isn’t to start the drying process yourself. It’s about getting vulnerable items out of harm’s way. Improper DIY drying can actually trap moisture inside walls and floors, leading to mold and much more serious structural problems down the road.
Finally, make the call to a certified restoration company. The sooner the pros get on site, the faster they can start the critical work of water extraction and drying. To really grasp the urgency, it’s helpful to understand the emergency water damage restoration process and see why a rapid response is so crucial for protecting your property.
Once you make that crucial call, a certified water damage restoration team shifts from emergency response to a strategic recovery mission. Think of it like a hospital’s ER protocol—a systematic, multi-phase approach designed to stabilize, treat, and fully restore your property. This methodical process ensures nothing gets missed, from the initial triage to the final handshake.
The need for this expertise is massive. Water damage restoration is a cornerstone of a global market valued at around $13.8 billion, and it’s projected to climb toward $22.6 billion. In the U.S. alone, recent flood damages have soared past $8 billion in a single year, which shows just how critical professional intervention has become.
To give you a clearer picture of what a professional restoration job looks like from start to finish, here’s a breakdown of the typical stages.
| Phase | Primary Goal | Key Activities |
|---|---|---|
| 1. Inspection & Assessment | Understand the full scope of damage and create a plan. | Identify water source, classify contamination, use moisture meters and thermal cameras. |
| 2. Water Removal | Extract all standing water to prevent further spread. | Use submersible pumps and truck-mounted vacuums for rapid extraction. |
| 3. Drying & Dehumidification | Remove hidden moisture from structural materials. | Strategically place industrial air movers and dehumidifiers to create a controlled drying environment. |
| 4. Cleaning & Restoration | Sanitize affected areas and rebuild damaged structures. | Apply antimicrobial treatments, clean contents, and perform necessary repairs (drywall, flooring, etc.). |
Each phase builds on the last, moving your property from a state of crisis to complete recovery. Let’s dig into what each step really involves.
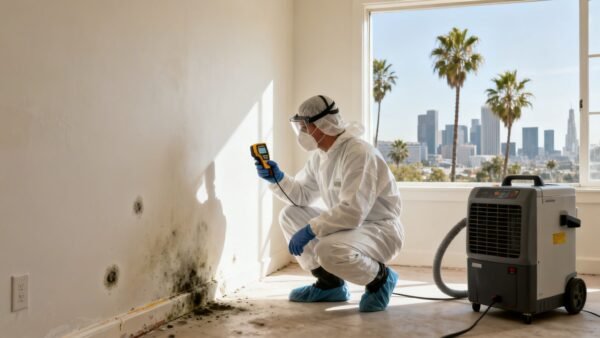
The moment technicians arrive, they start the “triage.” Their first job is to get the full story—identifying the water source, classifying its contamination level, and mapping out the full extent of the damage. This isn’t just a quick glance; it’s a full-blown investigation using specialized tech.
Professionals use advanced tools to see what the naked eye can’t:
This detailed assessment is what allows the team to create a precise action plan that’s tailored to your home’s specific situation. It’s the blueprint for the entire project.
As the infographic below shows, a technician using a moisture meter is a perfect example of how professionals find hidden dampness that DIY methods would miss.
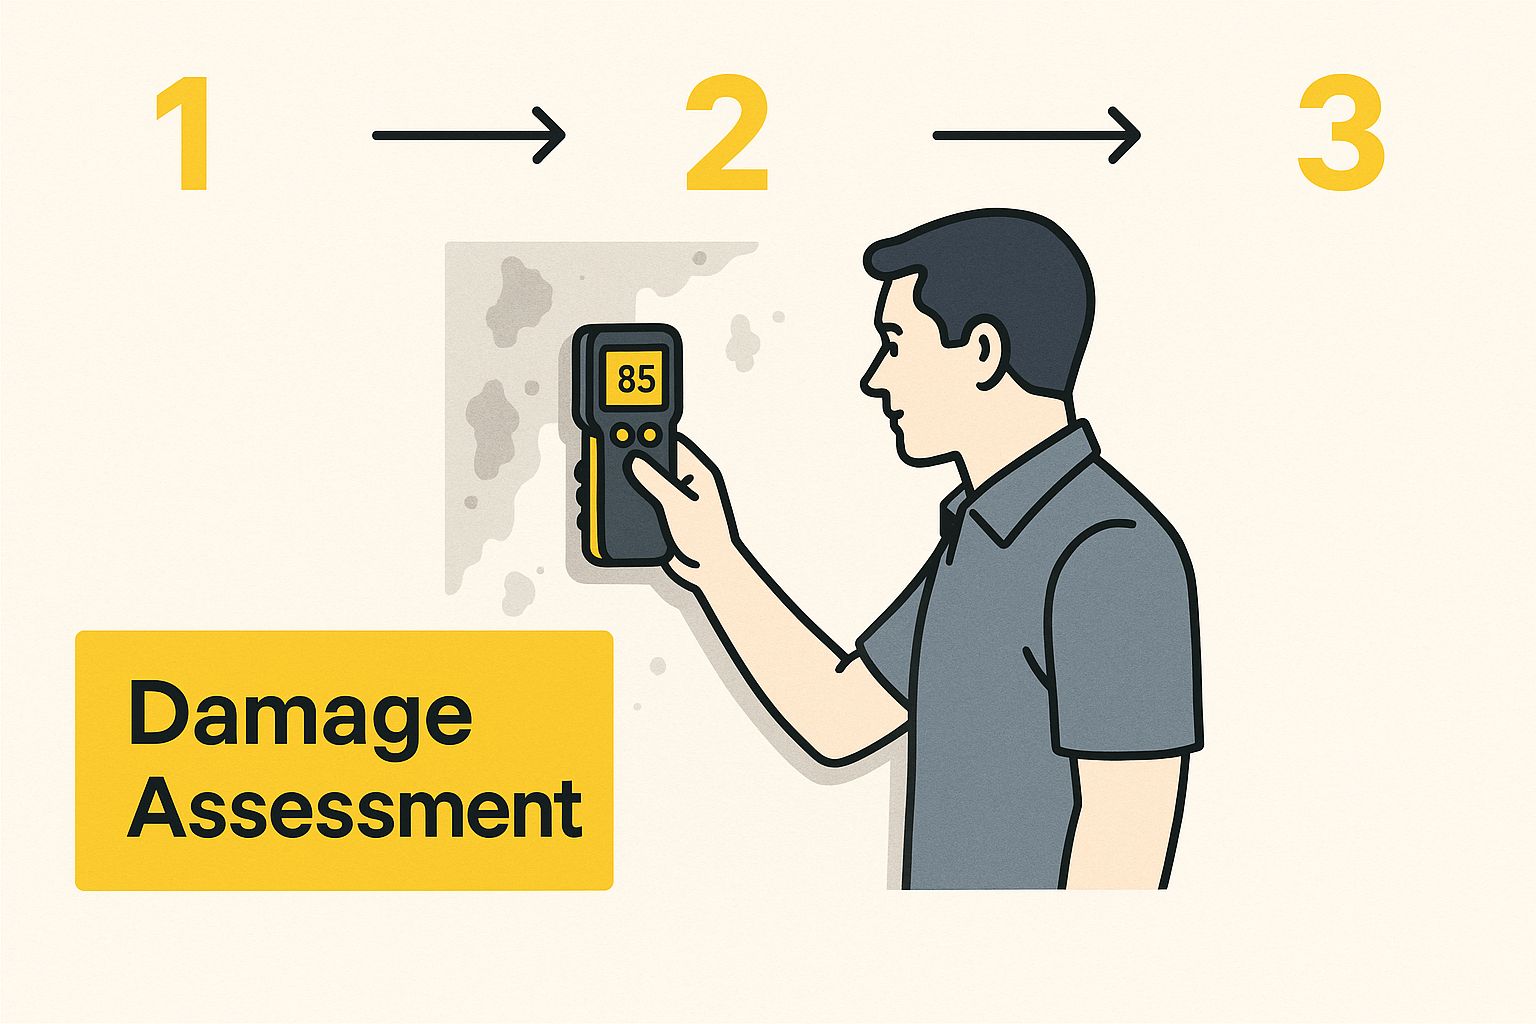
This highlights a key difference: professional restoration is about tackling the problem at its source, not just cleaning up the visible mess.
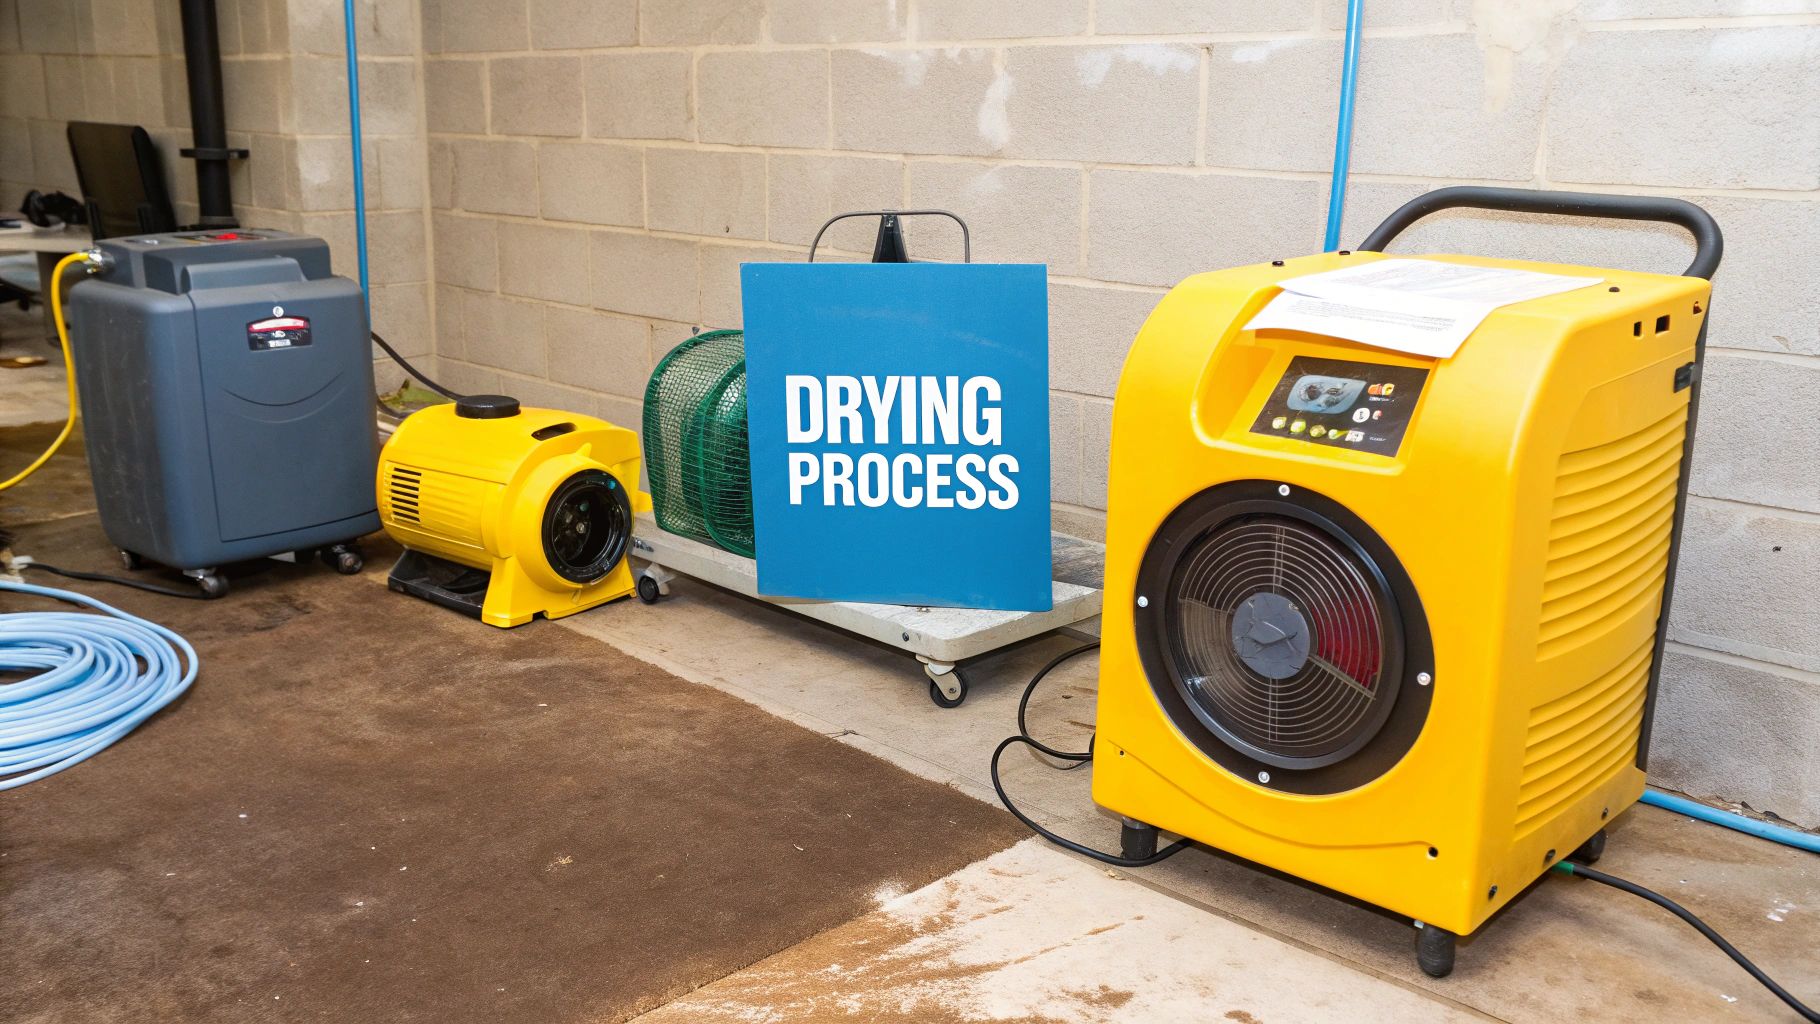
Next up is the “stabilization” phase. The top priority is getting all standing water out—and fast. The longer water sits, the deeper it seeps into your home’s structure, causing more and more damage by the minute.
To get this done, crews roll out the heavy machinery. We’re talking powerful, commercial-grade equipment like submersible pumps for deep water and truck-mounted vacuums that can pull hundreds of gallons from carpets and floors. This step is aggressive for a reason: it dramatically cuts down the drying time and is the first line of defense against mold.
With the bulk water gone, the “treatment” phase begins. This is where the real science of drying, known as psychrometry, comes into play. The goal now is to pull out all the remaining moisture that has soaked into porous materials like drywall, wood framing, and even concrete.
Simply opening a few windows and turning on a fan won’t cut it. Professional water damage restoration is all about creating a controlled drying environment. Technicians set up industrial-grade air movers to speed up evaporation and use massive dehumidifiers to literally suck that moisture out of the air.
This isn’t a “set it and forget it” process. The team will return regularly to take moisture readings, monitor progress, and reposition equipment to hit stubborn damp spots. This scientific approach ensures your home is returned to a safe, dry standard.
Finally, we hit the “recovery” stage. Once every material is verifiably dry, the focus shifts to cleaning and sanitizing everything the water touched. This is absolutely critical if the water was contaminated (grey or black water), as it can leave behind nasty bacteria. Crews use antimicrobial treatments to stop mold in its tracks and employ specialized techniques to clean and salvage your belongings.
The process wraps up with any needed repairs. Sometimes it’s minor, like replacing a patch of drywall and painting. In more serious cases, it could involve rebuilding entire sections of a room. The ultimate goal isn’t just to dry your property—it’s to return it to a safe, clean, and fully functional state, turning a disaster into a distant memory.
When a restoration pro shows up to a water damage job, their first question isn’t “how much water is there?” It’s “what kind of water is it?”
That’s because not all water is created equal. The source of the flood dictates the entire game plan, from the safety gear the team wears to the specific methods used to clean and sanitize your property.
The industry breaks water intrusions down into three distinct categories based on how contaminated it is. As a homeowner, understanding these categories is critical. It directly impacts the health risks involved and the complexity of the restoration work ahead.
Knowing the difference helps you have a much more informed conversation with your restoration team and truly grasp the seriousness of the situation.
Category 1 water is the least hazardous of the bunch. It comes from a sanitary source and doesn’t pose a substantial threat if you touch it or even accidentally ingest it. Think of it as the water that comes straight from your home’s pipes.
Common sources of Category 1 water include:
But here’s the catch: even clean water doesn’t stay clean for long. If it soaks into building materials like drywall or sits for more than 48 hours, it can easily pick up contaminants and degrade into Category 2.
Category 2 water, what we often call “grey water,” contains a significant level of contamination—whether chemical, biological, or physical. Coming into contact with it can cause discomfort or sickness. It’s basically used water that isn’t full of raw sewage.
You’ll typically see grey water from sources like:
Tackling a grey water situation is much more intensive. Technicians must wear personal protective equipment (PPE), and porous materials like carpet padding usually have to be ripped out and replaced. Every affected surface needs a thorough cleaning and disinfection.
This is the most dangerous and unsanitary classification, hands down. Category 3, or “black water,” is grossly contaminated. It can be teeming with pathogenic agents, toxins, and other nasty stuff. Exposure to black water presents a serious health risk.
Any water that originates from a sewage source or has come into contact with the ground is immediately classified as Category 3. This includes storm flooding and sewer backups.
Sources of black water are pretty unmistakable:
Handling black water is a job strictly for certified professionals. The process demands full containment of the affected zone and the removal of all porous materials that got wet. Extensive cleaning, sanitizing, and disinfection are mandatory. Because of the severe health risks, homeowners can learn more about the critical safety protocols in our detailed guide to sewer remediation services. Proper handling is non-negotiable to get your property back to a safe, livable condition.
When you call in a professional for water damage restoration, you’re not just getting mops and buckets. You’re getting a science-backed process driven by some seriously advanced equipment. This is what truly separates a professional job from a simple cleanup attempt.
Using the right gear isn’t just about working faster; it’s about being thorough. The real danger isn’t the puddle you can see on the floor. It’s the hidden moisture that’s already seeped behind your walls, soaked under the flooring, and started to saturate the wood framing of your house. This is where mold and rot get their start.
Before any drying starts, technicians have to map out the full extent of the water’s reach. To do this, they use diagnostic tools that are like an X-ray for your home, revealing every last pocket of hidden moisture.
These instruments make sure the entire drying plan is based on solid data, not just guesswork.
Once all the wet spots are identified, the real work begins. The goal is to create a controlled drying environment—basically, a powerful vortex of targeted airflow and dehumidification that pulls moisture out of the structure and the air itself.
The core principle is simple: speed up evaporation and then capture the airborne moisture. Professionals achieve this by deploying a strategic combination of industrial-grade air movers and dehumidifiers, turning a damp room into an efficient drying chamber.
Here’s the equipment that makes it all happen:
This combination of equipment works in tandem to create an environment where drying happens as quickly and completely as possible, which is the key to stopping secondary damage like mold. The restoration industry is always evolving, and new tech is making this process even more effective. Things like AI-powered assessment tools and smart moisture sensors are already improving accuracy and cutting down inspection times. You can discover more insights about these industry innovations on purocleanfranchise.com.
Without this kind of specialized technology, a complete and safe water damage restoration just wouldn’t be possible.
Dealing with the aftermath of water damage is stressful enough, but the insurance claim process can often feel like a second disaster. Juggling policy language, adjusters, and paperwork adds a whole new layer of complexity just when you’re already overwhelmed.
But with a clear strategy, you can approach your claim with confidence and secure the fair settlement you need for a proper water damage restoration.
The first step is figuring out what your homeowner’s policy actually covers. Most standard policies are designed for damage from “sudden and accidental” events. Think of things like a burst washing machine hose, an overflowing toilet, or a pipe that freezes and breaks out of nowhere.
So, what’s generally not covered?
Your insurance company has a script to follow, but remember, you are your own best advocate. Your most powerful tool? Meticulous documentation. Those photos and videos you snapped right after you found the water are your starting point, but the paper trail doesn’t end there.
Keep a detailed log of every single conversation with your insurance company. Note the date, time, who you spoke with, and the key takeaways from the discussion. Save every email and piece of mail. This creates an undeniable timeline of communication and helps shut down any potential misunderstandings.
An organized claim is a smoother claim. Think of yourself as the project manager for your own recovery. The more detailed your records, the easier it is for the adjuster to understand the scope of the loss and approve the necessary work.
The insurance adjuster’s job is to assess the damage and figure out how much the claim is worth based on your policy. To make this go smoothly, be ready for their visit. Have all your documentation organized and be prepared to walk them through the property, pointing out every single affected area.
It’s also crucial to understand the role your restoration company plays. A professional crew will provide its own deep dive into the damage, complete with moisture readings, photos, and a precise scope of work required to bring your home back to its pre-loss condition. This expert report is some of the most powerful evidence you can have for your claim.
The demand for these professional services is consistently high. In fact, the damage restoration services industry in the United States has grown at a compound annual rate of 4.5% and is now worth about $7.1 billion. A lot of that growth is fueled by an increase in weather-related events, which makes professional documentation from a restoration company more critical than ever. You can learn more about the restoration industry’s growth on ibisworld.com.
Ultimately, getting through the claims process takes patience and persistence. By understanding your policy, documenting everything, and working as a team with your adjuster and your restoration company, you can ensure a much more transparent and successful outcome.
When you’re dealing with a water damage emergency, the temptation is to hire the first company that picks up the phone. But that’s a decision you can’t afford to rush. Choosing the right partner for your water damage restoration is the difference between a smooth recovery and a long-term nightmare filled with secondary damage.
A great company acts as your advocate, walking you through both the technical work and the insurance claim. A bad one? They can leave you with hidden mold, shoddy repairs, and a mountain of avoidable stress. You need to know what separates the true professionals from everyone else.
The first thing you should look for—no exceptions—is certification from the Institute of Inspection, Cleaning and Restoration Certification (IICRC). This isn’t just some logo they slap on their van. It’s proof that the technicians have been properly trained and passed exams on the industry’s highest standards.
An IICRC-certified firm gets the science behind structural drying, knows how to handle contaminated water safely, and operates under a strict code of ethics. If a company doesn’t have this certification, just move on. It’s the non-negotiable benchmark for competence in this industry.
Next up, make sure the company is fully licensed and insured. They need to carry general liability insurance to protect your property from any accidental damage while they work. They also need workers’ compensation insurance. That last one is critical—it protects you from being liable if one of their crew members gets hurt on your property.
Don’t just take their word for it. Ask for their certificates of insurance. Any legitimate company will provide them without hesitation. It’s a simple check that protects both you and your home.
Water damage doesn’t stick to a 9-to-5 schedule. You absolutely need a company offering 24/7 emergency services that can promise a fast response. The longer water sits, the worse the damage gets, and the risk of mold growth skyrockets after just 24-48 hours.
When you call, ask them point-blank: “How quickly can you have a team at my property?” A reliable company should be able to get there in 60-90 minutes. A vague answer is a huge red flag that they aren’t set up for real emergencies.
A quick arrival shows they have the team and the tools ready to stabilize the situation before it spirals out of control.
Once you have a potential company on the phone or on-site, it’s time for you to interview them. A real professional will welcome your questions and give you clear, confident answers. For a more detailed breakdown, check out this guide on how to choose a restoration company in Los Angeles.
Be ready with a few key questions:
How they answer tells you everything about their experience, transparency, and customer service. It’s how you find a team you can truly trust with your home.
Even after walking through the process, you probably still have a few questions swirling around. Let’s tackle some of the most common concerns homeowners have when they’re suddenly facing a water damage restoration project.
A: Every situation is different, so the timeline really depends on how bad the damage is and what got wet. A small leak from a supply line that just dampened a bit of flooring might be fully dried by a professional in only 2-3 days. But if you’re dealing with major flooding that has soaked deep into drywall, insulation, and the subfloor, you’re looking at a week or more for the complete job. An IICRC-certified technician can give you a much more accurate timeline once they’ve done a full assessment on-site.
A: You can definitely mop up a small spill on a waterproof floor, no problem. But the moment water soaks into structural materials like drywall, carpet padding, or subfloors, you need to call in the pros. The real danger is the moisture you can’t see. Without professional moisture meters, there’s no way to know if an area is completely dry. That trapped dampness is a perfect invitation for mold, which can start growing in as little as 24-48 hours and lead to much bigger problems like wood rot.
A: Most standard homeowners insurance policies will cover water damage as long as it’s “sudden and accidental.” Think of things like a burst pipe, a washing machine hose that suddenly fails, or a toilet that overflows unexpectedly. However, policies almost always exclude damage caused by gradual leaks, ground flooding (which requires separate flood insurance), or poor maintenance. When in doubt, pull out your policy and call your agent right away to confirm what your specific coverage includes.
A: Being proactive is your best defense. A little bit of regular maintenance goes a long way. Check appliance hoses for cracks or bulges, keep your gutters clean so they don’t overflow (especially before rainy season), and make sure your yard slopes away from your foundation. Most importantly, know where your home’s main water shutoff valve is and how to use it. For extra peace of mind, consider installing smart water leak detectors near your water heater, washing machine, or under sinks. They’ll send an alert straight to your phone, turning a potential disaster into a minor inconvenience.
A: Mold can begin to grow in as little as 24 to 48 hours after a water intrusion, especially in the warm, humid conditions often found in Southern California homes. This is why a rapid response from a professional water damage restoration company is so critical to prevent a simple water issue from turning into a major mold contamination problem.
If you’re dealing with a water emergency, don’t wait for things to get worse. The experts at Onsite Pro Restoration are on call 24/7 to provide a fast, professional response to homeowners throughout Los Angeles. Contact us now for a free assessment and let us help you get your home back to normal.
When you find a leak or flood in your Los Angeles home, you’re officially in a race against the clock. The first 48 hours are critical for preventing a minor

It often starts with a persistent musty smell you can't quite place. Or maybe it’s a cough that just won’t quit. The earliest black mold symptoms in a house show
When you find a fresh pet accident on the carpet, what you do in the first few minutes is everything. Forget panicking—your one and only goal is damage control. This

