8 Critical Signs of Water Damage Los Angeles Homeowners Miss
by onsitepro.org
In Los Angeles, from the damp coastal air of Santa Monica to the aging plumbing in historic Hollywood homes, water damage is a silent threat that can compromise your property’s value and your family’s health. While a burst pipe is an obvious disaster, most water intrusion starts subtly, leaving behind small clues that are easy to overlook. Ignoring these early signs of water damage—like faint musty smells or minor wall discoloration—can quickly lead to catastrophic structural decay, warped flooring, and rampant mold growth that thrives in Southern California’s climate.
Understanding the common signs of water damage is your first and most critical line of defense against extensive, costly repairs. This guide is designed for Los Angeles property owners and managers, breaking down the eight indicators you need to watch for. We’ll provide real-world examples, from peeling paint in a Sherman Oaks bathroom to spongy drywall near a leaky window in Pasadena. By learning to recognize these warning signals, you can identify problems before they escalate into true emergencies, protecting both your property and your peace of mind.
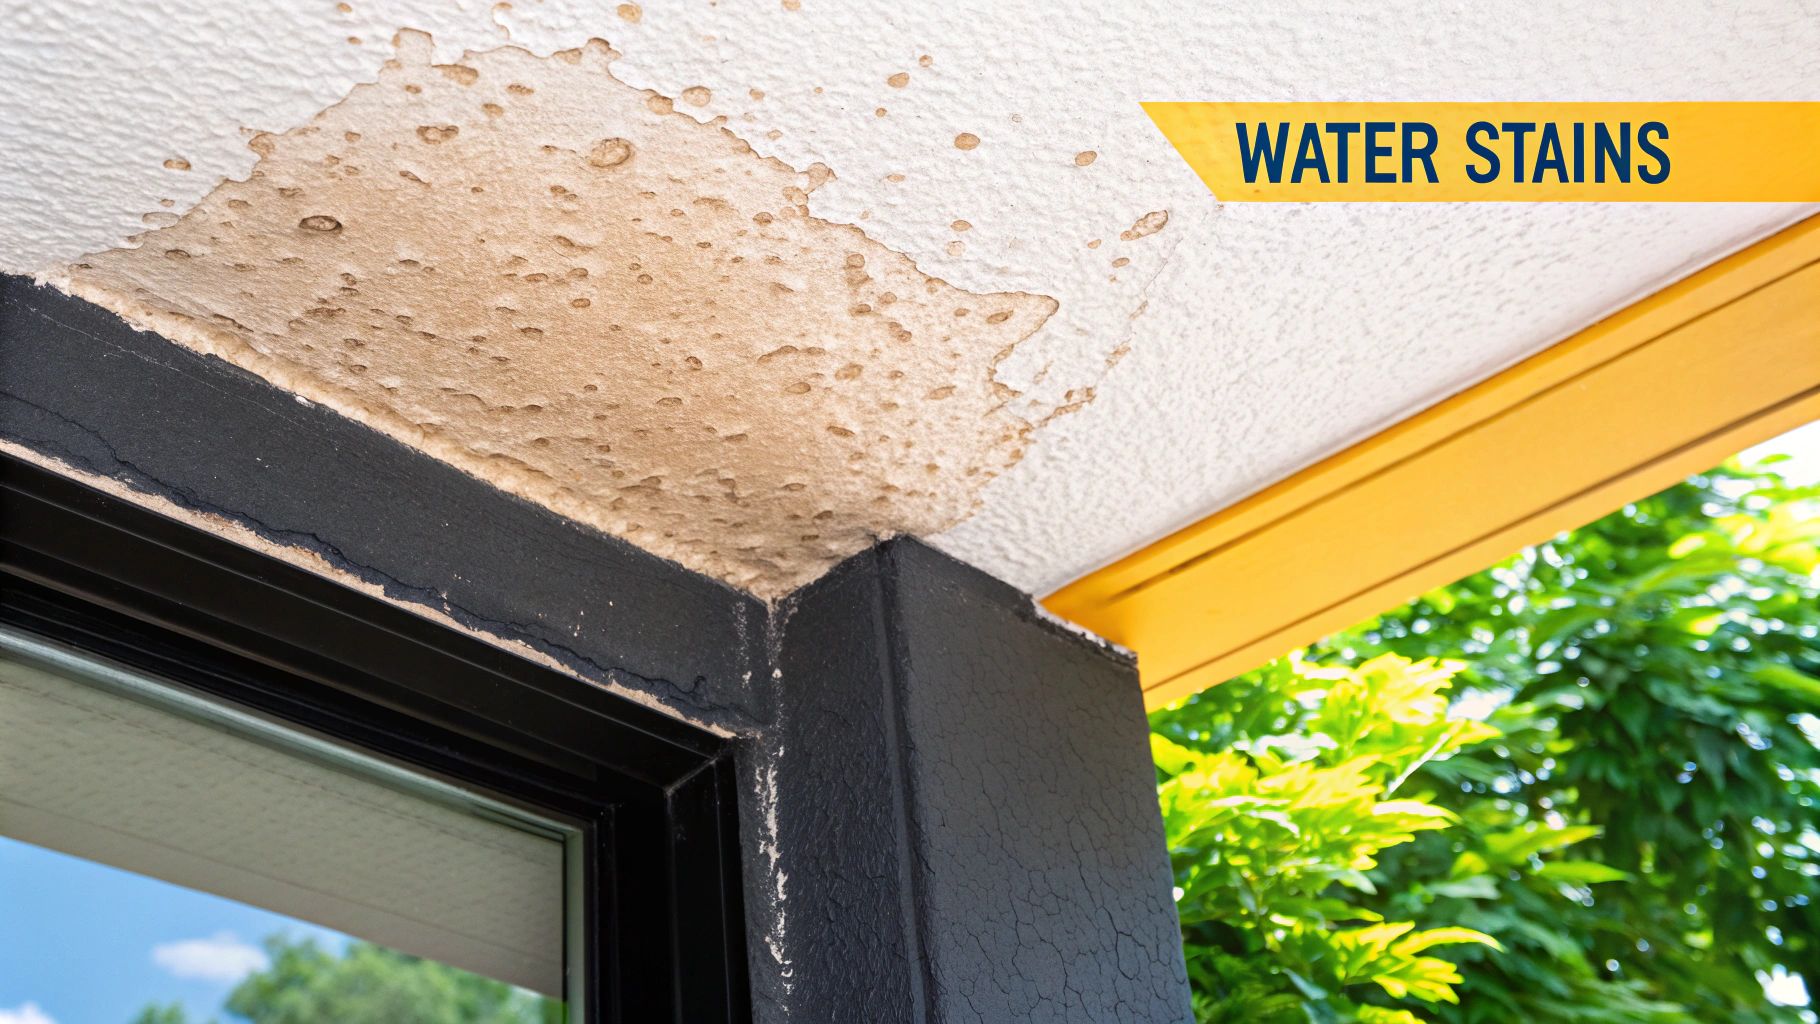
Discolored patches on your walls and ceilings are often the first and most obvious indicators of hidden water intrusion. These stains are far more than a simple cosmetic issue; they are a clear distress signal that moisture has penetrated your home’s building materials. When water seeps into drywall, plaster, or wood, it carries minerals and dirt. As the water evaporates, it leaves these deposits behind, creating the characteristic yellow, brown, or dark “rings” that are telltale signs of water damage.
These stains can originate from numerous sources, each requiring a different investigative approach. A circular brown spot on a top-floor ceiling in a San Fernando Valley home might point to a failing roof tile, while a streak running down a wall could signal a slow leak from a plumbing line or a compromised window seal.
Common Causes and Locations
The location of the stain is your first clue to the source of the leak.
Ceiling Stains: Often caused by roof leaks, HVAC condensation line clogs, or plumbing failures from an upper-level bathroom. For instance, a persistent stain in a bathroom ceiling might stem from a leaky toilet seal on the floor above.
Wall Stains: These frequently indicate a burst or leaking pipe within the wall cavity, a leaking window frame, or water intrusion from outside due to poor drainage or cracked stucco.
Stains Near Fixtures: Discoloration around toilets, showers, or sinks can signal a failing wax ring, loose connection, or deteriorating caulk.
Actionable Steps to Take
Ignoring a water stain allows the underlying problem to worsen, potentially leading to structural decay and mold growth.
Key Insight: A water stain is the symptom, not the disease. Simply painting over it without addressing the moisture source is like ignoring a fire alarm and just muffling the sound. The damage will continue to spread unseen.
If you spot a stain, follow these steps:
Document Everything: Take clear photos of the stain from multiple angles and distances. This documentation is crucial for insurance claims.
Check for Active Moisture: Carefully touch the stained area. If it feels damp, soft, or cool, the leak is likely active. A moisture meter can provide a definitive reading.
Monitor for Changes: Outline the stain lightly with a pencil. Check back in a day or two to see if the stain has grown or darkened, which confirms an ongoing leak.
Investigate the Source: If it’s safe to do so, check adjacent areas like attics, crawl spaces, or rooms directly above the stain for obvious signs of water.
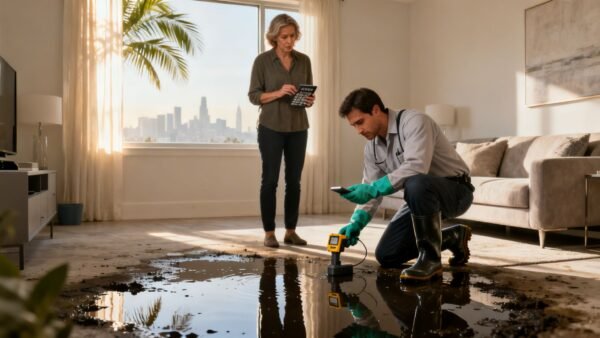
Call a Professional: For any stain that is damp or growing, it’s time to call a water damage restoration specialist. They have the tools to pinpoint the leak’s origin and prevent further damage.
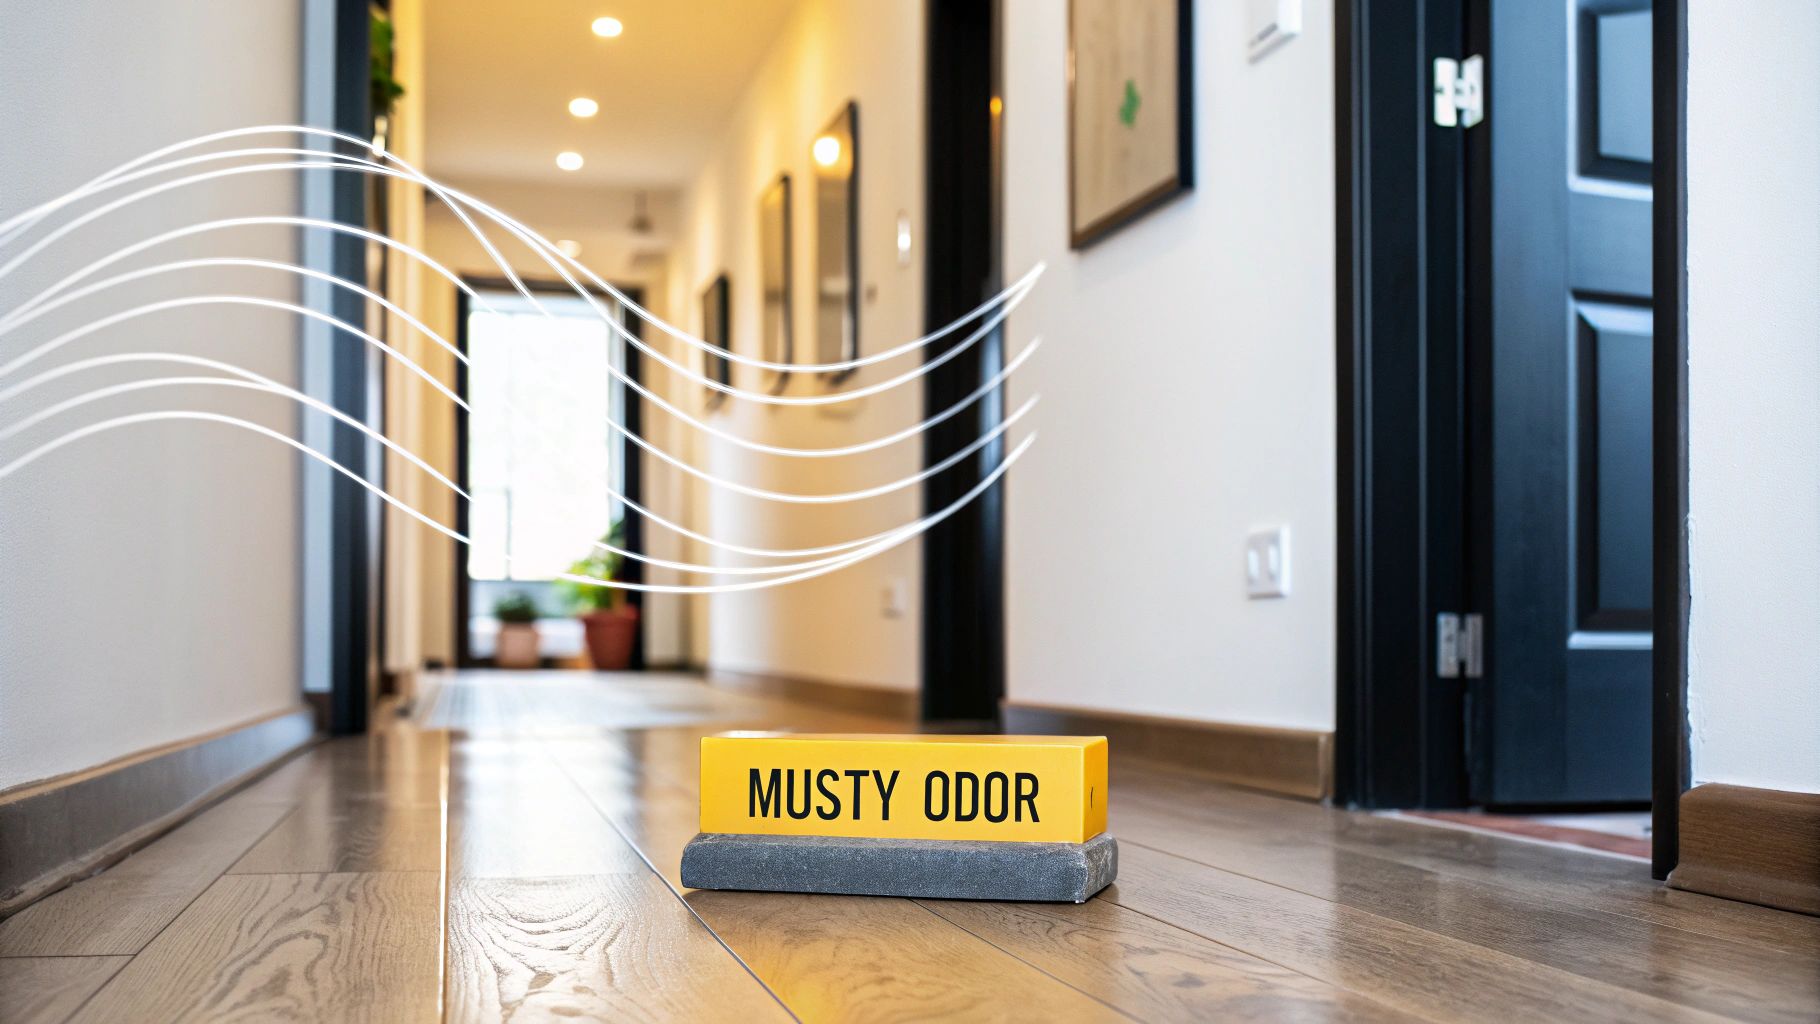
2. Musty or Moldy Odors
That persistent, earthy smell in your basement or bathroom is more than just an unpleasant nuisance; it’s a significant warning sign of water damage. This distinct musty or moldy odor is often your first sensory clue to hidden moisture, indicating that mold or mildew has begun to grow. The smell is produced by microbial volatile organic compounds (MVOCs), which are gases released by fungi as they consume and digest damp organic materials like drywall paper, wood, and insulation.
Because your sense of smell can detect problems that aren’t yet visible, an odor is a critical sign of water damage that should never be ignored. A musty aroma in a poorly ventilated Los Angeles attic could point to a slow roof leak, while a damp, mildewy smell under a kitchen sink is a classic sign of a failing P-trap or a leaky supply line.
Common Causes and Locations
Following your nose is an effective first step in locating the source of hidden moisture.
Basements and Crawl Spaces: These below-grade areas are prone to moisture from foundation cracks, high humidity, or poor exterior drainage, creating an ideal environment for mold growth and persistent musty odors.
Bathrooms: Constant humidity combined with potential slow leaks from shower pans, toilet seals, or plumbing within walls can lead to hidden mold that produces a telltale musty smell.
Kitchens and Laundry Rooms: Smells often originate from behind or under appliances like refrigerators, dishwashers, and washing machines due to leaking hoses or drain lines.
Attics: Poor ventilation can trap moisture, while roof leaks can saturate insulation, leading to mold growth that goes unnoticed until the odor permeates the living space below.
Actionable Steps to Take
Masking the odor with air fresheners is a dangerous mistake, as it allows the root cause to fester and spread.
Key Insight: Odor is an alarm system for your nose. If you smell mold or mildew, it means mold spores are already airborne. Addressing the scent means addressing the moisture source to protect your property and your health.
If you detect a musty smell, take these steps:
Trust Your Senses: Systematically walk through your home to pinpoint where the odor is strongest. Check inside closets, cabinets, and behind furniture.
Check Humidity Levels: Use a hygrometer to measure the relative humidity in the area. Consistent readings above 55-60% create an environment where mold can thrive.
Perform a Visual Inspection: In the area with the strongest odor, look for other signs of water damage, such as discoloration, peeling paint, or warped materials. Use a flashlight to inspect dark corners and cavities.
Avoid Disturbing Potential Mold: If you locate visible mold, do not touch it or try to clean it with household chemicals like bleach, which can aerosolize spores.
Seek Professional Help: A persistent musty odor warrants a call to a professional. Specialists use advanced tools to find hidden moisture and can provide expert odor removal services to eliminate the problem at its source.
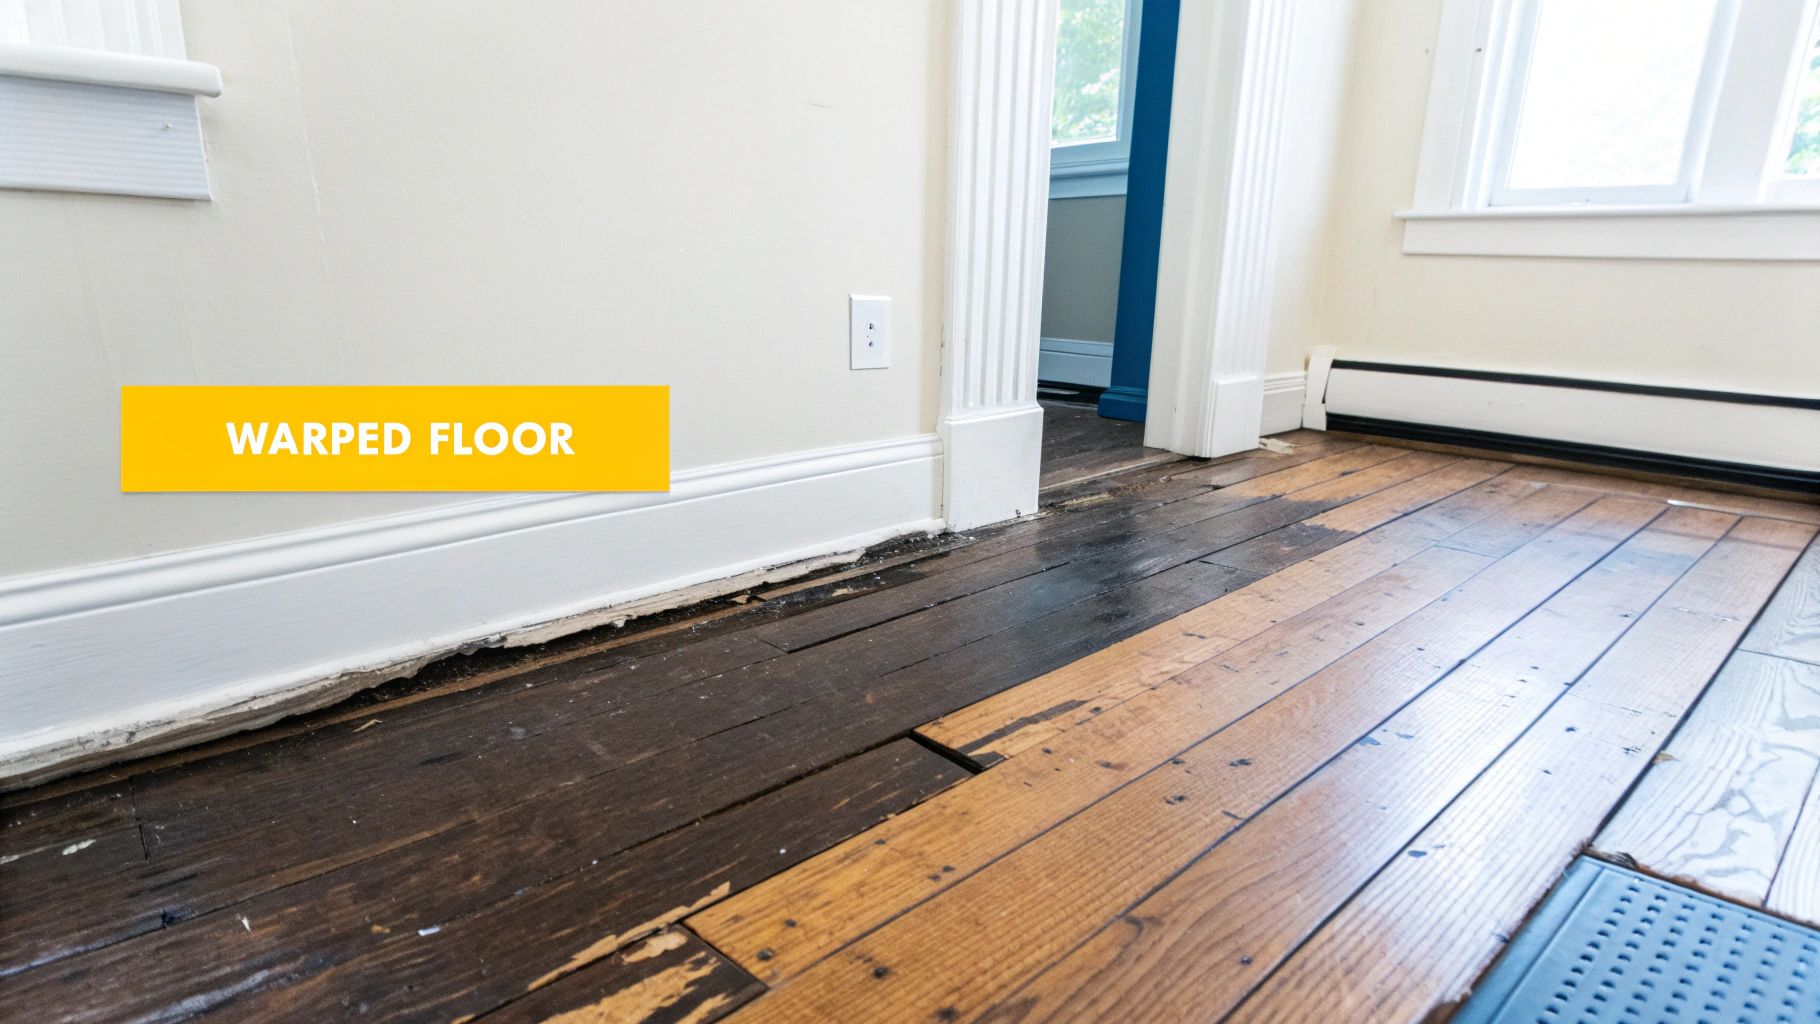
3. Warped or Buckling Floors
Changes in your flooring’s texture and shape are powerful signs of water damage that should never be ignored. When porous materials like wood or laminate absorb moisture, the fibers swell and expand. This expansion has nowhere to go, forcing the flooring to lift, separate, or distort, creating an uneven and often hazardous surface. This can manifest as buckling (lifting at the seams), cupping (edges are higher than the center), or crowning (the center is higher than the edges).
This type of damage is a clear indicator that a significant amount of water has saturated not just the visible surface but also the subfloor beneath. In Los Angeles homes, this often stems from a slow-leaking dishwasher, a sudden washing machine hose failure, or groundwater intrusion in a basement after heavy rains. The longer the moisture remains, the more severe and permanent the warping becomes.
Common Causes and Locations
The type of flooring and its location can help you trace the water back to its source.
Kitchen & Laundry Rooms: Hardwood or laminate floors in these areas are highly susceptible to appliance leaks. A dishwasher drain line or a refrigerator ice maker supply line can leak for weeks, causing boards to warp slowly over time.
Basements & Ground Floors: Concrete slabs can wick moisture upward, causing vinyl or laminate flooring to buckle. This is a common issue tied to poor exterior drainage or hydrostatic pressure.
Near Exterior Doors: Warping or buckling near sliding glass doors or entryways often points to a failed weather seal or improper flashing, allowing rainwater to seep underneath the flooring.
Actionable Steps to Take
Addressing warped flooring requires a dual focus: stopping the water source and assessing the full extent of the damage.
Key Insight: The visible warping is just the tip of the iceberg. The real damage often lies in the saturated subfloor and underlayment, which can become a breeding ground for hidden mold if not properly dried.
If you discover buckling or warping, take these immediate steps:
Identify and Stop the Leak: If the source is an appliance, shut off its water supply valve immediately. For potential plumbing issues, you may need to turn off the main water supply to your home.
Document the Damage: Take extensive photos and videos of the affected flooring from various angles. Make sure to capture where the buckling is most severe, as this helps pinpoint the origin.
Remove Surface Water: Use towels or a wet-dry vacuum to remove any standing water from the surface to prevent further absorption.
Promote Air Circulation: Open windows and use fans to begin the drying process, but avoid applying high heat directly to the wood, which can cause it to crack.
Contact Restoration Experts: Warped flooring almost always requires professional intervention. A specialist can use moisture meters to determine the saturation level of the subfloor and implement a structural drying plan. Understanding the nuances of emergency water damage prevention can help property managers and homeowners act quickly to mitigate these issues.
4. Peeling or Bubbling Paint and Wallpaper
When paint or wallpaper begins to bubble, flake, or peel away from the wall, it’s a strong indication that moisture is present where it shouldn’t be. This is one of the most common signs of water damage because moisture trapped behind these surfaces compromises the adhesive bond. As water saturates the drywall or plaster underneath, it pushes outward, causing the paint to lift or the wallpaper glue to fail, resulting in unsightly and revealing blisters.
These cosmetic defects are direct evidence of a hidden moisture problem. A small bubble in the paint below a window in a Pasadena home could signal a failing window seal letting in rain. Similarly, peeling wallpaper in a kitchen might point not to humidity, but to a slow, persistent leak from the ice maker line behind the refrigerator.
Common Causes and Locations
The specific location and type of damage can help you trace the issue back to its origin.
Bathrooms and Kitchens: High humidity can cause minor peeling, but significant bubbling often indicates a leak from a supply line, drain pipe, or failing grout and caulk around tubs and sinks.
Exterior Walls: Peeling or blistering on an interior-facing exterior wall is a major red flag for water intrusion from the outside, potentially due to cracked stucco, roof-line issues, or poor drainage.
Ceilings and High on Walls: Bubbling paint in these areas often points to a roof leak or a plumbing failure on an upper floor, where water is traveling down through the wall cavity.
Actionable Steps to Take
Addressing the cosmetic issue without fixing the leak is a temporary and ineffective solution. The problem will always return and worsen.
Key Insight: Paint and wallpaper are like a home’s skin. When they start to peel or blister, it’s a symptom of a deeper issue. Simply repainting is like putting a bandage on a wound that needs stitches; it hides the problem but doesn’t heal it.
If you discover peeling or bubbling surfaces, act quickly:
Assess the Area: Gently press on the bubbled area. If it feels soft, spongy, or wet, the leak is active and the underlying material is saturated.
Ensure Safety: Be cautious of peeling paint in older homes, as it may contain lead. Avoid scraping or sanding it without taking proper safety precautions.
Find the Source: Look for the most likely cause nearby. Check adjacent rooms, floors above, and the exterior of your home for obvious signs of water entry.
Dry Completely: Before any cosmetic repairs, the area must be professionally dried. Painting over a damp spot will only trap moisture, leading to mold growth and wood rot.
Contact a Professional: Due to the risk of hidden mold and structural issues, it’s best to call a water damage restoration expert. They can use moisture meters to find the full extent of the saturation and ensure the root cause is fixed before repairs begin.
5. Soft or Spongy Drywall and Wood
When building materials lose their rigidity and become soft, spongy, or squishy, it’s a critical sign that prolonged water exposure has occurred. Unlike a surface stain, compromised structural integrity indicates that moisture has deeply saturated materials like drywall and wood, causing them to break down at a cellular level. This is one of the more advanced signs of water damage, signaling a problem that has likely been developing for some time.
Waterlogged drywall will often feel soft and may crumble with gentle pressure. Wood materials, such as baseboards, window sills, or structural beams, will lose their hardness and can develop a fibrous, stringy texture as they begin to rot. This physical change is a direct warning that the structural stability of the affected area is at risk.
Common Causes and Locations
The source of moisture causing this type of damage is often a slow, persistent leak that gives materials time to become fully saturated.
Behind Walls: Drywall behind bathroom tiles can turn soft from years of a slow shower leak. A persistent leak from a supply line inside a wall cavity will eventually turn the surrounding drywall mushy.
Window and Door Frames: In coastal areas like Santa Monica or homes with older windows, constant exposure to weather and condensation can cause wooden sills and frames to rot, becoming soft to the touch.
Basements and Crawl Spaces: Foundation leaks or high humidity in a basement can cause wooden support beams and drywall to absorb moisture from the ground or air, leading to widespread softening and deterioration.
Actionable Steps to Take
Soft or spongy materials represent a serious problem that requires immediate attention to prevent structural failure and extensive mold growth.
Key Insight: Soft drywall and wood are not just damaged; they are failing. Their ability to support weight and maintain the shape of your home is compromised, turning a moisture issue into a potential safety hazard.
If you discover soft building materials, act quickly:
Test Gently: Carefully press on the suspected area with a screwdriver or a similar tool. If it gives way easily or feels spongy, the material is compromised.
Mark the Boundaries: Use a pencil or painter’s tape to outline the entire affected area. Note that the damage often extends beyond the visibly soft portion.
Check Adjacent Areas: Water spreads. Check the floor below the soft wall, the other side of the wall, and nearby baseboards for similar signs of water damage.
Avoid DIY Demolition: Do not start tearing out the soft materials yourself. You could disturb a hidden mold colony, spreading spores throughout your home, or damage plumbing and electrical lines.
Contact a Restoration Professional: This level of damage requires expert assessment. A specialist can determine the extent of the saturation, identify the leak source, and safely remove the compromised materials.
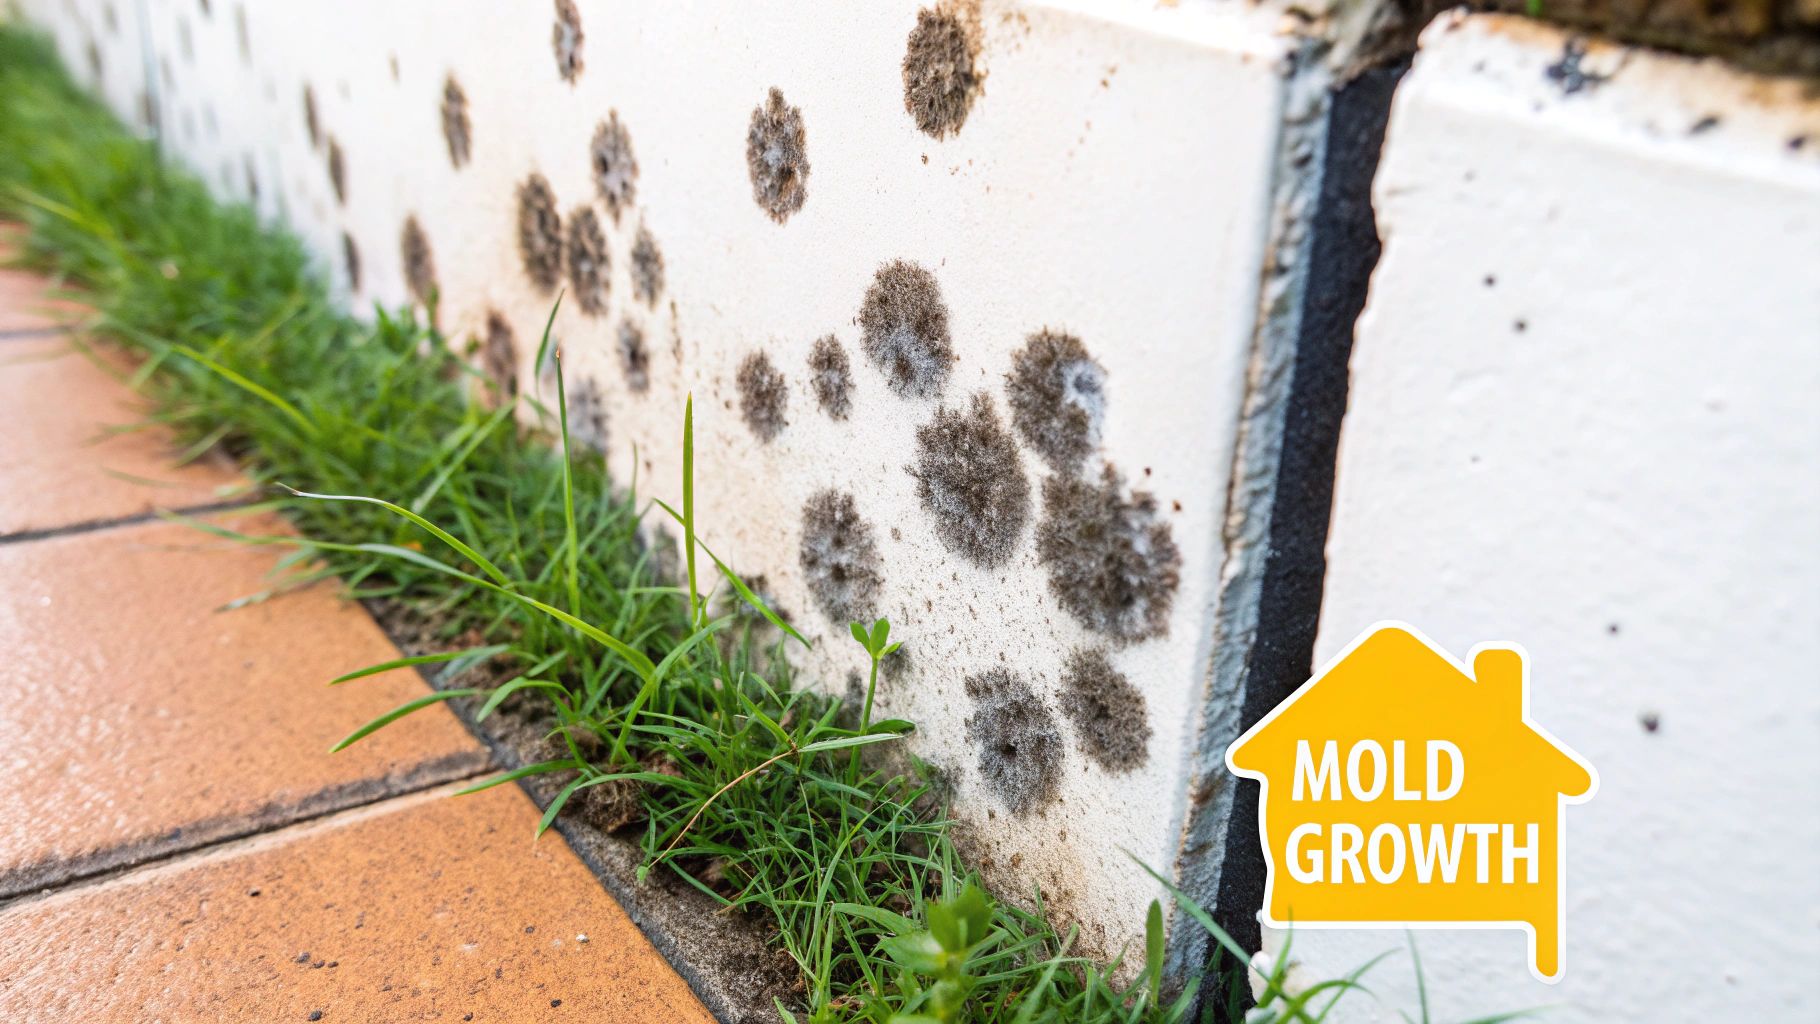
Finding visible mold growth is an undeniable and serious sign of a persistent moisture problem. Mold, a type of fungus, presents as fuzzy, slimy, or powdery growths and can appear in various colors, including black, green, white, or even orange. It is not just an unsightly nuisance; it is a direct indicator of prolonged water exposure, as spores can begin to colonize a damp surface within just 24 to 48 hours. Its presence confirms that water damage has occurred and is creating an environment ripe for further decay and potential health issues.
This biological growth is one of the most hazardous signs of water damage because it actively deteriorates the materials it feeds on, like drywall and wood, and releases spores into the air. A patch of black mold in a poorly ventilated Sherman Oaks bathroom or green mold on a basement wall in a coastal Santa Monica home points directly to a chronic leak or high-humidity issue that needs immediate attention.
Common Causes and Locations
Mold will grow anywhere with sufficient moisture, warmth, and an organic food source.
Bathrooms and Kitchens: High-humidity areas around showers, sinks, and under cabinets are prime locations, often due to poor ventilation or slow plumbing leaks.
Basements and Crawl Spaces: These below-grade areas are susceptible to moisture intrusion from foundation cracks, poor drainage, or high humidity, leading to widespread growth on walls and wooden structures.
Behind Walls and Appliances: Hidden leaks from pipes, ice makers, or washing machines can fuel extensive mold colonies that only become visible when the growth emerges through the drywall.
Actionable Steps to Take
Disturbing mold can release a high concentration of spores, so a cautious approach is critical.
Key Insight: Visible mold is often just the “tip of the iceberg.” The hidden colony behind the wall or under the floor is typically far more extensive and is tied directly to the unresolved water source.
If you discover mold, proceed carefully:
Do Not Disturb: Avoid touching, scrubbing, or trying to clean the mold, especially if the area is larger than a few square feet. This can spread spores throughout your property.
Document the Growth: Take clear photographs of the mold from various angles and distances for your insurance claim.
Isolate the Area (If Possible): Close doors to the affected room and turn off any HVAC systems that could circulate spores to other parts of your home.
Identify and Stop the Moisture: The absolute priority is to address the underlying water issue. Whether it’s a leaky pipe or a condensation problem, the moisture source must be eliminated.
Call a Certified Mold Remediation Professional: Mold removal requires specialized equipment and containment procedures to be done safely. Professionals can accurately assess the extent of the problem and ensure it is removed completely.
7. Higher Than Normal Water Bills
One of the most insidious signs of water damage is one you can’t see, hear, or smell: an unexpected spike in your monthly water bill. This financial red flag often indicates a hidden, persistent leak somewhere in your plumbing system. While a small drip might seem insignificant, it can waste thousands of gallons of water over time, causing gradual, unseen destruction to your home’s foundation, walls, or subflooring.
Unlike a sudden pipe burst, which announces itself dramatically, these slow leaks operate in secret. A tiny crack in a pipe under a concrete slab or a silent toilet flapper leak can go unnoticed for months, all while your water meter keeps spinning. This constant moisture saturation is a direct invitation for structural rot and widespread mold growth.
Common Causes and Locations
An unusually high water bill is a mystery that requires investigation to pinpoint the hidden culprit.
Toilet Leaks: A worn-out flapper or fill valve in a toilet tank is a common source of “silent” leaks that can waste hundreds of gallons per day.
Slab Leaks: In many Southern California homes, water lines run beneath the concrete foundation. A small leak here can seep into the ground and compromise the slab without any visible signs inside the house initially.
Underground Irrigation Leaks: A cracked sprinkler line in your yard can lead to a massive increase in water usage that appears on your home’s main utility bill.
Hidden Pipe Leaks: A pinhole leak in a pipe behind a wall or in a crawlspace can drip continuously, contributing to a higher bill and causing significant hidden damage.
Actionable Steps to Take
Treat a sudden, unexplained rise in your water bill as an urgent warning sign of water damage.
Key Insight: Your water meter is your home’s silent alarm system. Learning to read it and check for hidden leaks can save you from catastrophic damage and costly repairs down the line.
If your bill seems too high, take these steps:
Perform a Water Meter Test: Turn off all water-using appliances in your home. Locate your water meter and check if the small dial (the leak indicator) is spinning. If it is, you have an active leak.
Conduct a Toilet Dye Test: Add a few drops of food coloring to your toilet tank and wait 15-20 minutes without flushing. If color appears in the bowl, you have a faulty flapper that needs replacing.
Monitor Your Bill: Compare your current usage to the same month from the previous year. A significant, unexplained increase warrants a professional investigation.
Call a Professional: If you can’t find the source of the leak yourself, contact a plumber or a water damage restoration specialist. They have advanced tools like acoustic leak detectors to find hidden leaks without destructive demolition. For complex situations, understanding your coverage is key; you can learn more about insurance for water damage to be better prepared.
8. Rust or Mineral Deposits
When water repeatedly evaporates from a surface, it often leaves behind telltale evidence in the form of rust stains or chalky mineral deposits. These residues are more than just an eyesore; they are physical proof of a persistent or recurring moisture problem. The presence of these deposits is one of the key signs of water damage, indicating that water has been traveling through and leaching minerals from building materials or oxidizing metal components.
This process, known as efflorescence for mineral deposits, occurs when water dissolves natural salts within materials like concrete, brick, or stucco. As the moisture makes its way to the surface and evaporates, it leaves a white, powdery residue behind. Similarly, constant dampness on or around metal pipes, fixtures, and fasteners will cause them to oxidize, creating distinctive orange or reddish-brown rust stains that can bleed into surrounding materials.
Common Causes and Locations
The type and location of the deposit offer valuable clues about the water’s source and path.
Basement and Foundation Walls: White, chalky lines (efflorescence) on concrete or brick walls in a basement or crawl space are a classic sign of hydrostatic pressure forcing groundwater through the foundation.
Around Plumbing Fixtures: Rust stains surrounding water heater connections, pipe joints, or toilet bases often point to a slow, long-term leak from a failing fitting or seal.
On Stucco or Brick Exteriors: Crystalline white deposits on exterior walls can indicate that water is getting behind the siding, often due to poor flashing or cracked caulking.
Actionable Steps to Take
Addressing these deposits requires more than just cleaning them away; the underlying moisture intrusion must be resolved to prevent their return and further damage.
Key Insight: Mineral deposits and rust are like the footprints left by unwanted water. Cleaning them up without fixing the leak is like mopping the floor while leaving the window open in a rainstorm. The problem will inevitably reappear.
If you discover rust or mineral buildup, take the following steps:
Document the Location and Pattern: Take detailed photos of the deposits. Note whether they appear in lines, patches, or around specific fixtures. This helps professionals diagnose the water’s movement.
Inspect Metal Components: Carefully check any rusted pipes, fasteners, or support brackets for structural integrity. Severe corrosion can compromise their strength and lead to failure.
Clean a Test Area: Remove the deposits from a small section using a stiff brush and an appropriate cleaner. This allows you to monitor the area closely to see how quickly new deposits form, confirming an active leak.
Trace the Water Source: Look for the origin of the moisture. For efflorescence on a basement wall, check for exterior drainage issues like clogged gutters or improper grading. For rust around a pipe, check the fitting above it.
Consult a Professional: Due to the persistent nature of these leaks, it’s wise to call a water damage restoration expert. They can identify the root cause, address the moisture problem permanently, and prevent the long-term structural issues these deposits signal.
Common Signs of Water Damage in Los Angeles
Sign of Water Damage
Key Indicator
Common Los Angeles Location
Action Priority
Water Stains
Yellow, brown, or dark rings
Ceilings below flat roofs in Sherman Oaks, walls near old windows
High
Musty Odors
Earthy, damp smell
Basements in coastal Santa Monica, under kitchen sinks
High
Warped Floors
Buckling, cupping, or soft spots
Near dishwashers, laundry rooms, sliding glass doors
Urgent
Peeling Paint
Bubbling, flaking, or blistering
Bathrooms with poor ventilation, exterior-facing walls with stucco cracks
Medium
Spongy Drywall
Soft or crumbling texture
Behind shower tiles, near leaking pipes, around window sills
Urgent
Visible Mold
Black, green, or white spots
Poorly ventilated closets, basements, anywhere with a leak
Urgent
High Water Bill
Sudden, unexplained increase
Indicates hidden leaks in slabs, irrigation, or behind walls
High
Rust/Deposits
Rust stains, white powder
Around water heaters, on foundation walls, on exterior brick
Medium
Don’t Let Water Damage Win: Take Control with Professional Help
Recognizing the subtle and overt signs of water damage is the critical first step in protecting your property’s value and structural integrity. From faint, musty odors in your Santa Monica basement to discolored spots appearing on the ceiling of your Sherman Oaks home, each indicator detailed in this guide is a call to action. Ignoring these warnings, such as a slightly warped floorboard or a mysteriously high water bill, can allow a minor issue to escalate into a catastrophic and expensive problem.
The key takeaway is that water intrusion is rarely a self-correcting issue. It is a persistent force that undermines building materials, creates the perfect breeding ground for mold, and compromises your home’s foundation. The difference between a simple, targeted repair and a full-scale restoration project often comes down to how quickly you act on these initial signs.
From Identification to Action: Your Next Steps
Once you’ve spotted potential trouble, your response is what matters most. While identifying peeling paint or spongy drywall is a crucial skill for any Los Angeles property owner, pinpointing the hidden source and assessing the full extent of moisture saturation requires specialized tools and expertise. This is where a professional assessment becomes invaluable.
Consider these actionable next steps:
Document Everything: Take clear photos and notes of the signs you’ve observed, including the date you first noticed them. This information will be crucial for both restoration professionals and your insurance claim.
Avoid DIY Demolition: Resist the urge to tear out affected materials like drywall or flooring. Disturbing the area can release hidden mold spores, potentially cross-contaminating other parts of your property and creating a more significant health hazard.
Contact Your Insurance Provider: Inform your insurance agent about the potential damage. They can guide you on the claims process and what your policy covers.
Schedule a Professional Inspection: The most important step is to bring in certified experts. They use tools like thermal imaging cameras and moisture meters to detect moisture that is invisible to the naked eye, ensuring the entire problem is addressed, not just the visible symptoms.
By understanding these signs of water damage and responding with decisive, informed action, you transform from a passive victim into an empowered protector of your investment. You stop the damage in its tracks, prevent long-term decay, and safeguard the health of your environment. This proactive approach not only saves you money but also provides invaluable peace of mind.
Q: Can I just paint over a water stain on my ceiling? A: No, painting over a water stain is a mistake. The stain is a symptom of a leak that must be fixed first. Painting over a damp spot traps moisture, which will lead to mold growth, wood rot, and will eventually ruin the new paint job.
Q: How can I tell if water damage is old or new? A: New water damage will feel damp and cool to the touch, and the stained area may be soft or spongy. Old water damage is typically dry and hard, and the stain will have distinct, well-defined rings from multiple drying cycles.
Q: What should I do first if I find a water leak in my Los Angeles home? A: Your first priority is to stop the source of the water if possible by shutting off the main water valve. Then, take photos to document the damage for your insurance claim and call a professional water damage restoration company immediately to prevent further damage.
Q: Is a musty smell always a sign of water damage and mold? A: While other issues can cause odors, a persistent, earthy or musty smell is one of the most reliable indicators of hidden moisture and microbial growth. If the smell is concentrated in one area and doesn’t go away with ventilation, you should investigate it as a potential water damage issue.
When a sewer line backs up into your Los Angeles home, the first thing that hits you is the smell. The second is the immediate, gut-punching question: "What is this
Getting rid of cigarette smoke odor for good is a lot more involved than just spraying some air freshener and opening a window. That stubborn smell comes from a physical
Pete Mantizian is the dedicated owner of Onsite Pro Restoration. He is driven by a passion to improve living conditions and prevent health issues caused by improper restoration. With over 10 years in construction and 7 years in restoration, Petros has managed projects for major franchises like Serv-Pro and 911 Restoration. He holds certifications in Applied Structural Drying, Microbial Remediation, and more. Committed to excellence, Petros ensures every project is done right the first time. Outside of work, he cherishes time with his loving wife and two children, balancing his fulfilling career with creating lasting family memories.
For comprehensive damage restoration services, including biohazard mitigation, contact Onsite Pro Restoration at (818) 336-1800 or info@onsitepro.org. We’re available 24/7 to assist with all your emergency needs.