When you find a puddle spreading across your floor from a burst pipe or a ceiling stain growing from a hidden leak, every second is critical. What you do in those first few moments can dramatically reduce the total damage, cost, and headache of the final repair. Taking the right steps, right away, protects your property, your belongings, and most importantly, your safety while you wait for restoration water damage professionals to arrive.
This guide provides a clear, step-by-step action plan for Los Angeles homeowners, explaining what to do immediately, how professionals assess the damage, and what to expect from the entire recovery process.
Don't navigate this alone. If you're facing water damage, call Onsite Pro Restoration for immediate, expert help.
Get a Free Assessment and a Fast Response Now
Your First Hour Emergency Action Plan
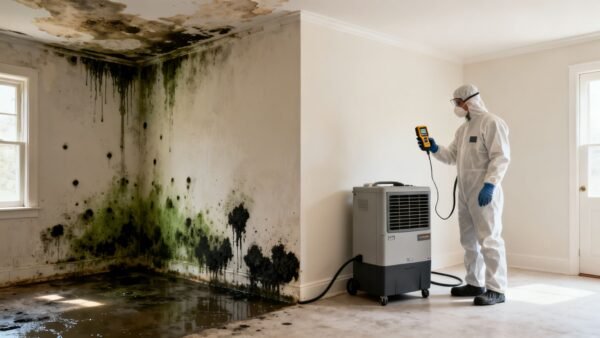
The moment you spot water damage, a clock starts ticking. It’s a race against secondary issues like mold growth and structural weakening. Water soaks into materials like drywall as quickly as a coastal fog rolls into a Santa Monica home, which makes fast action absolutely essential.
This first hour is your golden window to contain the immediate threat and pave the way for a much smoother, faster restoration. Your priorities are simple: stop the source, ensure safety, and document everything. Acting decisively now can be the difference between a minor cleanup and a full-blown catastrophe.
Step 1: Safety First—Shut Off Utilities
Before you do a single other thing, you have to neutralize the immediate dangers. Water and electricity are a lethal mix.
- Shut Off the Main Water Valve: Find your home's main water supply valve and turn it off. This is non-negotiable. It immediately stops more water from flooding your property and making a bad situation worse.
- Turn Off Electricity: If there's any significant standing water, head to your circuit breaker box and kill the power to the affected areas. Do not attempt this if you have to stand in water to reach the breaker box—in that case, leave it alone and wait for a professional.
Step 2: Document the Damage for Insurance
Once the area is safe, your next job is to become a crime scene investigator. Your insurance company is going to need detailed proof of the damage exactly as you found it.
Pull out your smartphone and start recording. Take plenty of pictures and videos. Get wide shots of the entire affected space, then move in for close-ups of damaged furniture, soaked carpets, and that dripping ceiling. This visual evidence is worth its weight in gold and can make a massive difference in getting your claim approved without a fight.
For a deeper dive on what to do next, our guide on emergency water cleanup lays out additional crucial steps.
Step 3: Mitigate Further Damage
While you wait for the restoration team to arrive, you can take a few small but powerful steps to protect your belongings. This is all about minimizing your losses and saving cherished items from being ruined.
- Move Valuables: Get furniture, electronics, area rugs, and important documents out of the wet zone and into a dry, safe part of your home.
- Protect Furniture: Place small pieces of aluminum foil or little wood blocks under the legs of heavy furniture. This simple trick prevents wood stains from bleeding into wet carpets and permanently staining them.
- Remove Standing Water: If you're certain the water is from a clean source (like a supply line) and it’s a manageable amount, use mops, towels, and buckets to get up as much as you can.
Your First Hour Water Damage Checklist
| Priority | Action Item | Why It's Critical |
|---|---|---|
| 1 (Safety) | Shut off the main water valve. | Immediately stops the flow of water, preventing further damage. |
| 2 (Safety) | Turn off electricity to wet areas. | Prevents electrocution risk from water and live circuits. |
| 3 (Insurance) | Take photos and videos of everything. | Creates undeniable proof for your insurance claim. |
| 4 (Insurance) | Call your insurance company. | Starts the claims process and gets an adjuster assigned. |
| 5 (Mitigation) | Call a certified restoration company. | Gets professional help on the way to prevent secondary damage. |
| 6 (Mitigation) | Move valuables to a dry area. | Protects personal belongings from ruin. |
| 7 (Mitigation) | Put foil under furniture legs. | Prevents permanent stains on carpeting. |
Keep this list handy. Following these steps methodically will put you in the best possible position for a successful recovery.
Key Takeaway: The actions you take in the first 60 minutes after discovering a water problem directly impact the cost, timeline, and success of the entire restoration water damage project. Prioritizing safety and documentation is non-negotiable.
How Professionals Classify the Severity of Water Damage
Not all water damage is created equal. When a restoration pro shows up, they aren't just looking at a puddle on the floor; they're assessing the situation using a specific, industry-standard system to figure out exactly what they're up against.
This framework, set by the Institute of Inspection, Cleaning and Restoration Certification (IICRC), ensures every restoration water damage project gets the right equipment, safety protocols, and cleaning methods from the get-go. Understanding how they see it helps you grasp the true scope of the problem and why they're recommending a particular plan of attack.
The whole process breaks down into two key parts: the Category of water (how contaminated it is) and the Class of damage (how much stuff is wet and how hard it will be to dry). Getting both right creates a clear picture of the risks and the resources needed.
The Three Categories of Water Contamination
First thing's first: where did the water come from? A certified technician will immediately identify the source to determine its contamination level. This is non-negotiable, as it dictates the safety measures needed to protect both you and the crew.
-
Category 1: 'Clean Water'
This is the least threatening type, coming from a sanitary source like a burst supply line or an overflowing sink (as long as no soap or dirt was involved). While it doesn't pose a substantial health risk at first, don't let the name fool you. If left to sit, it can quickly degrade into a higher, more dangerous category as it picks up bacteria from its surroundings. -
Category 2: 'Gray Water'
This water is a step up in terms of contamination, containing a significant amount of chemical or biological gunk. Think of water from a washing machine overflow, a dishwasher discharge, or a failed sump pump. You wouldn't want to drink it, and exposure can cause sickness or discomfort. -
Category 3: 'Black Water'
This is the most hazardous and grossly contaminated water. It's teeming with pathogenic agents, toxins, and other nasty materials that pose a serious health threat. Common sources include sewage backups, rising floodwaters from rivers or streams, or any stagnant water that has become a breeding ground for bacteria. You can learn more about these severe situations in our guide on what defines Category 3 water damage.
The Four Classes of Water Damage
After figuring out the "what" (the category), pros assess the "how much" and "how hard to dry." This is the Class of damage, which is all about the evaporation rate. It tells the team how challenging the drying phase will be.
-
Class 1 (Slow Evaporation): This is the easiest scenario to manage. It involves just a small amount of water affecting materials that don't soak up much moisture, like concrete or vinyl flooring. A minor leak in a garage is a perfect example.
-
Class 2 (Fast Evaporation): This is the one we see most often. Water has wicked up the walls less than 24 inches and soaked into materials like carpet and drywall. It’s a common result of an appliance failure or a serious pipe leak.
-
Class 3 (Fastest Evaporation): This class is a big deal. The water has come from overhead—imagine a burst pipe in the ceiling—and has completely saturated everything below. We're talking insulation, drywall, framing, carpeting, and the subfloor.
-
Class 4 (Specialty Drying): This class is reserved for tricky situations where water is trapped in materials that are incredibly dense and difficult to dry. Think saturated hardwood floors, plaster, brick, or deep concrete. It requires advanced techniques and specialized equipment.
This infographic breaks down the first critical actions you should take, which can directly influence how bad the damage gets.
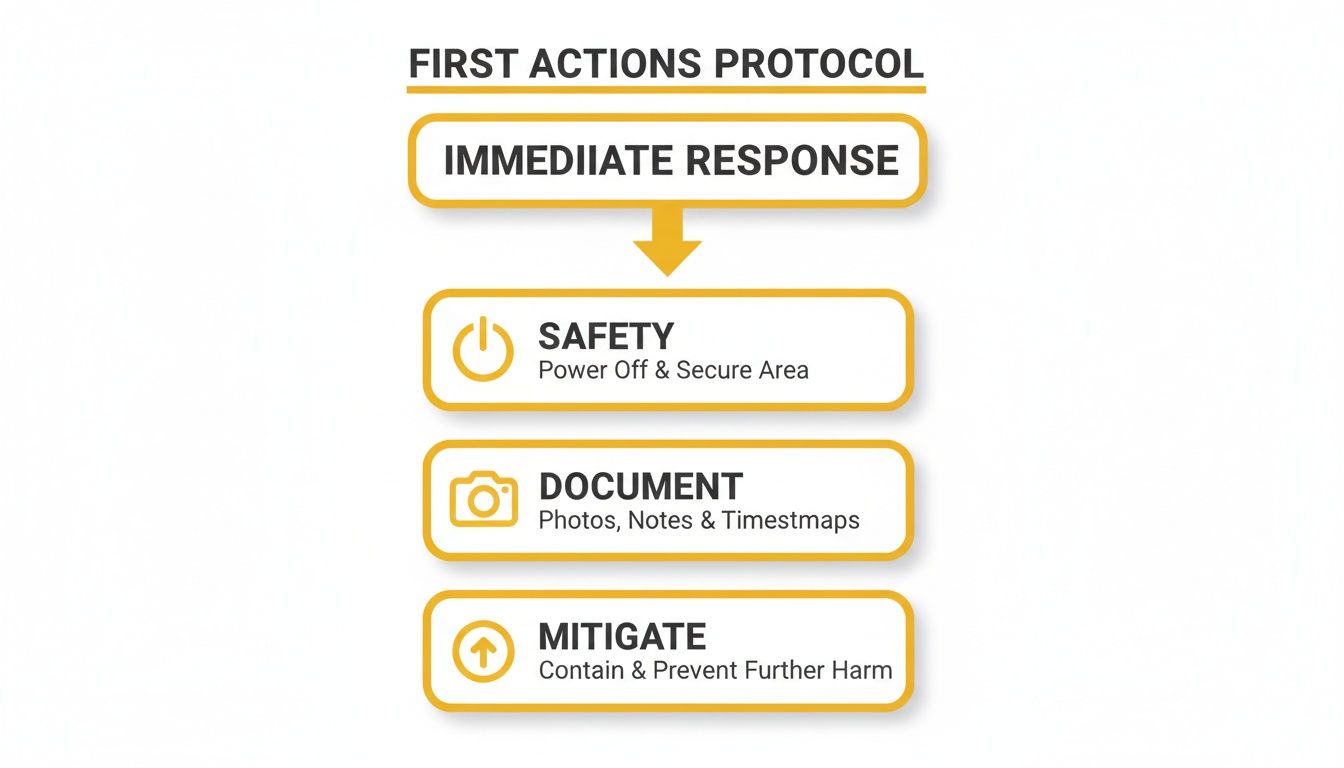
Following this protocol—hitting pause to focus on safety, documenting the scene, and taking smart steps to mitigate—can be the difference between a manageable cleanup and a crisis that escalates into a higher Class or Category.
Get a Free Assessment and a Fast Response Now
The Professional Restoration Process from Start to Finish
When certified pros show up at your door, they aren’t just there to start mopping. They follow a highly structured, scientific process designed to bring your home back to its pre-loss condition—safely and completely. This systematic approach is the difference between a quick fix and a real solution, ensuring no hidden moisture is left behind to cause problems like mold down the road.
Understanding their game plan helps demystify the whole operation. You'll see the purpose behind every piece of equipment and every step they take. From the initial inspection to the final coat of paint, each phase builds on the last to guarantee a thorough and lasting recovery. Let's walk through the five key stages.
Phase 1: Initial Assessment and Damage Inspection
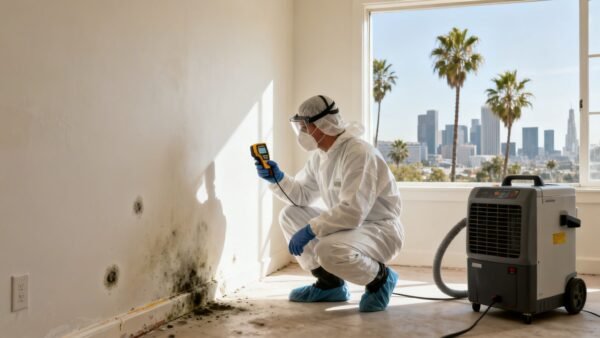
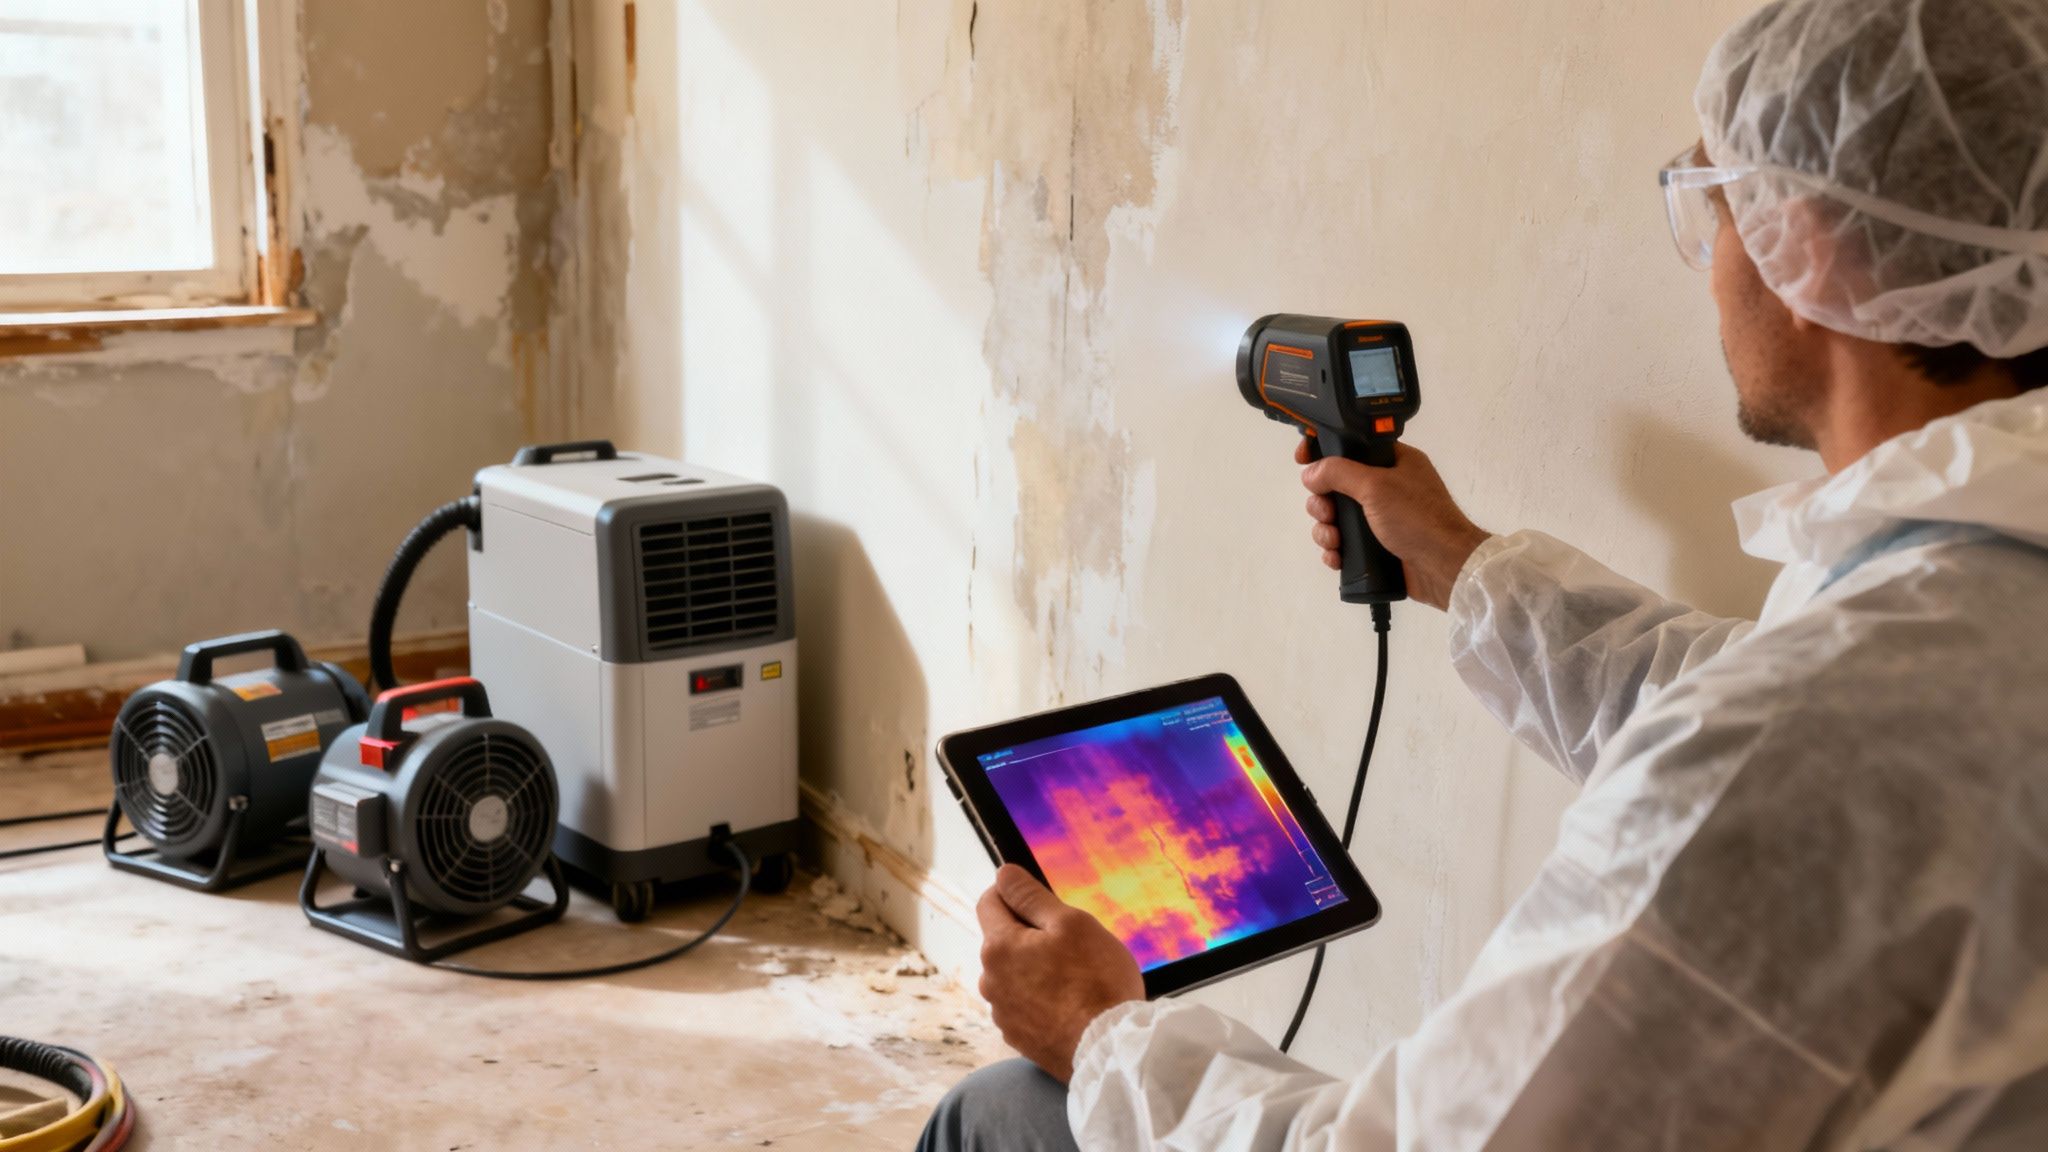
The very first step is a meticulous inspection. Technicians aren't just looking at the puddles; they're using advanced tools to map out the full extent of the water's journey, much of which is invisible.
They’ll use moisture meters for precise readings on surfaces you can see, like drywall and flooring. But the real magic happens with thermal imaging cameras. These tools reveal temperature differences behind walls and under floors, instantly flagging hidden pockets of moisture. It's how they find the slow leak inside a wall cavity in a Sherman Oaks home that would otherwise go completely unnoticed.
During this phase, the crew will:
- Identify the Water Source: Pinpoint exactly where the water came from and confirm the leak is stopped.
- Classify the Damage: Determine the Category (1, 2, or 3) and Class (1, 2, 3, or 4) to set up the right safety protocols and game plan.
- Document Everything: Take tons of photos and readings to build a detailed report for your insurance company.
- Develop a Scope of Work: Outline a clear plan of action, explaining what needs to be removed, what can be dried, and how it will all be restored.
Phase 2: High-Powered Water Extraction
With a clear plan, the next job is to get the bulk of the standing water out—fast. The quicker this happens, the less moisture gets absorbed into porous materials like wood and drywall. This single step dramatically cuts down drying time and prevents damage from spreading.
This isn't a job for a shop vac. Professionals use powerful, truck-mounted extraction units and submersible pumps that can remove hundreds, even thousands, of gallons of water in a surprisingly short time. For soaked carpets, they use special extraction wands that squeeze the carpet and pad, literally pulling water out from the very bottom. This step lays the foundation for everything that follows.
Phase 3: Strategic Drying and Dehumidification
Once the standing water is gone, the real science begins. The new goal is to remove all the moisture that has soaked into the structure and is now hanging in the air as humidity. It’s a delicate balancing act of airflow, temperature, and dehumidification.
Crews will strategically place high-velocity air movers (think industrial-grade fans on steroids) to sweep air across wet surfaces. This accelerates evaporation, pulling moisture from drywall, wood framing, and subfloors and pushing it into the air.
At the same time, massive commercial-grade dehumidifiers get to work pulling all that moisture out of the air. You'll typically see two types:
- Refrigerant Dehumidifiers: These work like a powerful air conditioner, cooling coils to condense the airborne moisture into water that gets drained away.
- Desiccant Dehumidifiers: These use special materials that absorb moisture, making them incredibly effective in cooler or harder-to-dry environments.
Key Insight: Simply opening the windows on a humid Los Angeles day won't do the trick. Professional drying creates a controlled "drying chamber" inside your home, managing the rate of evaporation to prevent secondary damage like warped wood or cracked drywall.
Phase 4: Thorough Cleaning and Sanitizing
After the materials are tested and confirmed dry, it’s time to clean and sanitize. This step is non-negotiable for preventing health risks and getting rid of musty odors for good. The methods used will depend entirely on the water category.
For clean water (Category 1), the focus might be on simple carpet cleaning and wiping down surfaces. But for gray or black water (Category 2 or 3), the process is far more intense. It involves applying EPA-registered antimicrobial treatments to kill bacteria and stop mold spores in their tracks. Technicians might also use fogging equipment to neutralize odors that have seeped deep into porous materials.
During the restoration, your belongings often need to be moved out of the way. Knowing which items that require climate-controlled storage helps protect them from damage caused by the wild humidity swings.
Phase 5: Complete Restoration and Rebuilding
The final phase is all about putting your home back together. This is where mitigation ends and reconstruction begins. Depending on the damage, this could be a minor job or a major project.
Restoration work can involve:
- Replacing sections of drywall and insulation.
- Installing new carpet, hardwood, or tile.
- Painting walls and ceilings to match.
- Repairing or replacing water-damaged kitchen or bathroom cabinets.
The goal of a true professional is to make it look like the damage never happened. They'll seamlessly blend new materials with the old, ensuring your property is not just dry and safe, but feels like home again. To dive even deeper into each stage, our guide on the water damage restoration process breaks it down even further.
Understanding the Hidden Threat of Mold After Water Damage
Once the standing water is gone, it’s easy to think the worst is over. But the real stealth threat in a restoration water damage scenario often emerges after the initial chaos: mold.
This isn't just a nuisance; it's a serious health risk and a direct attack on your property's structural integrity.
The science behind it is simple and alarming. Mold spores are everywhere, all the time, just floating harmlessly in the air. All they need to activate and start colonizing is moisture, a food source (like your drywall or wood), and the right temperature. After a water event, your home becomes the perfect incubator.
The 24-48 Hour Window
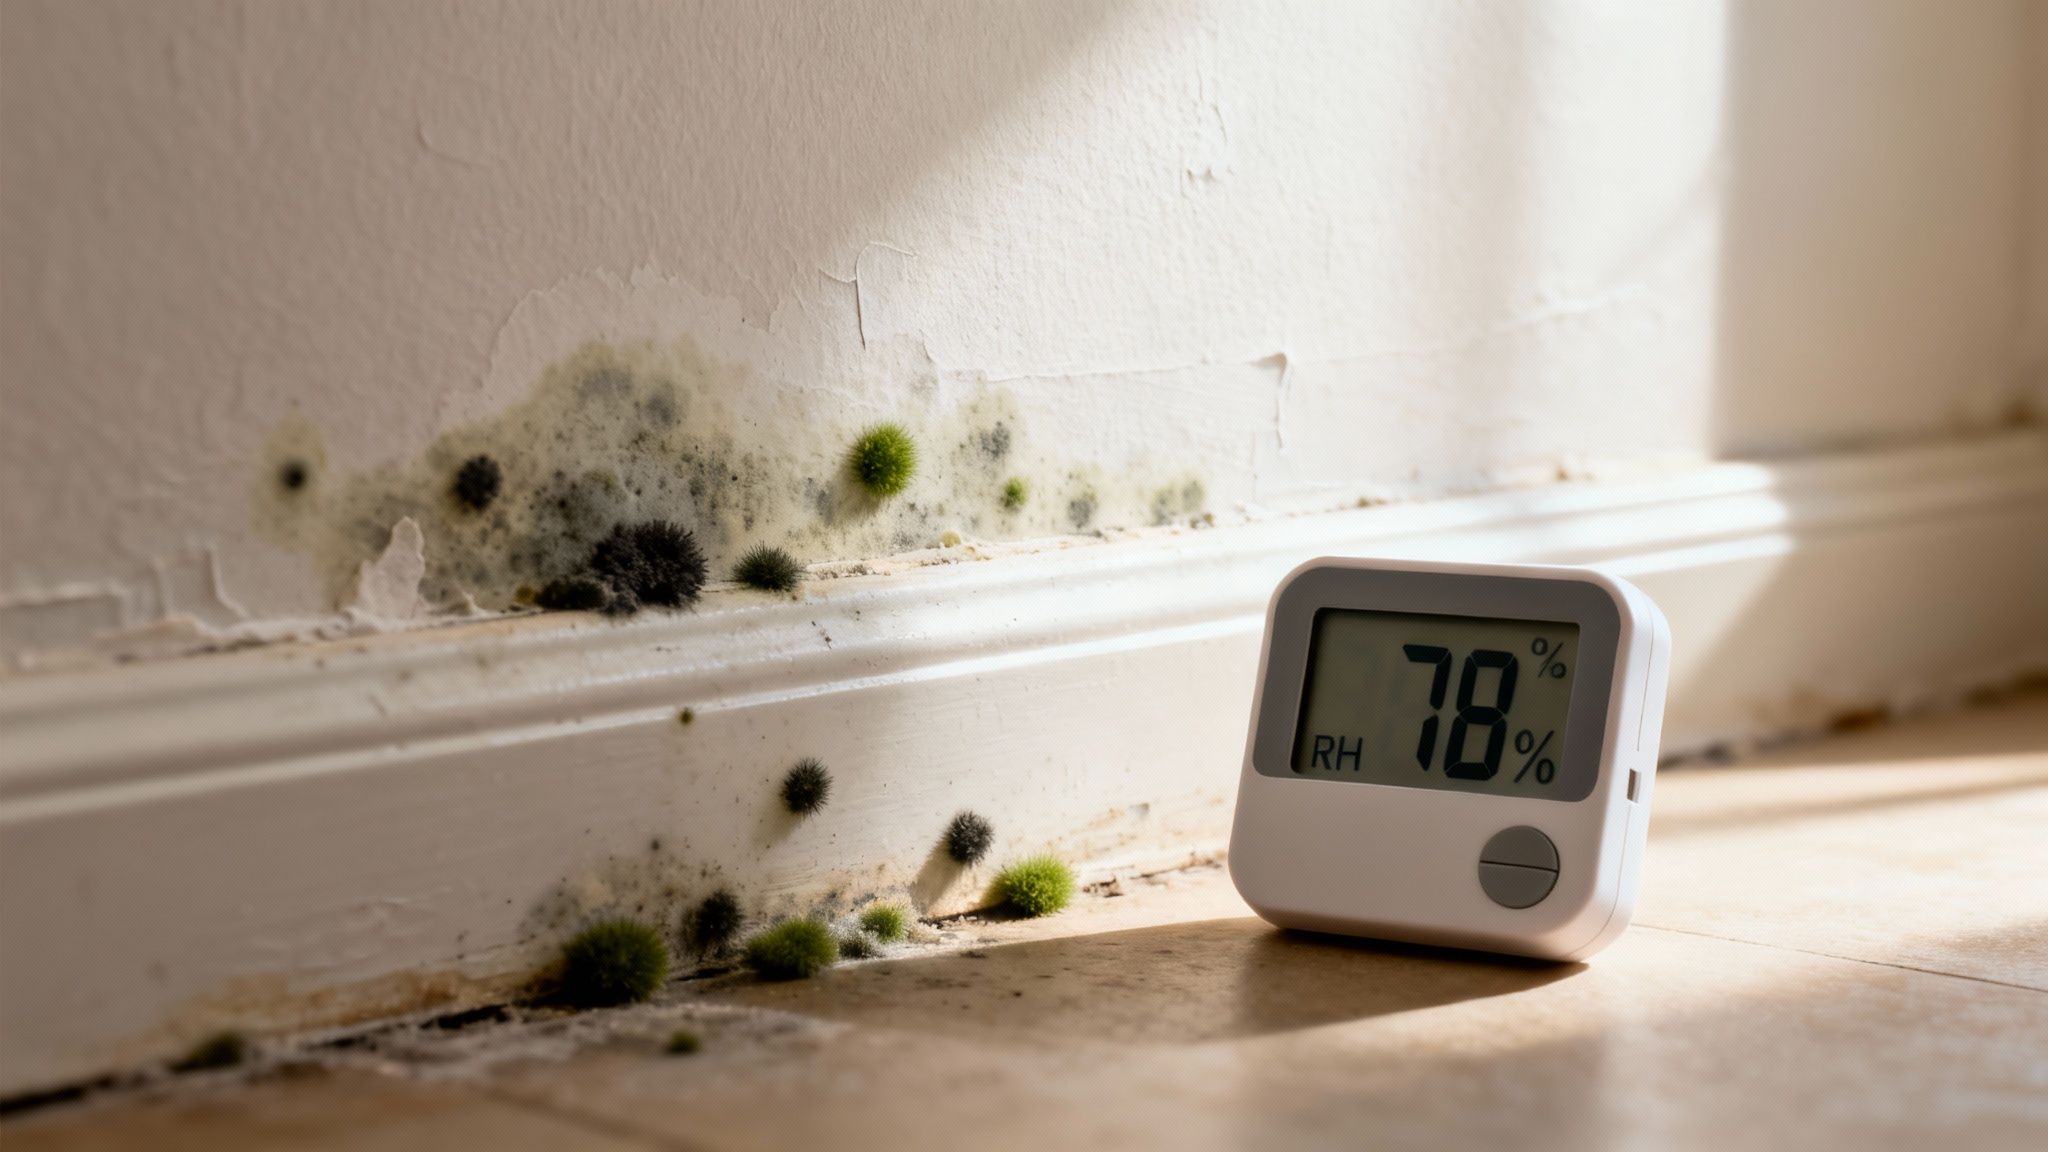
The clock starts ticking the moment materials get wet. Under ideal conditions—like the warm, damp environment inside a wall cavity after a leak—mold colonies can begin to form in as little as 24 to 48 hours.
This incredibly short timeline is why professional drying is so critical. We're literally in a race to remove the moisture before these spores take hold.
Los Angeles properties have their own unique vulnerabilities. Poorly ventilated bathrooms in older Hollywood apartments can trap steam and humidity, speeding up growth. Meanwhile, subfloors in coastal Santa Monica homes constantly battle ambient humidity, making them prime real estate for mold if a leak occurs.
Identifying the Early Warning Signs
You won’t always see mold right away, but you can often detect its presence through other senses. Staying vigilant for these early signs can help you catch a problem before it spirals.
- A Persistent Musty Odor: This is the most common and reliable red flag. If you notice a damp, earthy, or stale smell that just won’t go away, it’s a major sign that mold is growing somewhere nearby.
- Visible Discoloration: You might see spots or patches of black, green, white, or even orange popping up on walls, ceilings, or baseboards.
- Worsening Allergies: A sudden spike in allergy-like symptoms—sneezing, coughing, itchy eyes, or respiratory issues—when you're inside the home can signal the presence of airborne mold spores.
Remediation vs. Removal
It’s crucial to understand that a professional service isn't just about "mold removal." That term implies we just scrub away the visible spots. True mold remediation is a far more scientific and thorough process.
Key Distinction: Mold removal just cleans the surface. Mold remediation contains the area, removes the contaminated materials, cleans the air, and fixes the moisture source to ensure the problem never comes back.
Remediation is a critical part of a complete restoration water damage project because it focuses on a long-term solution. Professionals set up containment barriers to stop spores from spreading, use negative air machines to scrub the air, and safely dispose of any materials that can't be salvaged.
We don’t just treat the symptom; we cure the disease by eliminating the conditions that allowed mold to thrive in the first place. For a deeper look into prevention, you can explore our guide on how to prevent mold after water damage.
Navigating Insurance Claims and Project Costs in Los Angeles
After the immediate shock of water damage wears off, the financial questions start piling up. For most Los Angeles homeowners, this is the most stressful part of the entire ordeal. How much will this cost? What will my insurance actually cover? Getting a handle on these numbers early on is the key to making clear-headed decisions.
Think of a professional restoration company as more than just a cleanup crew; they're your advocate. They speak the same language as insurance adjusters, use the same estimating software—like Xactimate—and create the meticulous documentation needed to justify every single step of the job.
Kicking Off Your Insurance Claim
The second you call your insurance agent, the clock starts ticking on a formal claims process. Your provider will assign an adjuster to your case. Their job is to figure out what happened, see how bad the damage is, and determine what your specific policy will pay for.
This is where all those photos and videos you took right at the beginning become your most valuable asset. That initial evidence shows the damage exactly as you found it, before a single tool was lifted.
A certified restoration team makes this whole process smoother. They’ll hand your adjuster a detailed scope of work, complete with moisture readings, photos, and a line-item estimate that explains the why behind every action. This professional approach almost always leads to faster approvals and fewer headaches. For a deeper dive, check out our insurance claim tips for water damage.
What Drives Up Restoration Costs?
No two water damage jobs are ever the same, and a few key factors will directly influence the final bill. Understanding these variables helps explain why one project might cost thousands more than another.
Across the United States, the restoration industry has been growing, valued at an estimated USD 7.1 billion in 2025. This isn't surprising when you consider the increase in severe weather and the problems that come with aging homes and infrastructure. The National Flood Insurance Program (NFIP) reported over $8 billion in flood-related losses back in 2022 alone, which shows just how common these events have become.
Here’s what really moves the needle on cost:
- Extent of Damage: The total square footage impacted is the biggest factor. A small leak contained to a single room is a completely different ballgame than water that has soaked through multiple floors.
- Water Category: As we covered earlier, the level of contamination dictates everything. Category 3 "black water" requires intense safety protocols, specialized cleaning agents, and the mandatory removal of anything porous, all of which add to the cost.
- Type of Materials Affected: Drying out dense, tricky materials like hardwood, plaster, or concrete (Class 4 damage) takes a lot more time and specialized gear than just drying out drywall and carpet.
- Reconstruction Needs: The final price tag depends heavily on the rebuild. It’s one thing to dry out a structure; it's another thing entirely to replace custom kitchen cabinets, match historical trim, and repaint several rooms.
Estimated Restoration Costs for Common Los Angeles Scenarios
To give you a clearer idea of what to expect financially, it helps to look at some real-world examples. Here are some ballpark figures for common water damage situations we see all the time here in Los Angeles.
| Damage Scenario | Affected Area | Water Category | Estimated Cost Range |
|---|---|---|---|
| Washing Machine Overflow | 150 sq. ft. Garage | Category 2 (Gray Water) | $2,500 – $5,000 |
| Leaking Refrigerator Line | 200 sq. ft. Kitchen | Category 1 (Clean Water) | $3,000 – $7,000 |
| Upstairs Bathroom Pipe Burst | Multi-room, Two Floors | Category 1 (Clean Water) | $8,000 – $20,000+ |
| Sewage Backup | 500 sq. ft. Basement/Den | Category 3 (Black Water) | $10,000 – $25,000+ |
It's crucial to remember that these numbers are just estimates for the mitigation and drying phase. If significant reconstruction is needed, that will add to the total project cost. A reputable restoration company will always provide a precise, line-item quote after they've done a thorough inspection.
Frequently Asked Questions About Restoration Water Damage
When you're dealing with a water incident, your head is probably swimming with questions. It's overwhelming, and that's completely normal. Let’s cut through the noise and tackle some of the most common concerns we hear from Los Angeles homeowners. My goal here is to give you clarity so you can feel confident about the next steps.
Q: How long does the water damage restoration process take?
A: The timeline for a restoration water damage project depends entirely on the severity. A minor, clean water leak (Category 1) caught quickly might take 3 to 5 days for a full dry-out and minor repairs. However, more serious situations involving contaminated water or significant reconstruction (replacing flooring, drywall, etc.) can easily extend into several weeks. A professional will provide a realistic timeline after the initial inspection.
Q: Can I stay in my home during the restoration work?
A: It depends on the scope and type of damage. For a small, contained issue in one room, you can usually stay. However, for widespread damage, significant structural repairs, or contamination from hazardous "black water" (Category 3), it is often unsafe to remain in the home. The constant noise from industrial drying equipment can also be highly disruptive. Your project manager will advise you on the safest course of action.
Q: Will my homeowners insurance cover this water damage?
A: Most standard homeowners insurance policies cover damage from sudden and accidental events, such as a burst pipe, appliance malfunction, or storm damage. They typically do not cover damage resulting from gradual leaks, poor maintenance, or natural flooding (which requires a separate flood insurance policy). Always review your specific policy and contact your insurance agent immediately to start the claims process.
Q: What's the difference between "water mitigation" and "water restoration"?
A: These are two distinct phases. Water mitigation is the emergency response designed to prevent further damage. It includes stopping the water source, extracting standing water, removing unsalvageable materials, and setting up drying equipment. Water restoration is the second phase, which begins after the structure is completely dry. This involves repairing and rebuilding the affected areas—like replacing drywall, installing new floors, and painting—to return your home to its pre-loss condition.
Feeling overwhelmed by water damage in your Los Angeles home? You don't have to handle it alone. The certified experts at Onsite Pro Restoration are available 24/7 to provide a rapid, professional response. We work directly with your insurance to make the process as smooth as possible. Get a Free Assessment and a Fast Response Now.