That ugly brown spot or the steady drip… drip… drip… from above is more than an annoyance—it’s your home’s emergency alert system. Repairing a water damaged ceiling isn't just about patching a hole; it's a multi-step process that involves finding the leak's source, drying everything completely, and then making the repair. Ignoring it is a costly mistake. That simple stain can quickly escalate into structural rot, electrical hazards, and a serious mold problem, turning a minor issue into a major restoration project.
Acting fast is crucial. A small leak from a burst pipe in a Sherman Oaks home can cause thousands in secondary damage if left unchecked.
Get a Free Water Damage Assessment Now
What a Water Damaged Ceiling Really Means for Your Home
A discolored ceiling is never just a cosmetic flaw; it's a clear signal of a much bigger issue hiding out of sight. Whether you're in a West Hollywood apartment with a burst pipe or a Santa Monica home where coastal fog has led to a roof leak, finding the source is everything. What you can't see is almost always more dangerous than the stain itself.
Putting off the repair is one of the costliest mistakes a homeowner can make. Trapped moisture is the perfect environment for mold, which can start growing in as little as 24-48 hours. This isn't just a health hazard; it rots out wooden joists and weakens drywall, threatening the very structure of your home.
The Hidden Dangers Behind the Drip
It’s easy to look at a small leak and think, "I'll get to it later." But the fallout can be surprisingly severe, impacting much more than just the ceiling.
- Structural Weakness: When drywall gets saturated, it becomes soft, heavy, and will eventually start to sag or even collapse. Meanwhile, the wooden support beams above can begin to rot, weakening the entire framework.
- Electrical Hazards: Water and electricity are a deadly combination. Moisture can easily find its way into light fixtures, ceiling fans, and internal wiring, creating a serious risk of short circuits or an electrical fire.
- Rapid Mold Proliferation: Hidden moisture is a breeding ground for mold. Those spores can spread through your HVAC system, tanking your indoor air quality and triggering allergies or respiratory problems.
Understanding the Common Culprits
You have to play detective and track down where the water is coming from. The usual suspects are plumbing failures—like when a shower leaks through the ceiling—or problems with the roof and gutters that let rainwater sneak in, a common issue with flat-roof homes in areas like Beverly Hills.
This isn't just a local problem. Globally, flood-related disasters have shot up by 134% since 2000 compared to the two decades prior. Letting a small leak go unchecked can make your final repair bill ten times higher as secondary damage takes hold. You can learn more about these trends from the UN Office for Disaster Risk Reduction.
Your Immediate Action Plan When You Spot a Ceiling Leak
The second you notice that ugly brown stain or hear the dreaded drip… drip… drip, what you do in the next hour is critical. This isn't about making a perfect repair; it's about triage. Quick, smart moves now can stop a minor headache from turning into a full-blown catastrophe that costs thousands in secondary damage.
Your first job is containment. Grab buckets, old towels, anything you can to catch the water and protect your floors and furniture. If you can, move electronics, rugs, and anything valuable out of the splash zone. Covering bigger items with a plastic tarp works, too. Every single thing you save now is one less thing you have to replace later.
Stop the Water at Its Source
Catching the drips is just a band-aid. You have to shut off the supply. If it’s a plumbing issue, find your home's main water shut-off valve—usually in the garage, basement, or a utility closet—and turn it completely off.
A roof leak during a storm is a different beast. Sometimes, a temporary fix a leaking roof from the inside is your only option until a professional can get there safely.
Pro Tip: If you see the ceiling bulging or sagging, stay back. That's a sign it's holding a lot of water and is dangerously unstable. A collapse could be imminent. Carefully slide a bucket underneath and call for emergency help right away.
This infographic shows just how fast things can go from bad to worse.
What starts as a simple drip (warning) can quickly lead to structural cracks (escalation) and serious hazards like mold (danger). That’s why you can’t afford to wait.
Document Everything for Your Insurance Claim
Amid the chaos, it's easy to overlook one of the most important steps: documentation. Before you clean up or move a single thing, pull out your phone and go to town with photos and videos.
You need to capture everything:
- The source of the leak, if you can see it.
- The water stain on the ceiling from different angles.
- Any damaged furniture, flooring, or personal belongings.
- Both close-ups and wide shots to give a clear picture of the situation.
This evidence is gold when you file your insurance claim. Once you've stopped the leak and documented the damage, it's time to bring in the pros. Getting expert help is vital for a proper cleanup, and our guide to emergency water cleanup walks you through what to expect.
How to Assess the Damage: DIY Fix or Professional Job?

Alright, you’ve stopped the leak and cleaned up the initial puddles. Now you're staring at the ceiling, wondering what comes next. This is the crucial moment where you have to decide: Is this a weekend warrior project, or is it time to call in the professionals?
Making the right call here saves you from headaches down the road. A small, light-brown stain on a ceiling that’s still perfectly flat and firm might look like a simple paint job. If the leak was tiny and you caught it instantly, you might be able to handle it yourself. But even the most innocent-looking stains can be deceiving.
The size of a water stain is a terrible indicator of the real problem. I’ve seen it a hundred times in Los Angeles homes—water travels along ceiling joists and spreads out. A one-foot stain could easily be hiding a five-foot area of soaked insulation and drywall just beyond what you can see.
Red Flags: When to Immediately Call a Professional
Some signs are non-negotiable. If you see any of these, don't even think about a DIY fix. Trying to tackle these problems yourself can lead to unsafe conditions, a failed repair, and much bigger, more expensive issues later on.
- Sagging or Bulging Ceiling: If your ceiling is drooping, it's a clear sign the drywall is saturated and has lost its structural integrity. It's essentially a water-filled balloon at risk of collapsing. Stay away from the area and call for help.
- Soft or Spongy Texture: Gently press on the damaged spot (if it's safe to do so). Does it feel mushy or give way easily? That means the material is compromised beyond repair and needs to be completely removed.
- Widespread or Dark Stains: A large stain, or one that’s dark brown or black, points to prolonged water exposure. This dramatically increases the odds of serious structural damage and hidden mold.
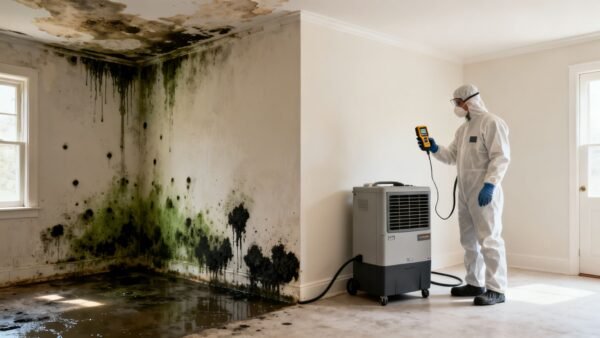
- Visible Mold or a Musty Smell: If you see fuzzy black, green, or white spots—or you smell that distinct damp, earthy odor—you've got a mold problem. Repairing a water damaged ceiling with active mold requires specialized containment and remediation to protect your family's health.
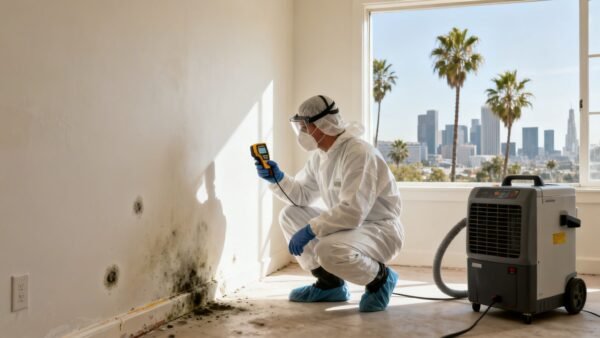
The Tools Pros Use to See Through Your Ceiling
So, why is a professional assessment so much more reliable? It comes down to the technology we use to see what the naked eye can’t.
A moisture meter is one of the most critical tools in our arsenal. We can get precise readings of the moisture content deep inside the drywall and wooden joists. This tells us exactly how far the water has spread and, just as importantly, confirms when the materials are bone-dry and ready for repair. Knowing how to read moisture meter readings is fundamental to a proper restoration job.
We also use thermal imaging cameras to spot temperature differences. Wet areas are cooler than dry ones, so these cameras create a "moisture map" that shows us hidden pockets of water without having to cut a single hole in your ceiling. Getting this right from the start is huge—some data shows that acting within the first hour can cut secondary damage by up to 80%.
DIY Repair vs Professional Restoration Checklist
Not sure which path to take? Use this quick checklist to assess your situation and make a smart, safe decision for your home.
| Symptom | Likely DIY Fix | Professional Help Recommended |
|---|---|---|
| Small, light tan stain (<1 sq ft) | Yes, if leak is fixed and area is confirmed dry. | No, unless you're uncomfortable with drywall patching. |
| Any sagging or bulging | No. This is a collapse risk. | Yes, immediately. The area is structurally unsafe. |
| Ceiling feels soft or spongy | No. The material is compromised. | Yes. Full removal and replacement are necessary. |
| Visible mold or musty smell | Absolutely not. This is a health hazard. | Yes. Requires certified mold remediation and containment. |
| Large, dark, or spreading stains | No. Indicates extensive, hidden moisture. | Yes. Likely involves structural drying and inspection. |
| Damage near light fixtures/vents | No. Risk of electrical or HVAC issues. | Yes. Requires specialized knowledge to work around systems. |
| Damage from a sewer or drain line | Never. This is contaminated "black water." | Yes, this is a biohazard cleanup situation. |
Ultimately, if you have any doubt about the extent of the damage, calling a professional restoration company for an inspection is the safest and most effective way to protect your property. A small inspection fee is a tiny price to pay to avoid a catastrophic failure or a hidden mold problem down the line.
Inside the Professional Restoration Process for Water Damaged Ceilings
So you've decided to call in the pros. Smart move. But what actually happens when a certified restoration team shows up at your door? It’s far more than just patching a hole—it’s a systematic, scientific process designed to make sure your home is safe, dry, and structurally sound for the long haul.
From the moment we arrive, the mission is to stop the damage from getting any worse. That means getting the water out and controlling the moisture, fast.
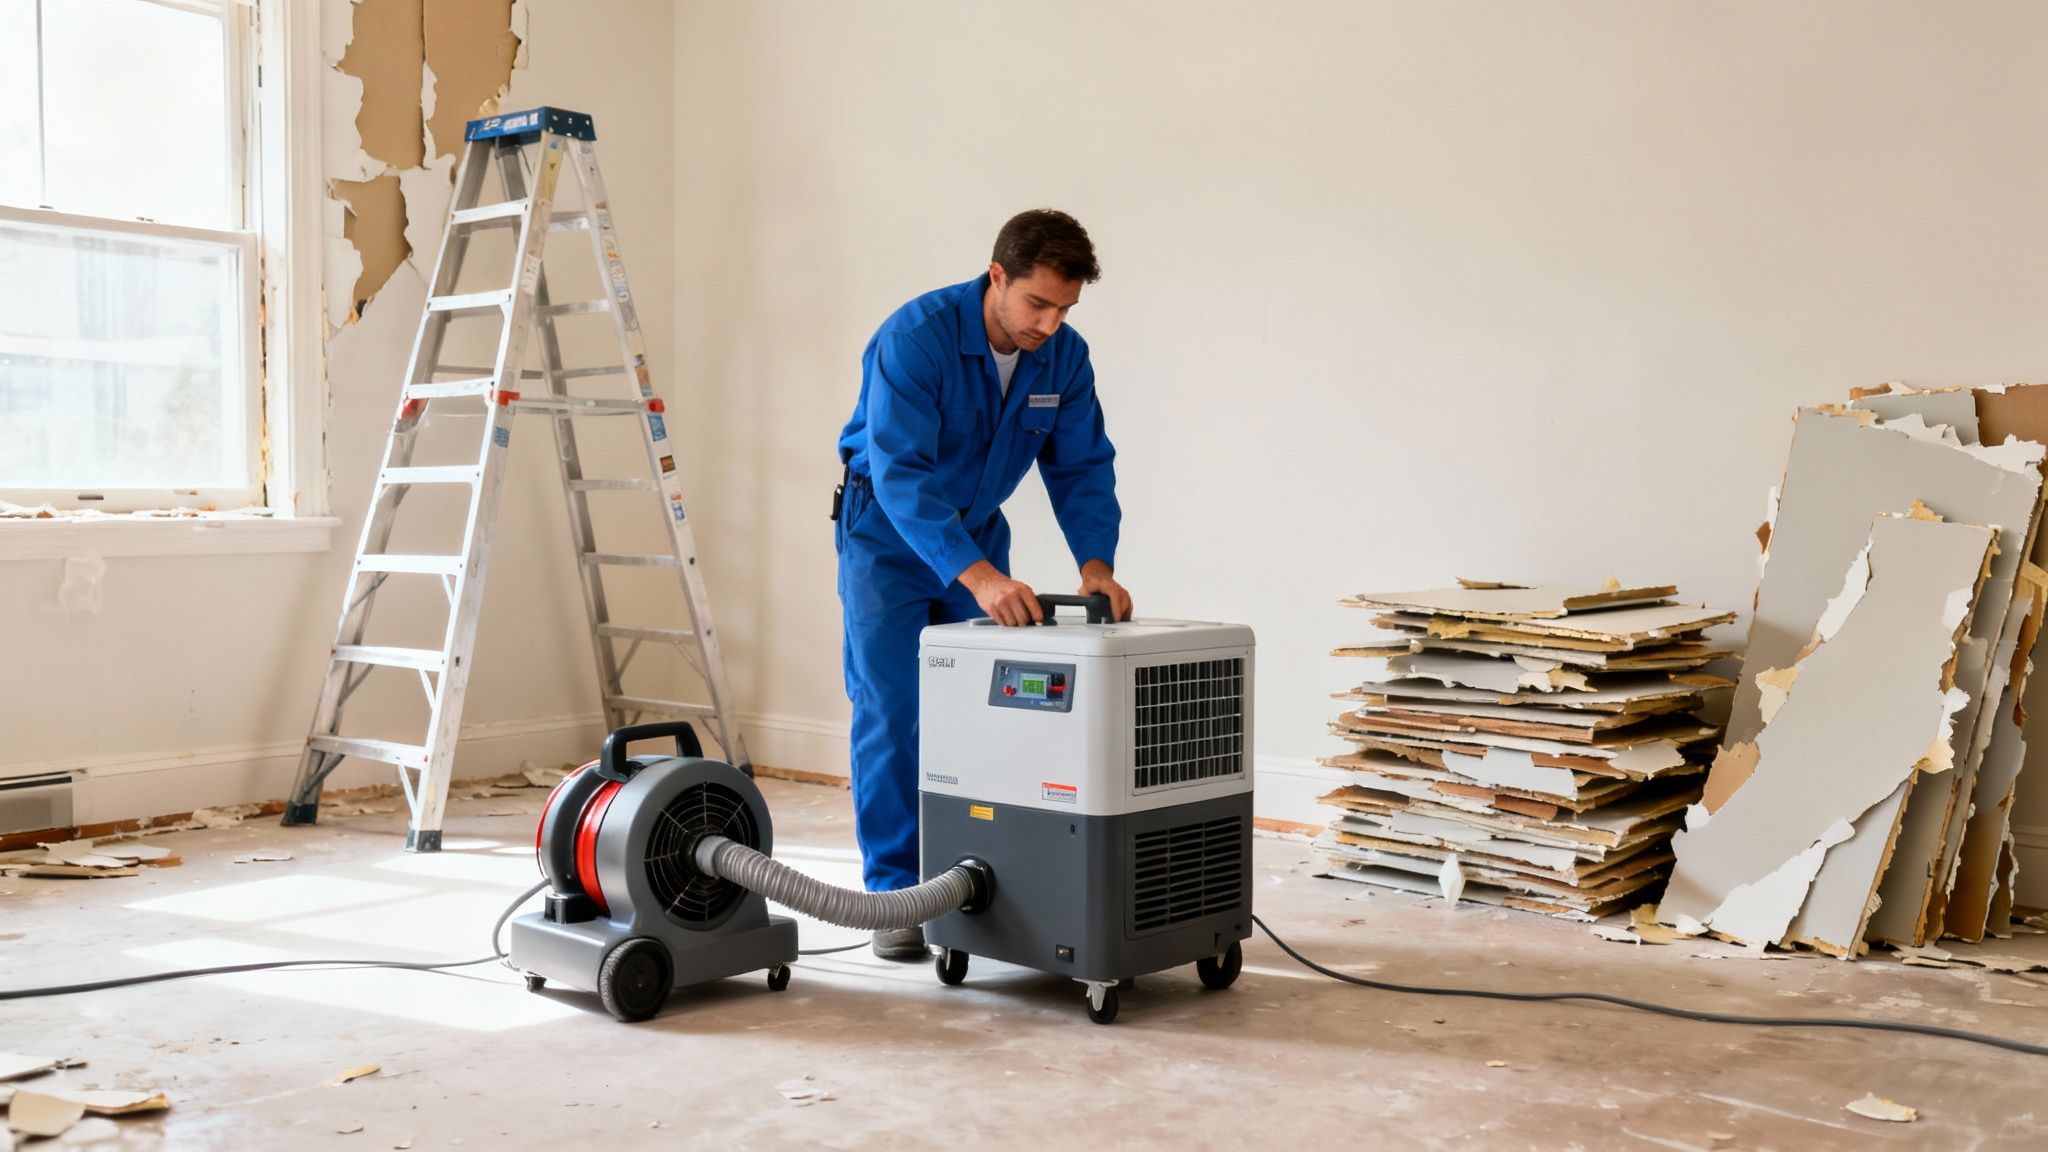
Emergency Water Extraction and Structural Drying
First things first, any standing water has to go. We use powerful, truck-mounted pumps and vacuums to extract the bulk of the water, and we're not just talking about the puddles you can see. We're removing the moisture that's already soaked into everything. Just letting it "air dry" is a recipe for disaster, leading directly to mold and rot.
With the standing water gone, the real work begins: structural drying. This isn't just about setting up a few fans. It's a strategic deployment of industrial-grade equipment:
- High-Velocity Air Movers: These aren't your average box fans. We position them to create a vortex of airflow across ceilings, walls, and floors, dramatically speeding up evaporation.
- Low-Grain Refrigerant (LGR) Dehumidifiers: These are the heavy hitters. Unlike a home unit, LGR dehumidifiers aggressively pull massive amounts of water vapor from the air. This creates an extremely dry environment that literally sucks the remaining moisture out of materials like wood joists and drywall.
This one-two punch is the only proven method to eliminate hidden moisture trapped deep inside the ceiling assembly. The entire water damage restoration process is designed to get your home's materials back to their normal, safe moisture levels as quickly as possible.
Mold Inspection and Safe Remediation
As we’re drying things out, we’re also hunting for mold. It’s a non-negotiable step. Mold can start growing in as little as 24-48 hours, so a thorough inspection is critical to protect both your property and your family's health.
Our certified technicians will conduct a detailed visual inspection and may use air quality tests to see if a colony has taken root. If we find mold, we immediately set up a containment zone with negative air pressure and HEPA filters to stop spores from spreading. From there, all contaminated materials are carefully removed and disposed of following strict industry and environmental protocols.
Key Takeaway: Tearing out moldy drywall yourself is a huge mistake. It can release millions of spores into your home’s air, creating a much bigger problem. Professional remediation is the only way to guarantee it's gone for good.
Full-Service Ceiling Repair and Reconstruction
Once we’ve confirmed the structure is completely dry and mold-free, it's time to put everything back together. And I don’t just mean a little spackle and paint. This is a complete reconstruction job.
We manage the entire process. That includes replacing saturated insulation, hanging and finishing new drywall, and taping and mudding it until the surface is perfectly smooth. Our technicians are masters at matching ceiling textures—whether you have a smooth finish, orange peel, or a custom knockdown pattern—so the repair is completely seamless.
We finish it off with a high-quality, stain-blocking primer and a final coat of paint, leaving your ceiling looking like the damage never even happened.
Navigating Insurance Claims for Water Damage
Let's be honest: dealing with an insurance claim can feel more stressful than the water damage itself. For any homeowner in Los Angeles, the first step is getting a handle on your policy. Most standard homeowner's insurance covers damage from "sudden and accidental" events—think a pipe bursting under the kitchen sink and flooding the room.
But here’s the catch they don't always advertise: coverage often stops when the damage is from a slow, long-term issue. That gradual drip from a worn-out pipe you meant to fix? That's usually not covered. Knowing this distinction from the get-go is critical and can be the difference between a paid claim and a denial letter.
Understanding Coverage: What Is and Is Not Included
The specific language in your policy is everything. Learning the difference between a covered peril and a policy exclusion will save you a massive headache later.
- Typically Covered: Sudden disasters are your best bet. Things like burst washing machine hoses, toilets that overflow without warning, or a pipe that freezes and cracks are almost always included.
- Often Excluded: Gradual damage is the big one. This means slow leaks from old plumbing, water seeping through foundation cracks, or any issue that stems from a lack of routine maintenance are on you. Damage from natural floods also requires a completely separate flood insurance policy.
Important Takeaway: The moment you find water damage, your insurance carrier expects you to act. You have a "duty to mitigate," which simply means taking reasonable steps to stop things from getting worse. Shut off the water main and call a professional restoration company to get the drying process started immediately.
Documenting and Communicating for a Successful Claim
A successful insurance claim really comes down to two things: thorough documentation and clear communication. Your job is to build a case with undeniable proof of the damage and the smart steps you took to contain it. You already started by taking photos and videos of the mess—keep that momentum going.
Create a detailed inventory of every single item that was damaged, from the ceiling drywall and insulation down to your personal belongings. Hang on to every receipt for emergency repairs or temporary living expenses if the damage forced you out of your home.
When you talk to your adjuster, be prepared, stay professional, and don't be afraid to be persistent. Hand over all your documentation, including the detailed report from your restoration company. This is where partnering with an experienced team like Onsite Pro Restoration can be a game-changer. We work directly with all major insurance carriers, giving them the moisture logs, photos, and professional estimates they need to move your claim forward without delays.
Navigating the complexities of an insurance claim for water damage is a lot to handle on your own. Having a professional advocate in your corner simplifies the entire ordeal. This kind of collaboration ensures the scope of work for repairing your water damaged ceiling is accurate and gets approved quickly, getting you and your home back to normal much faster.
FAQs About Repairing Water Damaged Ceilings
When you spot that dreaded brown stain or, even worse, a drip coming from your ceiling, your mind starts racing. It’s natural to have a ton of questions. Getting clear, honest answers is the first step toward getting your home back to normal without making a costly mistake.
Here are a few of the questions we hear most often from homeowners who are staring up at a damaged ceiling, wondering what to do next.
Q: How long does it take to repair a water damaged ceiling?
A: Honestly, the timeline is all over the map—it hinges entirely on how bad the damage is and how long things were wet. If you’re dealing with a tiny, cosmetic stain from a leak you caught instantly, you might be looking at a couple of days. But for anything more serious, professional structural drying is a must, which alone can take three to five days. If we have to tear out soggy drywall, replace insulation, and treat for mold, the project can easily stretch from a week to several weeks.
Q: Can I just paint over a water stain on my ceiling?
A: This is easily the most common—and most dangerous—shortcut people take. Just painting over a water stain is like putting a small bandage on a deep wound. It hides the ugly spot for a little while, but the trapped moisture will continue to rot the drywall and breed mold. You must fix the leak and ensure the area is 100% dry before priming and painting.
Q: How much does it cost to fix a water damaged ceiling in Los Angeles?
A: The cost to fix a water-damaged ceiling in the Los Angeles area can vary wildly. A minor repair might be a few hundred dollars. Moderate repairs involving drywall replacement often range from $1,000 to $2,500. For a major restoration project requiring professional drying, mold remediation, and significant reconstruction, costs can easily climb past $5,000. The final price depends on the size of the area, the source of the water, and how long the materials were saturated.
Q: What are the health risks of a water damaged ceiling?
A: The biggest health risk by far is mold growth. Mold releases allergens and mycotoxins into the air, triggering allergic reactions, asthma attacks, and other respiratory issues. Beyond mold, a heavily saturated ceiling is a direct physical hazard. Drywall becomes incredibly heavy when it’s full of water and can collapse without any warning, causing serious injury. Prompt, professional remediation is about protecting your home and your family.
If you're facing a water-damaged ceiling, don't wait for a small problem to become a big, expensive disaster. The team at Onsite Pro Restoration is available 24/7 to provide a free assessment and expert guidance.