Discovering mold in your attic can be alarming for any homeowner. The key to understanding how to remove attic mold effectively is recognizing it’s a multi-step process that starts with finding and fixing the moisture source. It requires containing the mold to prevent cross-contamination, safely cleaning the affected areas, and ensuring everything is thoroughly dried to prevent its return. Getting this process right is crucial for protecting your property's value and, more importantly, your family's health.
For homeowners in the Los Angeles area, a mold issue can be a significant concern. If you suspect mold in your attic, don’t wait.
Get a Free Mold Inspection
Spotting the First Signs of Attic Mold in Your Home
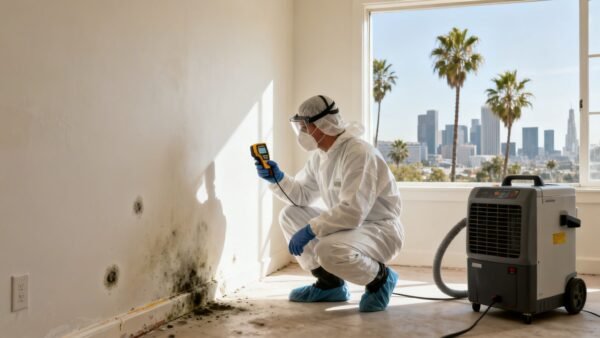
More often than not, the first clue you have an attic mold issue isn’t something you see—it's what you smell or how you feel. A persistent, musty odor hanging around the attic hatch or coming through your HVAC vents is a classic red flag. You might also notice that your family's allergy symptoms—sneezing, coughing, itchy eyes—suddenly get worse when you're at home. These subtle signs are your house telling you something’s wrong.
Common Visual and Olfactory Clues
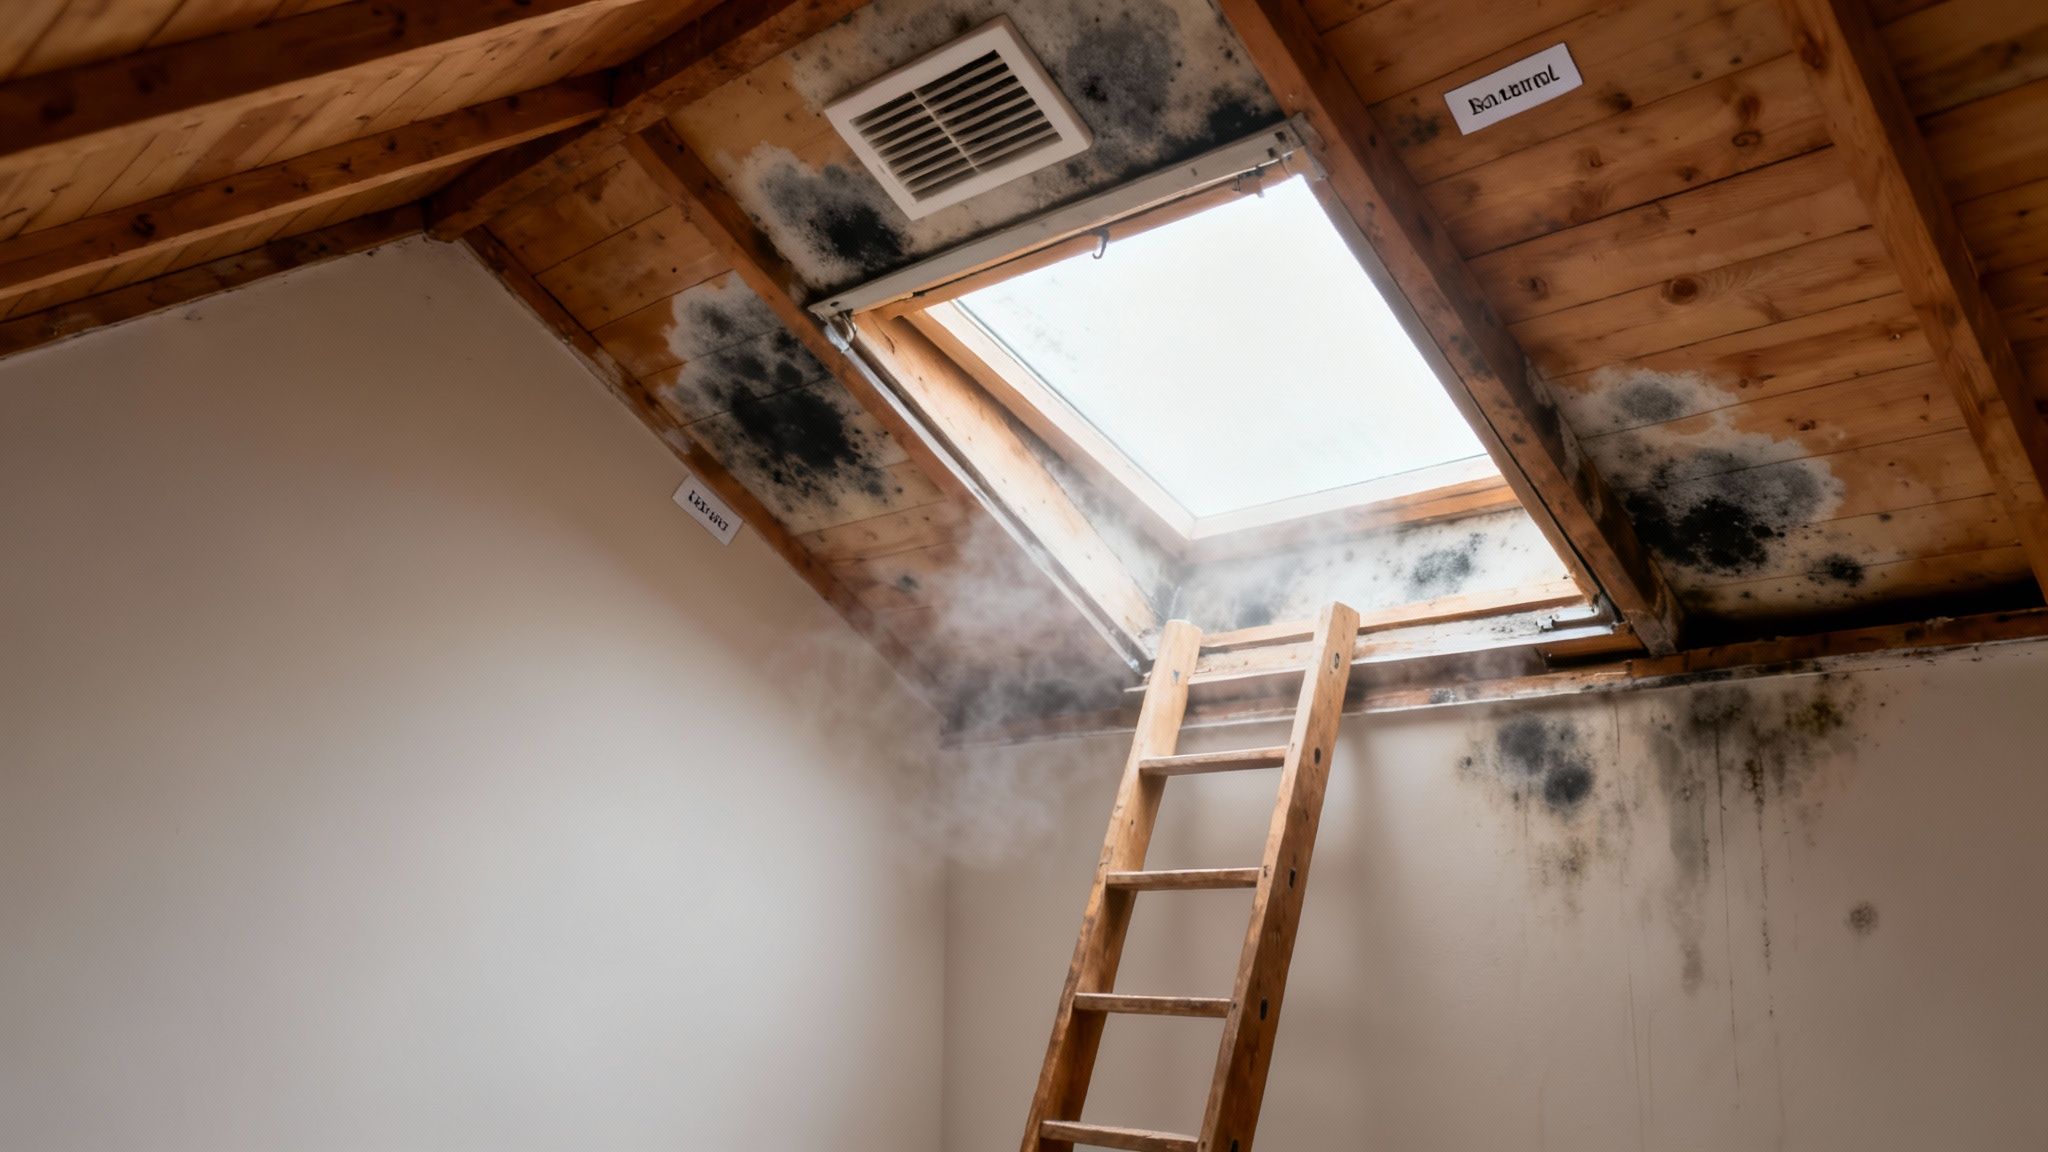
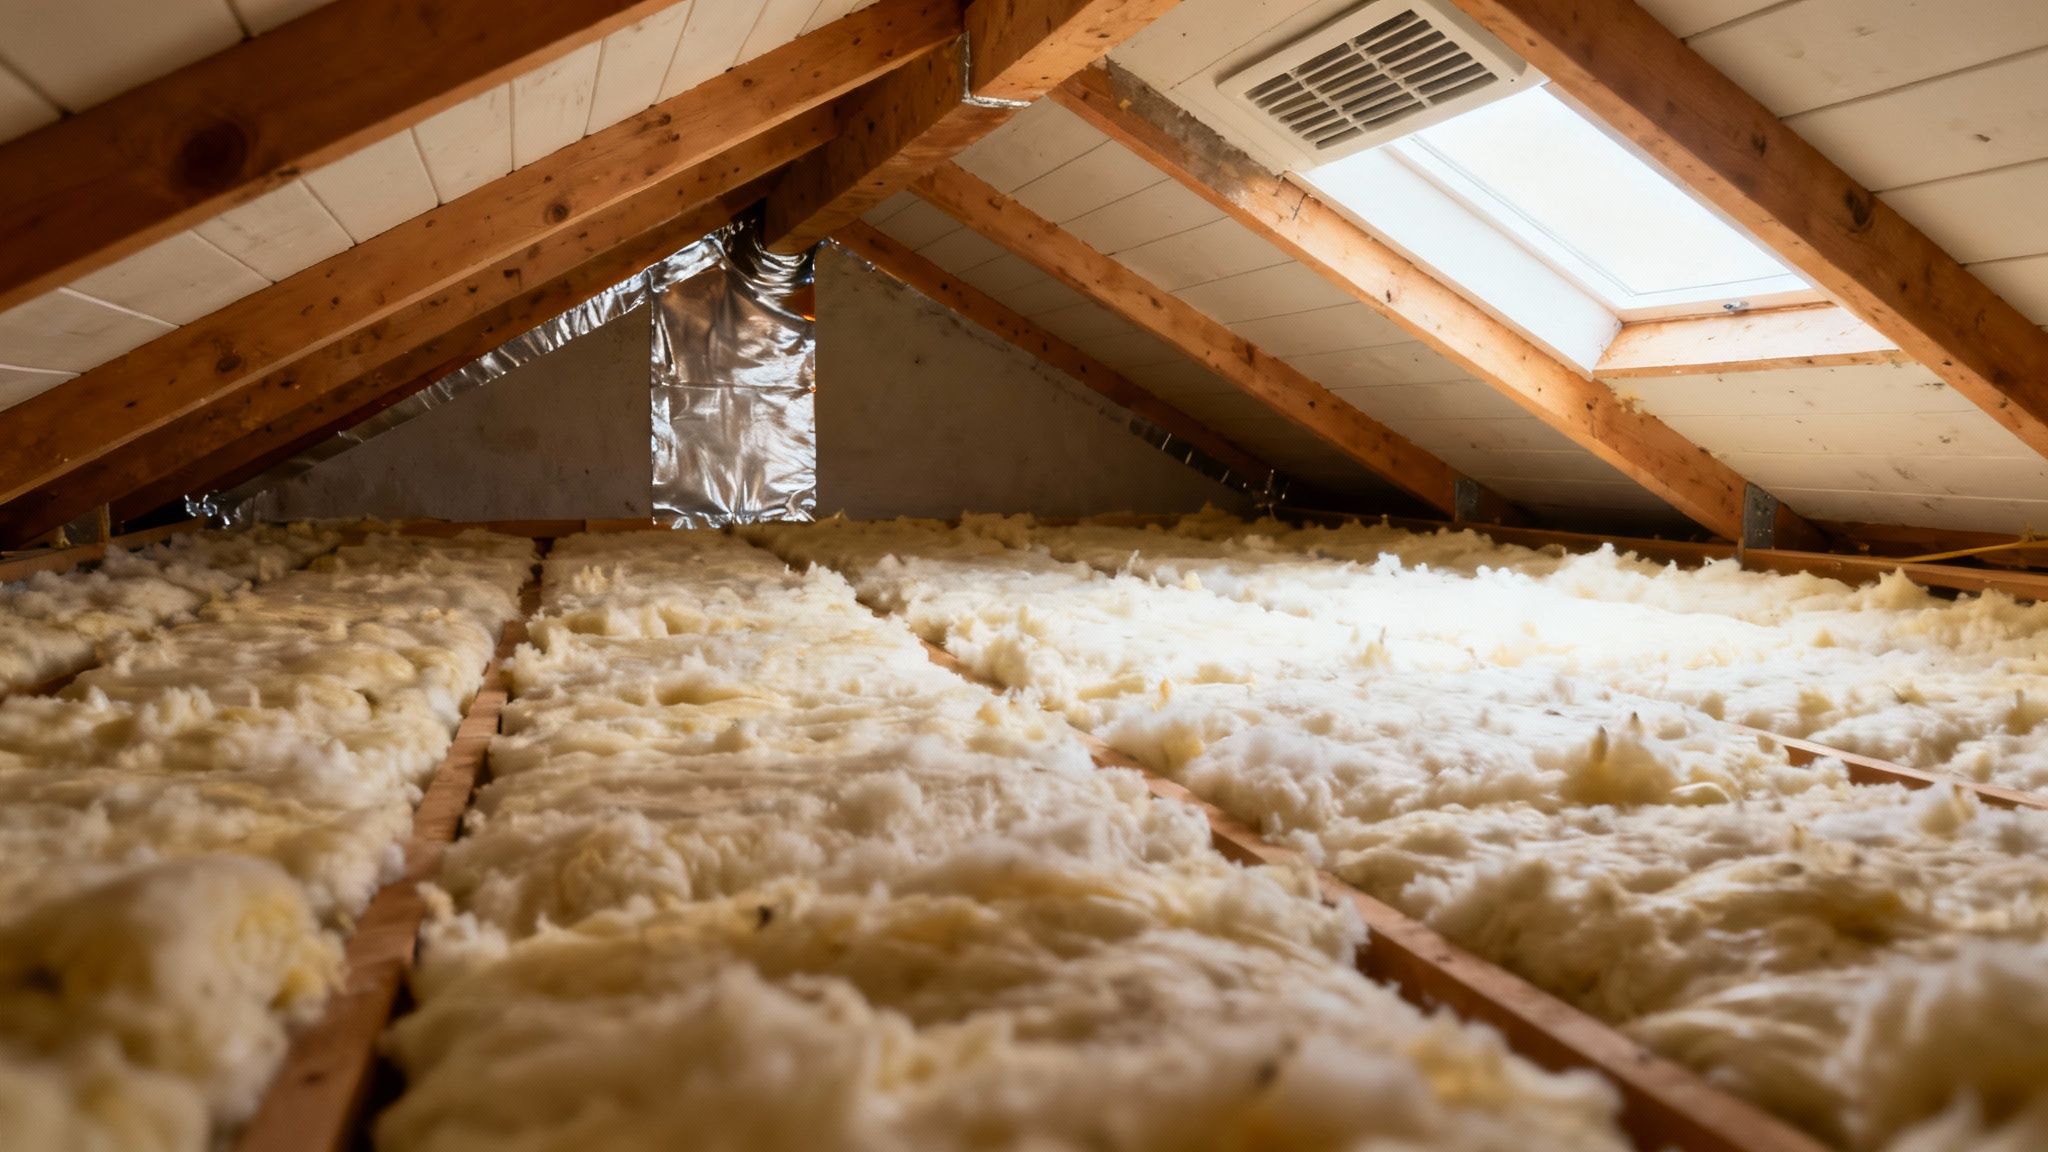
When you do a visual check, the signs can range from small discolored spots on the wooden roof sheathing to big, ugly patches of black or green growth spreading across the insulation. Here in Los Angeles, we see specific patterns. The damp, coastal fog in Santa Monica, for example, often leads to condensation on roof rafters, creating a perfect breeding ground for mold. Over in Sherman Oaks, those popular flat-roof homes are notorious for developing slow, hidden leaks that can go unnoticed for months, feeding a mold problem that silently grows out of sight.
Keep a close eye out for:
- Discoloration: Look for any black, white, green, or even grayish stains on the wood, insulation, or any boxes you have stored up there.
- Musty Odors: That damp, earthy smell is the unmistakable signature of active mold growth. Trust your nose, even if you can't see anything yet.
- Water Stains: Dark streaks or rings on the ceiling directly below the attic are dead giveaways of a past or current leak.
The Scale of the Problem
This is a far more common issue than most people realize. Did you know that studies show nearly 47% of buildings across the United States have mold problems? Attics are prime real estate for mold thanks to poor ventilation and those sneaky leaks.
Two-thirds of Americans report having dealt with mold, with a staggering 14.6% facing serious infestations that require calling in the pros. The financial hit can be huge, too. The average remediation job costs around $2,347, and a severe attic mold problem can seriously slash a home's resale value.
Key Takeaway: Never ignore the small signs. A faint musty smell or a tiny stain is often just the tip of the iceberg, pointing to a bigger moisture problem that needs to be fixed immediately to avoid costly structural damage and health risks.
Before we dive into the nuts and bolts of removal, here’s a quick overview of what a professional remediation process looks like.
Attic Mold Remediation At a Glance
This table breaks down the core phases of a proper attic mold removal project. It gives you a high-level look at the entire process, from the initial inspection right through to making sure the mold doesn't come back.
| Phase | Core Objective | Critical Actions |
|---|---|---|
| 1. Inspection & Assessment | Identify the source and extent of the mold. | Visual inspection, moisture mapping, and sometimes air or surface sampling. |
| 2. Containment | Prevent cross-contamination to other areas of the home. | Set up plastic barriers, use negative air pressure machines, seal HVAC vents. |
| 3. Removal & Cleaning | Safely eliminate mold from all affected surfaces. | Remove contaminated porous materials, HEPA vacuum, scrub surfaces with antimicrobial agents. |
| 4. Drying & Moisture Control | Restore the attic to a normal, dry state. | Use industrial dehumidifiers and air movers; fix the original moisture source (leaks, ventilation). |
| 5. Verification | Confirm the remediation was successful. | Post-remediation visual inspection and optional third-party clearance testing. |
Understanding these steps will help you tackle the issue methodically or know what to expect when you hire a professional.
Recognizing these initial signs is the first crucial step. It's also important to remember that mold in your attic could mean it's hiding elsewhere. For more tips on finding hidden growth, check out our guide on how to check for mold inside your walls.
Your Non-Negotiable Safety Checklist for Mold Removal
Before you touch a single speck of mold, let's get one thing straight: when you disturb mold, you're releasing millions of microscopic spores and mycotoxins into the air. This isn’t just a weekend cleaning project. It’s a hazardous materials situation, and you have to treat it that way to protect your health and keep the contamination from spreading through your entire home.
Skipping these safety steps isn't just a bad idea—it's dangerous.
Essential Personal Protective Equipment
The foundation of any safe mold removal job is your Personal Protective Equipment (PPE). This is the absolute bare minimum, and it’s a lot more than just a paper dust mask and some kitchen gloves. Your first line of defense is creating a complete barrier between you and the junk in the air.
Think of it as your personal hazmat suit, because that's exactly what it's for.
- N95 or P100 Respirator: This is your most critical piece of gear. It needs to be fitted correctly to form a tight seal around your nose and mouth. Without a good seal, it's useless against tiny mold spores.
- Non-Vented Goggles: You need to protect your eyes from airborne spores and any cleaning solutions you're spraying. Your everyday safety glasses with the vents on the side won't do the job.
- Disposable Coveralls with Hood: These are a must. They keep spores from clinging to your clothes and hair, which you'd otherwise track right back into your living space.
- Rubber Gloves: Look for gloves that go up to your mid-forearm. You need to protect your skin from both the mold itself and the chemicals you'll be using to kill it.
Crucial Insight: An N95 mask is only effective if you wear it right. You have to mold the metal nose clip tightly to your face. If you can't feel the mask pull in slightly when you breathe, you don't have a proper seal.
Setting Up Professional-Grade Containment
Next up, you have to completely isolate the attic from the rest of your house. The whole point is to create a sealed-off work area so that all the spores you kick up during the cleaning process stay put. You absolutely cannot have them getting into your HVAC system and spreading to every room.
First thing's first: shut down your HVAC system completely. Go to the thermostat and turn it off. For good measure, find the breaker and flip that off, too. This is non-negotiable, as it stops your air handler from sucking contaminated air out of the attic and blasting it everywhere else.
With the system off, go around and seal every single supply and return air vent in or near the attic with thick plastic sheeting and good tape. This is a critical barrier against cross-contamination.
Isolating the Work Zone
Okay, HVAC is off and vents are sealed. Now you build the physical barrier. This is how the pros do it, and you should too.
- Seal the Entrance: Get some heavy-duty (6-mil) plastic sheeting and completely seal off the attic entrance. To get in and out, you'll slice a vertical slit down the middle, then cover that slit with a second, overlapping flap of plastic. This creates a simple, self-closing door.
- Establish Negative Air Pressure: For anything more than a tiny patch, you really need a Negative Air Machine equipped with a HEPA filter. Professionals use these on every job. This machine constantly pulls air from inside the contained zone, filters out the contaminants, and pumps the clean air outside through a flexible duct run to a window or vent. This guarantees that air is always flowing into the attic, never out, effectively trapping the spores inside your work area.
Taking these precautions isn't just best practice; it's fundamental to doing the job right without making things worse. To see how these steps fit into the bigger picture, you can learn more about our comprehensive mold removal and remediation services.
A Practical Guide to Cleaning Mold from Attic Surfaces
Once you’re geared up and the attic is sealed off, it’s time to get to work. How you tackle the mold depends entirely on what it’s growing on. Attics are usually a mix of wood framing, insulation, and sometimes drywall—and each surface needs a different game plan.
This isn’t just about making ugly stains disappear. The goal here is to physically remove the mold growth and its byproducts, leaving the space truly clean and safe.
Tackling Mold on Wood Rafters and Sheathing
Wood is the backbone of most attics, and unfortunately, it's also a five-star meal for mold. When mold takes hold of porous surfaces like OSB sheathing or wood rafters, its roots (called hyphae) dig deep. Just spraying a chemical on top won't cut it.
You need a combination of elbow grease and the right treatment. Here’s the process that works:
- Start with a HEPA Vacuum. Before you touch anything, grab a HEPA-filtered vacuum and go over all the visible mold. This captures the loose, lightweight spores that are just waiting to fly around. A standard shop vac will just blast these spores back into the air, making your problem ten times worse.
- Get Physical with It. This is the most critical step for wood. Using a wire brush or a coarse scrubbing pad, you have to physically agitate the moldy spots. Scrubbing dislodges the embedded growth and gets the surface ready for cleaning.
- Wipe It Down. After you’ve scrubbed the area, use a damp rag with a simple detergent-and-water solution to wipe everything down. This physically removes the mold you just loosened up. Work in small sections and swap out your rags often so you’re not just smearing contaminants around.
This three-part method—vacuum, scrub, wipe—is the foundation of how you properly get mold out of attic wood. It ensures you’re not just killing what's on the surface but physically removing the source of the problem.
For a deeper dive into treating wood, check out our guide on how to kill mold on wood, which has even more detailed techniques.
Choosing the Right Cleaning Solution
After the heavy lifting of physical removal is done, you’ll treat the wood with a cleaning agent. This is where a lot of DIYers get tripped up by conflicting advice. Let's clear it up.
Expert Insight: The main job of a cleaning solution isn't just to "kill" mold. It's to clean the surface and remove any lingering microscopic particles. If you kill mold but leave the dead organic matter behind, you’re just leaving a food source for the next mold problem.
Here’s a look at the common options:
| Cleaning Agent | Pros | Cons | Best For |
|---|---|---|---|
| Detergent & Water | Safe, cheap, and effective for lifting surface mold. | Doesn't kill mold spores; relies entirely on thorough scrubbing. | Small, contained mold spots on non-porous surfaces. |
| Professional Biocides | EPA-registered to kill mold spores and provides a deep clean. | Can be hazardous without proper PPE and ventilation. | Widespread mold on porous materials like attic wood. |
| Bleach Solution | Kills surface mold on non-porous materials. | Useless on wood (the water in bleach just feeds the roots); it's also corrosive and toxic. | Not recommended for attic wood remediation, period. |
For a real attic remediation job, a professional-grade antimicrobial or biocide is the way to go after you’ve done the initial scrubbing. These products are formulated to get into porous surfaces and neutralize mold spores. But they are serious chemicals—follow the directions to the letter and wear your full PPE.
Before you start any of this, keep this simple safety workflow in mind.
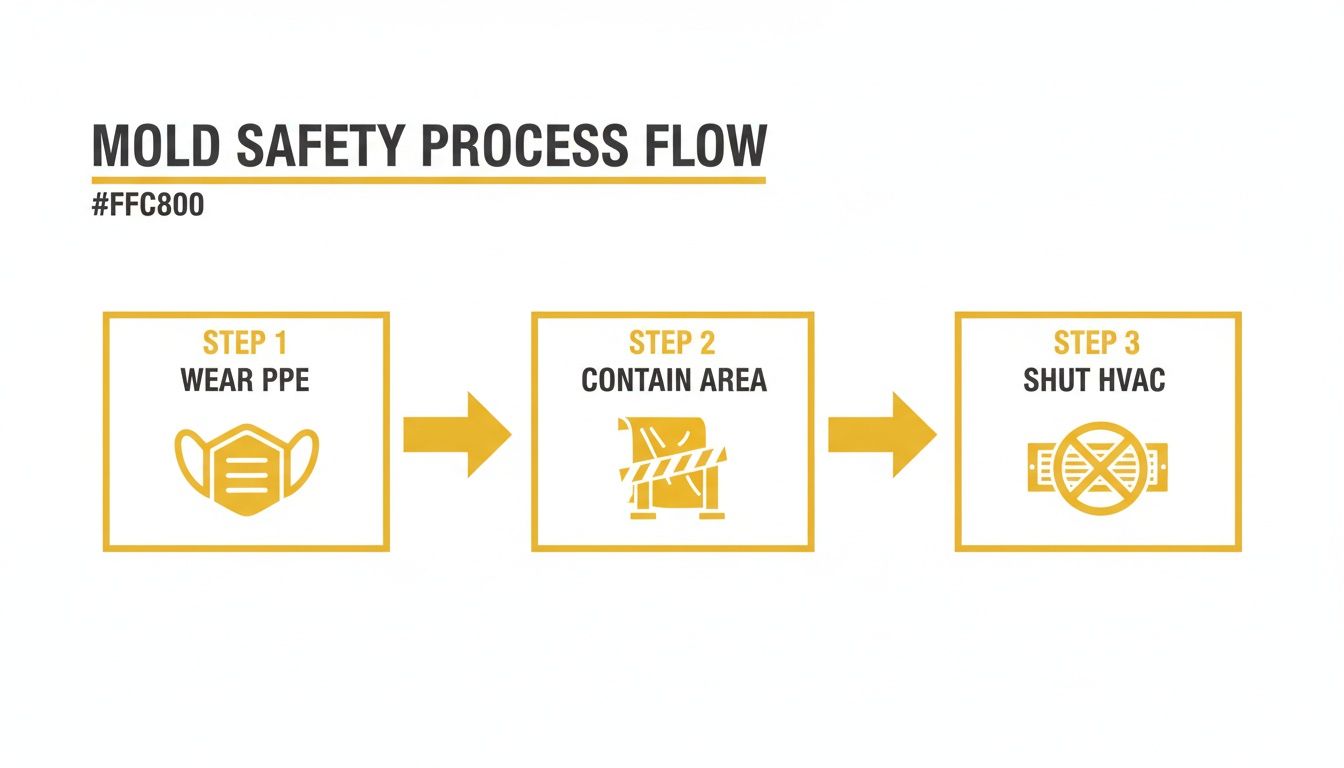
This flow is non-negotiable: protect yourself, isolate the work zone, and control the air. It’s the bedrock of any safe mold removal project.
Handling Contaminated Insulation and Drywall
Unlike wood, which can often be cleaned and saved, soft, porous materials like insulation and drywall are a different beast. Once mold gets in there, it’s impossible to clean it all out. The only safe and effective move is to remove and dispose of it.
Trying to clean moldy insulation is a waste of time and a great way to send a massive cloud of spores into the air.
- For Moldy Insulation: Carefully cut out the affected insulation in sections. To keep spores from going airborne, give the insulation a light mist with a water spray bottle before you handle it. The moisture helps weigh down the spores.
- For Moldy Drywall: Use a utility knife to score the drywall well outside the visible mold—give yourself at least a 12-inch buffer zone. Remove that entire section. Mold loves the paper backing on drywall and often spreads far beyond what you can see on the surface.
Proper Disposal Procedures
You can’t just toss this stuff in the trash can like normal garbage. All contaminated materials have to be disposed of carefully to avoid spreading mold through your house.
Use heavy-duty (6-mil) contractor bags for all the debris. Double-bag everything. As you carry each sealed bag out of the containment area, wipe down the outside with a damp cloth. This removes any spores that may have settled on the bag before you walk it through clean parts of your home.
It’s always a good idea to check with Los Angeles County for any specific rules on disposing of moldy building materials. For most residential jobs, though, securely double-bagged debris can go out with your regular trash. Just make absolutely sure those bags are sealed tight.
Finding and Fixing the Moisture Source for Good
Let me be blunt: cleaning up attic mold without fixing the water problem is a complete waste of time and money. It's like mopping the floor while the sink is still overflowing. To win this fight, you have to cut off the mold's lifeblood—moisture. This is the single most important step that turns a temporary cleanup into a permanent fix.
This isn't just about ugly stains. Attic mold remediation costs an average of $2,347, and it's a problem that plagues nearly half of all homes in the U.S. In a market like Los Angeles, where property values in areas like Burbank and Sherman Oaks are sky-high, an unresolved mold issue can be a serious financial hit. Every set of guidelines, from the EPA to the CDC, agrees: lasting remediation starts and ends with moisture control.
Diagnosing Common Moisture Culprits
In my experience, attic moisture in Los Angeles usually comes from one of three places. Your first job is to become a detective. Grab a powerful flashlight, get ready to get a little dusty, and start hunting for clues.
We’re going to look for roof leaks, condensation from bad ventilation, and exhaust vents dumping moisture where they shouldn't. Each one leaves a different trail.
Investigating Roof Leaks
Even a tiny breach in your roof can let in just enough water to create a massive mold colony. These leaks are often slow and sneaky, staining the wood and soaking insulation for months or years before you even notice.
Here’s what to look for:
- Stains Around Penetrations: Your roof has weak points wherever something pokes through it. Check carefully around chimneys, plumbing vents, skylights, and exhaust fans. The flashing here is the first thing to fail.
- Water-Stained Rafters: Look for dark streaks running down the wooden rafters or on the underside of the roof sheathing. These are the tracks left by water as it made its way in.
- Damp or Compressed Insulation: If you see patches of insulation that look matted down, discolored, or feel damp, water is almost certainly dripping from above.
Finding the leak is step one. For a more detailed guide on tracking down hidden water sources, check out our post on how to detect water leaks in walls.
Addressing Poor Ventilation and Condensation
Sometimes the enemy isn't outside—it's coming from inside your own house. Warm, humid air from showers, cooking, and just breathing rises into your cool attic. When it hits the cold underside of the roof, it condenses, creating a fine dew that mold loves. This is a huge issue in LA, especially on cooler winter nights.
Pro Tip: Look closely at the roofing nails poking through the sheathing. See any rust or little black circles around them? That’s a classic sign of condensation. The cold metal nail becomes a drip point, feeding the wood just enough moisture to start a mold problem.
When your attic can't breathe, that humid air gets trapped. The solution is simple: get the air moving.
- Check Your Soffit Vents: These are the vents located under the eaves of your roof. They are critical for air intake. Make sure they aren't clogged with insulation, debris, or layers of paint.
- Inspect Ridge and Gable Vents: These vents at the peak of the roof (ridge) or on the walls (gable) let the warm, moist air escape. Ensure they're clear and functional. A healthy attic needs a balanced flow of air in from the bottom and out through the top.
You can't just clean the mold; you have to change the environment. To get a better handle on this, it's worth learning how to prevent damp and condensation throughout your entire home.
Correcting Exhaust and Ducting Issues
This is one of those problems that's surprisingly common and, thankfully, easy to spot. I see it all the time: bathroom fans, kitchen hoods, and dryer vents that just terminate in the attic. Instead of pushing all that hot, steamy air outside, they dump it directly into the attic space.
Find your exhaust fans and follow the ducts. If a duct just ends in the middle of the insulation, you've found a major problem. Every single exhaust vent must be ducted all the way to the exterior of the house, either through the roof or a side wall. Fixing this is non-negotiable for keeping mold away for good.
When to Skip the DIY and Call a Remediation Pro
While I’m a big fan of the DIY spirit, knowing your limits with attic mold isn't about pride—it's about safety. Some situations are just too hazardous or complex for a weekend warrior project. This is where you need the specialized equipment, containment protocols, and expertise of a certified professional.
Attempting a large-scale removal on your own is a huge gamble. Without proper containment, a localized attic issue can quickly spiral into a whole-house contamination nightmare. One wrong move can blast millions of spores through your HVAC system, letting them settle into carpets, furniture, and your family’s lungs.
The Ten Square Foot Rule
The U.S. Environmental Protection Agency (EPA) gives a pretty solid guideline: if the moldy area is bigger than 10 square feet (think a 3-foot by 3-foot patch), it's time to bring in a professional. This isn't just an arbitrary number. It’s the threshold where the risk of releasing a massive amount of airborne spores—and the likelihood of hidden, widespread growth—goes up dramatically.
A tiny, isolated spot on one rafter? You might be able to handle that. But if you see mold stretching across multiple sheets of roof sheathing or blanketing entire sections of insulation, you've stepped into professional territory. What you can see is often just the tip of the iceberg, and a pro has the tools to find out just how deep the problem goes.
Red Flags That Demand a Professional
Beyond just the size of the patch, there are several other red flags that scream "stop" and tell you a DIY approach is unsafe. If you spot any of these, your next call should be to a certified remediation company.
- HVAC System Contamination: See mold growing on or near attic vents? Smell a musty odor from your registers when the system kicks on? That's a huge warning sign. The contamination has likely infiltrated your ductwork, and cleaning that requires specialized tools to avoid blowing spores into every room of your house.
- Sewage or Contaminated Water Source: If the mold came from a sewer backup or overland flooding (known as Category 3 or "black water"), you're dealing with a serious biohazard. That water is loaded with dangerous bacteria and pathogens. Don't even think about cleaning this yourself without proper training and gear—it's incredibly risky.
- Recurring Mold Growth: If you've cleaned mold in the attic before only to have it return, it means the underlying moisture problem was never solved. A professional won't just scrub the mold; they'll perform a full moisture investigation to find and fix the root cause for good.
- Compromised Health in the Household: If anyone living in your home has asthma, severe allergies, or a compromised immune system, DIY mold removal is off the table. The health risks from airborne spores are significantly higher for vulnerable individuals, and it’s a risk you should never take.
The IICRC-Certified Advantage
When you do decide to hire a professional, make sure they are certified by the Institute of Inspection Cleaning and Restoration Certification (IICRC). This isn't just a fancy badge; it’s your guarantee that the technicians have been trained on industry-best practices for safe, effective remediation. They truly understand the science behind mold growth, moisture control, and proper containment.
Hiring an IICRC-certified firm means you're getting a team that follows a strict standard of care. They know how to protect your property, provide the necessary documentation for insurance claims, and ensure the job is done right the first time, giving you peace of mind.
It’s no wonder homeowners are so concerned. Searches for 'how to remove mold from walls'—often tied to attic problems—skyrocketed by 111.8% from 2020 to 2023. This is justified when you consider that 47% of U.S. buildings have mold issues, with attics being hotspots. With mold contributing to over 20% of asthma cases and costing the nation $22.4 billion annually, calling a pro is a critical decision.
Ultimately, a professional mold remediation contractor does more than just clean. They restore your attic to a healthy, safe condition. To find the right experts for the job, it helps to understand what to look for when selecting mold removal contractors.
Answering Your Top Questions About Attic Mold
Even with a detailed guide, dealing with attic mold brings up a lot of questions. As a restoration pro in Los Angeles, I've heard them all. Let's tackle the most common concerns homeowners have so you can move forward with confidence.
Q: Will homeowners insurance cover attic mold removal in California?
A: This is always the first question, and the answer almost always boils down to one thing: the source of the water. In California, standard homeowners insurance is very specific. If the mold grew because of a "sudden and accidental" covered event—like a pipe that bursts inside a wall—your policy will likely pay for the remediation. However, if the mold is from a slow, gradual problem like a leaky roof or poor ventilation, you're almost certainly not covered. A professional remediation company is crucial here, as they can provide the detailed documentation of the water source needed to support your claim.
Q: Can I just use bleach or paint over attic mold?
A: This is the most common—and most damaging—mistake homeowners make. Bleach is not effective on porous surfaces like the wood in your attic; its water base feeds the mold's deeper root structure. Painting over mold, or "encapsulating" it, is even worse. You're just hiding it while the mold continues to grow and compromise the wood's structural integrity. Real remediation means physically removing the mold, cleaning the surface, and fixing the moisture problem for good.
Q: How do I know if I have dangerous black mold?
A: The term "toxic black mold" usually refers to Stachybotrys chartarum, but you can't identify a mold species by color alone. The only way to know for sure is through professional lab testing. However, from a practical remediation standpoint, the specific species doesn't change the game plan. The CDC and EPA both agree: all mold growth inside a home should be treated as a potential health risk and removed safely and quickly. The color doesn't change the process—it all needs to go.
Q: What's the difference between mold removal and remediation?
A: People use these terms interchangeably, but they mean very different things. Mold removal is just the act of cleaning visible mold. Mold remediation is the complete, professional solution. It's a holistic approach that includes assessment, containment, removal of contaminated materials, detailed cleaning, thorough drying, and final verification to ensure the attic's fungal ecology is back to a normal, healthy level. When you choose remediation, you're investing in a permanent fix.
If you're looking at an attic mold problem that feels too big to handle or fits the criteria for calling in a pro, don't wait. The health of your home and your family is on the line. For a free, no-obligation assessment from an IICRC-certified team in the Los Angeles area, contact Onsite Pro Restoration today.