When it comes to stopping bathroom mold, it all boils down to one thing: controlling moisture. If you can master ventilation, clean smart, and use the right materials, you’ll create a space where mold spores simply can't gain a foothold. Get these elements right, and you can stop mold before it ever has a chance to start. For Los Angeles homeowners, understanding how to prevent mold growth in the bathroom is crucial for protecting your property and health.
Dealing with a stubborn mold problem? Don't wait.
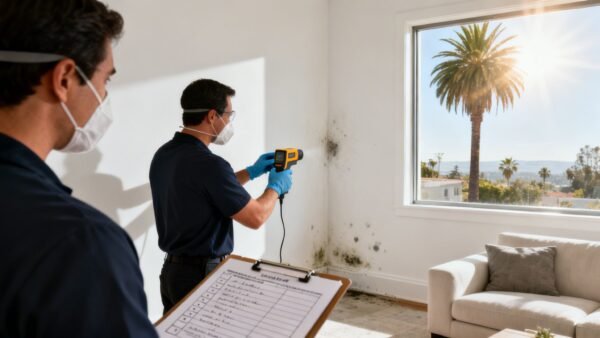
Get a Free Mold Inspection Now
Why Your Bathroom Is a Magnet for Mold
Ever wonder why those stubborn dark spots keep showing up in your shower grout, no matter how much you scrub? It’s because your bathroom is a perfect storm for mold growth. It provides the three things mold needs to thrive: moisture, warmth, and an organic food source like drywall paper or soap scum.

A single steamy shower can skyrocket the room's humidity, creating the perfect landing strip for microscopic mold spores to settle in and multiply. Here in Los Angeles, this risk gets even worse when coastal fog in areas like Santa Monica or Venice rolls in and drives up indoor humidity unexpectedly. Understanding what makes your bathroom a prime target is the first step in learning how to prevent mold growth in your bathroom for good.
The Science Behind Bathroom Mold
Mold isn’t just grime you can wipe away; it's a living organism that literally feeds on the stuff left behind in your bathroom. The conditions that turn your bathroom into a five-star resort for mold are surprisingly common in nearly every home.
Here’s what’s happening behind the scenes:
- Constant Moisture Source: Every time you run the shower, take a bath, or even just wash your hands, you’re releasing water vapor. This damp air condenses on cooler surfaces like mirrors, walls, and ceilings, creating persistent dampness.
- Abundant Food Supply: Mold isn’t a picky eater. It will happily devour soap scum, shed skin cells, dust, and even the paper facing on your drywall.
- Warm, Stagnant Air: Bathrooms are often small, enclosed spaces. Without good airflow, they trap warm, humid air, essentially becoming a cozy incubator for mold colonies.
A common mistake is assuming mold only grows in dirty bathrooms. The truth is, even a spotless bathroom can develop mold if it stays damp. The real key is dryness, not just cleanliness.
Think about it this way: a slow, unnoticed leak from the P-trap under your sink in your Sherman Oaks home can silently saturate the cabinet wood for weeks. By the time you finally smell that musty odor, a full-blown mold colony has likely taken over. The same goes for the dark corners of your shower where water pools after every use. These are notorious hotspots, and they perfectly illustrate why proactive moisture control is so much more effective than just cleaning up after the fact.
How to Control Bathroom Humidity to Prevent Mold
Forget about endless scrubbing. If you want to stop bathroom mold for good, you have to cut off its fuel source: moisture. It’s that simple. Getting a handle on your bathroom's ventilation and humidity is the only strategy that truly works.
Mold is everywhere—studies show it's present in nearly 100% of U.S. homes. The difference between a clean bathroom and a problem bathroom is keeping your indoor humidity consistently below the 40-50% mark. One major study found mold festering in 49% of shower grouts and 50% of walls above showers. The common thread? Lingering steam and poor air circulation.
The solution isn't complicated. It starts with an exhaust fan that actually vents outside and a commitment to running it long enough to do its job.
Upgrade and Optimize Your Exhaust Fan
Your bathroom fan is your number one defense against the damp, stagnant air mold loves. The problem is, many older homes in Los Angeles have fans that are little more than noise-makers. They're often underpowered, clogged, or—worst of all—venting directly into the attic, where moisture can cause even bigger headaches.
Run It Longer. Don't wait until the room is a steam cloud. Turn the fan on before you step into the shower and leave it running for a solid 30 minutes after you’re done. This is non-negotiable for pulling all that lingering moisture out of the air.
Check Its Power. Here’s a simple test I use on-site. Hold a single square of toilet paper up to the fan grille. If the suction holds it flat against the vent, your fan has decent airflow. If it flutters or falls, the fan is either clogged with dust or just too weak to be effective.
Consider an Upgrade. If your fan fails the toilet paper test or sounds like a jet engine, replace it. Modern fans are incredibly quiet and efficient. Look for a model with a CFM (Cubic Feet per Minute) rating appropriate for your bathroom’s square footage. A higher CFM means more power to pull humid air out.
Smart Habits to Reduce Everyday Moisture
Beyond the fan, a few small changes to your daily routine can make a massive difference in preventing condensation and surface dampness.
A squeegee is your best friend. A quick 30-second wipe-down of the shower walls and glass door after every use removes the vast majority of water that would otherwise evaporate, raising the room's humidity and feeding mold.
Use Technology to Your Advantage
For a more data-driven approach, a few inexpensive gadgets can take the guesswork out of humidity control.
Hygrometer: This is a small device that measures the humidity level in the air. Stick one on a shelf in your bathroom and make it a goal to keep the reading consistently below 50%.
Dehumidifier: In bathrooms with no windows or persistent dampness, a small dehumidifier is a game-changer. This is especially true during Southern California’s notorious "May Gray" and "June Gloom" when the marine layer keeps everything feeling damp.
Moisture Meter: If you suspect a hidden leak behind a wall or under the floor, this is the tool pros use to confirm it. A moisture meter tells you if building materials like drywall or wood are saturated. To learn more, check out our guide on how to properly use a moisture meter.
A Smart Cleaning Routine to Starve Bathroom Mold
Controlling moisture is step one, but a smart cleaning routine is what starves mold for good. This isn't about spending your weekends scrubbing grout with a toothbrush. It's about targeted, consistent upkeep that makes your bathroom a place mold simply can’t survive.
A go-to solution we recommend is a simple 50/50 mix of white vinegar and water in a spray bottle. Vinegar is a mild acid that actually kills many common mold types on hard, non-porous surfaces like tile and porcelain—it doesn't just bleach them. For anything more stubborn, look for store-bought cleaners formulated specifically as a mold killer (not just a stain remover).
A Simple Maintenance Checklist
Staying on top of mold is all about routine. A little work each week prevents a big, expensive problem later. I've put together a simple checklist to help homeowners focus on the hot spots where moisture and soap scum (mold's favorite food) build up.
Weekly Bathroom Mold Prevention Checklist
| Task | Area | Frequency | Pro Tip |
|---|---|---|---|
| Wipe Down Shower | Shower walls, door, and floor | Weekly | Do a quick squeegee after the last shower of the day. Less standing water means less work for you. |
| Inspect Grout | Shower, floor tile | Weekly | Use a stiff brush on any discolored spots. You're removing the soap scum and biofilm that mold feeds on. |
| Clean Splatter Zones | Around the sink and toilet base | Weekly | These areas collect condensation and splashes. A quick wipe prevents moisture from seeping into caulk or flooring. |
| Check Linens | Shower curtain and bath mats | Weekly | Wash fabric curtains and mats. They hold a surprising amount of moisture and organic material. |
| Inspect Under Sink | P-trap and supply lines | Monthly | Look for slow drips or water stains. A small leak here can go unnoticed for months, creating a hidden mold factory. |
| Check Behind Toilet | Water supply valve and base | Monthly | Use a flashlight to check for any signs of water. A failed wax ring is a common and messy source of subfloor mold. |
Following a simple schedule like this turns a big job into a few minutes of easy maintenance. It's the best way to keep your bathroom environment consistently inhospitable to mold.

As this visual shows, a multi-pronged attack works best. Actively removing moisture with a fan and squeegee while passively monitoring with a hygrometer gives you total control over the environment.
Why Bleach Isn't the Answer for Mold
So many people grab a bottle of bleach when they see a dark spot in the shower. I get it. But from a professional standpoint, bleach is often the wrong tool for the job, especially on porous surfaces like grout, caulk, or drywall.
Bleach is great at killing surface mold and making stains disappear. The problem is, its chemical structure keeps it from soaking into porous materials to kill the mold's "roots." Instead, the water in the bleach solution soaks in—feeding the underlying problem—while the chlorine quickly evaporates. The mold looks gone, but it comes right back.
For small spots on hard tile or porcelain, your vinegar solution is a much better choice. But if you see recurring black mold in your shower, it's a sign of a deeper issue that surface cleaning won't fix. For a detailed breakdown of how to tackle this common problem, learn more about how to get rid of black mold in a shower and understand when it's time to call in a professional.
Choosing Mold-Resistant Materials for a Lasting Solution
If you're gearing up for a bathroom remodel, or just want to win the long-term war on mold, the materials you choose are your best weapon. While daily habits like running the fan and wiping down surfaces are critical, what’s behind your tile and under your paint forms the true foundation of a mold-free bathroom. Making smart upgrades here can save you thousands in remediation down the road.

Think of it this way: standard drywall is like a sponge. It’s made of paper and gypsum—organic food that mold loves. When it soaks up steam, it becomes a perfect breeding ground. Choosing the right materials from the start helps you build a defense against moisture from the inside out.
Start With The Walls And Ceiling
Your walls and ceiling bear the brunt of the daily steam and condensation from showers. Using materials designed specifically for these high-moisture zones is a non-negotiable part of how to prevent mold growth in the bathroom. This is where we see most DIY jobs go wrong.
Mold-Resistant Drywall: You’ve probably heard it called "green board" or "purple board." This stuff is the industry standard for any wet area for a reason. It has a water-resistant paper facing and a core treated with antimicrobial agents. It should be used on all bathroom walls, especially around the shower.
Moisture-Blocking Primer and Paint: Don’t even think about putting regular paint on bathroom drywall. You need to start with a high-quality, mold-inhibiting primer to create a sealed barrier. Then, top it with a premium paint formulated for "kitchen and bath" use. These paints have antimicrobial additives and create a hard, non-porous film that moisture just can't penetrate.
A common mistake we see is assuming "water-resistant" means "waterproof." Even with green board and specialty paint, every seam, corner, and screw hole must be properly sealed with water-resistant compounds. If not, moisture will find a way in.
Upgrade Your Shower And Flooring
The shower and floor are ground zero. Any porous material here is basically an open invitation for mold to move in. Your goal should be solid, non-porous surfaces that give water nowhere to go.
Porcelain or Ceramic Tile: These are fantastic choices because of their incredibly low water absorption rate. Installed correctly, they create a nearly impenetrable shield.
Solid-Surface Surrounds: If you want to eliminate the biggest failure point in a shower, look at solid fiberglass or acrylic surrounds. With no grout lines, you remove the most common spot for mold to take hold.
Vinyl Flooring: Luxury Vinyl Tile (LVT) and modern sheet vinyl are excellent, 100% waterproof options for bathroom floors. They are tough, a breeze to clean, and offer zero organic material for mold to eat. For a deeper look at protecting the joists and subfloor, you can learn more about how to kill mold on wood, which is a frequent problem under a leaky bathroom floor.
Don't Forget The Grout
Even with the best tile job, your grout lines are the weakest link. Traditional cement-based grout is porous. It acts like a tiny sponge, soaking up water and allowing mold to grow deep inside the joint where you can't scrub it away.
For a truly bulletproof solution, use epoxy grout when tiling your bathroom. It’s completely waterproof and stain-proof, and it never needs to be sealed. It costs a bit more upfront but makes for a low-maintenance, mold-resistant shower that will last for decades.
How to Spot the Hidden Signs of a Mold Problem
Sometimes, the mold you can't see is the biggest threat. While a few black spots in the shower grout are an obvious nuisance, the hidden mold growing behind your walls or above the ceiling is what causes the most serious damage before anyone even knows it’s there.
Learning to think like a mold detective is the first step in preventing a small bathroom problem from becoming a full-blown restoration project.
Your best tool is often your nose. If you notice a persistent musty or earthy smell that never goes away—even right after cleaning—that's the number one sign of a hidden moisture issue. Don't write it off. That smell comes from microbial volatile organic compounds (MVOCs), which are gasses released by active, growing mold colonies.
Visual Clues of Unseen Mold
Beyond smells, your walls and ceilings will often give you subtle visual hints that something is wrong behind the surface. Pay close attention to these tell-tale signs, especially in areas right next to the bathroom.
- Peeling, Bubbling, or Cracking Paint: When drywall gets damp from a slow leak, the paint on its surface loses its grip. This blistering is a classic indicator that moisture is coming from behind.
- Shadowy Stains or Discoloration: See a faint yellowish or brownish stain on the ceiling or wall that seems to get bigger over time? That's often the first sign of a leak from a pipe inside the wall or from the floor above.
- Warped or Swollen Materials: If your drywall, baseboards, or even vanity cabinets feel soft, swollen, or are visibly bowing, they are actively absorbing water. This is a five-alarm fire for potential mold growth.
Pinpointing the source of moisture can be tricky. It sometimes takes a professional assessment using tools like those offered by the best plumbing leak detection services to find a leak hidden from view.
The Problem With Ceiling Mold
The ceiling is a particularly sneaky spot for hidden mold. It often explains why your bathroom mold keeps coming back no matter how much you scrub.
A detailed survey from the LION Science Journal uncovered a startling truth: about 50% of homes had mold on bathroom ceilings that wasn't visible. When combined with the 30% of homes showing obvious spots, a whopping 80% of bathrooms were harboring mold up there.
This hidden menace constantly releases spores that rain down onto your walls and floors, where they feed on soap scum and start the cycle all over again.
This "seeding" effect from ceiling mold is a primary reason why homeowners feel like they are fighting a losing battle. They diligently clean the shower grout, only for new spots to appear weeks later, seeded from an unseen source above.
If you suspect mold is hiding in your bathroom, it's crucial to investigate. For a closer look at what to do next, check out our guide on how to check for mold in walls, which provides more detailed steps for confirming a hidden problem. Recognizing these early signs helps you know when a small issue has turned into something that needs a professional eye.
Frequently Asked Questions About Bathroom Mold
Even with the best prevention habits, nagging questions about mold always pop up. I hear them from homeowners all the time. Here are some straightforward answers to the most common "what if" scenarios we encounter in the field.
Q: Is it safe to clean black mold in my shower myself?
A: For a few small specks on a hard surface like tile or your fiberglass tub, you can usually handle it yourself. A simple mix of one part white vinegar to one part water in a spray bottle can knock out surface-level mildew. The trick is to get it while the spot is small—think less than a couple of square feet. But if that patch is spreading, keeps coming back no matter what you do, or you can smell a strong musty odor, that's your cue to stop. Those are red flags that the mold has gotten behind the wall or under the flooring. Aggressive scrubbing of a large mold colony can release a massive volume of harmful spores into your home's air, which only makes the problem bigger and more dangerous.
Q: How can I tell if my bathroom exhaust fan is actually working?
A: There’s a simple trick we use on-site all the time: the “toilet paper test.” Just turn the fan on and hold a single square of toilet paper up to the vent cover. If the fan’s suction grabs the paper and holds it tight, you’ve got good airflow. If the paper just flutters or falls away, your fan isn’t moving enough air to do its job. A weak fan might just have a duct clogged with years of dust and lint. Other times, the motor is just old and underpowered for the size of the bathroom. One critical thing to check is that the fan vents all the way to the outdoors—not just into the attic. Pumping all that moist air into your attic is just asking for a much bigger mold problem down the road.
Q: Will running a dehumidifier in the bathroom really prevent mold?
A: Absolutely. A dehumidifier is a fantastic tool to prevent mold growth in a bathroom, especially in small, windowless bathrooms or those with a weak exhaust fan. Mold spores really take off and start colonies when the relative humidity stays above 60%. By running a dehumidifier after you shower, you can pull that moisture right out of the air, keeping the humidity well below that threshold. It creates an environment where mold simply can’t get a foothold. It's a great backup for your exhaust fan, especially during Southern California's "May Gray" and "June Gloom," when the coastal marine layer makes everything feel constantly damp. I always recommend setting your dehumidifier to maintain a humidity level between 35% and 50%.
Q: What should I do if my landlord won't fix a leak causing mold?
A: This is a tough situation, but California law is on your side. Landlords are legally required to provide a habitable living space, which includes fixing plumbing leaks and dealing with any mold that results. A significant mold problem is legally considered a breach of the "implied warranty of habitability." The first thing you have to do is give your landlord written notice. Be specific about the leak and the mold. If they don't take action within a reasonable timeframe, you have options. It's best to consult with a local tenant rights group or an attorney to understand the proper legal steps, which might include rent withholding or using the "repair and deduct" remedy. To get an idea of the work involved, you can see what goes into a professional job and what a mold remediation project might cost.
If you're dealing with a mold issue that feels out of control or just keeps coming back, it’s time to bring in a professional. The team at Onsite Pro Restoration is IICRC-certified and ready 24/7 to provide a free assessment and help you take back your home.