Finding dark, slimy spots in your shower is unsettling. If you’re a homeowner in the Los Angeles area, where coastal fog and fluctuating humidity can create the perfect breeding ground for mold, knowing how to get rid of black mold in a shower is a critical skill. The key is to work safely and systematically. Start by ensuring the room is well-ventilated and put on your safety gear. Next, apply a mold-killing solution—undiluted white vinegar is a great natural option—directly onto the moldy grout and caulk. Let it sit for at least 10-15 minutes to penetrate, then scrub the area hard with a stiff brush before rinsing everything down.
Ready to tackle the problem but worried about hidden issues? The experts at Onsite Pro Restoration are here to help.
The Hidden Dangers of Black Mold in Your Shower
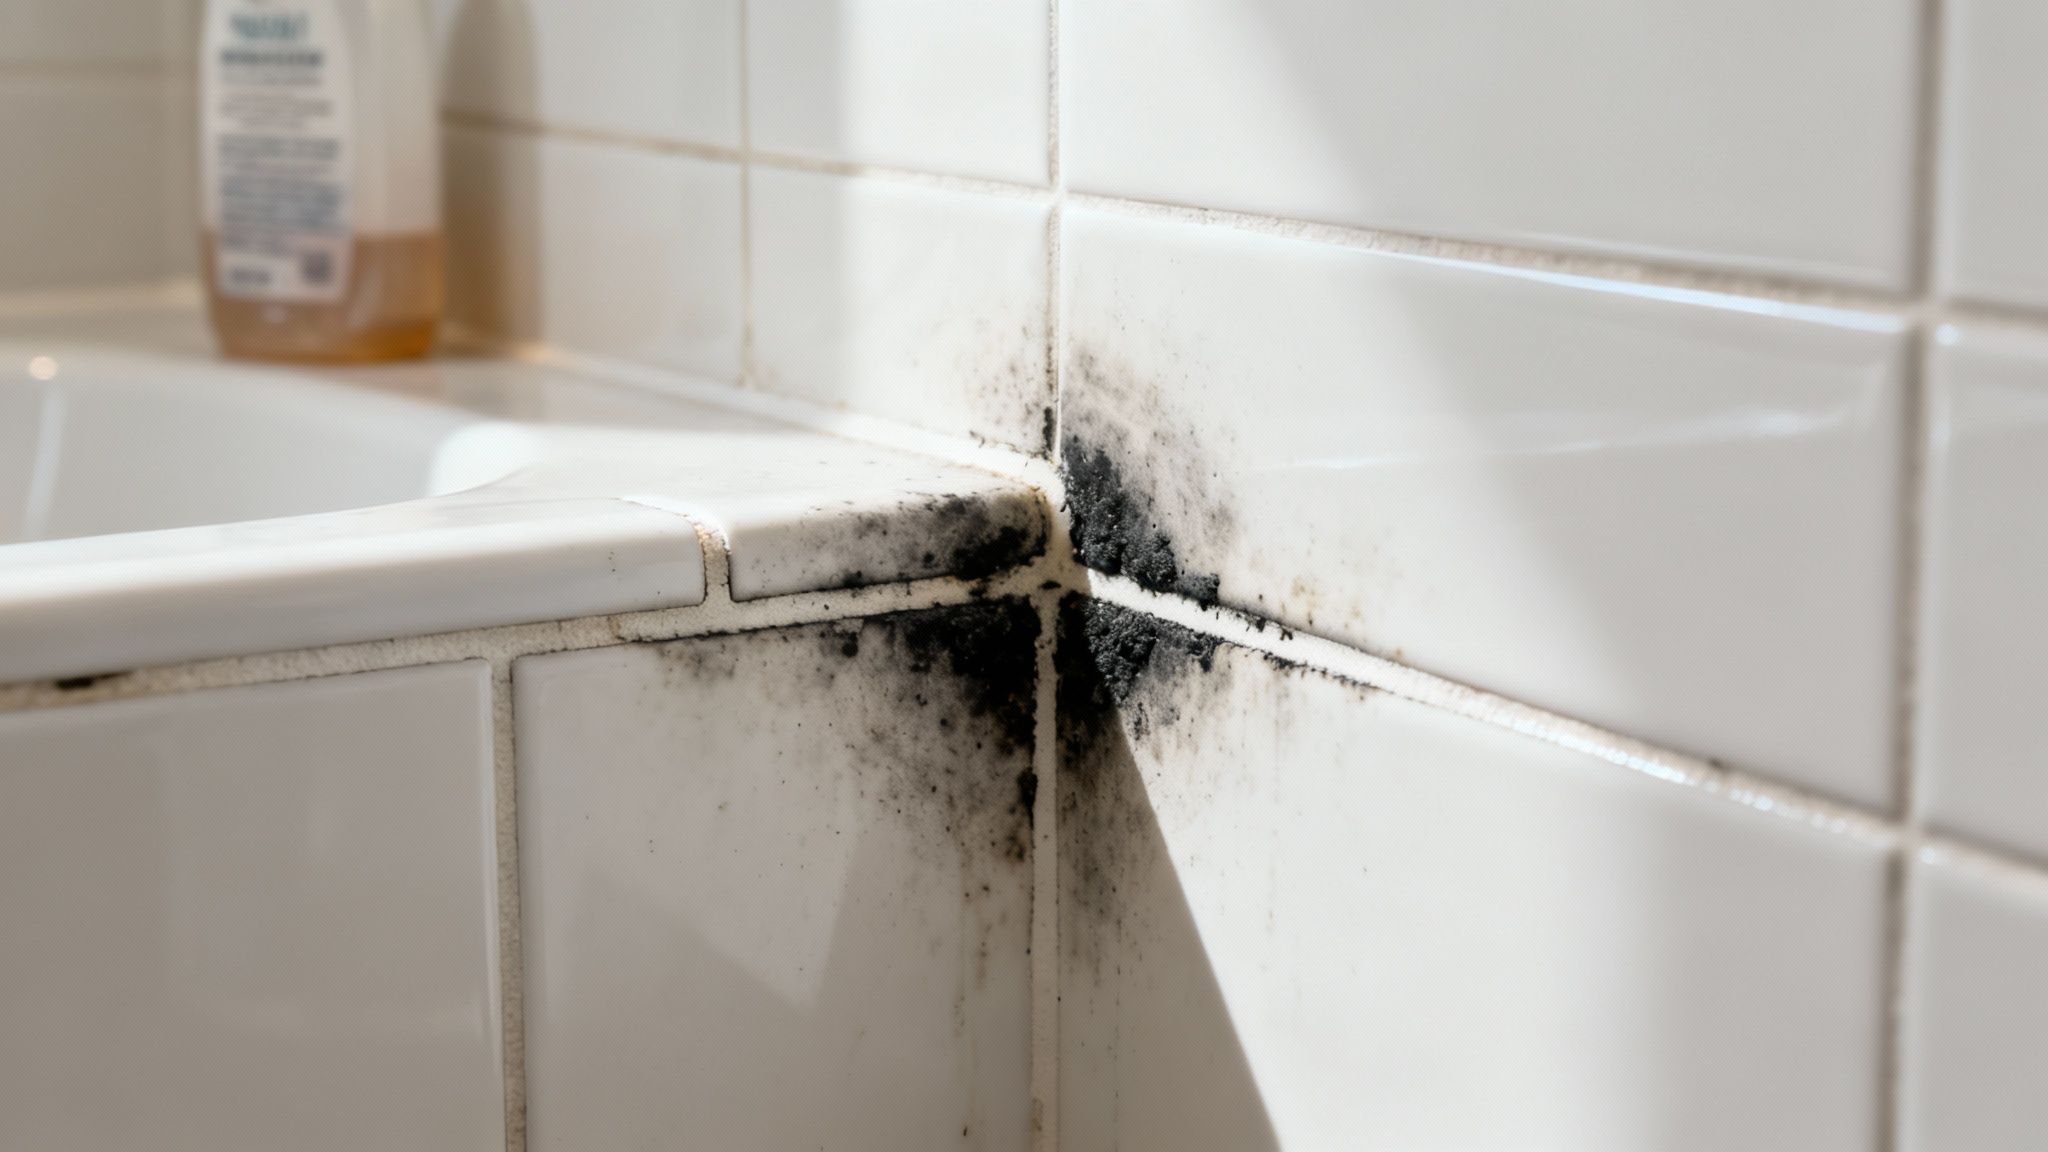
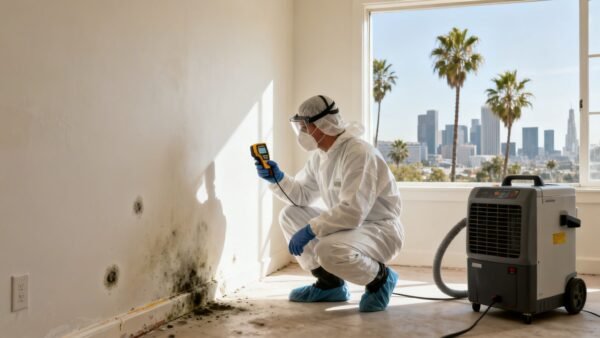
Finding those dark spots creeping along your shower grout or caulk is more than just an ugly stain. Your shower is the perfect storm for mold growth: it has constant moisture, warmth from hot water, and a steady food supply from soap scum and skin cells. This persistent dampness, common in Southern California homes from Santa Monica to the San Fernando Valley, creates an ideal breeding ground for mold species, including the notorious Stachybotrys chartarum, often called “black mold.”
Understanding the Intruder in Your Bathroom
Not every dark spot in your bathroom is the hazardous kind of black mold, but any mold can cause problems if you let it go. Honestly, it’s tough to tell the difference just by looking. For a deeper dive into identifying what you’re dealing with, check out our guide on how to know if it’s mold.
The numbers are pretty surprising. Globally, a staggering 70% of homes have some type of mold. Here in the U.S., it’s estimated that over 45 million buildings have unhealthy mold levels. While not all of that is black mold, it shows just how widespread this issue is, making it critical to act the moment you spot it.
The presence of mold, especially in a high-humidity spot like a shower, isn’t just a cosmetic problem. It points to an underlying moisture issue that can compromise your home’s air quality and even its structural integrity if you ignore it.
Getting rid of mold isn’t just about cleaning what you can see on the surface. To truly solve the problem, you have to kill the organism at its roots and, more importantly, get control of the moisture that allowed it to grow in the first place.
Before you roll up your sleeves, here’s a quick cheat sheet for tackling the job.
Quick Guide to Shower Mold Removal
This table breaks down the essential steps for handling a small, manageable mold problem in your shower. Think of it as your quick-reference guide to get the job done right.
| Step | Action | Key Tip |
|---|---|---|
| Safety First | Wear an N95 mask, gloves, and eye protection. | Prevents you from breathing in spores and getting cleaners on your skin. |
| Ventilation | Open a window or turn on the exhaust fan. | This improves air circulation and helps fumes dissipate safely. |
| Application | Spray your cleaning solution directly onto the mold. | Make sure to completely saturate the area so the cleaner can penetrate deep. |
| Scrubbing | Use a stiff-bristled brush on grout and caulk. | You need that agitation to really dislodge and remove the mold growth. |
| Prevention | Dry the shower after use and keep the air moving. | The best way to get rid of black mold for good is to stop it from coming back. |
With these steps in mind, you’re ready to restore your shower to a clean, healthy state. The real victory isn’t just cleaning the mold away—it’s creating an environment where it can’t return.
Gathering Your Safety Gear and Cleaning Arsenal
Before you even think about scrubbing, let’s talk about safety. This is the single most important part of the job.
When you disturb mold, it releases millions of microscopic spores into the air that you can easily inhale. Tackling this job without the right protection isn’t just a bad idea—it’s a direct risk to your health, potentially causing respiratory irritation and allergic reactions.
Your first line of defense is personal protective equipment (PPE). I can’t stress this enough: this isn’t a step to skim over.
Essential Personal Protective Equipment
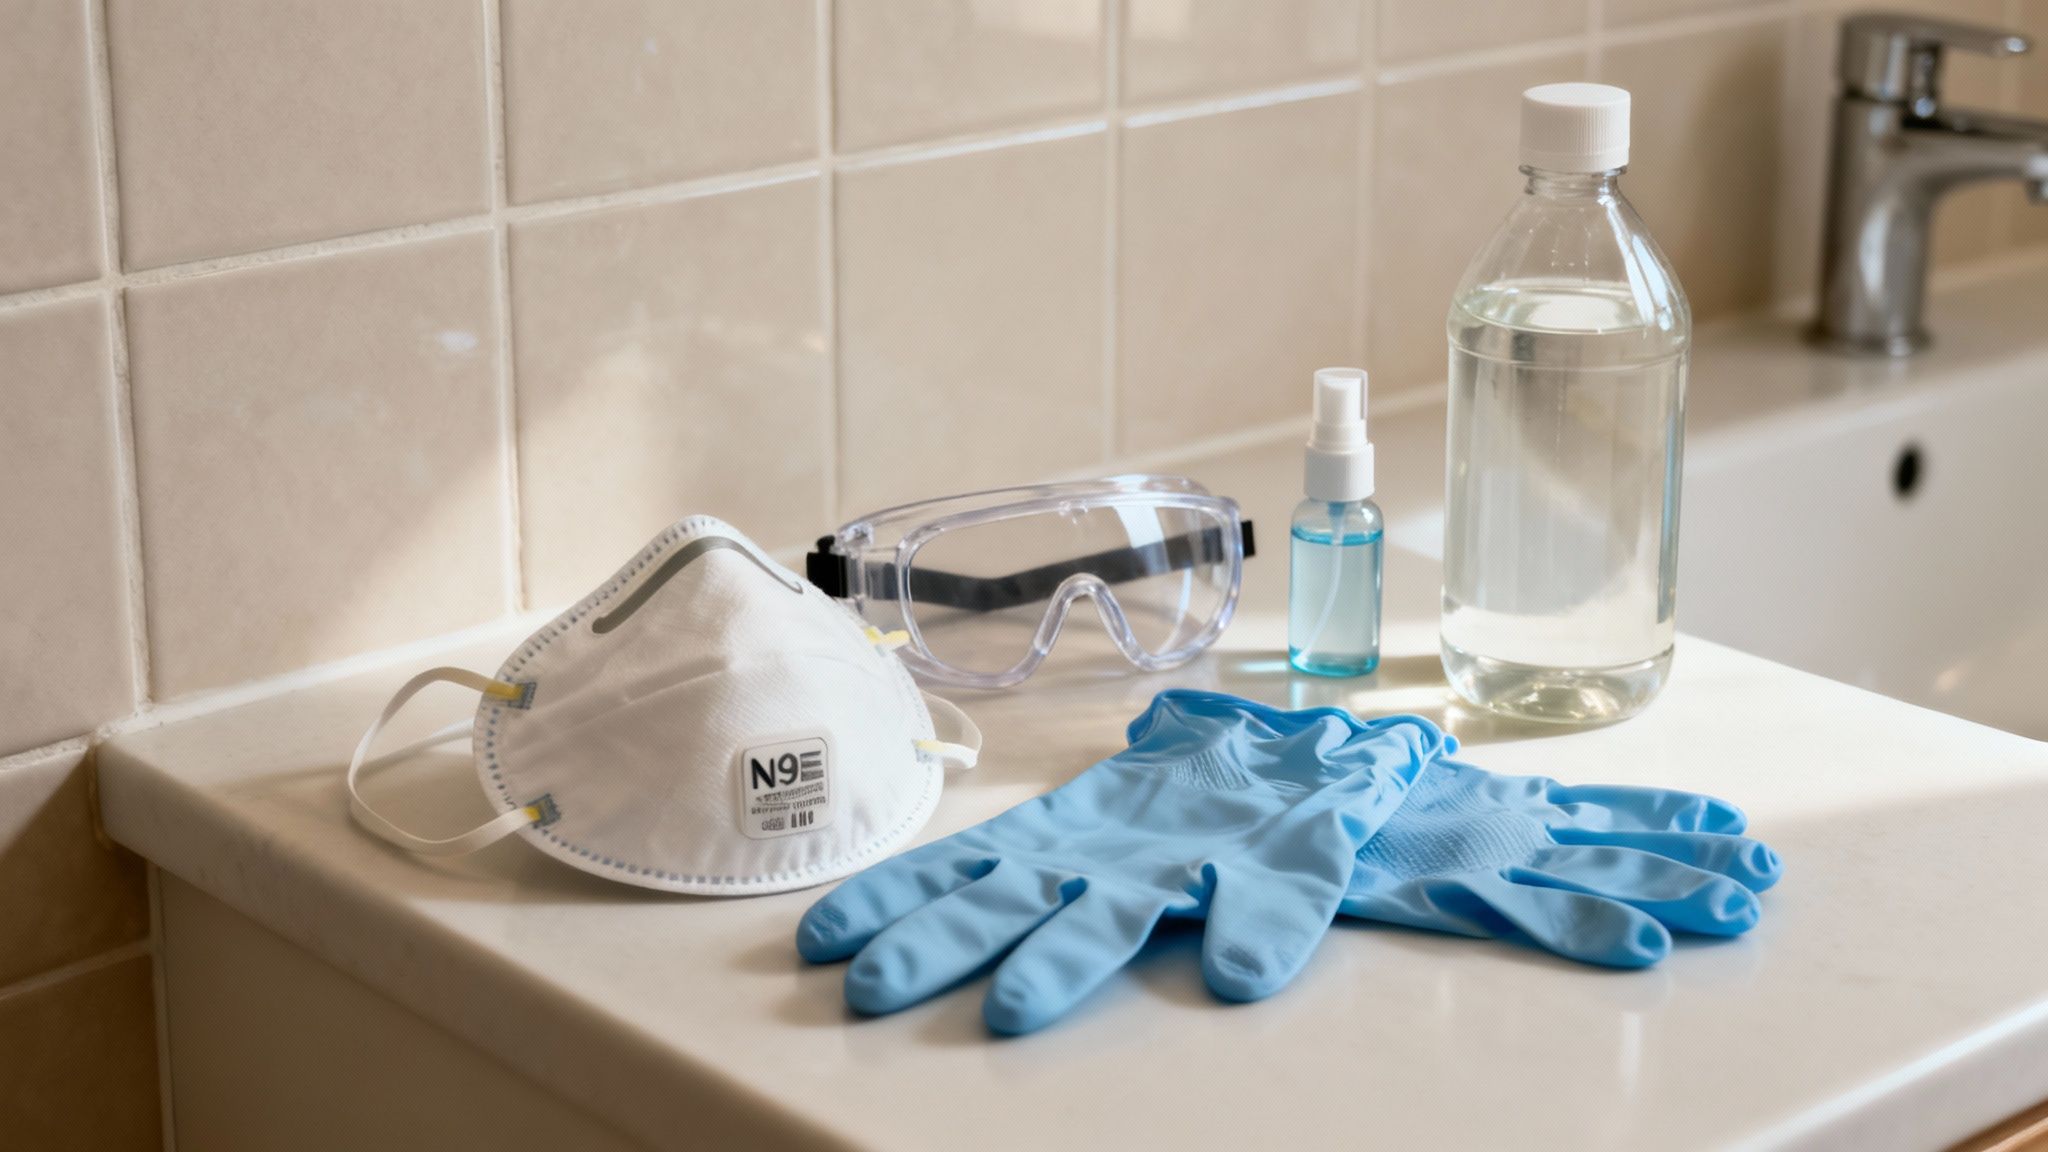
You need three key items at a minimum to protect yourself from getting sick while you get rid of the black mold in your shower.
- N95 Respirator Mask: A simple dust mask or surgical mask won’t cut it. An N95 is specifically designed to filter out at least 95% of airborne particles, including those tiny mold spores.
- Waterproof Gloves: Grab a pair of non-porous gloves, like thick rubber or neoprene. This keeps harsh cleaning solutions and mold itself from coming into direct contact with your skin.
- Safety Goggles: Protect your eyes. Splashes from cleaning chemicals and airborne spores are a real threat, and your regular glasses don’t offer nearly enough coverage.
With your safety gear on, the next step is to prep the bathroom itself. Proper ventilation is critical for dispersing fumes and spores. Open every window and crank up that exhaust fan.
For more serious mold situations, professionals often bring in specialized equipment. It’s worth knowing about an air scrubber rental to understand how the pros ensure spores don’t contaminate the rest of the house.
Choosing Your Mold-Fighting Solution
Once you’re protected, it’s time to choose your cleaner. You’ve got several effective options, from household staples to commercial products formulated specifically for mold.
Pro Tip: I see this all the time—people immediately reach for bleach. But it’s often not the best choice. Bleach is a harsh chemical and can actually be ineffective on porous surfaces like grout. Its high water content can soak into the material and feed the mold’s roots, making the problem worse in the long run.
Instead, consider these powerful alternatives:
- Undiluted White Vinegar: The natural acidity in white vinegar is fantastic for killing many common species of mold. Just pour it into a spray bottle, and you’re good to go.
- Commercial Mold Removers: Products designed specifically to kill mold often contain fungicides that are highly effective on all sorts of bathroom surfaces.
- 3% Hydrogen Peroxide: This is another great, less harsh option. You can spray it directly onto the mold and let it work its magic.
Instead of defaulting to bleach, exploring safer alternatives to bleach for mold removal can give you the same results without the harsh drawbacks. Your final choice really depends on the severity of the mold and your comfort level with different chemicals.
With your gear on and your solution in hand, you’re ready for the next phase.
Your Battle Plan for Getting Rid of Black Mold in a Shower
Spotting that stubborn black mold in your shower is a frustrating, but fixable, problem. This guide will walk you through exactly how to tackle mold growth on tile, grout, glass, and caulk, making sure you remove it from the source.
Before you even think about scrubbing, get your tools and supplies ready. The key isn’t just elbow grease; it’s about letting the right cleaning solution do the heavy lifting so you kill the mold spores instead of just spreading them around.
Different Surfaces Need Different Approaches
Not all shower surfaces are created equal, and they certainly don’t respond to cleaners the same way. Tile and grout are porous, meaning they can soak up moisture and give mold a place to hide. Glass and acrylic, on the other hand, are nonporous.
Understanding this difference is crucial. It tells you why you might need a stronger cleaner and a bit more muscle for those tough grout lines, where mold really likes to dig in.
- Tile: A mild cleaner and a soft cloth are usually all you need. You want to avoid scratching the finish.
- Grout: This is where you bring out the stiff brush. A concentrated cleaning solution will help you get deep into the pores.
- Glass Doors: A simple mix of white vinegar and water often works wonders and won’t leave streaks or residue behind.
- Caulk: Look closely for any dark stains. If cleaning doesn’t remove them, the mold has likely penetrated the silicone, and it’s time for a replacement.
Using the Right Cleaning Method
Always—and I mean always—test your cleaner on a small, hidden spot first. The last thing you want is to discover your cleaner is discoloring or damaging your tile after you’ve sprayed the whole wall.
Once you’ve done a spot test, spray the solution generously over the moldy areas and just let it sit for a good 10–15 minutes. This “dwell time” is what actually kills the spores, making the scrubbing part much easier and more effective.
- Prep First: Put on your protective gear (gloves, mask, goggles) and get some air moving by opening a window or turning on the fan.
- Saturate the Area: Don’t be shy with the cleaner. Coat all the moldy spots thoroughly.
- Agitate and Scrub: Grab your brush and focus on the grout lines and any other textured areas.
- Rinse and Dry: Flush everything with warm water, then dry the entire area completely. A dry shower is a mold-free shower.
If you have some really stubborn grout stains, don’t be afraid to hit them with a second treatment. Reapply the cleaner, let it sit again, and focus your scrubbing on the corners and junctions where grime builds up.
For those persistent black mold issues, especially in grout, applying specialized grout cleaning strategies to halt mold growth can make a world of difference.
With glass doors, be careful to avoid etching the surface. A final wipe-down with a squeegee is a great habit to get into; it removes water droplets that would otherwise become future mold colonies.
Key takeaway: Mold thrives in damp, dark crevices. Drying the area after cleaning is just as important as the scrubbing itself.
When the Caulk Has to Go
Sometimes, no amount of cleaning will fix moldy caulk. Silicone is notorious for trapping mold spores behind its surface, where your cleaner can’t reach. If the stains won’t budge, it’s time to replace it.
Carefully slice out the old, discolored caulk with a utility knife. Clean the now-empty gap with a mold killer and let it dry completely—don’t rush this step. Then, apply a fresh bead of a high-quality, mold-resistant silicone caulk.
Many homeowners wonder if bleach is the best tool for the job. We break down its effectiveness in our detailed article on does bleach kill black mold.
| Cleaner | Dwell Time | Pro Tip |
|---|---|---|
| Vinegar | 10 min | Rinse thoroughly to get rid of the strong smell. |
| Hydrogen Peroxide | 15 min | Store it in a dark bottle; light breaks it down. |
| Commercial Remover | 10–15 min | Always follow the label’s safety directions. |
After applying new caulk, give it at least 24 hours to fully cure before you use the shower. This prevents moisture from getting trapped underneath and starting the whole mold cycle over again.
If the mold keeps coming back despite your best efforts, or if you’re dealing with a patch larger than 10 square feet, it’s time to call in the professionals. For immediate assistance, call (818) 336-1800 now and take back control of your bathroom.
Deciding Between DIY Removal and Professional Help
Knowing when to grab the cleaning spray versus calling in a professional is a huge part of dealing with mold correctly. For a small, contained spot of surface mold, you can often handle it yourself. The trouble is, what looks like a minor issue can sometimes be the tip of the iceberg, hinting at a much larger, hidden problem—like a slow leak behind the wall of a Sherman Oaks home.
The Environmental Protection Agency (EPA) offers a decent rule of thumb: if the moldy patch is less than 10 square feet (think a 3×3 foot area), a homeowner can usually tackle it. But this is just a guideline. Other red flags can pop up that signal you’re in over your head and it’s time to call for backup.
When to Make the Call for Mold Remediation
Even a small patch of mold can be a sign you need professional help. Have you cleaned the same spot over and over, only for the mold to creep back? That’s a classic sign you haven’t fixed the underlying moisture source, and this is where the pros really shine.
Keep an eye out for these warning signs:
- It Keeps Coming Back: You scrub the mold away, but it reappears in the same spot within a few weeks.
- That Musty Smell Won’t Go Away: A strong, earthy odor that hangs in the air even after cleaning suggests a hidden colony, maybe behind your tiles or drywall.
- It’s a Big Patch: Any mold growth larger than the 10-square-foot guideline is too risky for DIY methods.
- Signs of a Leak: Discolored drywall, peeling paint, or warped baseboards near the shower are dead giveaways of a water issue that’s feeding the mold.
This infographic does a great job of visualizing when a common issue, like mold on shower caulk, needs a simple clean versus a full replacement.
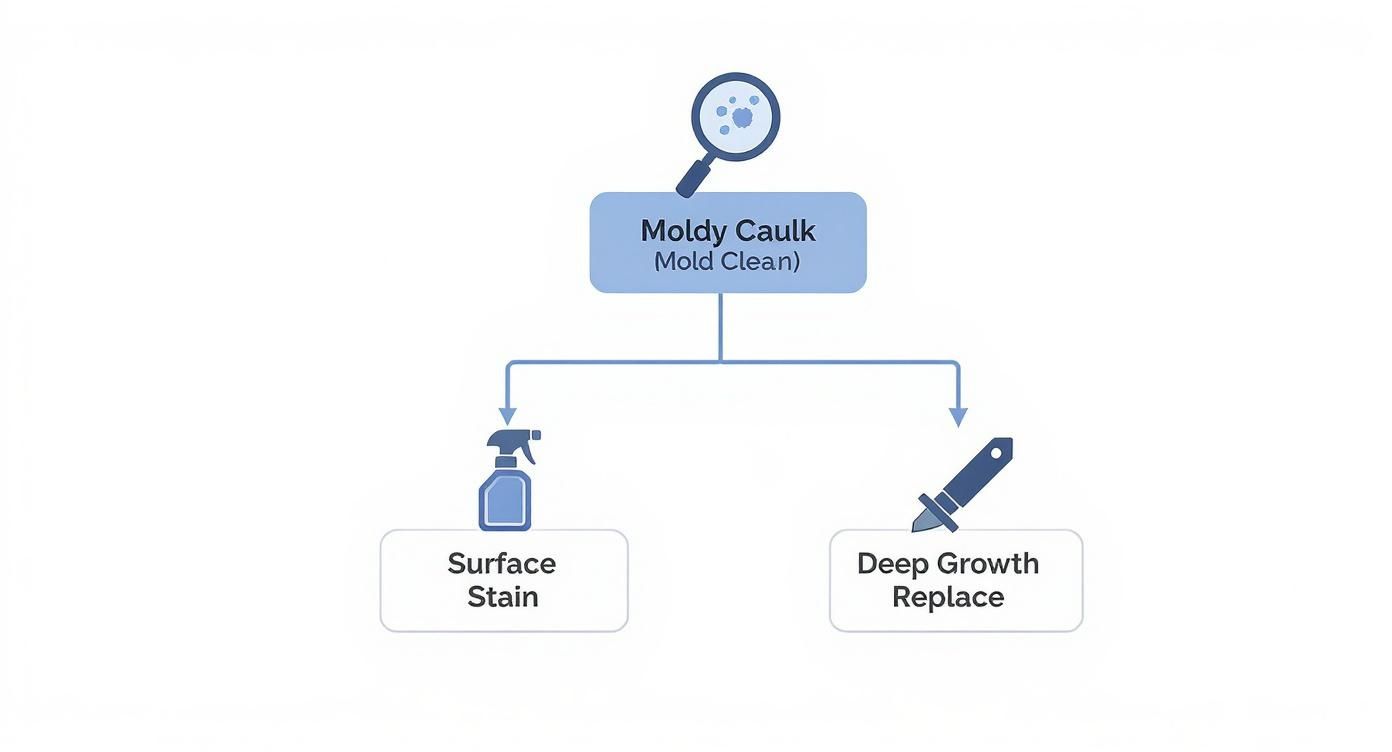
The main takeaway here is that once mold gets deep into porous materials like caulk or grout, you can’t just clean the surface. It demands a much more thorough fix.
DIY vs. Professional Mold Removal When to Make the Call
Figuring out the right move can feel overwhelming. This table breaks down the key factors to help you decide whether this is a project you can handle or if it’s time to bring in a certified team.
| Factor | DIY Approach (Best For) | Professional Remediation (Required When) |
|---|---|---|
| Size of Mold Area | A small, single patch less than 10 sq. ft. | Any area larger than 10 sq. ft. or multiple spots throughout the home. |
| Location of Mold | Surface mold on non-porous surfaces like tile, glass, or a tub. | Mold on drywall, insulation, wood, or deep within grout/caulk. |
| Recurrence | A first-time mold issue caused by simple surface moisture. | Mold that returns repeatedly after you’ve cleaned it. |
| Underlying Cause | Obvious cause, like condensation from a hot shower. | Hidden leaks, plumbing issues, or unknown moisture sources. |
| Associated Odors | No persistent smells after cleaning. | A strong, musty, or earthy odor that lingers. |
| Health Concerns | Household members are healthy with no respiratory issues. | Anyone in the home has asthma, allergies, or a compromised immune system. |
Ultimately, if your situation involves anything more than a small, one-time surface spot, calling a professional is the safest and most effective choice. They have the tools and training to find the root cause and eliminate the problem for good.
The Advantages of Professional Remediation
Hiring a certified team brings a lot more to the table than just elbow grease. Professionals use specialized equipment like moisture meters and infrared cameras to find the hidden water source that’s fueling the mold in the first place—something a homeowner just can’t do.
A professional remediation service doesn’t just clean the mold; they contain the area to prevent cross-contamination, use commercial-grade air scrubbers to capture airborne spores, and ensure the problem is resolved at its source.
This methodical process is critical for protecting your home’s air quality and structure. For homeowners staring down a persistent or widespread infestation, investing in a professional mold remediation service is the only reliable way to ensure the problem is gone for good. It’s about getting the peace of mind that comes from knowing the job was done right.
Keeping Your Shower Mold-Free for the Long Term
Getting rid of a black mold problem feels like a huge win. But the real victory? Making sure it never comes back. Preventing mold isn’t a one-and-done task; it’s about shifting your habits to create an environment where mold just can’t get a foothold.
The good news is that you don’t have to turn your life upside down to do it. A few simple, consistent routines can make all the difference. The entire strategy boils down to one thing: controlling moisture and humidity. It’s about turning your bathroom from a damp incubator into a clean, dry space where mold spores have nowhere to grow.
Building a Mold-Resistant Routine
Your best defense against mold is a proactive one. It’s the small, consistent actions that make the biggest difference in keeping shower humidity in check.
Let’s start with the exhaust fan. It’s not just there to clear steam—it’s your number-one tool for yanking moisture out of the air. Make it a hard-and-fast rule: the fan runs during your shower and for at least 15–20 minutes after you get out.
Another incredibly effective (and cheap) tool is a basic squeegee. After every shower, take 30 seconds to wipe down the walls, glass door, and floor. This simple act removes the standing water that mold needs to survive and will save you from major headaches down the road.
Smart Upgrades and Maintenance Checks
Beyond your daily habits, a few minor tweaks and regular check-ins can seriously fortify your bathroom against mold. These little steps help you stay ahead of moisture before it becomes a problem.
- Hunt Down Leaks: That tiny, slow drip from your showerhead isn’t just annoying; it’s a constant source of moisture. Regularly check all your fittings and fix any leaks immediately, no matter how small they seem.
- Wash Your Shower Curtain: If you use a curtain, toss it in the wash regularly. Even better, swap it for a quality mold-resistant liner that’s easier to wipe down and replace when needed.
- Boost Air Circulation: Don’t leave damp towels or bathmats bunched up on the floor. That’s just asking for mildew. Hang them where they can dry out completely.
Creating a dry environment is the cornerstone of mold prevention. Mold spores are always present in the air, but they only become a problem when they find a damp surface to land on and colonize.
Health agencies all over the world agree that the most effective black mold strategies involve thorough drying and improving air circulation. With climate shifts leading to higher humidity in many areas, these preventative steps are more critical than ever. For a deeper dive into how environmental factors play a role, you can explore these mold statistics.
If your home struggles with persistent humidity—especially in bathrooms with poor ventilation—managing the air itself becomes crucial. Looking into solutions for basement dehumidification can offer great insights into controlling moisture throughout your entire home, not just the shower. Stick with these strategies, and you can finally win the long-term war against shower mold.
Frequently Asked Questions About Shower Mold
Even after you’ve rolled up your sleeves and are ready to tackle the job, a few nagging questions can pop up. Getting the right answers is the difference between a quick fix and a lasting solution. Here are some of the most common things homeowners ask us when they’re staring down mold in their shower.
Q: Is it black mold or just mildew?
A: It’s easy to get these two confused. Mildew is a surface fungus, usually gray or white and powdery, that’s easy to scrub off. Black mold (Stachybotrys chartarum) is often slimy, dark green or black, and sends roots deep into porous materials like grout and caulk, making it much harder to remove completely.
Q: Can I just paint over the mold on my bathroom ceiling?
A: Absolutely not. Painting over mold traps moisture behind the paint, giving the mold a dark, damp place to thrive. The mold will eventually eat through the new paint and reappear, often worse than before. You must kill and remove all mold, fix the moisture issue, and then you can repaint.
Q: Are natural cleaners like vinegar as good as bleach?
A: For smooth, non-porous surfaces like glass or tile, white vinegar can be very effective due to its acidity. However, on porous surfaces like grout, bleach is often a poor choice because its water content can feed the mold’s roots while the chlorine stays on the surface. A commercial mold remover is typically the most reliable option for tough jobs.
Q: Why does mold keep coming back on my shower caulk?
A: If mold reappears on caulk after cleaning, it has likely grown into or behind the silicone where cleaners can’t reach. The only permanent fix is to cut out the old caulk, thoroughly clean and dry the joint, and apply a fresh bead of 100% silicone, mold-resistant caulk.
Q: How much does professional mold removal cost in the Los Angeles area?
A: The cost varies widely based on the size of the affected area, the location of the mold (e.g., surface vs. behind walls), and the extent of the underlying moisture problem. A small, contained job might cost a few hundred dollars, while extensive remediation can run into the thousands. We provide free, no-obligation inspections to give you an accurate quote.
Q: What should I do if I find mold behind my shower tiles?
A: If you suspect mold is growing behind your shower tiles, you should stop using the shower and contact a licensed restoration company immediately. This indicates a significant moisture problem that requires professional equipment to assess and remediate safely without spreading spores to other parts of your home.
If you’re stuck in a cycle of cleaning and re-cleaning, or if you think a hidden leak might be the real culprit, don’t let the problem get bigger. The expert team at Onsite Pro Restoration provides professional mold inspection and remediation services across the Los Angeles area. We’ll pinpoint the source, eliminate the mold for good, and help you keep your home safe.