Finding a water leak inside your walls usually starts with a simple observation—something just doesn't look right. For homeowners across Los Angeles, the best way to catch a problem early is by training your eye to spot subtle discoloration, peeling paint, or changes in your drywall's texture. These are often the very first warnings that moisture is hiding where it shouldn’t be. Learning how to detect water leaks in walls is a critical skill for protecting your property's value.
Don't wait for a small stain to become a big problem. If you suspect a hidden leak in your Los Angeles area home, call Onsite Pro Restoration now for a free, no-obligation assessment.
The Telltale Signs of a Hidden Water Leak
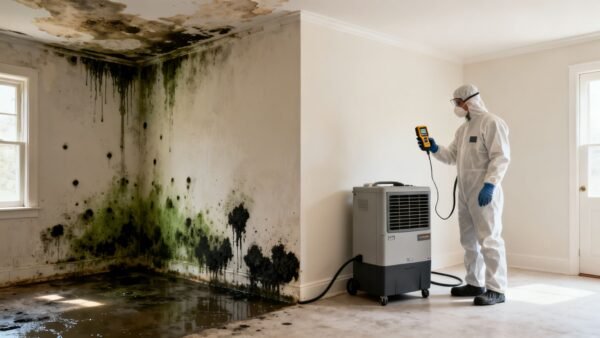
A hidden water leak is a quiet disaster in the making, capable of causing tremendous damage before you even know it's there. For homeowners across Los Angeles, where property values are high and many homes have character (and older plumbing), knowing what to look for is your first and best defense. A faint stain appearing in your North Hollywood living room or a small patch of bubbling paint in a Sherman Oaks bedroom isn't just a cosmetic problem—it's a distress call coming from inside your walls.
These early signs are your golden opportunity to act before a few drips spiral into major structural repairs and a serious mold problem. The longer moisture is left to sit, the more it weakens drywall, soaks insulation, and rots away the wooden studs holding your home together.
Visual Clues You Cannot Ignore
Your eyes are your most powerful leak-detection tool. We find that most homeowners first suspect an issue when they see something that just feels "off." The key is to investigate these signs the moment you see them, not paint over them and hope for the best.
Keep an eye out for these common visual red flags:
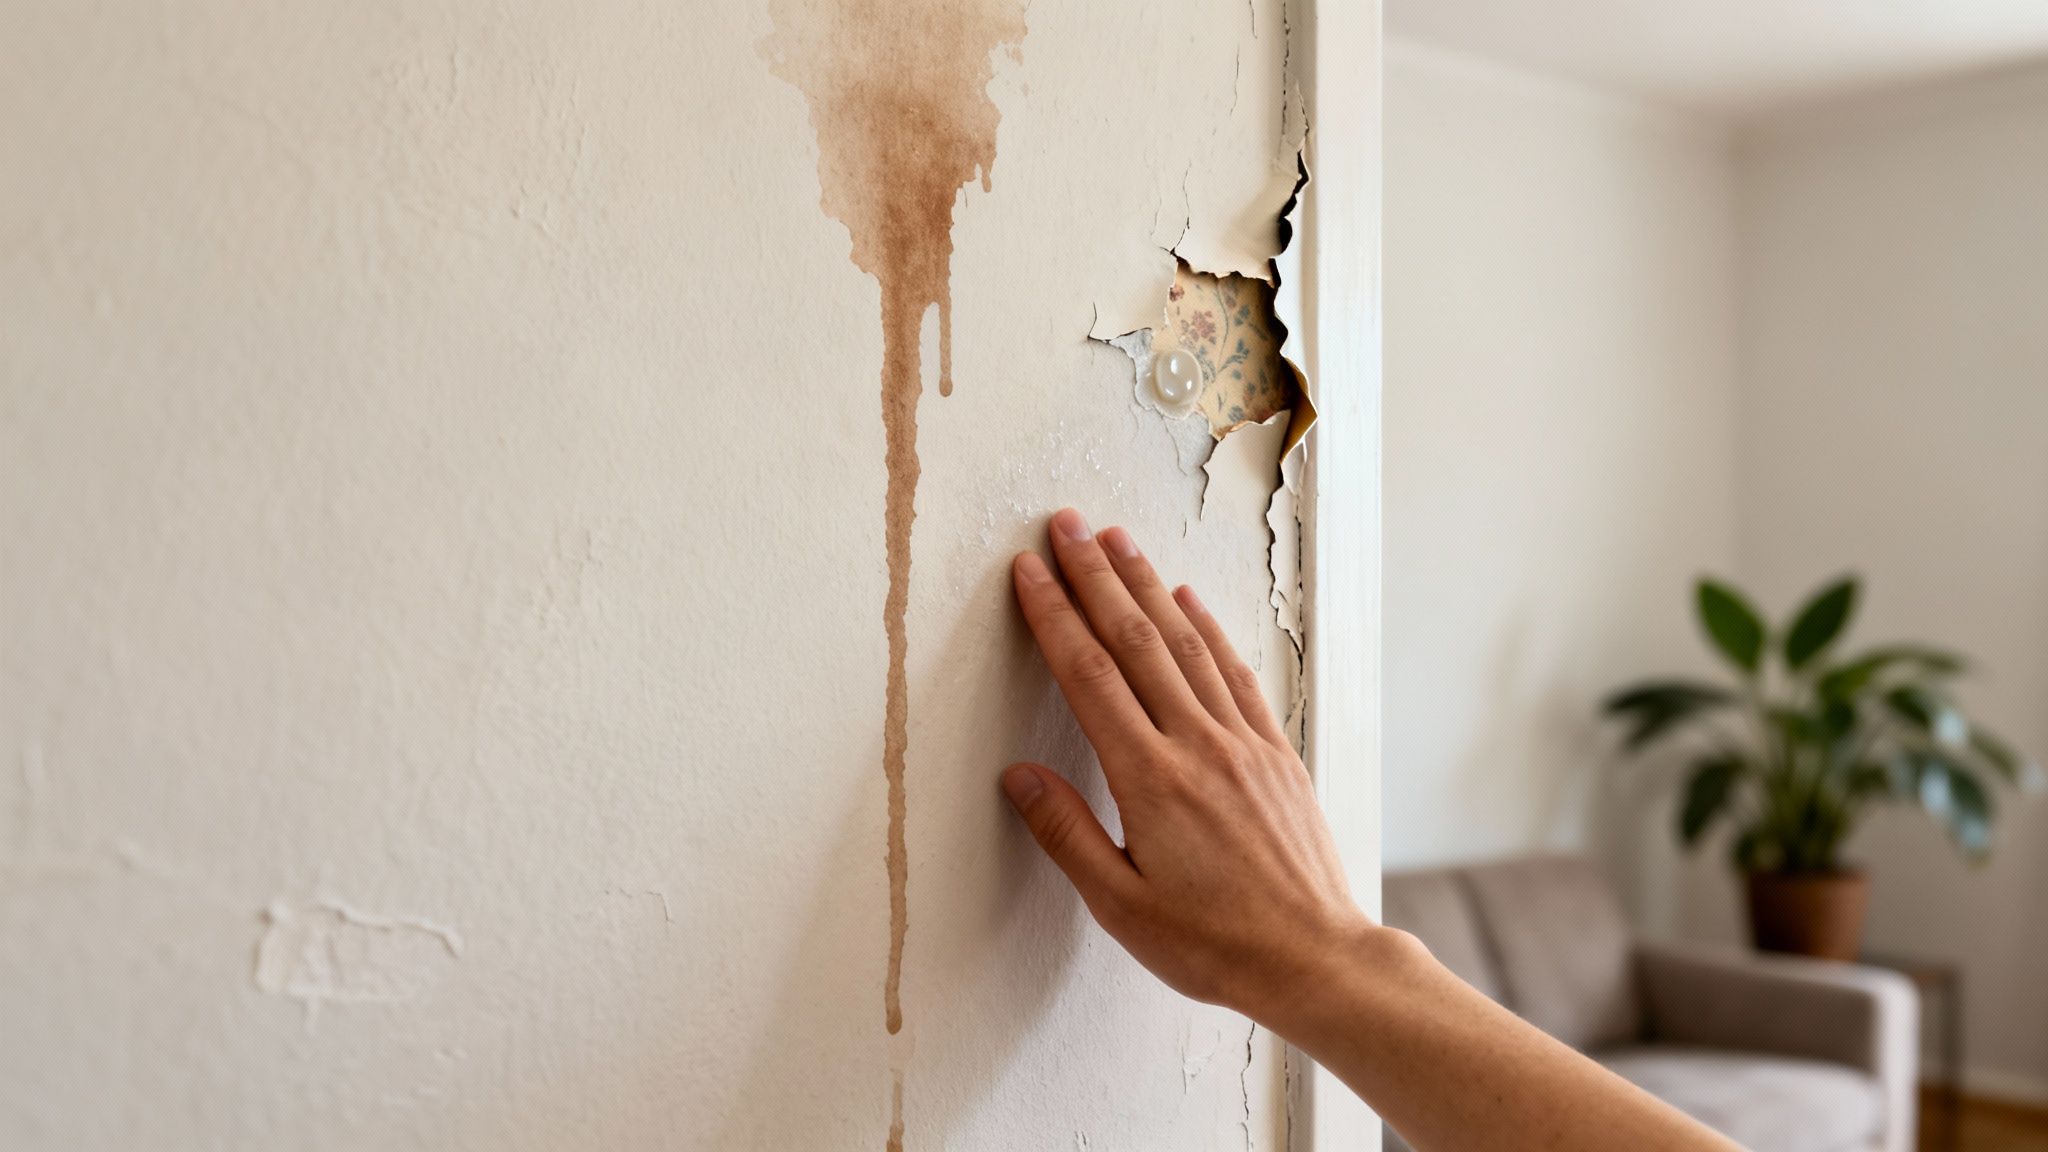
- Discoloration and Stains: These typically show up as yellowish-brown blotches or sprawling "water maps" on ceilings and walls. In older Glendale homes with original copper pipes, these stains are often a dead giveaway for a slow, persistent pinhole leak that’s been saturating the drywall for weeks.
- Changes in Surface Texture: Be on the lookout for paint that's bubbling, cracking, or flaking off. If you have wallpaper, it might start peeling at the seams or developing strange blisters underneath. This happens as moisture seeps in from behind, destroying the adhesive and saturating the material itself.
- Warped or Swollen Drywall: When drywall gets wet, it swells up and loses its strength. You might notice a wall that looks puffy or bowed, or see baseboards that seem to be pulling away. This is a very serious sign that the structural integrity of the material is compromised.
Professional Insight: Never write off a small water stain, even if it feels completely dry. The leak causing it could be intermittent—wetting the area and then drying out over and over. This wet-dry cycle is incredibly destructive to building materials and creates the perfect environment for mold to take hold.
Tactile and Structural Warnings
Beyond what you can see, what you can feel is just as important. A quick hands-on check can often confirm your suspicions and give you a better idea of how serious the moisture problem is.
Run your hand over the area you're concerned about. Does it feel unusually cool or damp? That coolness is often from the moisture inside the drywall evaporating, making it noticeably colder than the dry areas around it. That's a huge warning sign.
Next, gently press on the stained or discolored spot. If the drywall feels soft, spongy, or gives way easily, it means the gypsum core is saturated and breaking down. This is a clear indicator of significant water intrusion. To learn more about what these and other indicators mean, check out our detailed guide on the various signs of water damage.
Finally, listen to what the rest of your home is telling you. Pay close attention to structural shifts like soft spots underfoot or a toilet that feels like it's sinking, because these often point to a much larger, hidden water issue. Catching these signs early is the absolute key to stopping a small leak from turning into a full-blown restoration nightmare.
How to Detect Water Leaks in Walls Using Your Senses
Before you even think about grabbing a tool, trust the best detectors you already own: your eyes, ears, and nose. Small changes in your home’s environment are often the first sign of a big problem. Learning how to detect water leaks in walls almost always starts by just paying closer attention.
Many homeowners in Los Angeles, especially in neighborhoods with older homes like North Hollywood or Sherman Oaks, get used to the little quirks of their property. But a subtle, persistent change is something you can't afford to ignore. These senses are your first line of defense, and they're surprisingly good at spotting trouble before it turns into a disaster.
The Visual Inspection Checklist
Start by taking a slow, deliberate walk through the room where you suspect a problem. Don't just glance around—really look. Over time, even the slowest leaks leave behind a trail of evidence that’s easy to spot if you know what you’re looking for.
Here’s a practical checklist to guide your eyes:
- Look for Yellowish or Brown Stains: These aren't just water marks. They’re mineral deposits left behind as moisture evaporates, a classic sign that water has been there for a while.
- Identify Powdery White Residue: On any masonry like brick or concrete, you might see a chalky white substance. This is efflorescence, and it happens when water seeps through, dissolves natural salts, and deposits them on the surface as it dries out.
- Check for Surface Deformities: Scan the walls for any bubbling paint, peeling wallpaper, or drywall that looks swollen and feels soft. These are dead giveaways that moisture is wreaking havoc from behind the surface.
Imagine finding a strange damp spot on the living room wall that seems to get bigger each day. It’s a bigger issue than you think. A US government report on water loss highlights the scale of infrastructure challenges, and many of these issues trace back to homes. In a place like LA County, that little spot can quickly escalate into a repair job costing over $10,000. This is why catching it early with a visual check is so critical.
Listening for Hidden Leaks
Once you’ve done a visual sweep, it’s time to use your ears. Water moving where it shouldn't creates faint sounds that you'll only hear when the house is quiet. The best time for this is late at night or first thing in the morning.
Press your ear directly against the wall where you suspect a leak. Listen carefully for:
- Faint Dripping: A steady drip…drip…drip is the most obvious sound. It’s often from a leak hitting a stud or another surface inside the wall.
- Hissing or Whooshing: A constant, low hissing sound can point to a leak in a pressurized supply line, where water is spraying through a tiny crack or a bad joint.
Trusting Your Nose to Find Moisture
Your sense of smell is a powerful tool for detecting the side effects of a water leak—specifically, mold and mildew. These fungi release microbial volatile organic compounds (MVOCs), which have a very distinct, unpleasant odor.
Expert Tip: If you walk into a room and get hit with a persistent earthy, musty smell—like damp soil or a wet basement—you almost certainly have a moisture problem. That odor is the signature of mold growth, even if you can’t see a single spot.
That musty smell is your cue to dig deeper. If the odor is stronger near one particular wall, that’s a massive red flag. It often means that while the leak itself might be small, it has given mold plenty of time to grow. To understand the connection better, check out our guide on how to check for mold in walls.
This telltale scent is also how you can distinguish a real leak from simple condensation, which is a common issue in coastal homes from Santa Monica to Malibu. Condensation usually won’t produce such a strong, persistent odor unless it's been ignored for a very, very long time.
Using Practical Tools to Confirm a Leak
When your senses start screaming that something’s wrong, it’s time to move from suspicion to proof. A musty smell or a faint stain are strong clues, but you need data to understand what you’re up against. A few simple tools can help you confirm the presence of moisture inside a wall, giving you the hard evidence needed to make the right call.
This is where you graduate from guesswork to measurement. For any LA homeowner, having these tools on hand can be the difference between a quick fix and a full-blown restoration project.
Suspect you have a hidden leak but need proof? Call (818) 336‑1800 now. Our team uses advanced tools to pinpoint moisture and give you a clear path forward.
Uncovering Hidden Water with a Moisture Meter
A moisture meter is easily one of the most valuable tools a property owner can have. This little handheld device tells you the moisture content percentage inside materials like drywall, wood, and plaster. It’s a non-invasive way to get a clear, unbiased picture of what’s happening behind your walls.
You’ll generally find two types:
- Pin-Type Meters: These have two small metal prongs that you gently press into the wall's surface. They give you a very precise reading for that specific spot.
- Pinless Meters: These use an electromagnetic sensor. You just press the pad flat against the wall, and it scans a larger area. They're great for quickly checking different zones without leaving a single mark.
To get an accurate sense of the problem, start by testing a section of the wall you know is dry. This gives you a baseline. Then, move to the area you suspect is wet. For drywall, a normal, healthy reading is typically between 5% and 12%. Anything above that should get your attention.
Critical Alert: A moisture reading of 17% or higher in drywall is a major red flag. At this level, the material is saturated enough to be compromised, and it creates the perfect conditions for mold to start growing in as little as 24 to 48 hours.
Understanding these numbers is key. For a more detailed breakdown of what different readings mean for various building materials, check out our complete guide on how to read moisture meter readings.
The Water Meter Test: Your Secret Weapon for System-Wide Leaks
What if you're sure there's a leak but can't find a single wet spot? The problem could be anywhere in your plumbing system—even underground or inside a concrete slab. The water meter test is a foolproof way to confirm if you have an active leak somewhere on your property.
Here’s how you do it:
- Turn Off All Water: Make absolutely sure every faucet, shower, toilet, and water-using appliance (like your washing machine and dishwasher) is off. No water should be running anywhere.
- Find Your Water Meter: Head outside to the curb or check your utility area to find your home's main water meter.
- Look for the Leak Indicator: Most meters have a small triangle, dial, or wheel that only moves when water is flowing. If that little indicator is spinning, even slowly, you have an active leak.
- Do the Reading Test: If your meter doesn’t have an indicator, just jot down the numbers on the dial. Don't use any water for an hour or two, then go back and check again. If the numbers have gone up, you've confirmed a leak.
This test is incredibly effective for catching those slow, sneaky leaks that don't leave obvious signs. A tiny leak in the main line under your Studio City lawn won’t stain your living room wall, but it will quietly drive up your water bill and could eventually threaten your home's foundation.
This simple flow chart shows how your senses are the perfect starting point, guiding you from a strange smell or sound to a visual inspection.
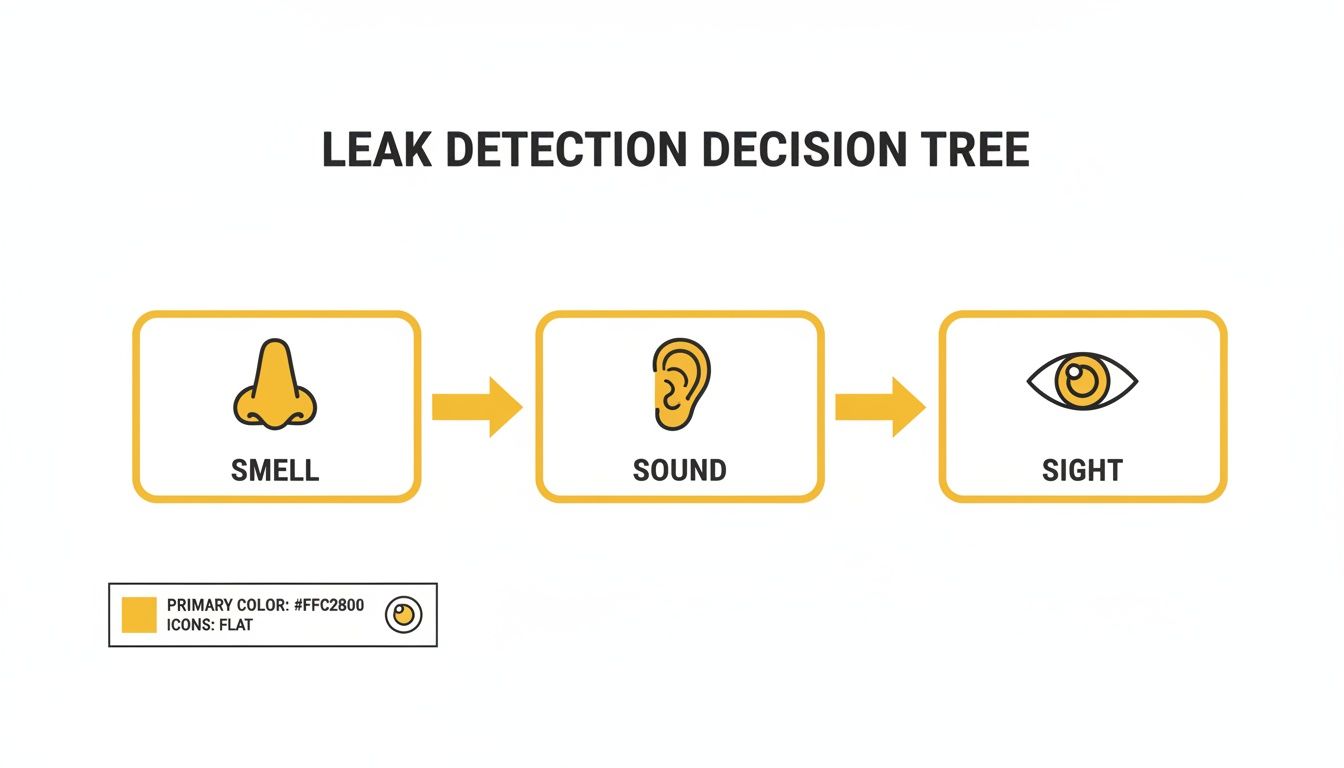
By following these steps, you can methodically narrow down the problem before bringing in tools to get hard proof.
Comparing DIY vs Professional Leak Detection Methods
While DIY tools are excellent for initial confirmation, professional restoration companies bring a whole arsenal of advanced technology to the table. This allows us to pinpoint the exact source and extent of water damage with incredible precision, often without cutting a single hole in your wall.
| Detection Method | Best For | Accuracy Level | Typical Cost |
|---|---|---|---|
| Moisture Meter (DIY) | Confirming wet spots on surfaces, checking drywall saturation | Good | $40 – $100 |
| Water Meter Test (DIY) | Identifying if any leak exists anywhere in the plumbing system | Excellent | Free |
| Infrared (IR) Camera | Quickly scanning large areas for temperature differences caused by moisture | Excellent | $500+ (Pro) |
| Acoustic Listening Devices | Hearing pressurized leaks in pipes behind walls or under slabs | High | Pro Equipment |
| Tracer Gas Testing | Finding tiny, non-pressurized leaks in plumbing or drain lines | Very High | Pro Service |
Ultimately, DIY methods are your first line of defense. They empower you to act fast and gather crucial information. When the problem is elusive or the stakes are high, professional tools take over to ensure nothing gets missed.
When to Call a Professional for Advanced Leak Detection
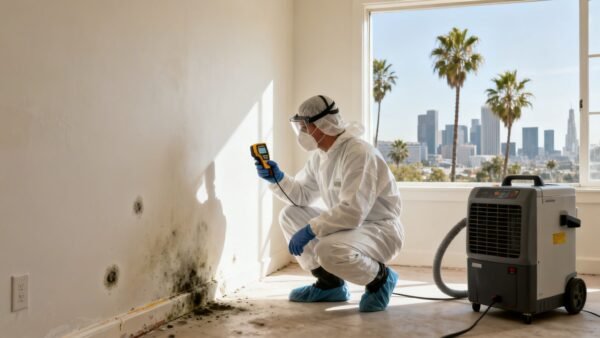
While DIY tools are great for confirming what you already suspect, some leaks are just too sneaky for a moisture meter alone. There’s a point where you’ve done all you can, and pushing forward without an expert risks turning a small problem into a massive, expensive one. This is when you call in an IICRC-certified professional who can literally see through your walls without making a single cut.

If you've run the water meter test and know for a fact you have a leak but can't find its source, it’s time to stop guessing. The same goes for widespread damage that’s showing up in multiple areas. Pros use non-invasive technology to pinpoint a leak's origin with surgical precision, saving you from the destructive game of randomly tearing open your walls.
Seeing the Unseen with Thermal Imaging
One of the most powerful tools in our arsenal is the thermal imaging camera. It doesn't actually "see" moisture. Instead, it detects tiny differences in surface temperature. Because of evaporative cooling, wet materials like drywall, insulation, and wood studs are almost always colder than the dry materials right next to them.
A thermal camera turns this temperature data into a color-coded map. When we see a dark blue or purple bloom spreading across an otherwise yellow and orange wall, that’s a huge red flag. It instantly shows us the exact boundaries of the hidden water, which is invaluable for tracing a leak from a second-story bathroom down into a first-floor ceiling in a Beverly Hills home or mapping out a serious issue behind the stucco of a Burbank property.
Listening for Leaks with Acoustic Detectors
Sometimes, a leak is buried so deep—under a concrete slab or behind a thick wall—that even thermal imaging can't reach it. For these jobs, we turn to acoustic listening devices. These are essentially super-sensitive microphones that can pick up the distinct sound frequencies of water escaping a pressurized pipe.
A skilled technician will use this gear to "listen" along the path of a suspected pipe. The hiss or whoosh of the leak gets loudest and clearest right over the source, letting us mark the exact spot for the plumber. This tech is an absolute game-changer for finding slab leaks, a notoriously tricky problem in many San Fernando Valley homes, without having to jackhammer the entire foundation.
Professional Insight: The one-two punch of thermal and acoustic detection is the gold standard for non-invasive leak finding. We can often narrow down the location of a pinhole leak inside a wall to within a few inches, making the repair process as targeted and minimally disruptive as possible.
When the usual methods fall short, pros can even deploy advanced techniques like drone roofing inspection for hard-to-reach areas, ensuring no potential entry point is missed. These tools aren't just about finding the leak; they're about understanding its full scope. A professional assessment gives you the complete picture you need for effective repairs and a smooth insurance claim.
You can learn more about the role of a certified restoration pro and how they manage the entire process. Bringing in an expert early on saves you time, money, and protects the structural integrity of your property in the long run.
What to Do Immediately After Finding a Water Leak
That moment you confirm there's a leak inside a wall is pure panic. You see the stain, feel the dampness, and your mind starts racing. What now?
The truth is, the steps you take in the next few minutes are absolutely critical. They can mean the difference between a manageable repair and a full-blown structural and financial nightmare. A calm, clear plan is your best defense.
Safety First: Shut Off the Water and Power
Before you do anything else, your priority has to be safety. That means stopping the water at its source and getting rid of any electrical hazards right away.
- Shut Off the Main Water Supply: Find your home's main water shutoff valve and turn it off completely. This stops more water from feeding the leak and making the damage worse.
- Kill the Power to the Area: Water and electricity are a deadly mix. If the leak is anywhere near outlets, switches, or appliances, go straight to your breaker box and shut off power to that entire section of the house. Don't even think about touching an electrical device if you're standing in water.
Crucial Safety Warning: If you walk into a room and see water pooling on the floor or dripping from a ceiling light fixture, do not enter. Stay out and immediately call a professional restoration company and a licensed electrician. It's not worth the risk.
Document Everything for Your Insurance Claim
Once the immediate danger is handled, grab your phone. Before you move a single thing or start wiping anything down, you need to document the damage. This evidence is the foundation of your insurance claim.
Take wide-angle photos and videos of the entire affected area. Then, get close-ups of the wet drywall, the bubbling paint, stained ceilings, and any visible water. Make sure your shots are clear and well-lit. This creates an undeniable record of the property's condition right after the incident happened, which will be invaluable when you file your claim.
Start Emergency Containment and Cleanup
With good photos and videos saved, you can shift to damage control while you wait for help to arrive. The goal here is simple: stop the water from spreading.
Use old towels, blankets, or buckets to catch any active drips. If you have a wet/dry vac, you can carefully start removing standing water from floors and other hard surfaces. For homeowners in the Los Angeles area dealing with a sudden pipe burst, our team can provide immediate emergency water cleanup to get the water out fast and prevent secondary damage like mold from taking hold.
Call a Professional Restoration Company
Let me be clear: this is not a DIY project. A professional, IICRC-certified restoration company has the training and, just as importantly, the specialized equipment to handle this correctly. We don’t just use fans; we use high-powered air movers, commercial-grade dehumidifiers, and precise moisture meters to find and eliminate every last bit of hidden moisture from your walls, floors, and framing.
A proper restoration job always follows a proven process:
- Assessment and Containment: First, we find the exact source and set up barriers to prevent cross-contamination.
- Water Extraction: All standing water is removed with powerful pumps and vacuums.
- Structural Drying: This is the critical part where specialized equipment is used to dry out the building materials themselves.
- Repairs and Restoration: Finally, we rebuild and restore the damaged areas to their pre-loss condition.
Working with a company that deals directly with major insurance carriers can take a massive weight off your shoulders. We handle the documentation and the communication for property owners across Los Angeles County, letting you focus on one thing: getting your life back to normal.
Frequently Asked Questions About Wall Leaks
Finding a leak in your wall opens up a flood of questions. We get it. As a restoration team working across Los Angeles, we’ve heard just about everything from worried homeowners and property managers. Here are some straight-up, no-nonsense answers to the questions we hear most often.
Can a Small Water Stain on My Wall Fix Itself if It Dries Out?
This is one of the most dangerous myths we come across, and the answer is a hard no. A water stain, no matter how small or dry it feels, is a permanent red flag telling you that moisture got in. It's the scar left behind.
Even if the surface feels bone dry, the underlying leak is almost certainly still there. Water has soaked into your drywall, insulation, and wood studs, creating the perfect hidden environment for mold. That mold can start growing in just 24-48 hours. The stain you see is just the leftover mineral deposit. You must always track down the source of any water stain, period.
How Much Does It Cost to Fix a Water Leak in a Wall in Los Angeles?
There’s no flat rate for this kind of work in the LA area—the cost to fix a leak inside a wall can vary wildly. The final price tag really boils down to a few critical factors:
- Location, Location, Location: Is the leak from an easy-to-reach pipe under the kitchen sink? That’s going to be much cheaper to fix than a leak buried behind a fully tiled shower wall or under a concrete slab. Accessibility is everything.
- The Extent of the Damage: Are we talking about a small damp spot on the drywall? Or has a slow leak been rotting the wall studs for months and created a serious mold problem? The more damage there is to undo, the higher the restoration cost.
- How Complex the Fix Is: A simple plumbing repair might only run a few hundred dollars. But if the job requires opening up the wall, bringing in professional drying equipment, remediating mold, and then putting it all back together with new drywall and paint, the costs can easily range from $1,500 to over $10,000.
Our Approach: We never guess. We start every job with a free, on-site assessment. This lets us see exactly what’s going on and give you a detailed, transparent estimate before we even think about starting the work.
Will My Homeowners Insurance Cover Damage from a Hidden Water Leak?
This is the big one, and the answer is almost always: it depends on how the leak started. Homeowners insurance policies are designed to cover damage from water that is "sudden and accidental." The classic example is a supply line that bursts inside a wall, causing immediate and obvious damage. That’s usually covered.
Where you run into trouble is with slow, gradual leaks caused by a lack of maintenance. If a leaky fitting has been dripping for months and was ignored, your insurance company will likely deny the claim, citing neglect. This is exactly why learning how to detect water leaks in walls and acting fast is so important—it protects your property and strengthens your claim.
How Do I Know if a Musty Smell Is from a Wall Leak?
Trust your nose. It’s one of the best leak detectors you have. That persistent musty, earthy smell is the number one sign of hidden mold or mildew, and they only grow where there’s excess moisture.
If you notice the smell is stronger in one room or near a specific wall—especially a "wet wall" in a bathroom, kitchen, or laundry room—it’s a very strong indicator of a hidden leak. Often, that smell is the very first clue you’ll get, long before you ever see a stain. If your nose is telling you something’s off, it's the perfect time to call in a professional to investigate.
Don't let a hidden water leak threaten your home’s structure and value. If you even suspect a problem in your walls, the expert team at Onsite Pro Restoration is on call 24/7. We’ll provide a free, no-obligation assessment to find the source and give you a clear plan to make it right.