Discovering a burst pipe in your Sherman Oaks home or a roof leak from a recent storm in your Glendale business is overwhelming. The immediate damage is bad enough, but the complex insurance claim process that follows can feel even more daunting. Navigating the paperwork, communicating with adjusters, and understanding your policy details requires precision and diligence. Any missteps in this critical period can lead to significant delays, undervalued settlements, or even outright denials of your claim, leaving you with substantial out-of-pocket expenses for repairs.
This guide provides an actionable checklist of water damage insurance claim tips for Los Angeles homeowners and property managers. Think of this as your roadmap to confidently manage the process from the moment you discover the damage until the final settlement is in your hands. We will cover everything from the crucial first steps of documenting evidence to the nuances of negotiating with your insurance company and understanding the difference between mitigation and full restoration.
Following this expert advice can be the difference between a swift, successful claim and a prolonged, frustrating battle. By mastering these essential steps, you can protect your investment, maximize your rightful payout, and ensure your property is restored correctly and efficiently. Let's dive into the proven strategies that will empower you to take control of your water damage claim and achieve the best possible outcome.
1. Document Everything Immediately with Photos and Video
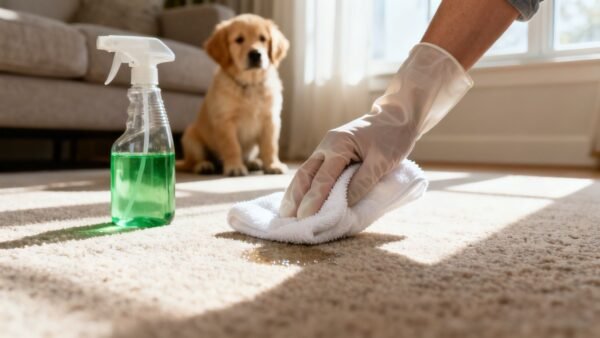
Before you move a single piece of furniture or mop up a drop of water, your first and most critical action is to become a meticulous documentarian. The moments immediately following the discovery of water damage are a one-time opportunity to capture the scene in its most authentic state. This initial visual evidence forms the bedrock of your water damage insurance claim, leaving no room for ambiguity when the adjuster assesses the scope of your loss.
Create an Undeniable Visual Record
Your smartphone is your most powerful tool in this initial phase. Create a comprehensive visual library of the damage before any cleanup or restoration begins. This documentation serves as irrefutable proof of the initial extent of the damage, preventing potential disputes with your insurer about what was affected.
A property manager in Glendale, faced with a flooded commercial office space, used their phone to film a continuous video walkthrough. They narrated the tour, pointing out submerged computer equipment, waterlogged inventory, and damage to the HVAC system. This single video expedited a claim approval of over $150,000 because it gave the adjuster a clear, unfiltered view of the total devastation.
Actionable Documentation Tips
To ensure your evidence is as effective as possible, follow these specific steps. This is a crucial first step in any list of water damage insurance claim tips.
- Go Wide and Get Close: Take wide-angle shots of each affected room to establish the overall scene. Follow up with detailed, close-up photos of specific damage: water lines on drywall, warped floorboards, ruined electronics, and soaked furniture.
- Timestamp Everything: Enable the timestamp and location-tagging features in your phone’s camera settings. This embeds crucial metadata into each file, proving when and where the damage was recorded.
- Show Contrast: If possible, photograph a damaged item (like a swollen cabinet door) next to an identical, undamaged one. This provides a clear visual comparison for the adjuster to understand the extent of the loss.
- Document the Source: Clearly photograph the cause of the water intrusion, whether it’s a burst pipe under the sink in a Sherman Oaks kitchen or a leak from an overflowing appliance in a Santa Monica apartment. This helps establish the cause of loss, which is critical for your claim.
- Create Immediate Backups: Don't risk losing this vital evidence. Immediately upload your photos and videos to a cloud service like Google Photos or iCloud. For an extra layer of security, email the files to yourself and your restoration company.
By creating this detailed visual log, you provide your insurance company with the clear, objective information needed to process your claim efficiently and fairly. This proactive step helps a professional restoration team, which will also document moisture levels, understand the full picture. You can learn more about how to read moisture meter readings to better comprehend the data they collect.
2. File Your Claim Within the Required Timeframe
While documenting damage is your first physical action, your first administrative action is just as critical: notifying your insurance provider. Insurance policies are legal contracts with strict deadlines. Failing to report the loss promptly can jeopardize your entire claim, regardless of its validity. This step officially starts the claims process and preserves your right to coverage under your policy terms.
Preserve Your Rights with Prompt Notification
Every insurance policy contains a "Duties After Loss" clause, which outlines your responsibilities. One of the most important duties is to provide prompt notice of the loss. Waiting too long gives the insurer grounds to argue that the delay worsened the damage or prevented them from properly investigating the incident. This can lead to a denial based on a technicality, not the merits of your claim.
A property manager in Burbank discovered a significant roof leak in a commercial building after a storm. Adhering to the policy's strict 24-hour reporting requirement, they filed the claim immediately. The insurer authorized emergency water extraction services the same day, preventing extensive secondary damage like mold growth and ultimately covering the full cost of repairs.
Actionable Notification Tips
Filing your claim quickly and correctly is a foundational part of any list of water damage insurance claim tips. Follow these steps to ensure you meet your policy obligations.
- Report Within 24-48 Hours: Even if your policy allows more time, make it a rule to contact your insurance agent or the company's claims hotline within one to two days of discovering the water damage.
- Have Your Policy Number Ready: Before you call, locate your policy number. This will expedite the conversation and ensure the claim is logged against the correct account.
- Document Your Conversation: During the call, take detailed notes. Record the date, time, the name of the agent you spoke with, and the claim or reference number they provide. Note any verbal instructions or approvals given.
- Follow Up in Writing: After your phone call, send a follow-up email to your agent summarizing the conversation. This creates a written, timestamped record of your notification.
- Clarify Your Policy's Timeline: During the initial call, specifically ask the agent to clarify the deadlines for submitting paperwork and proof of loss. Understand the difference between the 'date of occurrence' (when the pipe burst) and the 'date of discovery' (when you found the water).
- Don't Wait for Estimates: You do not need a full damage assessment or contractor estimates before filing your initial claim. The purpose of the first contact is simply to notify the insurer that a loss has occurred.
3. Review Your Policy Coverage Limits and Exclusions Before Filing
Before you even pick up the phone to call your insurance company, your most strategic move is to become an expert on your own policy. Many property owners mistakenly assume that "water damage" is a blanket term that covers any and all incidents. In reality, insurance policies are highly specific documents that differentiate between types of water damage, setting strict limits and exclusions that can make or break your claim.
Understand the Rules Before You Play the Game
Your insurance policy is the rulebook for your claim. Filing a claim without understanding its contents is like trying to play a game without knowing how to score. Taking the time to review your coverage details upfront allows you to frame your claim accurately, set realistic expectations, and avoid the shock of a partial or full denial based on a technicality you overlooked.
A Los Angeles homeowner experienced significant damage after a sewer line backed up into their basement. They filed a claim for $40,000, assuming it was a standard water damage event. They were devastated to discover their policy had a specific sub-limit of only $5,000 for sewer backup damage. Had they reviewed the policy first, they would have known this limitation and could have better prepared for the financial shortfall.
Actionable Policy Review Tips
To arm yourself with the necessary knowledge, conduct a thorough review of your policy documents. This proactive step is one of the most vital water damage insurance claim tips you can follow.
- Read the Full Policy, Not Just the Summary: Your policy declarations page provides an overview, but the full policy document contains the critical definitions, exclusions, and conditions. Locate the sections on "water damage," "flooding," and "exclusions."
- Identify Your Deductible: Note your deductible amount. This is the out-of-pocket sum you must pay before your insurance coverage begins. For a Sherman Oaks commercial property with an $8,000 claim and a $1,000 deductible, the final payout would be $7,000.
- Look for Sub-Limits: Policies often place lower coverage limits on specific types of damage, such as mold remediation or sewer backup. Identify these sub-limits to understand the maximum payout for those events.
- Distinguish "Flood" vs. "Water Damage": Standard policies cover sudden and accidental internal water damage (like a burst pipe) but exclude "flood" damage from rising external ground water. Flood insurance is a separate policy.
- Check for Endorsements: Review your policy for optional add-ons, known as endorsements, that you may have purchased. Common ones include coverage for sewer and water backup, which are typically excluded from a base policy.
- Clarify Before Filing: If any language is confusing, call your insurance agent (not the claims department) to ask for clarification. Asking your agent for an explanation is not the same as initiating a claim.
By thoroughly understanding your coverage, you can navigate the claims process from a position of strength and knowledge. You can learn more about what homeowners insurance typically covers for water damage to better prepare for your conversation with the insurer.
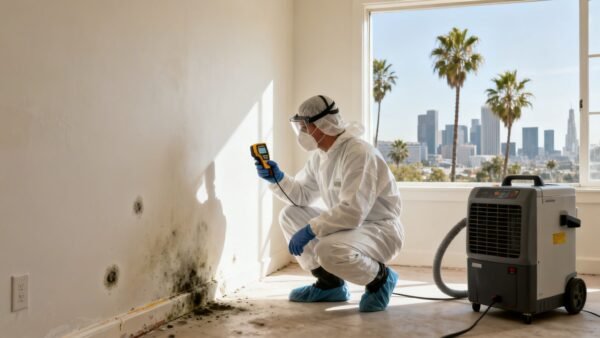
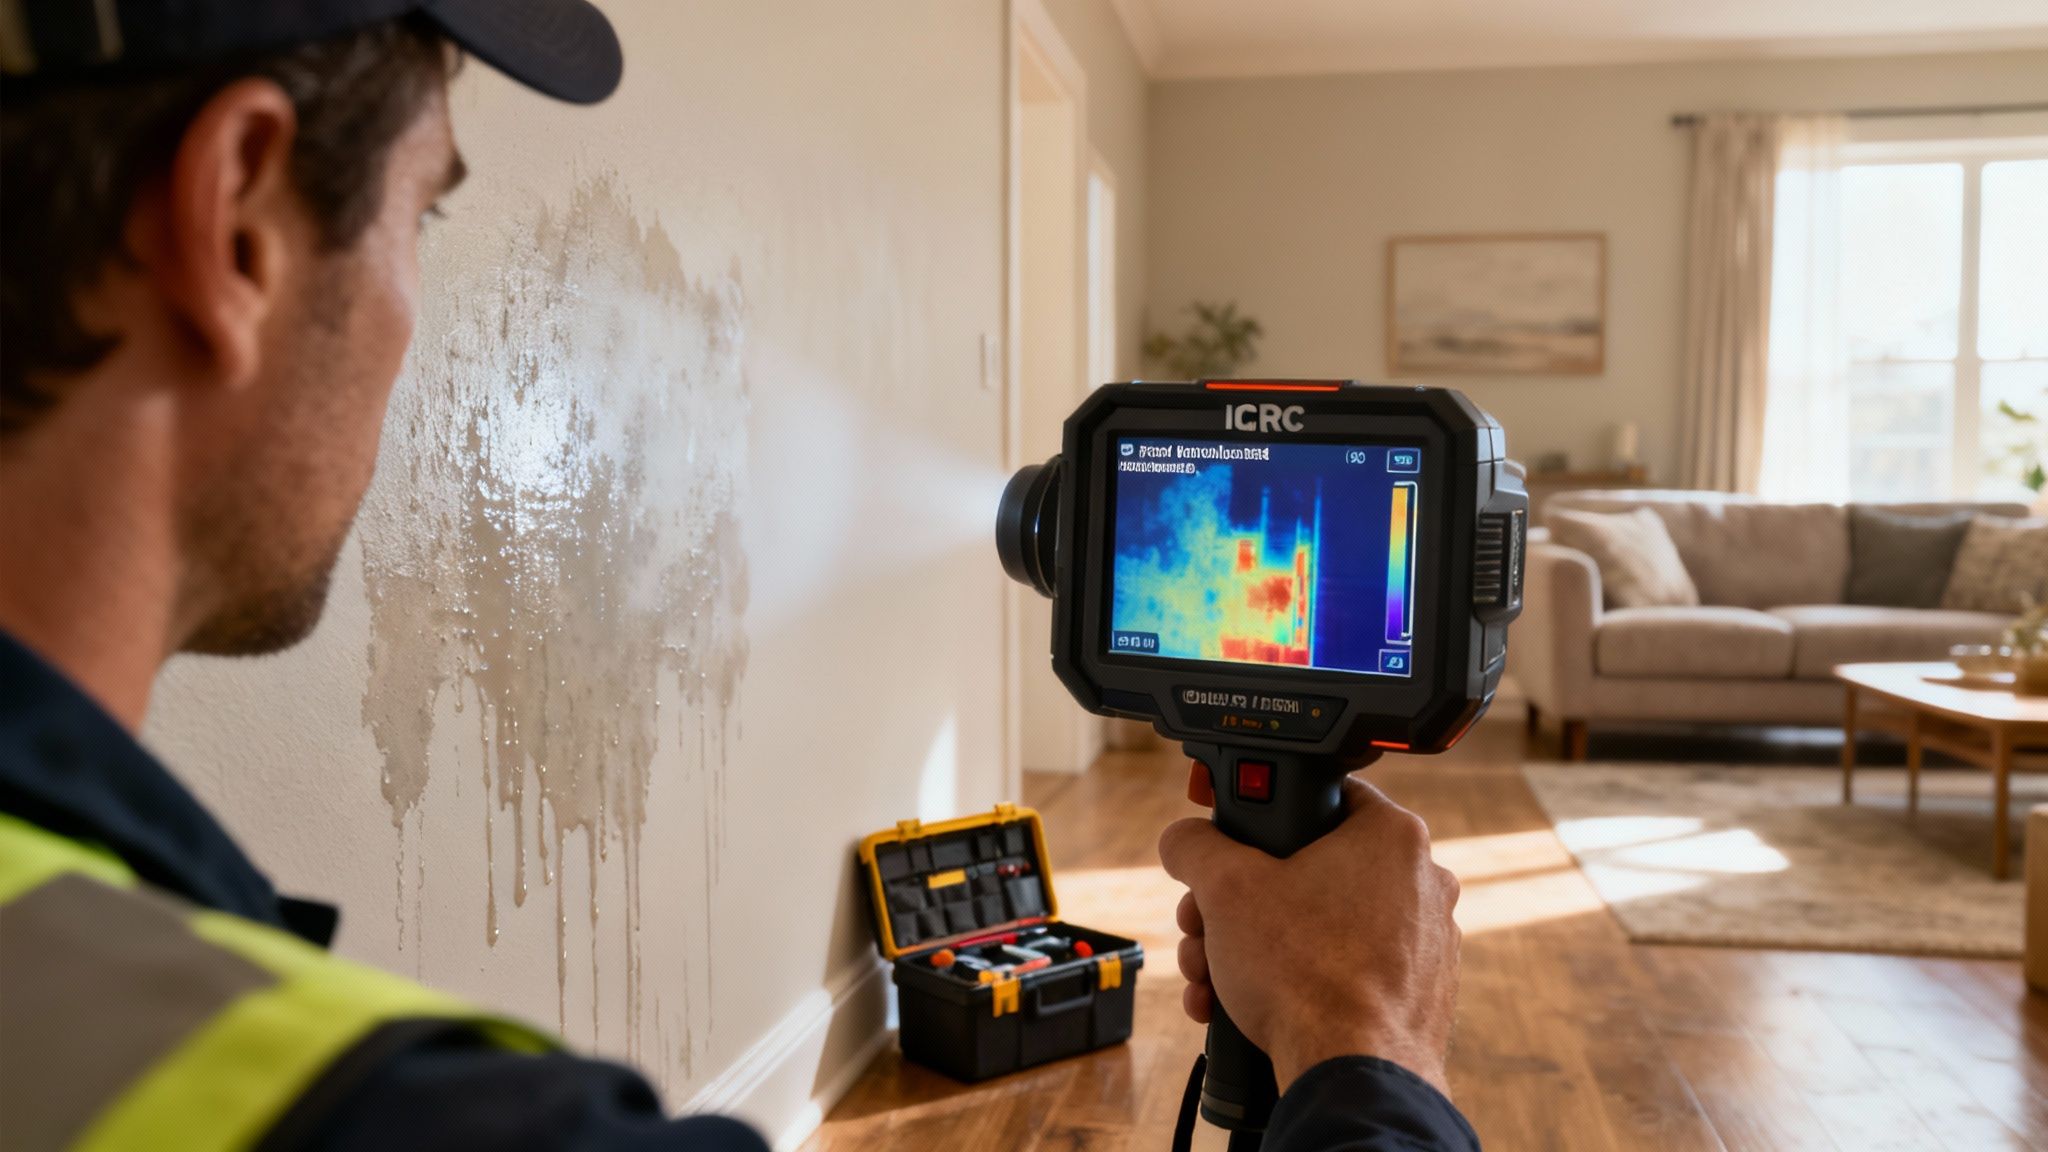
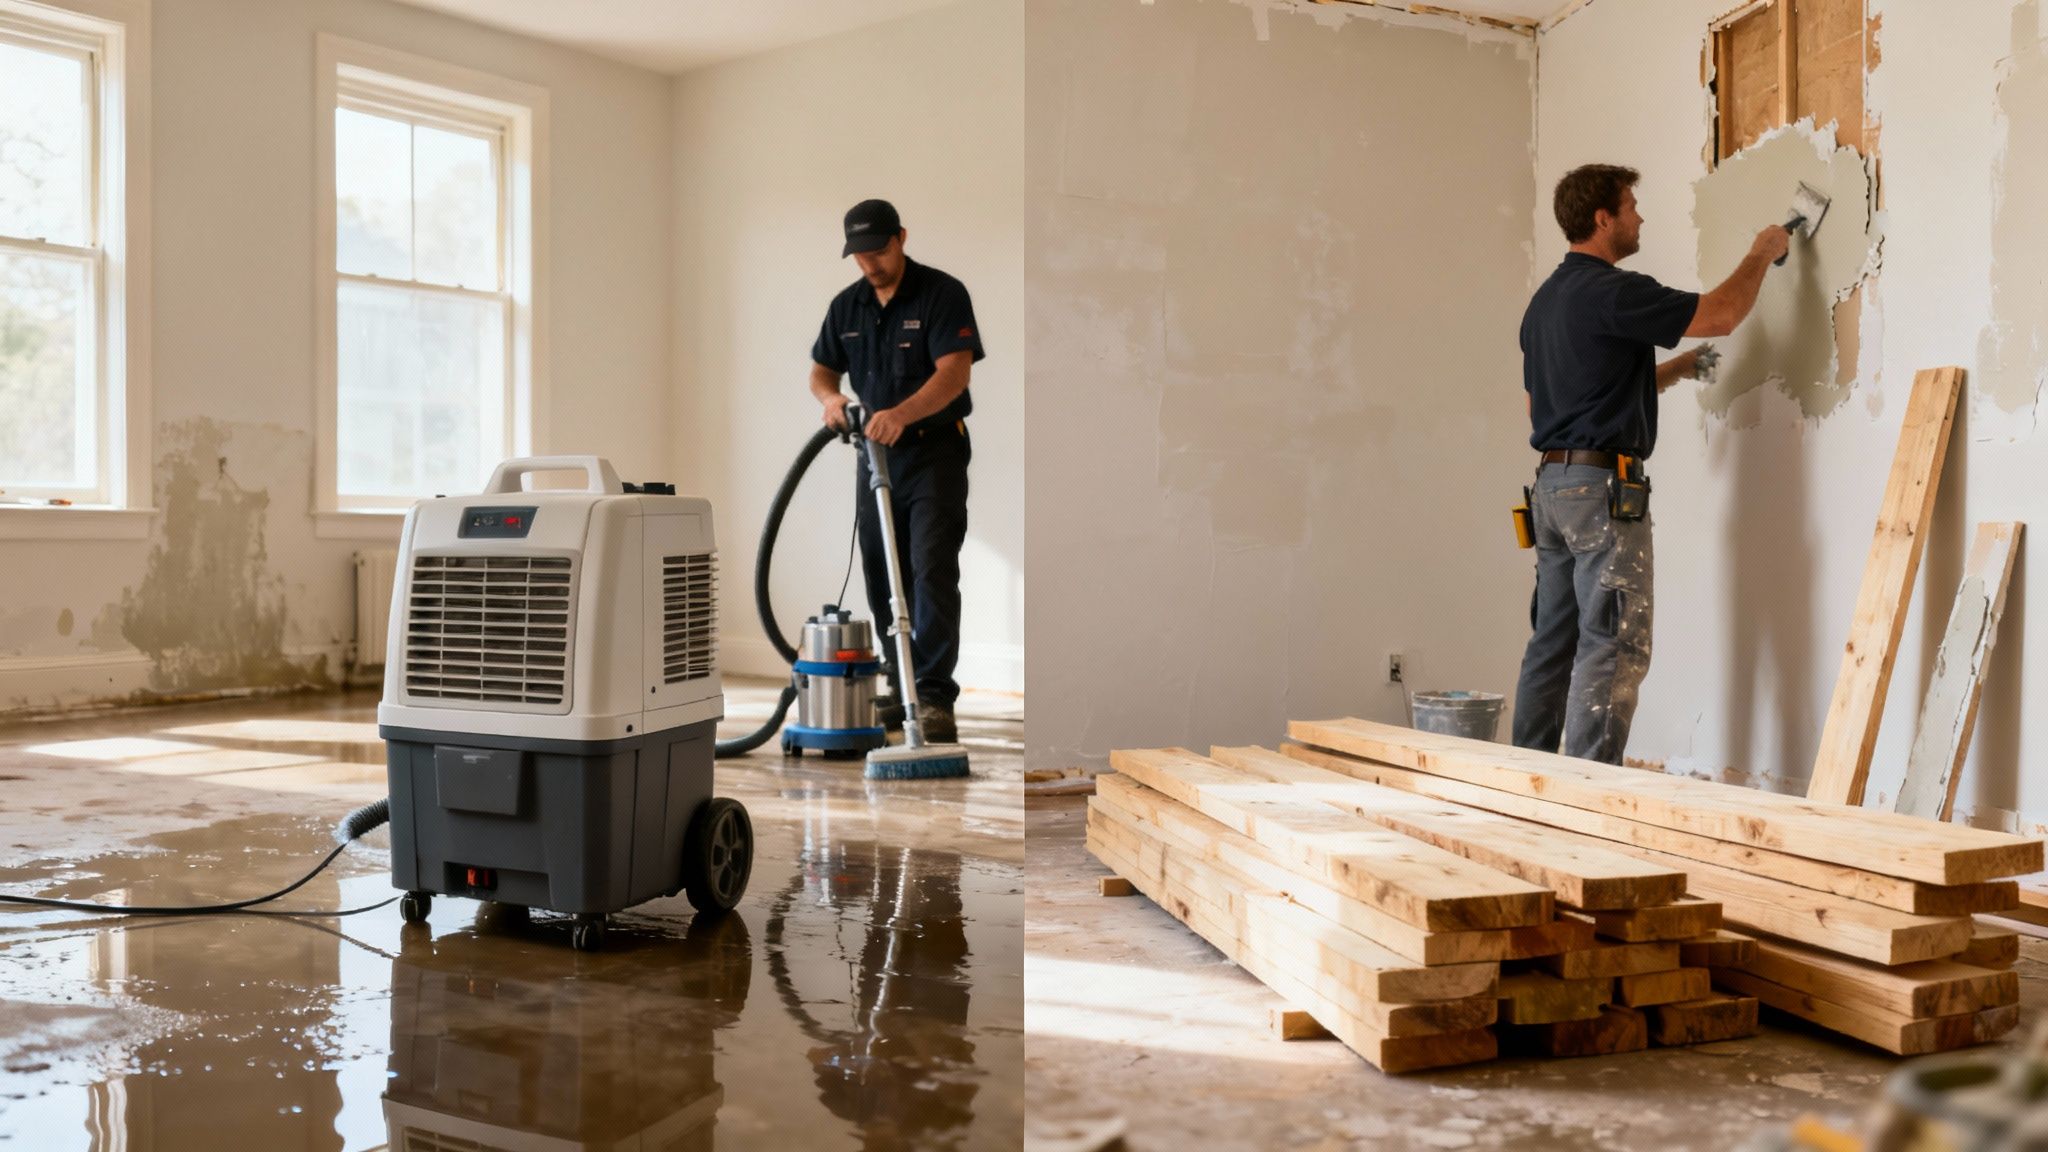
4. Request a Professional Damage Assessment Before Starting Repairs
Before you authorize any major repairs or even finalize your claim submission, it is essential to have a third-party, IICRC-certified restoration professional conduct a thorough damage assessment. An insurance adjuster's evaluation is primarily for the insurer's purposes, but an independent assessment from a restoration expert serves you. It provides a detailed, comprehensive roadmap of all damage, including issues that are not immediately visible to the untrained eye.
Uncover the Full Scope of Damage
A professional assessment goes far beyond a surface-level glance. Certified technicians use specialized equipment like thermal imaging cameras and moisture meters to detect water that has seeped behind walls, under floorboards, or into insulation. This hidden moisture is a leading cause of long-term structural rot and mold growth, which can lead to much costlier repairs and potential claim denials if not addressed from the start.
A Burbank homeowner, after a washing machine overflow, initially estimated their damages at around $15,000. Before filing, they brought in a restoration company for an assessment. The team's thermal cameras revealed a large pocket of trapped water inside a structural wall, which had gone completely unnoticed. The revised, fully-documented estimate reached $42,000, a figure the insurance company approved once presented with the professional evidence of the hidden damage.
Actionable Assessment Tips
To leverage a professional assessment for a stronger claim, follow these steps. This is one of the most vital water damage insurance claim tips for ensuring you receive a fair and complete settlement.
- Act Quickly: Contact a licensed, IICRC-certified restoration company within the first 24-48 hours. The sooner they can assess, the more accurately they can document the initial extent of the damage.
- Request a Comprehensive Report: Ask the company for a detailed, itemized report that breaks down the damage by category (e.g., structural repairs, contents restoration, equipment rental, labor costs). This document is invaluable for your adjuster.
- Verify Advanced Tools are Used: Confirm that the assessment will include the use of moisture mapping, hygrometers, and thermal imaging. Ask to see the findings from these tools to understand where hidden water is located.
- Share with Your Adjuster: Provide a full copy of the professional assessment to your insurance adjuster. This gives them a clear, expert-backed scope of work to review, often expediting the approval process.
- Coordinate Efforts: Ask your restoration company if they can meet the insurance adjuster on-site. This allows the two professionals to walk through the property together, discuss the findings, and agree on the scope of work, minimizing back-and-forth disputes.
By getting an expert assessment upfront, you move from a reactive position to a proactive one. You are not just reporting damage; you are presenting a complete, evidence-based solution. You can find qualified restoration water damage companies near you that are equipped to provide these critical assessments.
5. Maintain Detailed Records and Documentation Throughout the Claim Process
While initial photo evidence is critical, the documentation doesn't stop there. Your insurance claim is an ongoing process, and maintaining a meticulous, organized file of every interaction and expense from start to finish is your best defense against delays, disputes, and denials. This comprehensive record becomes the official history of your claim, providing the evidence needed to justify every cost and action taken.
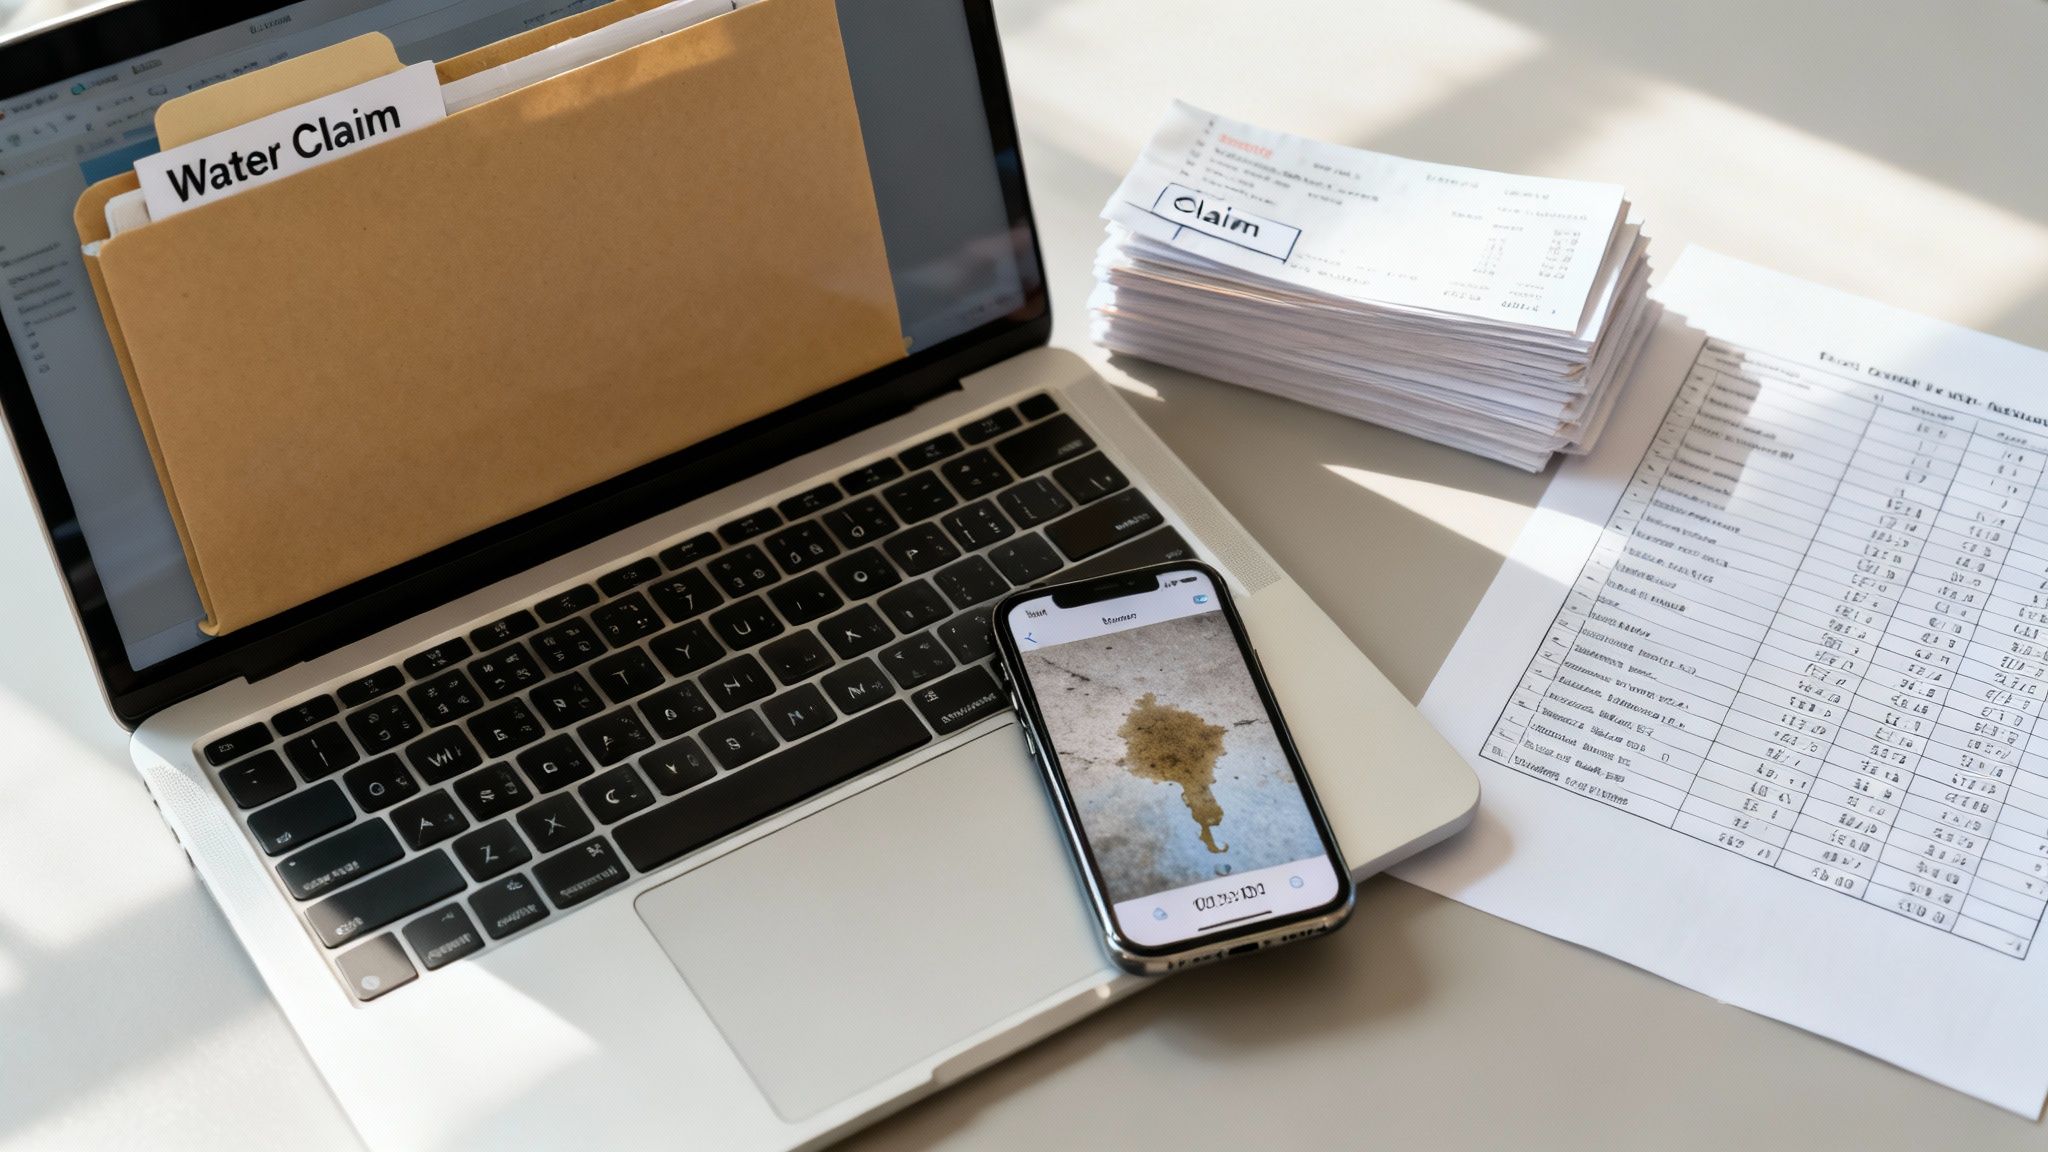
Create a Bulletproof Claim File
Think of your claim file as a business ledger. Every communication, receipt, and decision must be recorded to build a transparent and unassailable case for your settlement. This organized approach prevents crucial details from being lost and empowers you to respond to any adjuster's query with factual evidence, not just memory.
A Los Angeles homeowner facing extensive water damage created a dedicated digital folder with over 200 time-stamped photos, a log of all communications, and itemized invoices from their restoration company. When the adjuster questioned an $8,000 charge for drywall replacement, the homeowner immediately provided the contractor's detailed estimate, moisture readings, and photos proving the necessity. The charge was approved in full without delay.
Actionable Record-Keeping Tips
To build a file that supports your claim effectively, adopt these organizational habits from day one. This systematic approach is one of the most vital water damage insurance claim tips for a successful outcome.
- Create a Central Hub: Establish a dedicated folder, both digital (on a cloud service) and physical, for all claim-related documents. This prevents scrambling for a misplaced receipt or email.
- Log Every Conversation: Use a simple spreadsheet or notebook to log every phone call and meeting with your insurer, adjuster, and contractors. Note the date, time, person you spoke with, and a summary of what was discussed.
- Save All Written Correspondence: Archive every email related to your claim in its dedicated folder. Print hard copies of critical communications, such as approvals for work or settlement offers.
- Organize Invoices and Receipts: Keep every single receipt for temporary repairs, mitigation supplies, and additional living expenses if you're displaced. Organize them chronologically or by category.
- Document Work in Progress: Don't just photograph the initial damage and the final repair. Take photos and videos during the restoration process, such as after demolition and before new drywall is installed. This shows the full scope of work performed.
- Know Your Contacts: Keep a simple contact sheet with the name, title, phone number, and email address for your claim representative, their supervisor, and your adjuster.
By maintaining this level of detailed documentation, you create a clear and comprehensive narrative of your claim. This proactive record-keeping ensures you are always prepared to justify your expenses and helps streamline the entire insurance claim process for water damage.
6. Cooperate with Your Insurance Adjuster but Avoid Settling Too Quickly
Navigating the relationship with your insurance adjuster requires a balanced approach. Your goal is to be a cooperative and transparent partner while also protecting your financial interests by not rushing into a final agreement. Full cooperation expedites the initial assessment, but patience ensures you are fully compensated for all damages, including those that may surface later. This strategic patience is a cornerstone of successful water damage insurance claim tips.
Build a Collaborative but Cautious Relationship
Think of the adjuster as an investigator tasked with verifying your claim according to your policy's terms. Providing them with prompt access to the property, your detailed documentation, and clear communication helps them do their job efficiently. However, their initial assessment may not capture the full extent of the damage, especially issues like hidden moisture, mold growth, or long-term structural problems.
A Sherman Oaks homeowner, dealing with a significant leak, provided the adjuster with complete access and all initial photos. The adjuster wrote an estimate for the visible damage. Crucially, the homeowner did not sign a final settlement. Four weeks later, mold was discovered inside a wall cavity. Because the claim was still open, a supplemental claim was easily filed and approved, covering the additional $15,000 in remediation costs.
Actionable Tips for Adjuster Interactions
To manage this process effectively, maintain open communication without prematurely closing your claim. This ensures all damage is accounted for before you sign any final release documents.
- Schedule a Joint Walkthrough: Arrange for the adjuster’s visit when your professional restoration contractor can be present. This allows your advocate to point out technical details and moisture readings the adjuster might otherwise miss.
- Request an Itemized Estimate: Do not accept a lump-sum offer. Ask for a detailed, line-by-line estimate that breaks down costs for materials, labor, and specific repairs. This allows you to scrutinize the settlement and identify any gaps.
- Understand the Supplemental Claim Process: Ask your adjuster to explain how to file a supplemental claim if additional, related damage is discovered later. Acknowledging this possibility upfront sets the right expectation.
- Delay Final Settlement: Never feel pressured to sign a final settlement on the spot. Take time to review the offer with your restoration contractor to ensure it adequately covers the full scope of work. To protect your interests and ensure you receive fair compensation, understanding how to negotiate with insurance adjusters is a critical skill.
- Get Denials in Writing: If the adjuster denies coverage for any part of your claim, request a formal written explanation that references the specific language in your policy.
7. Understand Mitigation vs. Restoration and Their Insurance Coverage
In the world of water damage, not all work is created equal in the eyes of an insurance company. It's vital to understand the distinction between two key phases: mitigation and restoration. Failing to grasp this difference can lead to significant delays and out-of-pocket expenses, making it one of the most important water damage insurance claim tips for any property owner. Mitigation is the emergency response; restoration is the complete rebuild.
Differentiating Emergency Work from Rebuilding
Mitigation involves immediate actions to prevent further damage. This includes water extraction, removing soaked materials like carpet and drywall, and setting up industrial-grade dryers and dehumidifiers to stabilize the environment. Insurers almost always authorize this phase immediately because it's their best defense against more expensive problems like widespread structural rot or mold. Restoration, however, is the process of repairing and rebuilding your property to its pre-loss condition, such as installing new flooring, painting walls, and replacing cabinetry. This phase often requires separate adjuster approval.
For instance, a Sherman Oaks homeowner with a burst pipe might get immediate approval for the $12,000 mitigation phase. The insurance company knows this prevents mold. However, the $30,000 restoration phase, which includes replacing custom hardwood floors and cabinetry, will likely require a separate estimate review, adjuster visit, and formal authorization before any work can begin.
Actionable Tips for Navigating Mitigation and Restoration
To avoid getting caught in a coverage gray area, you must communicate clearly with both your insurer and your restoration company from day one. This proactive approach ensures a smoother and more predictable claims process.
- Ask for Immediate Authorization: Directly ask your insurance claims representative, "What specific mitigation work are you authorizing right now, and what are the monetary limits?" Get this confirmation in writing via email.
- Clarify Your Deductible: Understand if your deductible applies to the mitigation phase, the restoration phase, or the claim as a whole. A policy might cover mitigation in full but apply a $5,000 deductible to the restoration.
- Request Separate Estimates: Ask your restoration company to create two distinct estimates: one for emergency mitigation and another for the full restoration. This aligns with how most insurance companies process these claims and prevents confusion. You can learn more about what is water mitigation to better understand what this estimate should include.
- Inquire About Sub-Limits: Ask if your policy has sub-limits (coverage caps) on specific restoration items, like flooring, electronics, or mold remediation, as this can impact your final reimbursement.
- Discuss Temporary Living Expenses: Clarify if your policy provides for Additional Living Expenses (ALE) and during which phase this coverage is active. It often kicks in during the longer restoration period when your home is uninhabitable.
8. Know When to Hire a Public Adjuster and How to Track Expenses
When your insurer's settlement offer feels inadequate, or if your claim is outright denied, it's easy to feel powerless. However, you have professional advocates available. Hiring a licensed public adjuster or an insurance attorney can level the playing field, while meticulously tracking your expenses ensures you are fully compensated for every dollar spent during your recovery.
Create a Professional Advocacy and Financial Recovery Plan
Navigating a disputed or underpaid claim requires a two-pronged approach: expert negotiation and flawless financial documentation. A public adjuster works on your behalf to reassess the damage, interpret your policy, and negotiate a higher settlement with the insurance company. Simultaneously, maintaining a perfect record of all related expenses is non-negotiable, as insurers require proof for reimbursement of costs like temporary housing and replacement items.
A Los Angeles homeowner received a $35,000 settlement offer for water damage they estimated at over $55,000. They hired a public adjuster who, after a thorough review, negotiated a final settlement of $48,000. After the adjuster's 10% fee, the homeowner netted $42,200, a gain of over $7,000 compared to the insurer’s initial offer. This demonstrates how professional advocacy can be a vital part of your water damage insurance claim tips.
Actionable Advocacy and Tracking Tips
To effectively manage a complex claim and maximize your financial recovery, follow these specific steps. This strategy is crucial when you hit a roadblock with your insurer.
- Know When to Call for Help: Consider hiring a public adjuster if the settlement offer is more than $10,000 below your contractor's estimate or if the claim is particularly large and complex. For outright denials based on policy language, an insurance attorney may be more appropriate.
- Vet Your Advocate: Only work with licensed professionals in California. Ask for references, review case studies, and ensure you have a clear, written fee agreement before hiring them. They typically work on a contingency fee, taking a percentage of the final settlement.
- Create an Expense Tracking System: Immediately start a dedicated folder or digital file for all receipts related to the water damage. This includes everything from the initial emergency mitigation services to hotel bills, meals, and replacement personal items.
- Document Every Out-of-Pocket Cost: A Sherman Oaks homeowner who was displaced for six weeks tracked $8,400 in hotel bills, laundry services, and meals. Because they saved every single receipt, they were fully reimbursed under their policy's Additional Living Expenses (ALE) coverage.
- Digitize and Organize Receipts: Physical receipts can fade or get lost. Take clear photos or scan every receipt and save them to a cloud service. To ensure thorough documentation of all expenses incurred from water damage, consider using an itemized receipt template for repairs and replacements. This helps organize costs for your adjuster and insurer.
Partner with Experts for a Successful Claim Resolution
Navigating the complexities of a water damage insurance claim can feel like a monumental task, especially when you're already dealing with the stress of property damage. The journey from initial discovery to final restoration is filled with critical deadlines, detailed documentation requirements, and complex negotiations. However, by transforming chaos into a structured, strategic process, you can dramatically improve your outcome. The actionable water damage insurance claim tips detailed in this guide are a roadmap designed to empower you as a Los Angeles homeowner or property manager.
From the moment you discover water damage, every action you take matters. The immediate, detailed photo and video documentation you capture creates an undeniable record of the event's scope. Filing your claim promptly, while thoroughly reviewing your policy's unique coverages and exclusions, sets the stage for a transparent and efficient process. These initial steps are the foundation upon which a successful claim is built, preventing the common missteps that can lead to delays, disputes, or underpayment.
Mastering the Claims Process: From Documentation to Negotiation
The core of a successful claim lies in meticulous record-keeping and strategic communication. Maintaining an organized claim file with every receipt, email, and conversation log is non-negotiable. This comprehensive documentation serves as your primary evidence, substantiating your losses and validating your requests. When the insurance adjuster arrives, your preparedness allows for a collaborative and productive assessment, rather than an adversarial one. Remember, your goal is to work with them, providing clear, factual information that makes it easy for them to approve the necessary scope of work.
Understanding the distinction between mitigation and restoration is also crucial. Mitigation stops the damage from worsening, a responsibility that falls to you, the policyholder. Restoration brings your property back to its pre-loss condition, which is the primary focus of your settlement. By acting quickly to mitigate and then partnering with a certified restoration professional, you fulfill your policy obligations and ensure the subsequent repairs are fully covered.
Key Takeaway: A successful water damage insurance claim isn't about winning a fight; it's about presenting an irrefutable, well-documented case for the funds needed to make you whole. Your diligence in documentation, communication, and professional collaboration is your most powerful tool.
Your Path to a Fair and Final Settlement
Ultimately, securing a fair settlement empowers you to restore your property without cutting corners or paying out-of-pocket for covered damages. It provides the financial resources to hire qualified professionals who will ensure the work is done correctly, preventing future issues like hidden mold growth or structural decay. While most claims proceed smoothly with proper preparation, knowing when to escalate is vital. If your claim is unfairly denied, significantly underpaid, or unreasonably delayed, engaging a public adjuster or attorney can level the playing field and protect your interests.
By embracing these water damage insurance claim tips, you are not just managing a crisis; you are taking control of your recovery. You are moving from a position of stress and uncertainty to one of confidence and authority. This proactive approach ensures that your insurance policy functions as the safety net it was designed to be, helping you rebuild and restore your home or business efficiently and completely.
Navigating a complex claim is easier with a trusted partner by your side. Onsite Pro Restoration specializes in providing the IICRC-certified expertise and meticulous documentation required for a seamless insurance claims process in the Los Angeles area. Let our team manage the restoration and communicate directly with your insurer, so you can focus on getting your life back to normal.
Frequently Asked Questions About Water Damage Claims
Q: Should I call a restoration company before my insurance company?
A: Yes, it's often best to call a 24/7 restoration company first. They can immediately begin mitigation to prevent further damage, which is your responsibility as a policyholder. They can also help document the initial scope of the damage, which strengthens your claim when you do notify your insurer.
Q: Can I choose my own contractor for water damage repairs in Los Angeles?
A: Absolutely. While your insurer may have a list of "preferred vendors," you are not obligated to use them. You have the right to choose your own licensed and IICRC-certified contractor to ensure the work meets your standards.
Q: What if the adjuster's estimate is much lower than my contractor's?
A: This is a common issue. Provide your adjuster with your contractor's detailed, itemized estimate and any supporting evidence (like moisture readings or photos of hidden damage). If a large gap remains, ask your contractor to speak directly with the adjuster to justify the scope of work. If that fails, consider hiring a public adjuster.
Q: How long does a water damage insurance claim take in California?
A: The timeline varies significantly. In California, insurers must acknowledge a claim within 15 days and typically must make a decision (accept or deny) within 40 days of receiving proof of loss. However, complex claims involving significant restoration can take several months to fully resolve and pay out.
Q: Will filing a water damage claim increase my insurance premium?
A: It is possible. Insurers often view water damage claims, especially non-weather-related ones like burst pipes, as an indicator of future risk. However, the financial benefit of a successful claim almost always outweighs the potential for a premium increase. Not filing a claim leaves you responsible for all repair costs.
Q: What is the difference between replacement cost value (RCV) and actual cash value (ACV)?
A: Actual Cash Value (ACV) pays for the depreciated value of a damaged item—what it was worth right before the loss. Replacement Cost Value (RCV) pays the full cost to replace the item with a new, similar one. Many policies pay the ACV first, then release the remaining amount (the depreciation) after you've completed the repairs and submitted receipts.