When you first spot soot on your walls, your gut reaction might be to grab a wet rag and start scrubbing. Stop right there. That’s the single biggest mistake you can make. Smearing greasy soot with water will drive it deeper into the paint or drywall, turning a manageable cleanup into a permanent stain.
Successfully removing soot is all about the first few moves you make. It starts with a careful assessment, not immediate action. The key is to remove soot from wall surfaces methodically to prevent permanent damage, especially in homes across the Los Angeles area where various heating systems and environmental factors come into play.
Your First Moves After Discovering Soot on Your Walls
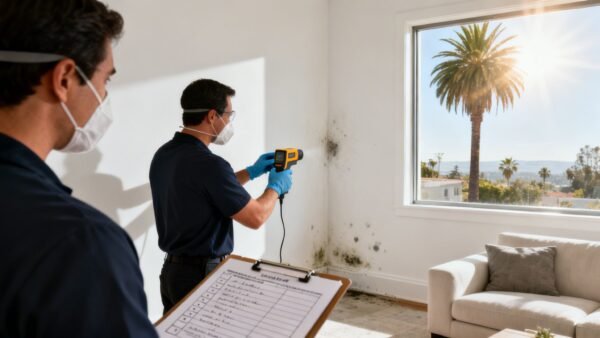
Finding those dark, shadowy stains is always unsettling, whether it’s from a furnace puffback in a San Fernando Valley home, a fireplace mishap in Glendale, or even just a few forgotten candles. Those marks are more than a mess; they’re a sign of incomplete combustion and can carry health risks if you don't handle them correctly. What you do in the first hour makes all the difference.
Prioritize Safety Above All Else
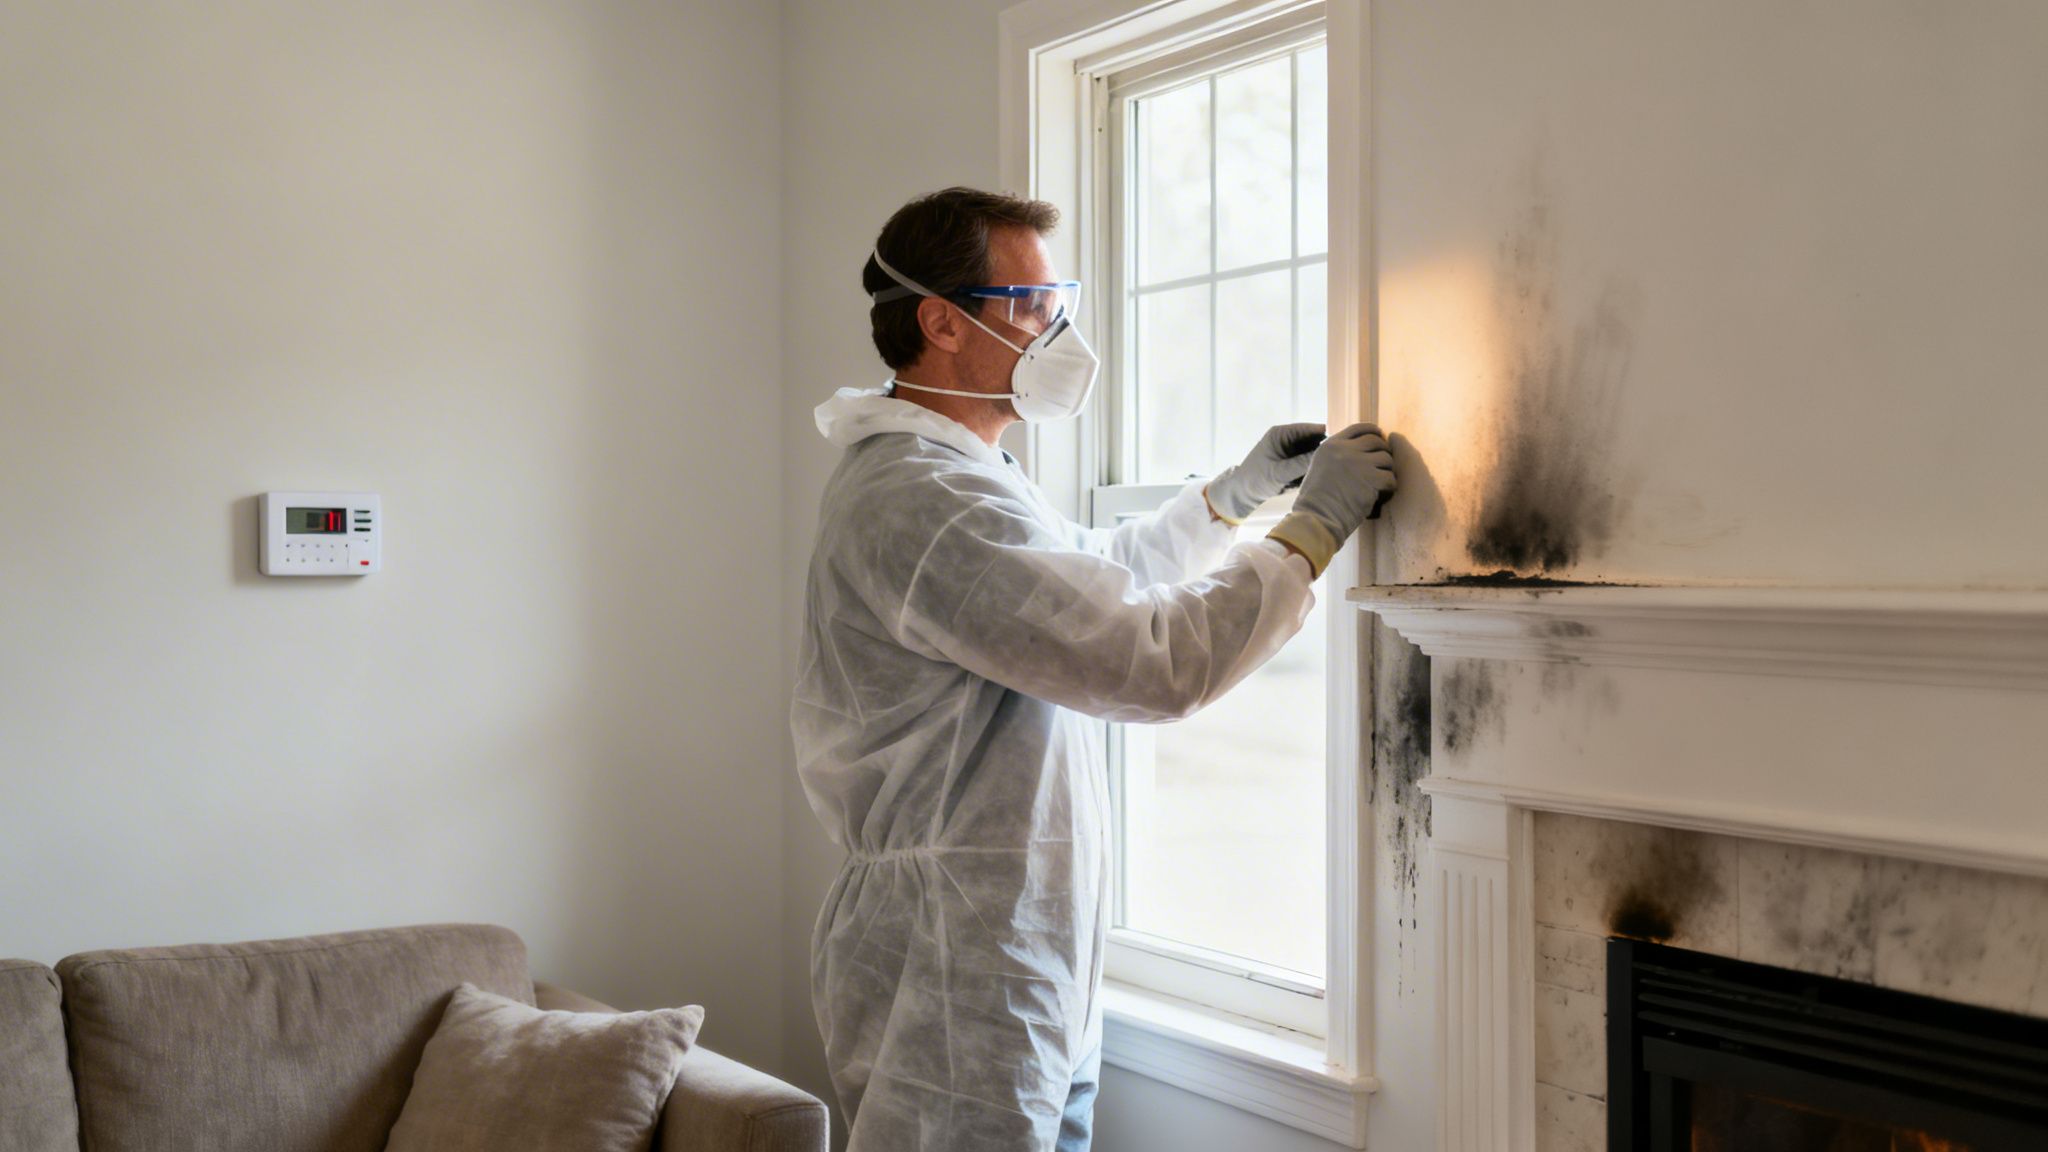
Before you touch anything, you need to protect yourself. Soot isn’t just dirt—it’s made of microscopic particles that can contain acidic and carcinogenic compounds. You can easily inhale them or absorb them through your skin.
- Personal Protective Equipment (PPE): This part is non-negotiable. At a bare minimum, you need an N95 respirator mask, safety goggles to protect your eyes, and disposable nitrile gloves.
- Ventilate the Space: Get the air moving. Open every window and door you can to create a cross-breeze. This helps clear out airborne particles and reduces what you’re breathing in.
- Shut Down Your HVAC System: This is a critical step people often forget. If your heating or air conditioning is running, it will suck soot particles into the ductwork and spread them through your entire house. A small problem in one room can quickly become a whole-home contamination issue.
Assess the Damage Without Touching
Fight the urge to wipe the wall. Oily soot, in particular, will smear instantly with pressure and moisture, penetrating deep into porous surfaces like drywall. Once it's in there, it’s nearly impossible to get out.
Instead, just look. Take a moment to diagnose what you're dealing with, because that initial assessment will dictate your entire cleaning strategy.
Crucial First Step: Never, ever start with water or a liquid household cleaner. The first cleaning step must always be a dry one to lift loose particles off the surface without grinding them in.
Different sources create different kinds of soot, and each one needs a slightly different approach.
Identifying the Type of Soot
Not all soot is created equal. Knowing what you’re up against is the key to choosing the right tools and techniques. Before you begin, take a look at our quick guide to figure out what you're dealing with.
Quick Guide to Identifying and Handling Different Soot Types
This table helps you quickly identify the soot on your walls and choose the right first step, preventing smears and permanent damage.
| Soot Characteristics | What It Looks Like | Likely Source | Your First Action |
|---|---|---|---|
| Dry, Powdery Soot | Fine, dark gray or black powder; feels dusty. Wipes away easily but creates a lot of airborne dust. | Natural materials like wood, paper, or even some candles. | Use a HEPA vacuum with a brush attachment to gently lift particles from the surface. Follow with a dry cleaning sponge. |
| Oily, Greasy Soot | Sticky or tacky to the touch; often has a strong, acrid smell. Smears very easily. | Synthetic materials, plastics, rubber, or a furnace "puffback." | Gently blot with a dry cleaning sponge (chemical sponge). Do not rub. This lifts the oily residue without smearing. |
| Combined Soot | A mix of both dry and oily textures. Common after a house fire, where multiple materials have burned. | House fires involving wood, plastics, and synthetic fabrics. | Start with a HEPA vacuum for loose particles, then switch to a dry cleaning sponge for the stickier areas. |
Understanding which type you have is the most important part of the puzzle. Dry soot is relatively forgiving, but oily soot requires a very specific, gentle approach to avoid making things worse. For major incidents like a house fire where you're facing a combination of soot types, it's essential to understand the full scope of what to do after a house fire before attempting any DIY cleanup.
Once you’ve protected yourself, aired out the room, and figured out what kind of soot you have, you're finally ready to grab the right tools and get to work.
Gathering the Right Tools for Soot Removal
Trying to clean soot off a wall without the right gear is like trying to fix a plumbing leak with a roll of tape. You might make a temporary dent, but you’ll probably end up with a much bigger, more expensive problem on your hands.
I’ve seen it countless times—homeowners in Burbank or Sherman Oaks walk into a big-box store, grab a few random cleaners, and just make the stains worse. A successful cleanup starts with having the right professional-grade tools ready to go before you even touch the wall.
Your Essential Soot Removal Toolkit
The entire goal here is to physically lift the soot off the surface, not just smear it deeper into the paint. That’s why your everyday household sprays and rags won’t work. This is what the pros bring to a job:
- A HEPA-Filter Vacuum: This is your non-negotiable first step. A standard vacuum cleaner will just blast microscopic soot particles—many of which are carcinogenic—right back into the air you’re breathing. A High-Efficiency Particulate Air (HEPA) filter is engineered to capture 99.97% of particles as small as 0.3 microns, trapping them for good. Always use a soft brush attachment and a light touch to avoid grinding the soot into the wall.
- Dry Cleaning Sponges (Chemical Sponges): This is the magic eraser of the restoration world and the single most important tool for this job. Forget what the name implies; these are completely dry sponges made of vulcanized natural rubber. Their incredibly porous texture grabs onto both dry and oily soot particles, lifting them away without a drop of moisture.
- Drop Cloths or Plastic Sheeting: Soot will rain down as you work. Don't skip this. Cover your floors, furniture, and anything else in the vicinity to prevent cross-contamination.
- Buckets: You’ll want at least two—one for your cleaning solution and a separate one for clean rinse water. Dipping a dirty sponge back into your main cleaning bucket is a rookie mistake that just spreads grime around.
Choosing the Right Cleaning Agents
Once the dry removal is done, you’ll need something to cut through the stubborn, oily film that’s often left behind. The wrong cleaner can cause more harm than good.
Professional Insight: Steer clear of any cleaners containing ammonia or bleach. Soot is a complex chemical cocktail, and these harsh agents can react with it, creating toxic fumes or permanently setting stains into your paint.
Your best bet is a powerful degreasing agent. We almost always reach for a Trisodium Phosphate (TSP) alternative. The modern formulas have all the grease-cutting power of traditional TSP but are biodegradable and much safer to use indoors. For very light soot damage, a simple solution of mild degreasing dish soap and warm water can also do the trick.
After cleaning the walls, the final piece is the air itself. Airborne soot particles can hang around for days, re-settling on clean surfaces and impacting your health. For a truly complete job, especially after a significant fire or puff-back, professionals deploy specialized air filtration devices. To see how experts guarantee clean air, you can discover the benefits of an air scrubber rental for your home.
With your safety gear on and these tools in hand, you're ready to get started using the same proven methods trusted by restoration crews across Los Angeles.
The Professional Method to Remove Soot from Wall Surfaces
Alright, you’ve got your gear ready. Now it's time to actually get that soot off the walls. Cleaning soot from painted surfaces is a methodical, two-phase process. I can't tell you how many times we've seen jobs in homes from Pasadena to Santa Monica where someone tried to rush it and ended up with smeared, permanent stains and a ruined paint job.
Technique is everything here. You have to start with a dry-cleaning phase to lift all the loose particles before introducing any liquid. Then, you follow up with a wet-cleaning phase to handle the oily, stubborn residue. This one-two punch is the only way to effectively remove soot from wall surfaces without grinding it in deeper.
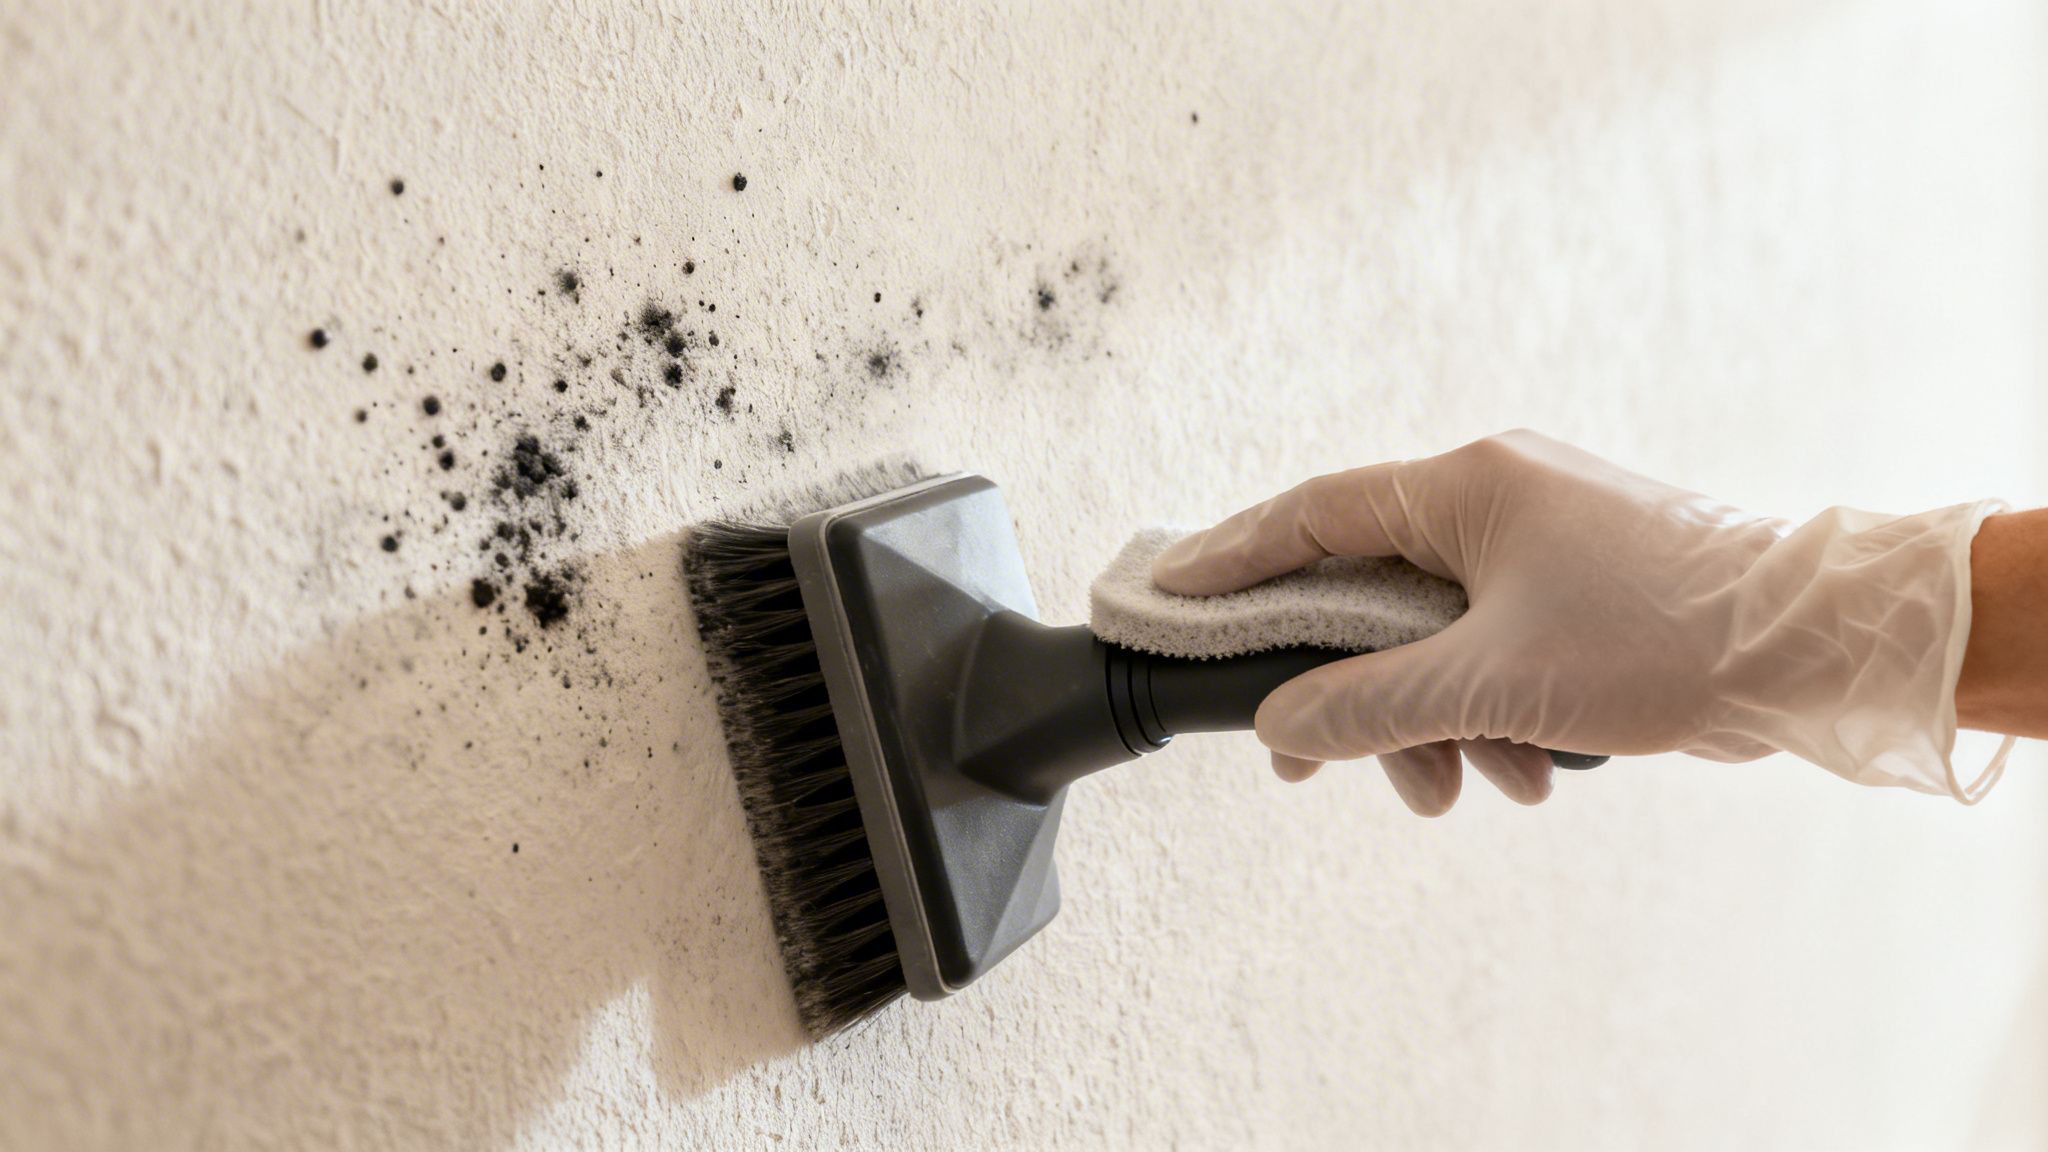
Mastering the Dry Cleaning Phase First
Your absolute first move is to get rid of that loose, powdery top layer of soot. This is where the dry cleaning sponge becomes your best friend. These aren't your typical kitchen sponges; they're made of a unique vulcanized rubber that acts like a magnet for soot, grabbing and lifting it right off the surface. Never get them wet.
Using it correctly is key. Follow this pattern:
- Start at the Top: Always begin cleaning at the highest point of the stain and work your way down. Gravity is not your friend here.
- Use Straight, Downward Strokes: Apply moderate, even pressure. Wipe in one direction only—straight down. No scrubbing, no circles. That just grinds the soot into the paint’s pores.
- Overlap Your Passes: Make sure each downward stroke slightly overlaps the last one by about an inch. This little trick prevents you from leaving behind those frustrating thin lines of soot.
- Keep a Fresh Surface: As the sponge face gets black, it stops working. Use a utility knife to carefully slice off the dirty layer, revealing a fresh surface so you can keep going.
This dry-cleaning step alone can knock out 80-90% of the visible soot, especially the dry, fluffy kind from a fast-burning fire.
This infographic breaks down the essential workflow for a successful soot removal project.
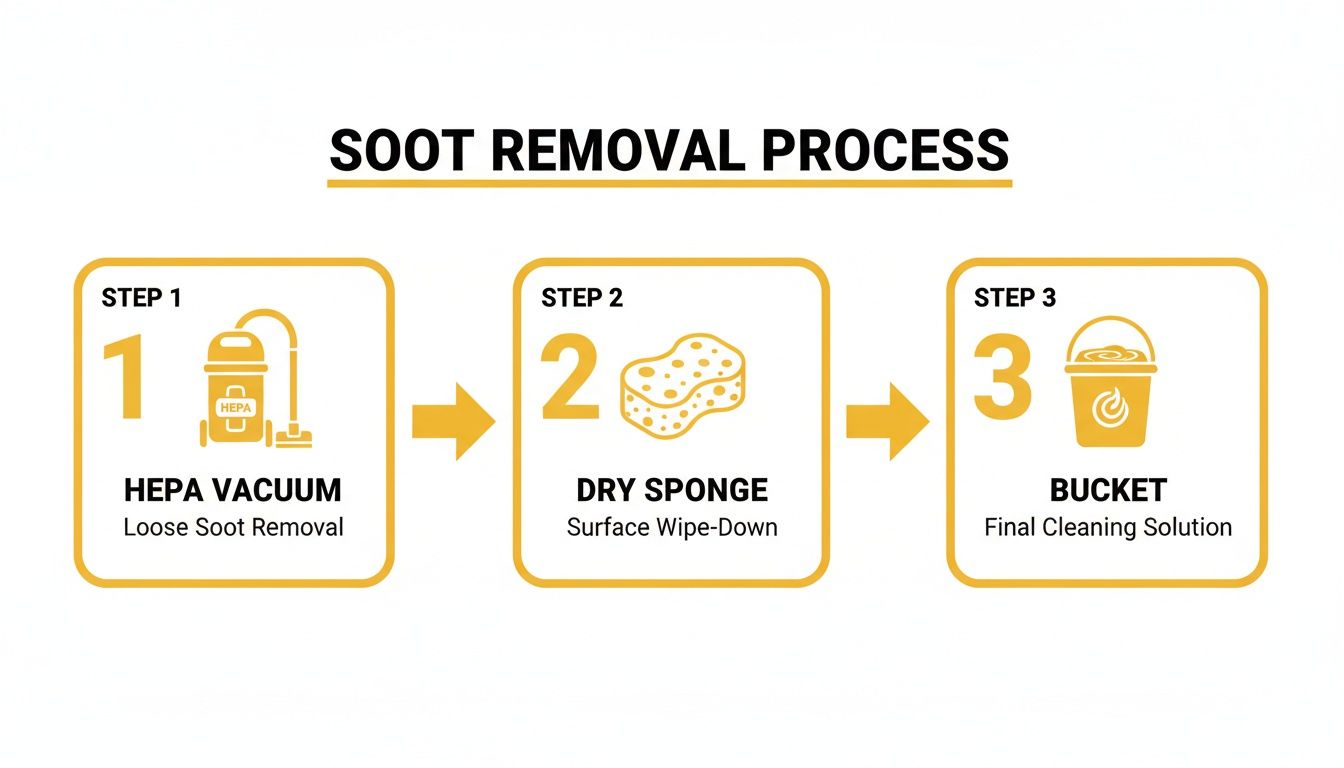
Notice how it moves from dry methods to wet methods. That order is non-negotiable if you want to avoid a smeary mess.
Executing the Wet Cleaning Phase
Only after you’ve removed every bit of loose soot with the dry sponge should you even think about introducing liquid. This next phase is all about tackling the greasy, oily film left behind. For this, you need a serious degreasing solution.
A reliable mix is one tablespoon of a TSP alternative cleaner in one gallon of warm water. But before you start wiping, it helps to understand why a perfectly clean surface is so important. For a deep dive, check out this excellent pro's guide to surface preparation; it really explains why a residue-free wall is the foundation for any paint job that lasts.
Once your solution is mixed, the technique feels a bit backward, but trust me, it’s critical.
Crucial Tip: Always start wet-cleaning from the bottom of the wall and work your way up. This prevents "clean streaks"—those ugly runs of cleaning solution that travel down a dirty wall and create new stains that are a nightmare to remove.
Dip a clean, soft sponge in your solution and wring it out until it’s just damp, not dripping wet. Gently wipe a small section of the wall, using a slight upward motion. Don’t scrub—let the degreaser do the heavy lifting of breaking down that oily film.
The Overlooked Rinsing and Drying Step
This is where so many DIY jobs go wrong. If you leave any chemical cleaner on the wall, your new primer and paint will fail. It’s just a matter of time before you see peeling or bubbling.
Right after you wash a section, grab a second, clean sponge dipped in plain water and gently wipe the area again. This removes any lingering cleaning solution. Pro tip: Use a separate rinse bucket so you're not accidentally putting soapy water back on the wall.
Finally, pat the area dry with a clean, lint-free towel. Proper drying is non-negotiable. You need to let the wall air dry for at least 24 hours before you even consider priming or painting. Any moisture trapped behind a new coat of paint is a recipe for disaster.
While this two-phase method works wonders, complex jobs with multiple rooms or deeply set-in smoke odors often need more firepower. To see what's involved in those larger projects, you can learn more about our comprehensive pro restoration services and how our IICRC-certified team handles them.
Tackling Soot on Wallpaper and Textured Surfaces
Not every wall in a Los Angeles home is smooth, painted drywall. From the historic plaster in Hancock Park mansions to the textured "popcorn" ceilings common in so many mid-century homes, these unique surfaces throw a major wrench in your plans to remove soot from wall areas.
Aggressive wiping or scrubbing is completely off the table. Doing so will permanently gouge the texture or tear the wallpaper. These delicate surfaces demand a much smarter, more patient approach. Your goal is to lift the soot off, not grind it into the thousands of tiny crevices or fragile paper fibers.
Cleaning Textured Walls and Popcorn Ceilings
Textured surfaces like stucco or popcorn ceilings are notoriously porous and fragile. Any attempt to wipe them down with force is a recipe for disaster—you'll just cause the material to crumble and create an even bigger mess.
Your best friends for this job are a HEPA-filter vacuum and a dry cleaning sponge.
- Start with the Vacuum. Attach the soft brush attachment to your HEPA vacuum. Don't press the nozzle against the wall; instead, hold it just slightly away and gently pass over the soot stains. You're trying to suck up all the loose, flaky particles without physically knocking the texture off.
- Follow Up with a Dabbing Motion. Once you've vacuumed up the loose stuff, grab a dry cleaning sponge. Forget wiping. You need to use a gentle dabbing or blotting motion. Lightly press the sponge against the soot, lift it straight off, and move to an adjacent spot. This lifts the embedded soot without any abrasion.
A Critical Warning: Popcorn ceilings, especially in older homes, can contain asbestos. If your home was built before the mid-1980s, you have to assume asbestos may be present. In that case, do not disturb it. It's time to call in professionals certified in hazardous materials cleanup to avoid dangerous exposure.
A Cautious Approach for Wallpaper
Wallpaper is even trickier because moisture is its worst enemy. How you clean it depends entirely on what the wallpaper is made of. Modern vinyl-coated papers can handle a bit of cleaning, but older paper-based or fabric wallpapers can be ruined by a single drop of water.
This is why a spot test is non-negotiable. Find a small, hidden area—behind a couch, near the floor trim—to test your cleaning method before you touch a visible spot.
Steps for Cleaning Wallpaper Safely
- Always Start Dry: Just like with painted walls, your first move is dry removal. Use a dry cleaning sponge with light, downward strokes to lift off as much loose soot as you can.
- Test with Minimal Moisture: If stains are left behind, you can cautiously try a slightly damp sponge. Take a clean sponge, add a tiny amount of a mild degreasing cleaner, and then wring it out until it’s almost completely dry to the touch.
- Dab, Don't Rub: Gently dab the test spot. Watch it like a hawk. Are you seeing any color lifting from the wallpaper? Is the paper bubbling? Are the seams starting to peel? If you see any of these signs, stop immediately.
If your spot test goes well, you can move forward with the rest of the wall, working in small, careful sections. But if that wallpaper is delicate, valuable, or shows any sign of damage during the test, it's a clear signal to put the sponge down. A DIY attempt is just too risky at that point, and professional help is the only way to save it.
How to Banish Lingering Smoke Odors for Good
You’ve done it. You scrubbed, rinsed, and managed to remove soot from wall surfaces, leaving them looking clean again. But then you walk back into the room, and it hits you—that stale, smoky smell that seems to have soaked into the very structure of your home.
Even after the black stains are gone, microscopic odor particles can stay trapped in drywall, wood, and other porous materials. Spraying an air freshener is like putting a bandage on a broken arm; it might mask the problem for a little while, but it does absolutely nothing to fix the source.
Natural Deodorizing Methods
Before jumping to heavy-duty solutions, a few simple methods can do a surprisingly good job of absorbing those lingering smells, especially for minor to moderate smoke issues.
- Activated Charcoal: I always recommend placing bags of activated charcoal in the corners of the room. It’s incredibly porous and fantastic at trapping odor molecules right out of the air.
- Vinegar or Baking Soda: You can also set out several open bowls of white vinegar or baking soda. They are both excellent natural deodorizers that will slowly absorb smells over a few days.
- Air Scrubbers: For more stubborn odor problems, renting a professional air scrubber with a carbon filter can make a world of difference. These machines actively pull air through the filter, trapping the particles causing the smell.
It's important to remember that cleaning the visible soot is only half the battle. You also have to know how to remove smoke smell from house interiors to truly get your home back to normal.
Advanced and Professional Odor Removal
Sometimes, especially after a serious fire or a furnace puffback, that smoky odor is just too stubborn for DIY methods. The odor molecules have burrowed so deep that only professional-grade technology is going to reach them.
Safety First: Ozone generators are extremely effective, but they produce ozone gas, which is harmful to breathe. The home must be completely empty of all people, pets, and plants during the treatment and then aired out thoroughly afterward. This is a job best left to certified professionals.
Thermal fogging is another technique we use in the restoration field. The process heats a deodorizing agent into a fine mist that acts just like smoke, allowing it to get into the same tiny cracks and crevices to neutralize odors where they started. Our in-depth guide on how to eliminate fire smoke odor in a house gets into the specifics of these professional techniques.
The Final, Non-Negotiable Step: Priming
Once the walls are clean and the odor is gone, you might be tempted to just start painting. Don’t. This is where you lock in all your hard work and prevent future problems. You absolutely must apply a high-quality, stain-blocking primer first.
And not just any primer will cut it. You need a shellac-based primer. While oil and latex primers are great for many jobs, only a shellac-based formula is dense enough to create an impermeable vapor barrier. This barrier permanently seals in any faint, leftover stains and odor molecules, guaranteeing they will never bleed through your new paint job. It's the final, bulletproof step to making sure your walls are truly restored.
When Professional Soot Removal Is Your Best Option
Cleaning up a small, dry soot mark from a candle that got a little too close to the wall is one thing. But when you’re facing down a widespread, greasy film from a furnace puffback or a small kitchen fire, you’re in a completely different league. While the can-do spirit is strong in Los Angeles homeowners, there are definite times when trying to remove soot from wall surfaces yourself will only make things worse.
Honestly, knowing your limits is the most important part of this job. A small, contained patch of dry, powdery soot? You can probably handle that with the right gear. But if you see any of the following red flags, it’s a clear sign to put down the sponge and call in the pros.
Red Flags That Demand a Professional
Calling for help isn't giving up; it's the smartest move you can make to protect your home and your health. If you see any of these signs, it's time to make that call:
- The Damage Is Widespread: If soot is in more than one room, the problem is bigger than what you can see. Soot particles are tiny and have likely been sucked into your HVAC system, which now needs specialized duct cleaning to stop it from re-contaminating your entire house.
- The Soot Feels Greasy or Oily: This type of residue is a nightmare. It usually comes from burnt plastics, rubber, or an oil furnace issue, and it smears like crazy. Trying to clean it with DIY methods almost guarantees you’ll just grind it deeper into the wall.
- A Strong, Lingering Smell: Can you still smell smoke even with all the windows open? That means the odor particles have soaked deep into porous materials like your drywall, studs, and insulation. No amount of surface cleaning will get that out.
- The Fire Involved Synthetic Materials: When plastics, synthetic fabrics, or electronics burn, they release a toxic chemical stew in the soot. Cleaning this mess safely requires specific PPE and disposal protocols that professionals are trained for.
Soot isn't just a simple cleaning challenge; it's a serious and persistent problem that often needs a professional-level response. To give you an idea of the scale, the global market for industrial soot removal equipment is projected to hit USD 285.7 million by 2035. This underscores just how specialized and technical effective soot cleanup really is. You can learn more about the growing industrial sootblower market here.
The Value of IICRC-Certified Technicians
When you hire a professional restoration company like Onsite Pro Restoration, you aren't just paying someone to wipe down walls. You're investing in proven expertise and safety. Technicians certified by the IICRC (Institute of Inspection, Cleaning and Restoration Certification) bring a whole different level of capability to the job.
They come equipped with things you just can't rent at the local hardware store:
- Advanced Equipment: We're talking high-powered HEPA air scrubbers to purify the air, thermal foggers to neutralize deeply embedded odors, and even ultrasonic cleaning systems for saving your valuables.
- Insurance Claim Navigation: A professional team knows exactly how to document the damage for your insurance claim. They provide the detailed reports, photos, and moisture readings that your adjuster needs to see, which makes the whole process go much smoother.
- Guaranteed Results: An experienced crew has the knowledge to get your home back to its pre-loss condition. They ensure no hidden soot or lingering odors are left behind to cause health issues or structural problems months down the line.
FAQs About How to Remove Soot from Walls
When homeowners in Los Angeles are dealing with soot, a lot of the same questions come up. Here are some quick, straightforward answers based on our years of experience in the field.
Q: Can I just paint over soot stains?
A: Absolutely not. Slapping a coat of paint over soot is one of the biggest mistakes you can make. That oily, greasy residue is stubborn—it will bleed right through new paint, sometimes within weeks. Even worse, you're trapping the smoky smell behind the paint, and it will find its way out, especially on warm, humid days. You have to do it right: clean the surface completely first with dry and then wet methods, seal it with a high-quality, shellac-based stain-blocking primer, and only then can you repaint.
Q: Are magic erasers good for removing soot?
A: Stay away from Magic Erasers, abrasive sponges, or hard-bristled brushes. Soot is greasy, and these tools will just smear the particles around and grind them deeper into the pores of your drywall or plaster. You can easily turn a manageable cleaning job into a permanent stain. Your first line of defense should always be a dry cleaning sponge (also called a chemical sponge). It's designed to lift fine particles off the surface without smearing or abrasion.
Q: How do I know if the soot is too dangerous to clean myself?
A: Treat all soot as a potential health risk, period. But there are clear red flags that mean it's time to call a professional. If the soot covers a large area of your home, came from a fire that burned plastics or synthetic materials, or if anyone in your family has asthma or other respiratory conditions, don't take the chance. Another tell-tale sign is oily, sticky soot that you can feel. That kind of residue requires specialized cleaning agents and techniques to remove without causing more damage.
Q: Will my homeowners insurance cover soot damage in California?
A: In most cases, yes, as long as the damage was from a sudden and accidental event. Think of a furnace "puffback" or a small kitchen fire that was quickly extinguished. Policies generally don't cover damage from long-term, preventable issues, like years of burning candles without proper ventilation. Before you touch anything, take clear photos and videos of all the damage. Call your insurance agent right away to report the incident and ask about your coverage. That documentation is your best friend when it comes to getting a claim approved smoothly.
Ignoring the proper steps for soot removal can lead to lingering odors and discoloration that can haunt your home and hurt its value for years. Getting it right from the start is the only way to truly restore your property.
If you're looking at soot damage that feels like too much to handle, don't risk your health or your home's condition. The IICRC-certified team at Onsite Pro Restoration has the right tools and expertise for safe, effective cleanup. Contact us for a free, no-obligation assessment in the Los Angeles area.