When you're filing an insurance claim for water damage, the first few moments are everything. A burst pipe in a Sherman Oaks home or a sudden appliance leak in a Santa Monica condo can quickly spiral out of control. It all boils down to stopping the water, thoroughly documenting the mess with photos, and getting your insurance company on the phone right away. What you do in that first hour sets the stage for a smooth claim, showing you acted responsibly to stop the bleeding while gathering clear proof of the damage from the very beginning.
What to Do Immediately After Discovering Water Damage
The second you find that burst pipe or leaking dishwasher, your world shifts from normal daily life to crisis control. That sinking feeling in your stomach? Totally normal. But the actions you take in the next hour are the most critical ones for both your safety and the success of your insurance claim. Panic just leads to expensive mistakes, so take a deep breath and follow a plan.
Your immediate response should have two clear goals: preventing further harm and preserving evidence. It’s a proactive approach that not only saves your property but also proves to your insurance company that you did your part to minimize the loss.
Prioritize Safety First
Before you even think about grabbing a mop, you have to make sure the area is safe. Water and electricity are a lethal mix.
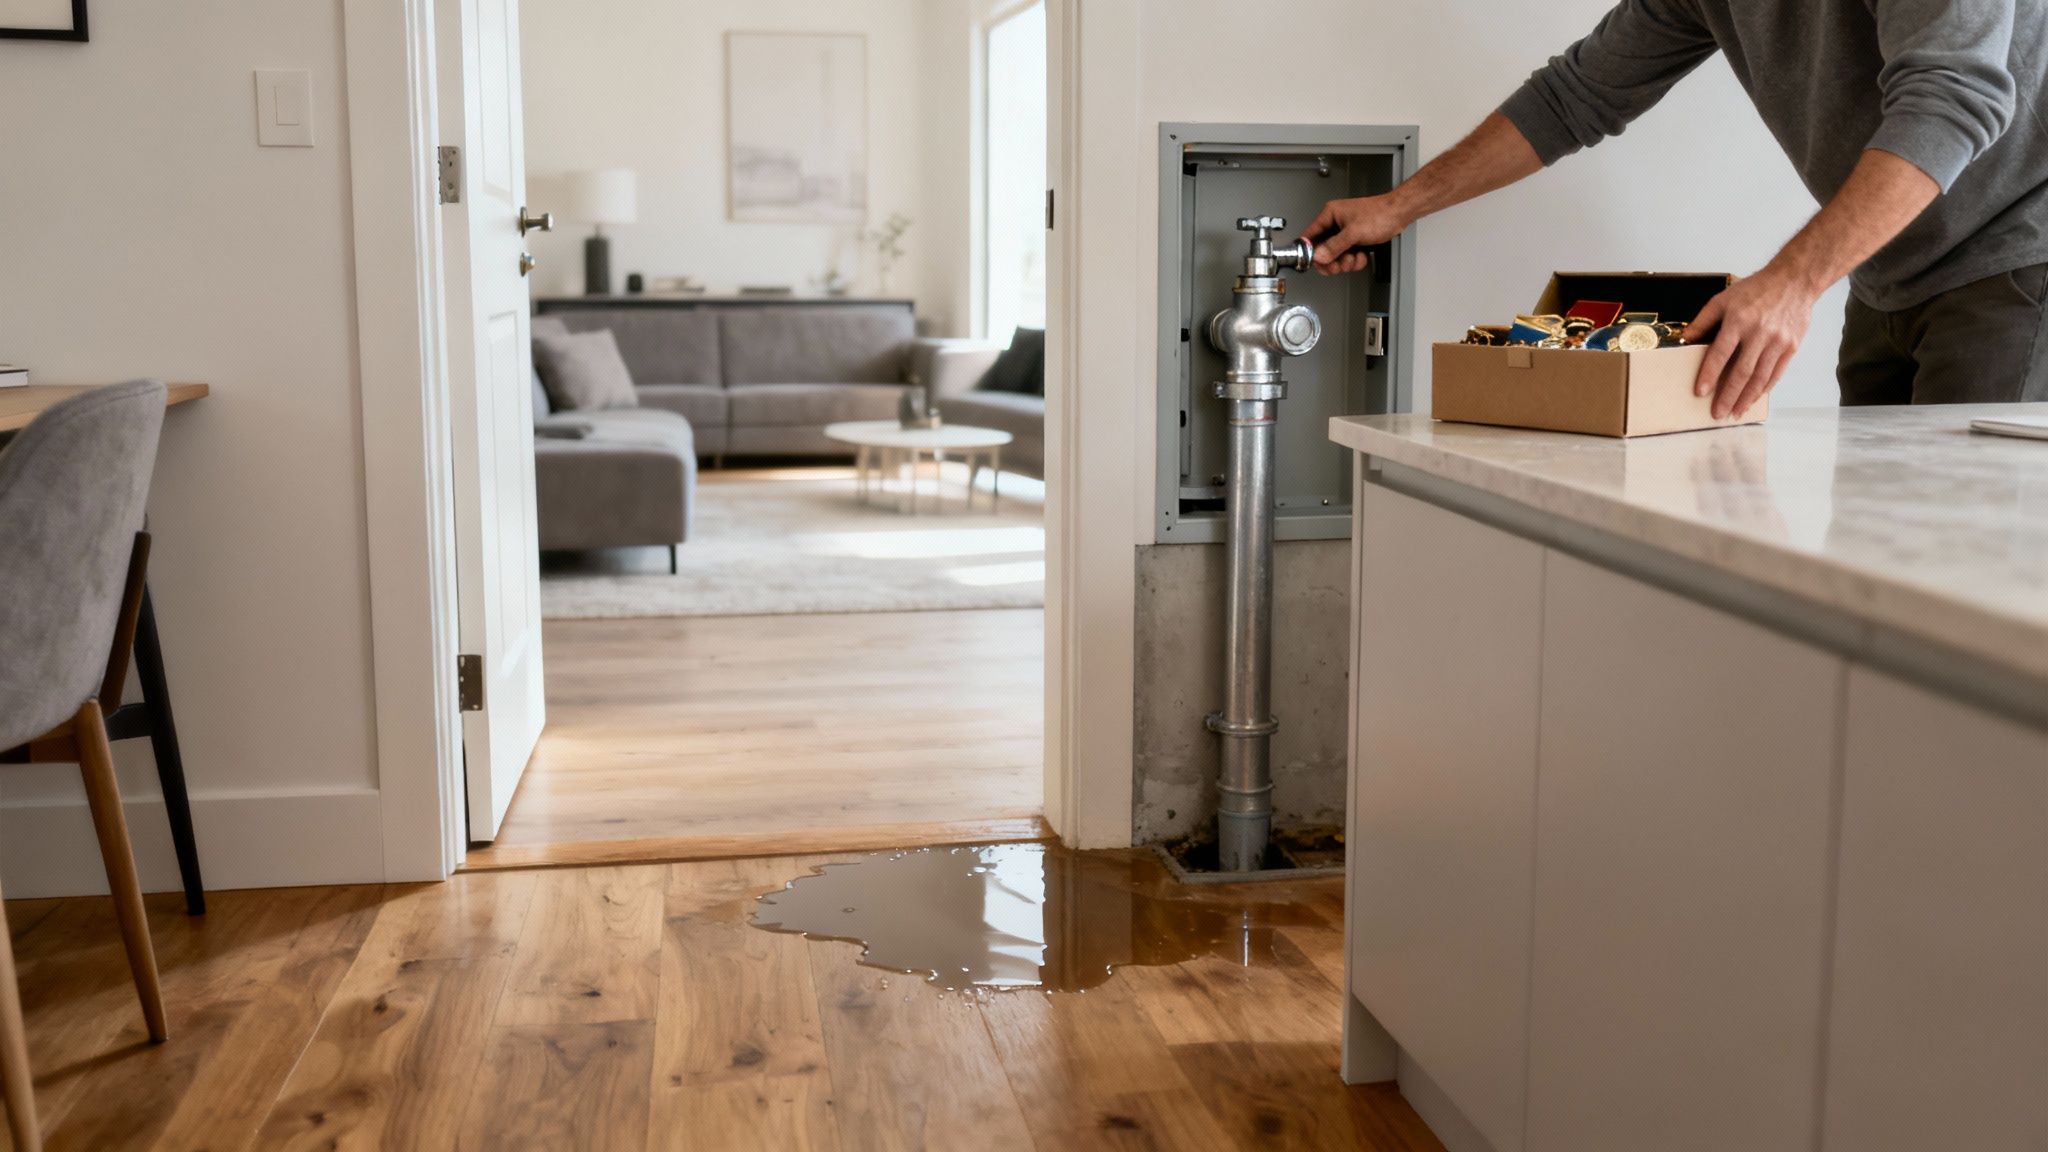
- Shut Off the Main Water Supply: If you know exactly where the leak is coming from (like a specific toilet or sink), use its local shut-off valve. If you can’t find it or the water is coming from somewhere inside a wall, don't hesitate—find your home’s main water valve and turn it off immediately. This cuts off the flow and stops the problem from getting worse.
- Turn Off Electricity to Affected Areas: Head straight to your circuit breaker box and flip the switches for any rooms with standing water or soaked drywall. Absolutely do not touch any plugs, outlets, or appliances in the wet zone.
Once you’ve handled these immediate hazards, you can shift your focus to mitigation.
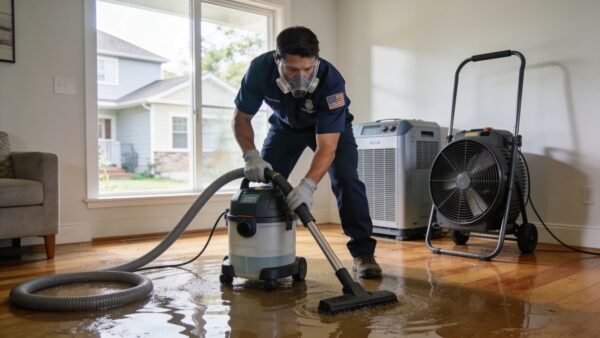
Begin Basic Mitigation Efforts
Your insurance policy actually requires you to take reasonable steps to prevent further damage—it’s called your "duty to mitigate." This is where you start.
Begin by moving anything you can salvage to a dry, safe part of your house. We’re talking about electronics, furniture, area rugs, and important papers. If you have heavy furniture you can't move, slip some aluminum foil or small wood blocks under the legs to lift them out of the water. Soaking up what you can with mops and old towels also shows your insurer you're being proactive.
Of course, for a serious flood, you’ll need professional help. Our guide on emergency water cleanup gives a complete rundown of what that process looks like.
This isn't just about saving your stuff; it's a vital step in the claims process. It should come as no shock that water damage is a massive issue for property owners, making up a staggering 43.21% of all US home insurance claims in recent years. Understanding why these initial steps are so important can make all the difference.
How to Build a Rock-Solid Evidence File for Your Insurance Claim for Water Damage
When you file an insurance claim for water damage, your insurer isn't just going to take your word for it. Let’s be real: the strength of your claim comes down to the quality of your evidence. A detailed, well-organized file is the single most powerful tool you have to show the true scope of your loss and stop the insurance company from lowballing your settlement.
Think of yourself as building an open-and-shut case. Every photo, video, and note is a piece of evidence that proves your claim, leaving zero room for an adjuster to argue or dispute the facts. This isn't about snapping a few quick pictures—it's about creating an undeniable record of your property's condition before, during, and after the damage.
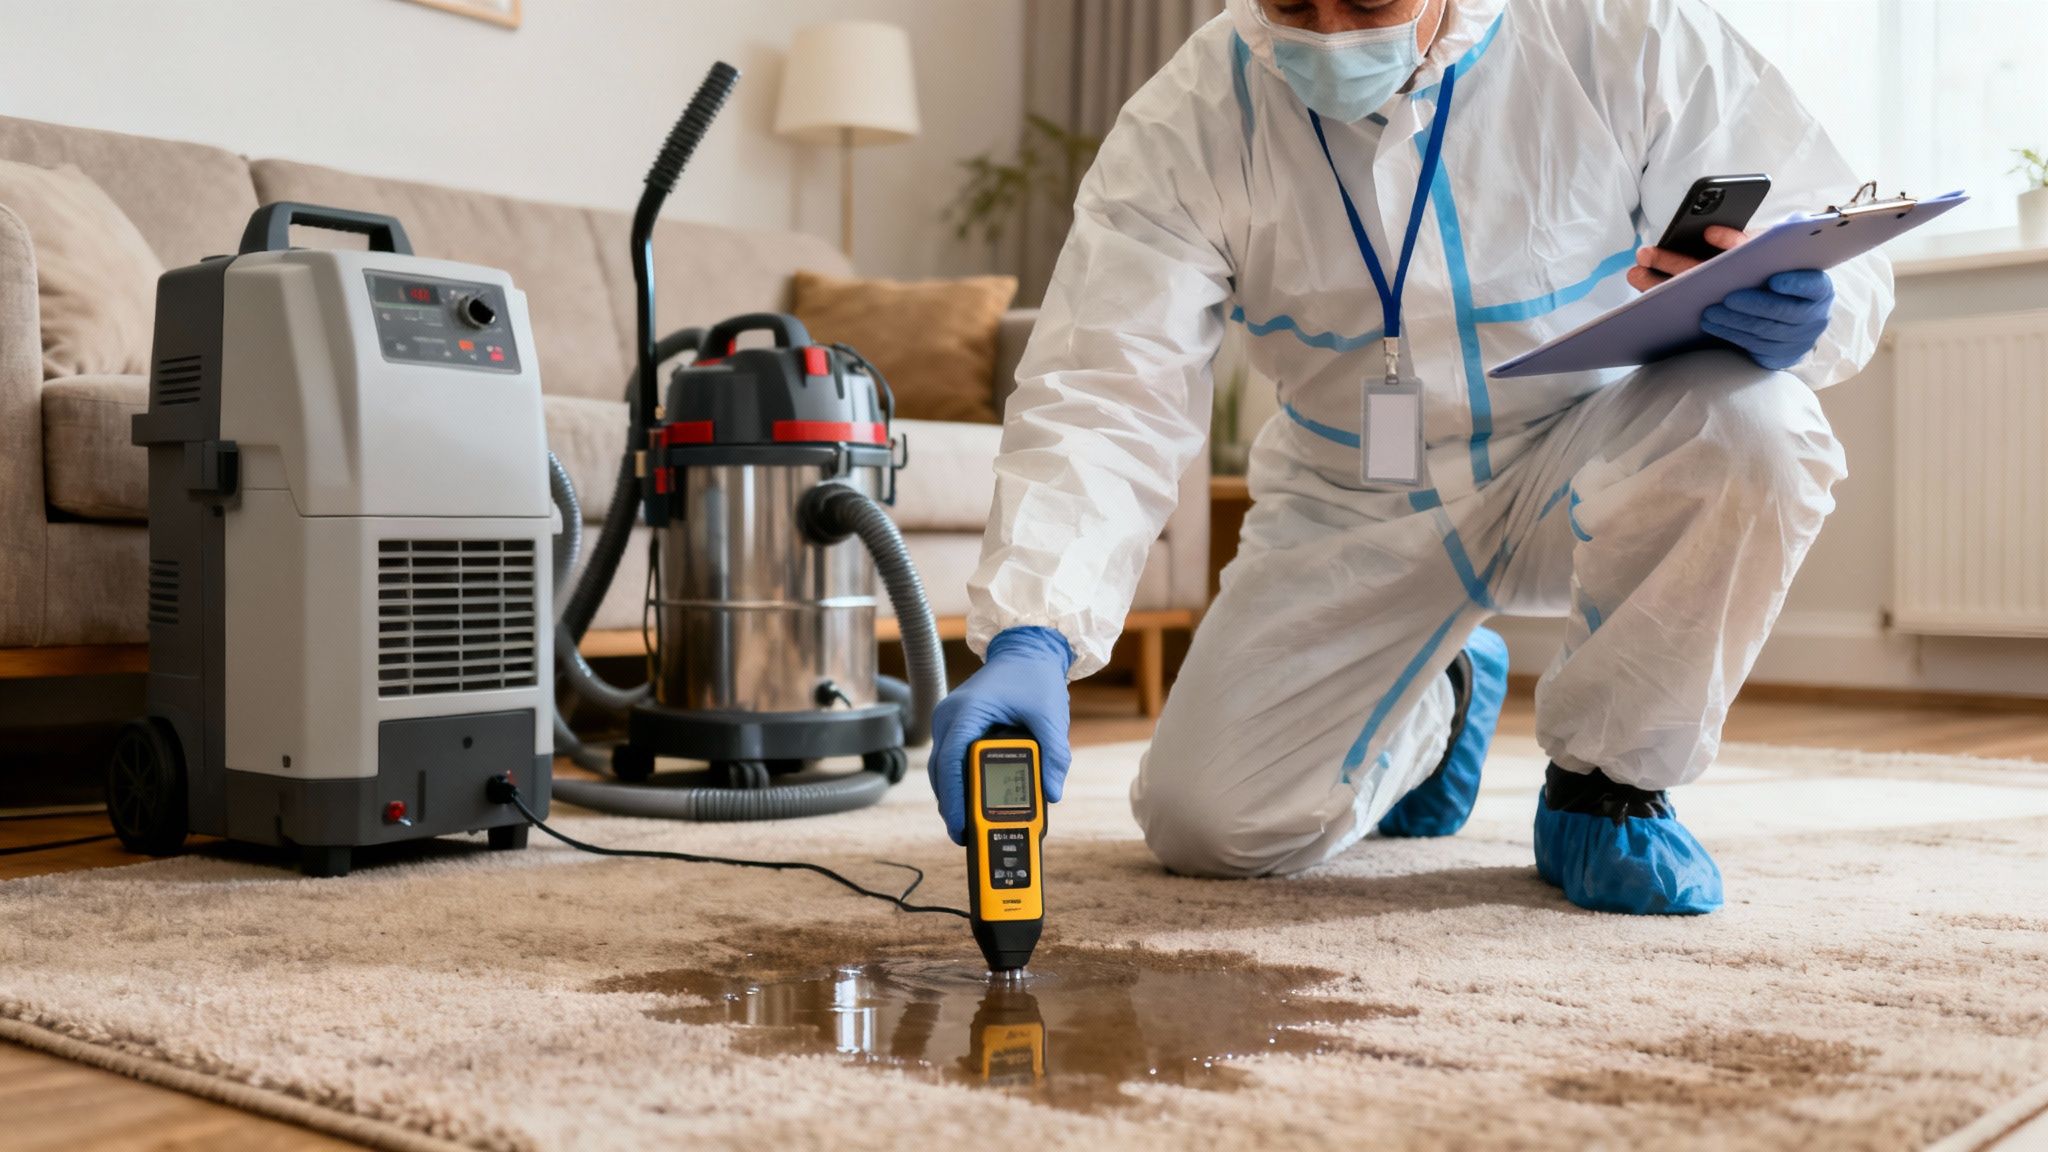
Capture Everything with Photos and Videos
In this situation, your smartphone is your best friend. Before you move, clean, or throw anything away (other than for immediate safety), document the entire scene. Your job is to tell a visual story that a claims adjuster can follow without ever setting foot in your home.
- Go Wide, Then Get Close: Start with wide shots or a full video walkthrough of each room. This shows the scale of the disaster. Then, get in close for the details: the warped baseboards, the soaked drywall, the fried electronics. Most importantly, get a clear shot of the source of the water if you can find it.
- Show the "Why": Capture crystal-clear images of the burst pipe, the busted washing machine hose, or the storm damage on the roof that let the water in. Proving the "cause of loss" is absolutely essential to getting your claim approved.
- Record the Water Line: If you had standing water, take photos showing the "high-water mark" on the walls and furniture. This proves how far the flooding went and justifies the need for more extensive repairs.
Pro Tip: As you film a video walkthrough, narrate what you’re seeing out loud. Say something like, "This is my home office. You can see the water came about four inches up the wall, completely soaking the custom bookshelves and ruining this brand-new wool rug."
Create a Detailed Inventory of Damaged Property
Just telling your adjuster "all my furniture was ruined" won't cut it. You have to create an itemized list of every single thing that was damaged or destroyed. This is easily the most tedious part of filing an insurance claim for water damage, but it's where a huge part of your settlement comes from. To really nail this, you'll want a comprehensive guide to home inventory for insurance claims that walks you through documenting every last possession.
Your inventory needs to be meticulous. For each item, you should list:
- A detailed description (e.g., "Samsung 55-inch 4K Smart TV, Model QN55Q80A")
- The manufacturer or brand name
- The approximate date you bought it
- The original purchase price (dig up old receipts or bank statements if you can)
- A link to a similar item for sale online today to show its current replacement cost
This level of detail makes it nearly impossible for an adjuster to downplay the value of what you lost. Keep in mind, the water damage restoration process often means items get thrown out before the adjuster ever sees them, making this inventory your only proof.
Here's a checklist to help you organize all the documentation you'll need. Think of this as your roadmap to a successful claim.
Your Essential Claim Documentation Checklist
Use this checklist to gather every piece of evidence needed for a successful water damage claim.
| Evidence Type | What to Capture | Why It's Critical |
|---|---|---|
| Photos & Videos | Wide shots of rooms, close-ups of damage, high-water marks, and the source of the leak (e.g., burst pipe). | Visually proves the extent of the damage and the "cause of loss" to the adjuster. |
| Damaged Items List | A detailed, itemized spreadsheet with descriptions, brands, models, purchase dates, and prices. | Forms the basis of your personal property payout. Without it, you can't prove what you lost. |
| Receipts & Proof of Value | Original receipts, bank statements, credit card records, or links to new replacement items. | Substantiates the value of your damaged items and prevents the insurer from undervaluing them. |
| Professional Reports | The initial report from your plumber or roofer explaining what failed and why. | Provides third-party validation that the cause was "sudden and accidental," a key for coverage. |
| Mitigation Invoices | Receipts for any emergency services, like water extraction, board-ups, or initial cleanup. | Shows you took reasonable steps to prevent further damage, which insurers require. |
| Communication Log | A simple log of every call and email with your insurer: date, time, who you spoke with, and what was discussed. | Creates a timeline and holds the insurance company accountable for what they promised. |
Putting in the effort to assemble a file this thorough might feel like a lot of work upfront, but it pays off. It streamlines the entire claims process, minimizes back-and-forth with the adjuster, and dramatically increases your chances of getting the full and fair settlement you deserve.
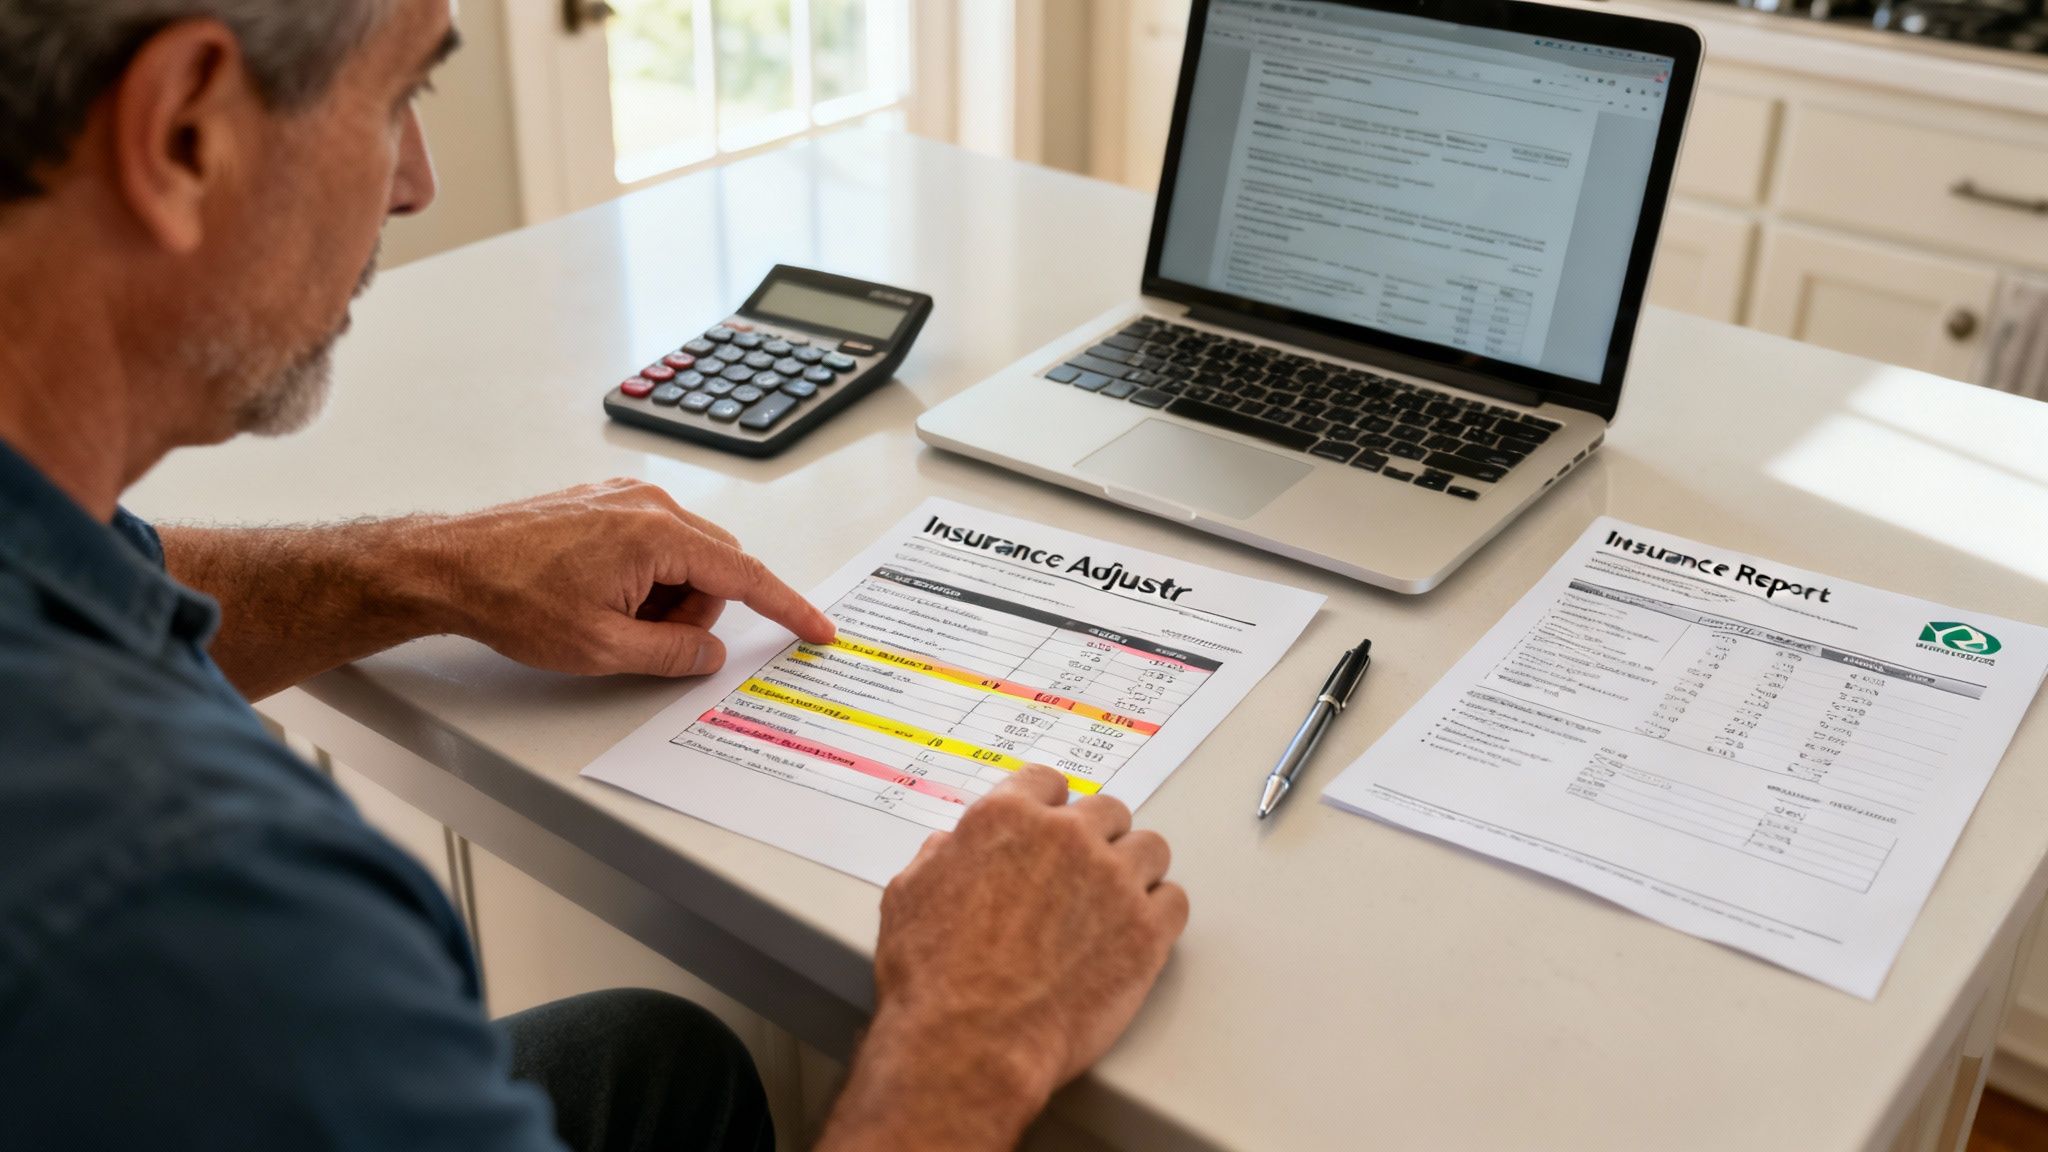
Navigating the Claims Process Like a Pro
Once you’ve built your evidence file, it’s time to officially submit your insurance claim for water damage. Think of this not as a single phone call, but as the start of an ongoing conversation with your insurer. How you handle these first interactions can set the tone for the entire process and make a real difference in the outcome.
When you make that initial call, have your policy number ready. Be prepared to give a clear, straightforward summary of what happened, when it started, and the emergency steps you've already taken to prevent more damage. This isn't the time for emotion; it's about presenting the facts.
Preparing for the Adjuster's Visit
The insurance adjuster is the key person assigned to investigate your claim. Their job is to assess the damage, figure out the cause, and estimate repair costs based on your policy. Your role? To present your case with clarity and professionalism.
Before they show up, get your documentation organized and easy to access. Don't just rely on memory—walk them through the damaged areas using your photos and videos as a visual guide. Be sure to point out problems they might overlook, like signs of moisture behind a wall or a buckled subfloor that isn't immediately obvious.
An adjuster's first visit is often quick. Make it count by having your damage inventory ready and being prepared to explain the full scope of your loss. This isn't the time for negotiation; it's about providing facts.
Understanding Key Insurance Terms
The claims world is full of jargon, and it can get confusing fast. Two of the most critical terms you need to know are Actual Cash Value (ACV) and Replacement Cost Value (RCV).
- Actual Cash Value (ACV): This is the value of your damaged item minus depreciation. In simple terms, it's what your five-year-old couch is worth today, not what you originally paid for it.
- Replacement Cost Value (RCV): This is the cost to replace your damaged property with a new, similar item without deducting for its age or wear and tear. Most policies pay out the ACV first. You get the rest of the money (the depreciation) only after you've actually replaced the item and sent them the receipts.
Getting a handle on this difference is essential for managing your expectations and budgeting for repairs. Knowing the full insurance claim timeline for water damage can also help you anticipate what comes next.
It's a tough time for the insurance industry. Global insured losses from natural catastrophes are climbing by 5–7% annually, recently hitting around USD 137 billion. Events like severe storms are driving a massive number of water damage claims, putting a strain on insurers everywhere.
Once you've got your evidence together and your claim is filed, the next big hurdle is figuring out how to negotiate an insurance settlement. Being prepared for that conversation is crucial.
The flowchart below breaks down the core parts of your evidence file—the very tool you'll use in your discussions with the adjuster.
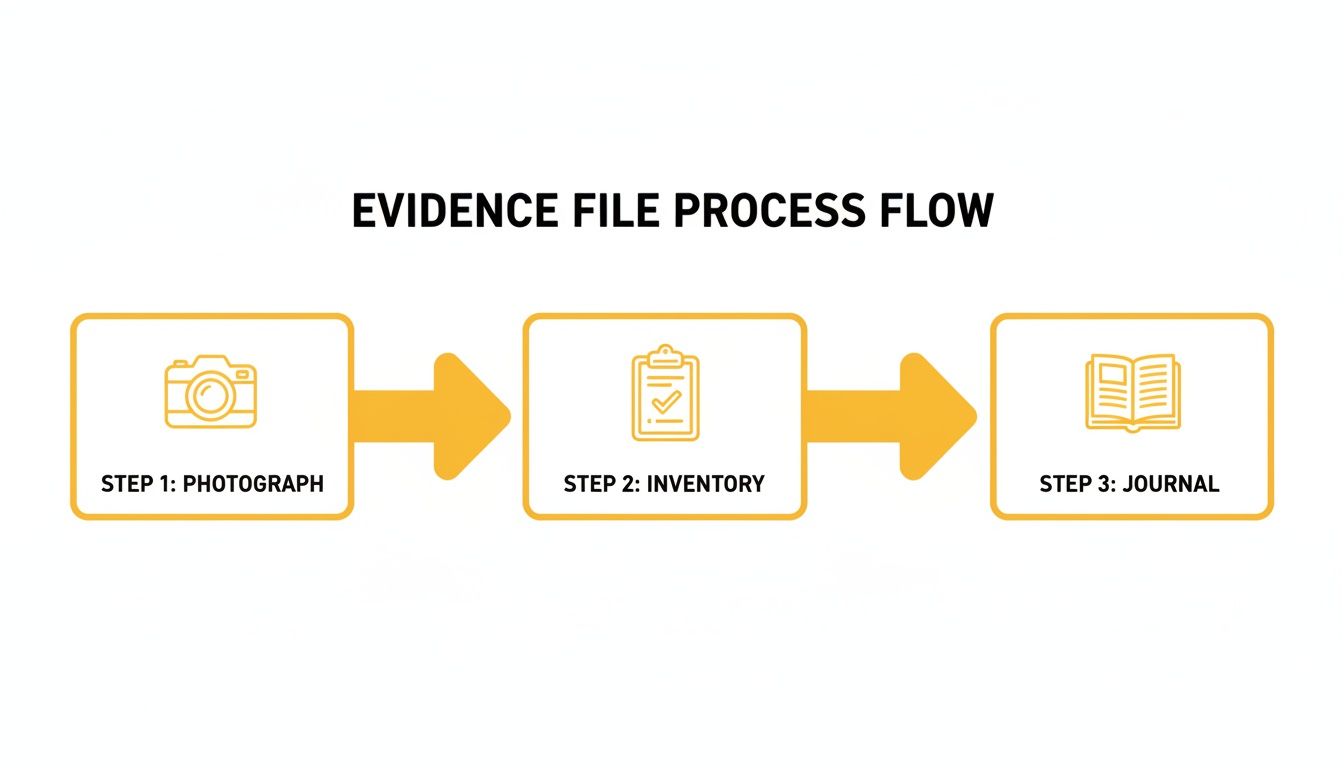
This simple process—photograph, inventory, and journal—is the foundation of a strong claim. It ensures every single detail is captured and presented in a logical way that’s hard to dispute.
Choosing and Working with Restoration Professionals
After the initial shock of discovering water damage, your insurance company expects you to act. Fast. It's on you to take immediate steps to stop things from getting worse.
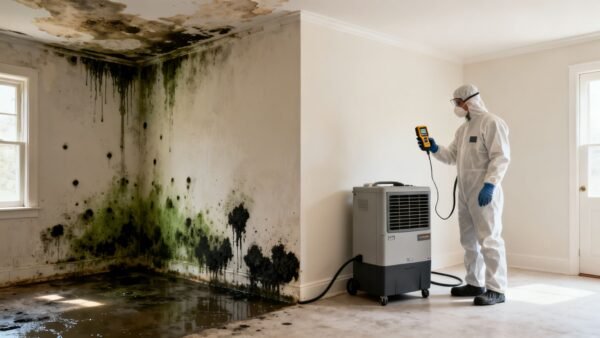
While you can handle a minor spill, any real water intrusion demands a professional restoration company. This isn't just a suggestion—it's a critical part of your policy's "duty to mitigate" and key to protecting the value of your insurance claim for water damage.
Hiring a certified team is non-negotiable. These pros bring in the heavy-duty equipment and specialized knowledge that no homeowner has on hand. They’ll use moisture meters, thermal imaging cameras, and powerful dehumidifiers to hunt down and kill hidden moisture. Left unchecked, that moisture leads directly to structural rot and dangerous mold growth.
Understanding Mitigation vs. Restoration
It's really important to know the difference between the two phases of their work, because your insurance policy handles them differently.
- Mitigation: This is the emergency response. The number one goal is to stop the damage from spreading. Think water extraction, tearing out soaked materials like carpet and drywall, and setting up industrial-grade drying equipment. Mitigation is all about stabilizing the scene to prevent further loss.
- Restoration: This is the repair and rebuild part of the job. Once the property is bone-dry and sanitized, the restoration work can start. This means replacing drywall, installing new floors, painting, and any other construction needed to get your home back to its pre-loss condition.
Your insurance adjuster must approve the scope of restoration work before it begins. However, emergency mitigation services should start immediately to prevent secondary damage, and these costs are almost always covered.
Coordinating with Your Adjuster
The secret to a smooth claim process? Crystal-clear communication between your restoration company and the insurance adjuster.
A good restoration team knows the insurance game. They will provide meticulous documentation—moisture readings, detailed photos, equipment logs—to justify every single thing they do.
This partnership is how you get work approved without a fight. For example, the restoration crew can prove that a wall that looks dry to the naked eye is actually saturated behind the surface, justifying its removal. This professional validation helps ensure the adjuster includes that cost in your settlement, so you're not paying out-of-pocket for essential work.
Finding the right team is everything. When searching for water damage companies near you, look for IICRC certification and read reviews that specifically mention how they handled the insurance claim process. That expertise ensures the work not only restores your home but is also documented perfectly for your insurer. A great company becomes your advocate, giving the adjuster the proof needed to get every step covered.
Decoding Your Settlement and Finalizing Repairs
The adjuster's report and settlement offer have finally landed in your inbox. It’s tempting to see the dollar amount and think the whole ordeal is over, but this is exactly the moment to slow down and scrutinize every single detail. The success of your insurance claim for water damage truly hinges on what you do next.
Don't just glance at the summary page. You need to go through the adjuster's "scope of work" line by line, comparing it directly against the estimates you got from your trusted restoration professionals. Adjusters often rely on standardized software that can easily miss local material costs or the unique quirks of your home's construction.
Scrutinizing the Adjuster's Report
Look for common discrepancies that we see all the time. Did they budget for replacing a whole section of continuous flooring, or are they just planning to patch a small area? Did they account for the cost of a painter to prime and paint the new drywall, or just for the drywall installation itself?
These small omissions can add up to thousands of dollars in out-of-pocket expenses for you. Understanding the real water damage cleanup cost is your best defense against ending up with an inadequate settlement.
If the offer seems low, don't be afraid to push back respectfully. Hand them your contractor's competing bid and point out the specific line items the adjuster either missed or undervalued. A professional negotiation, backed by solid evidence, almost always leads to a revised and fairer offer.
Understanding Your Payout and Getting Repairs Done
Once you and the insurer agree on a settlement figure, the payment process begins. Insurers handle this in a few different ways, so it’s critical to clarify the specifics upfront.
- Lump-Sum Payment: For smaller claims, you might just get a single check.
- Staged Payments: For larger, more complex restoration projects, the insurer may release funds in installments as the work is completed and verified.
- Payments to Your Mortgage Lender: This one often surprises homeowners. If you have a mortgage, the check might be made out to both you and your lender. The bank then holds the funds in escrow and releases them to your contractor in stages.
That last point is a big one. Lenders do this to protect their asset—your home—by ensuring it's properly repaired. It just means you'll need to coordinate between your contractor and your bank to manage the payment schedule.
The global insurance market has seen a huge shift recently, with payouts for water-related claims becoming more concentrated in high-insurance-penetration countries. In fact, in a recent year, the US accounted for over 90% of global insured losses from natural catastrophes. This reality means US insurers are handling a massive volume of claims, which underscores why it’s so vital for homeowners to be informed advocates for their own settlements.
Finalizing the Job
Before you sign off on anything, do a final walkthrough with your contractor. Check that every single repair has been finished to your satisfaction and that your home is truly back to its pre-loss condition. Only then should you authorize the final payment and close out your claim successfully.
FAQs: Answering Your Top Water Damage Claim Questions
Even with a solid plan, trying to navigate an insurance claim for water damage can feel like you're lost in a fog of questions and what-ifs. Believe me, you’re not alone. Most homeowners grapple with the same uncertainties. Getting straight, clear answers is the only way to move forward and get the settlement you deserve.
Let’s tackle some of the most common questions we hear from property owners right in the thick of a water damage crisis.
Q: What types of water damage are not covered by home insurance?
A: A standard homeowner's policy isn't a magic wand that covers everything, and knowing its limits is absolutely crucial. As a general rule, coverage depends on the water source being "sudden and accidental." Here are the most common things your policy will likely exclude:
- Flood Damage: This is a big one. Flooding refers to rising surface water from outside your home, like an overflowing river or a storm surge. This requires a completely separate flood insurance policy, which most people get through the National Flood Insurance Program (NFIP).
- Sewer Backups: Damage from a backed-up sewer or drain line is almost always excluded from a base policy. However, you can usually buy a special add-on, often called a rider or endorsement, to cover this specific mess. It's well worth the small cost.
- Gradual Leaks: If a pipe has been dripping slowly for months behind a wall because of poor maintenance you ignored, your insurer will almost certainly deny the claim. They expect you to keep your property in good repair.
Q: Should I hire a public adjuster for my claim?
A: For a major disaster—I’m talking extensive structural damage, a complicated cause, or a claim your insurance company is fighting you on—a public adjuster can be a real game-changer. They are licensed professionals who work for you, not the insurance company. Their entire job is to manage your claim and negotiate a better settlement. Of course, they don't work for free; they typically charge a percentage of your final payout, usually somewhere between 10-20%. But for a simple, straightforward claim, like a burst washing machine hose where the damage is obvious and the insurer is cooperative, you probably don’t need one. My advice? Only consider hiring one if your claim is very large, complex, or you feel the initial offer you received is just plain unfair.
Q: How long do I have to file a water damage claim?
A: This is where people get tripped up. While your state has a formal statute of limitations for filing a lawsuit (which can be years), your insurance policy has a much more urgent deadline. It will state that you must report the loss "promptly" or "as soon as reasonably possible." Waiting even a few days gives the insurance company leverage. They can argue that your delay made the damage worse—for example, by allowing mold to grow. That could lead to a partial or even a full denial of your claim. The bottom line: report the loss the second you discover it, even if you don't know the full extent of the problem yet.
Q: Can I start repairs before the adjuster arrives?
A: Yes and no. You absolutely must take steps to prevent further damage. In fact, it’s a policy requirement known as your "duty to mitigate." This means getting standing water extracted, moving undamaged belongings to a dry area, and starting the structural drying process with professional equipment. However, do not make permanent repairs or throw away damaged materials. The adjuster has to see the evidence with their own eyes to properly assess your loss. Document every emergency step you take with photos and keep every single receipt from the restoration pros you hire. These mitigation costs are almost always reimbursable as part of your claim.
Trying to manage a water damage claim is overwhelming, but you don't have to figure it all out on your own. Onsite Pro Restoration specializes in providing the expert documentation and professional restoration services you need to get your claim approved quickly and fairly. Call us 24/7 for a free assessment.