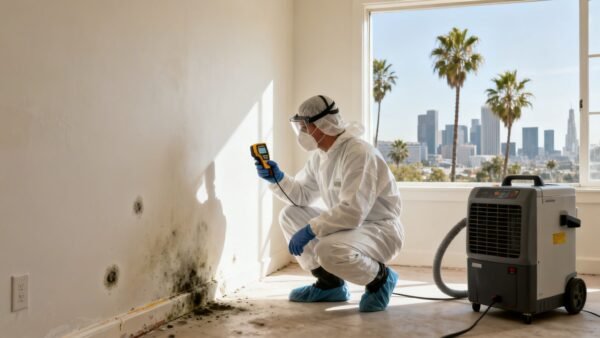
Taking proactive steps to prevent frozen pipes means insulating the plumbing in those vulnerable spots, sealing up air leaks, and keeping your heat consistent, especially when a cold snap rolls in. This isn't just busywork—even a tiny crack in a frozen pipe can dump hundreds of gallons of water into your home, causing catastrophic damage. Understanding how to prevent frozen pipes in winter is crucial for every Los Angeles homeowner.
Schedule Your Free Home Assessment Now
Why Los Angeles Homes Are Surprisingly at Risk for Frozen Pipes
It’s completely understandable to think frozen pipes are a problem for places like Chicago or Boston, not sunny Southern California. But that's a dangerous assumption. When a rare cold front hits Los Angeles, that exact mindset leaves countless homeowners exposed.
Because our climate is so mild, most of our homes just weren't built with the heavy-duty insulation you’d find back east. This creates a perfect storm for disaster when the thermostat unexpectedly plunges toward 32°F.
The biggest risks are hiding in plain sight. We’re talking about the uninsulated pipes running through attics, crawl spaces, garages, and along exterior walls. These areas get zero benefit from your home's central heating, leaving them completely exposed to the bitter cold.
The Real-World Cost of an LA Freeze
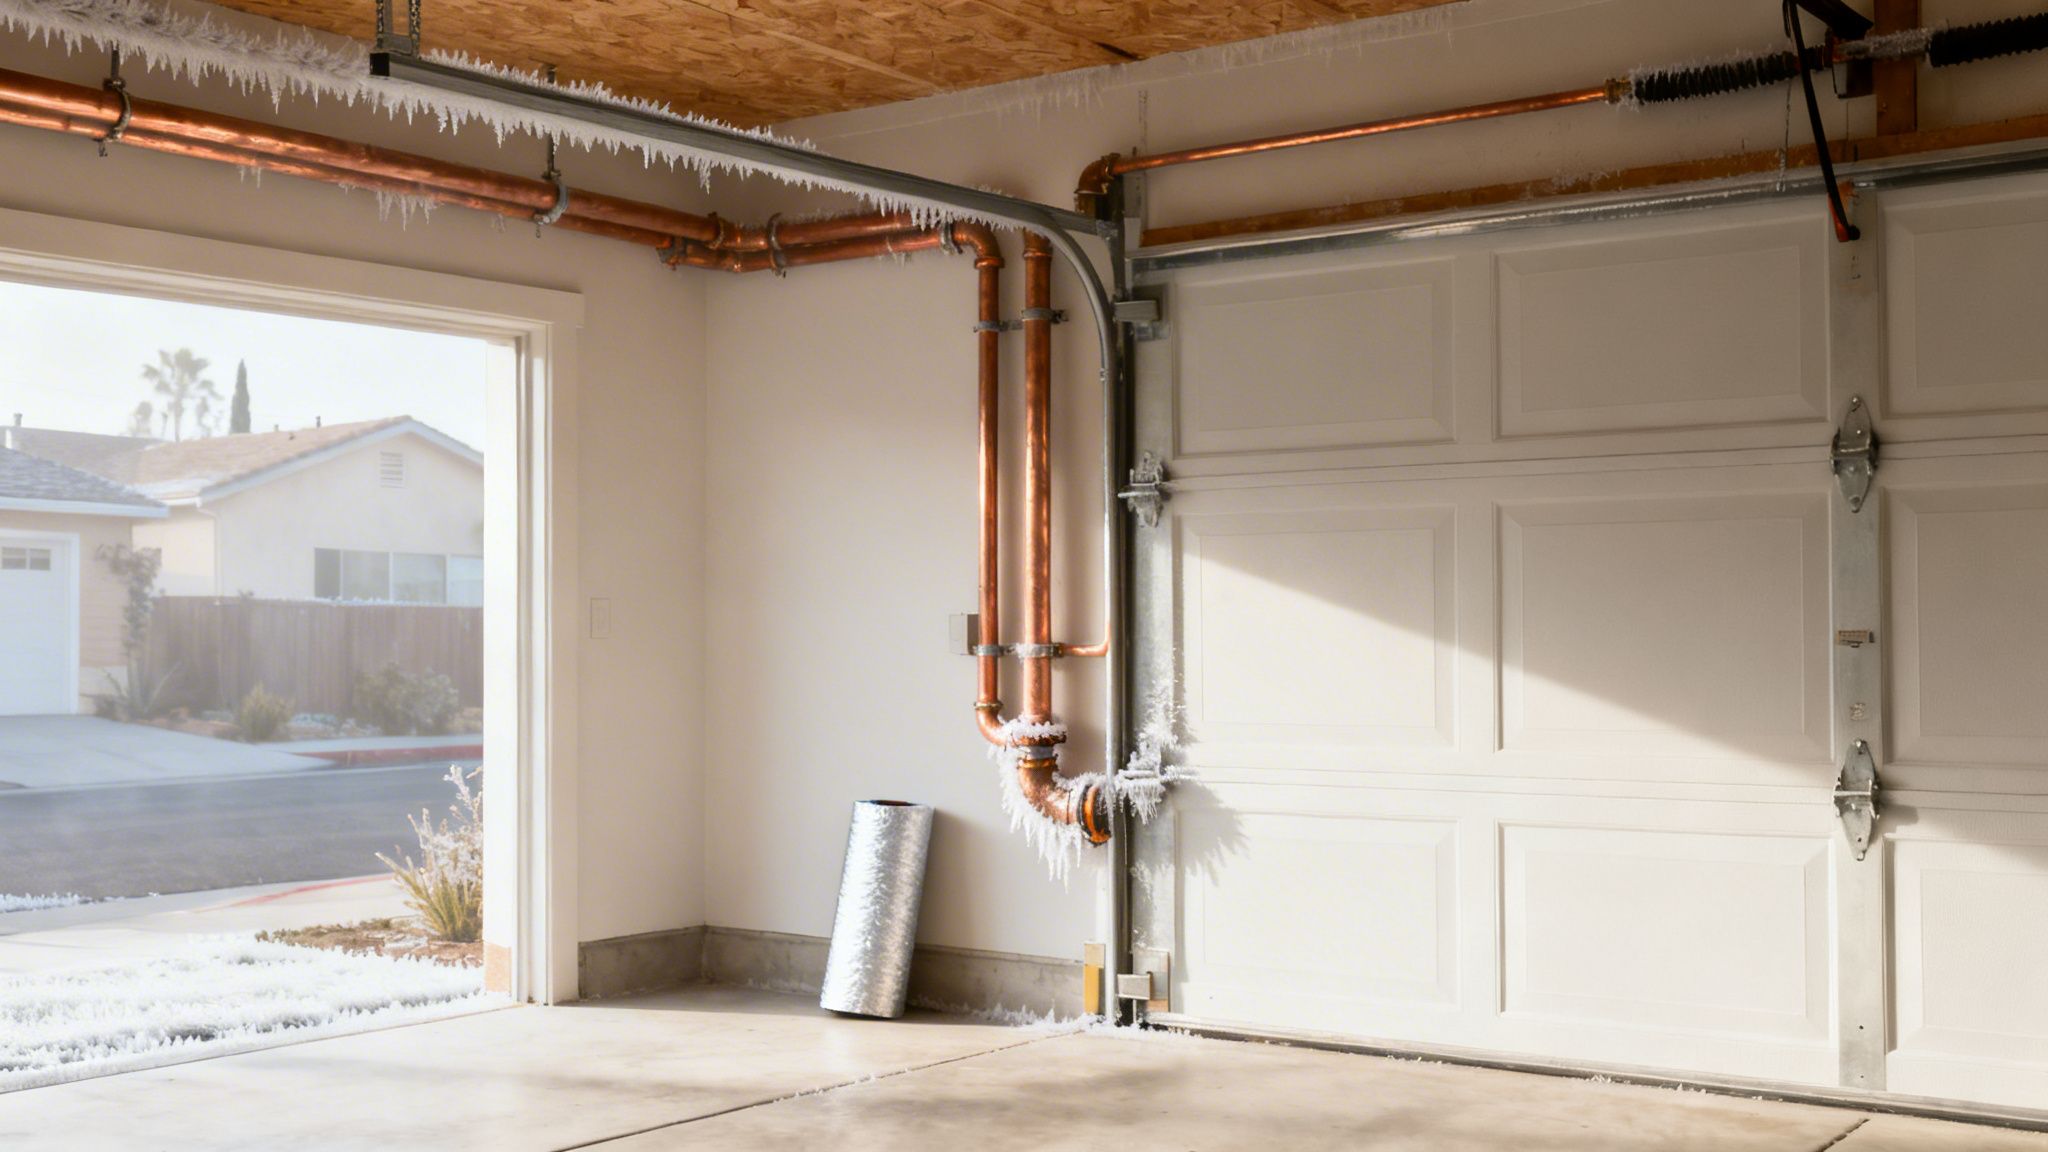
Picture a typical Sherman Oaks home with copper plumbing routed through an unheated garage. During an unusual overnight freeze, those unprotected pipes get dangerously cold, fast. As the water inside crystallizes into ice, it expands with incredible force, putting immense pressure on the pipe walls until a tiny fissure finally gives way.
The next morning, the family wakes up to a flooded garage, with water already wicking up the drywall and threatening the home's foundation. This isn't some far-fetched scenario; it's a completely preventable disaster that happens because we're not used to preparing for the cold.
The financial fallout is staggering. According to the Insurance Information Institute, claims related to freezing and water damage average over $12,500 after the deductible is paid. The reality is that this type of damage can easily cost tens of thousands to repair.
The bottom line is this: the cost and hassle of winterizing your pipes are nothing compared to the expense and chaos of an emergency water damage restoration. A few dollars and an afternoon spent on insulation can literally save you tens of thousands in repairs.
The first step in preventing a winter disaster is simply recognizing this hidden vulnerability. If a pipe does burst, the cleanup is a massive undertaking, and you'll need to understand if homeowners insurance covers burst pipes to navigate the claim. But proactive measures will always be your best, and cheapest, defense.
Your Pre-Winter Pipe Protection Checklist
The single best way to avoid a frozen pipe disaster is to hunt down your home’s weak spots before the first cold snap arrives. Trust me, a proactive inspection is a lot less painful than a frantic, middle-of-the-night call for emergency water damage cleanup. Think of it as a treasure map, but instead of searching for gold, you're finding—and fixing—your plumbing vulnerabilities.
Your mission is to find every single pipe located in an unheated or poorly insulated space. These are the ones that are almost guaranteed to freeze when temperatures drop, especially in areas like Glendale or Burbank where homes weren't always built with brutal winters in mind. You need to walk through your property with a critical eye, zoning in on the high-risk areas first.
Where to Look First
Start your hunt in the coldest, most neglected parts of your house. These are the zones where the ambient temperature can easily plummet, leaving your pipes completely exposed.
- Attics and Crawl Spaces: These are notorious for having uninsulated pipes. Check every water line running through these areas, paying extra close attention to any near vents or obvious gaps in the insulation.
- Garages: A lot of homes have laundry hookups or even the water heater tucked away in the garage. If your garage isn’t heated, those pipes are prime targets for freezing.
- Exterior Walls: It's common for kitchen and bathroom plumbing to be routed through exterior walls. Get down and look under your sinks. Can you feel a draft? That's cold air getting way too close to your pipes.
- Basements: Even in a finished basement, any pipes running along the foundation or near drafty windows are at a much higher risk.
As you go, keep an eye out for tell-tale signs of trouble. Visible cracks in the foundation near a pipe, drafts sneaking in around window seals, and completely bare copper or PVC lines are all major red flags. That subtle draft you barely notice in October becomes a pipe’s worst enemy come January. Knowing where these vulnerabilities are is step one, and if you spot any signs of moisture along the way, it’s worth learning more about how to detect water leaks in walls before they turn into a bigger problem.
Organizing Your Action Plan
Don’t let all that detective work go to waste. A simple checklist turns your inspection findings into a clear, prioritized action plan. This helps you focus on the most critical issues first, making sure your home is buttoned up before the temperature really drops.
A thorough pre-winter inspection isn’t just about finding problems—it’s about creating a strategic plan. Prioritizing your tasks ensures the most vulnerable pipes get protected first, giving you the best defense against a sudden freeze.
I find that using a simple table is the best way to get organized. It’s a great visual tool that makes it easy to see what needs to be done at a glance, turning a potentially overwhelming task into a few manageable steps.
Use this checklist to inspect your home, identify vulnerable pipes, and prioritize your winterization tasks.
Pipe Winterization Priority Checklist
| Pipe Location (e.g., Attic, Garage, Under Sink) | Risk Factor (High/Medium/Low) | Required Action (e.g., Insulate, Seal Draft, Add Heat Tape) | Status (To Do / Complete) |
|---|---|---|---|
| North-facing garage wall | High | Insulate with foam sleeves, seal foundation cracks | To Do |
| Under kitchen sink (exterior wall) | Medium | Add foam insulation, open cabinets during freeze | To Do |
| Attic water line to bathroom | High | Wrap with fiberglass insulation, check for roof leaks | To Do |
| Crawl space | Medium | Insulate all visible pipes | To Do |
By creating a systematic approach like this, you’ll know exactly where your efforts are needed most. It’s the difference between hoping for the best and being genuinely prepared for whatever winter throws at you.
Insulating and Sealing Your Home's Plumbing System
Alright, with your inspection checklist handled, it’s time to get your hands dirty. This is where you actively fortify your home against the cold and make sure those pipes are ready for whatever winter throws at them. The goal here is simple: create a solid thermal barrier between your plumbing and the frigid outside air.
Insulation is your absolute first line of defense. For most homeowners, this is a straightforward weekend project.
Choosing the Right Insulation
Not all pipes are created equal, and neither is insulation. What works for a pipe in a West Hollywood garage might not cut it for an exposed line in an older Beverly Hills attic. You have to match the material to the risk.
- Foam Sleeves: These are your go-to for long, straight runs of pipe in easy-to-reach spots like crawl spaces and basements. They're inexpensive, incredibly simple to install, and get the job done. Just slide them on and secure the seams with a bit of duct tape.
- Fiberglass Wrap: This is the perfect solution for insulating tricky spots—think joints, valves, and those awkward bends where a rigid sleeve just won't fit. A word of caution: wear gloves and a mask when you're working with fiberglass. And don't wrap it too tight! The trapped air is what does the real insulating work.
- Rubber Pipe Insulation Tape: This self-adhesive tape is a lifesaver for very short pipe sections or fittings that are otherwise a headache to cover. It’s flexible and forms a tight seal.
This simple workflow—inspect, prioritize, then act—is the heart of a successful winterization plan.
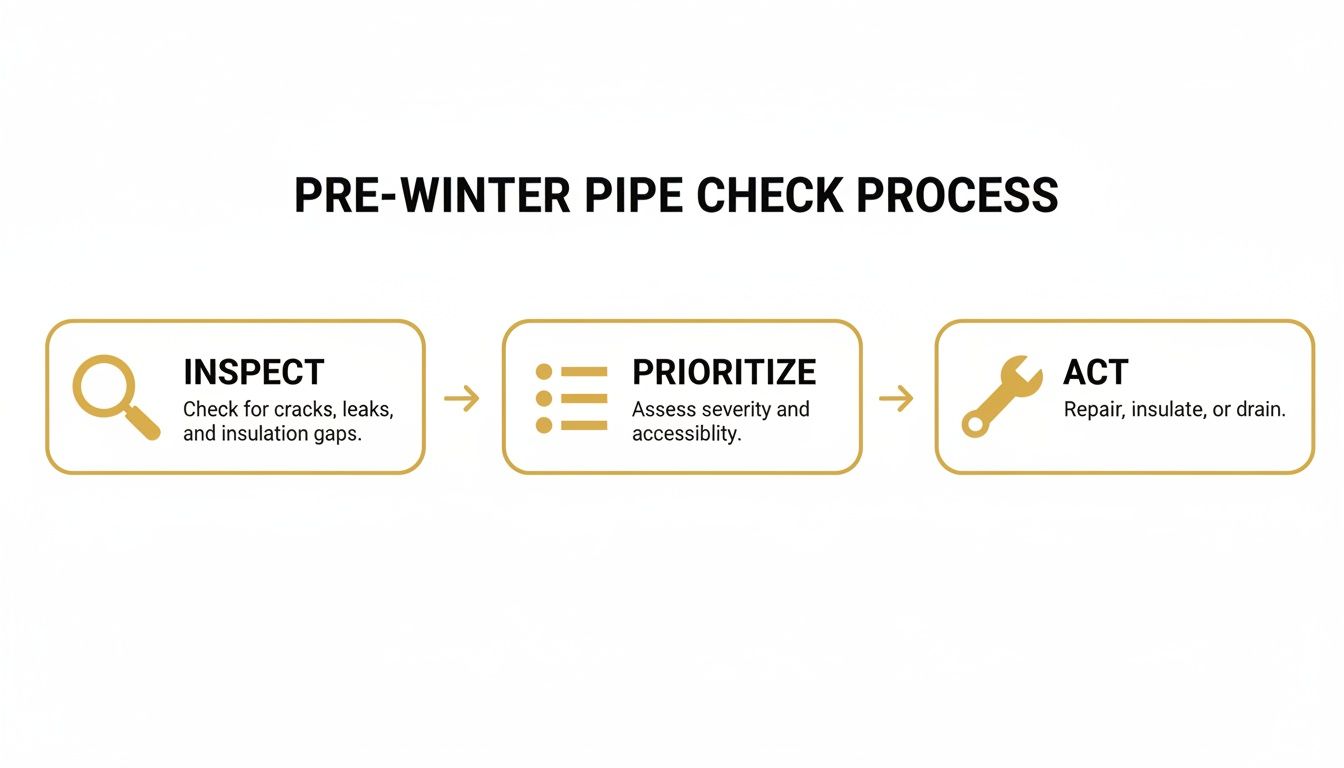
When you methodically identify the weak spots and apply the right fix, you systematically chip away at your home's vulnerability to freezing temperatures.
Sealing Cold Air Leaks
Here's a pro tip: insulation works ten times better when it isn't fighting a constant stream of cold air. Your next mission is to become a draft detective.
Get down on your hands and knees and check where pipes enter your home from the outside. Common culprits are under sinks and where your outdoor hose bibb comes through the wall. Use caulk to seal up any smaller gaps you find. For larger openings, expanding spray foam is your best friend—it creates a seal that's both airtight and insulating.
This small step makes a massive difference. You’re literally stopping the arctic air in its tracks. Just remember, completely sealing up a humid area can lead to other headaches like mold, so understanding when you might need proper crawl space dehumidification is key to your home's overall health.
Advanced Protection with Heat Tape
Now, let's talk about the most vulnerable pipes—the ones in unheated attics or garages that seem to freeze no matter what you do. For these problem areas, electric heat tape is the answer. It’s an active solution, not a passive one. Think of it as a heated cable that you wrap directly around the pipe.
When you install heat tape, follow the manufacturer's instructions to the letter. Overlapping the cable can create dangerous hot spots, so be precise. Most modern versions have a built-in thermostat, so they only kick on when the temperature drops near freezing, making them both safe and efficient.
For those chronically at-risk pipes, combining good insulation with targeted heat tape is the ultimate one-two punch. It ensures that even on the coldest nights, the water inside stays exactly where it should be: in its liquid state.
Winterizing Outdoor Faucets and Irrigation Systems

We spend so much time worrying about the pipes inside our homes that we often forget where the trouble usually starts: outside. Your garden hose, outdoor faucets (also known as hose bibbs), and sprinkler system are completely exposed, making them ground zero for ice when a Los Angeles freeze hits.
Forgetting about them is one of the fastest ways to learn how to prevent frozen pipes in winter the hard way.
The first, easiest, and most critical step is to disconnect, drain, and store your garden hoses. Leaving a hose attached to a spigot traps water inside the faucet and the pipe leading into your wall. It essentially creates a frozen highway for ice to travel right into your home.
With the hose off, the next job is protecting the faucet itself.
Protecting Hose Bibbs and Exterior Spigots
If your home has a dedicated shut-off valve for your outdoor plumbing—check the basement or a utility closet—turn it off completely. After that, head back outside and open the spigot to let any trapped water drain out. This simple action empties the section of pipe most vulnerable to freezing solid.
Next, every single outdoor faucet needs an insulated cover. These are inexpensive foam domes that fit snugly over the spigot, acting like a tiny winter coat. They do an incredible job of shielding the metal from cold air and wind, which dramatically lowers the risk of a freeze.
A single frozen pipe can unleash absolute chaos. A tiny eighth-inch crack can spew over 250 gallons of water a day. One of the top causes we see for these exterior bursts is a simple failure to disconnect a garden hose.
Dealing with a burst pipe is a homeowner's nightmare, and it so often begins with forgotten outdoor plumbing. If the worst happens, you’ll need immediate professional help for burst pipe cleanup to get the water out and minimize the damage.
Winterizing Your Sprinkler System
Many Southern California properties have in-ground irrigation systems, and these are highly susceptible to freeze damage. When water freezes in the underground pipes, they can crack, and the sprinkler heads can be completely destroyed.
Properly winterizing your sprinkler system requires a "blow out," a process that forces all the water out.
- Shut Off the Water Supply: First, find the main shut-off valve for the irrigation system (this is separate from your home’s main valve) and turn it off.
- Drain the System Manually: Some systems have manual drain valves. If you see them, open them up to let as much water escape as possible.
- Perform a Blow Out: This is the most important step. It involves using an air compressor to force every last drop of water out of the lines and sprinkler heads.
Warning: Using an air compressor can be dangerous due to the high pressure. If you're not experienced with this process, we strongly recommend hiring a qualified landscaping or irrigation professional to handle it for you.
Taking these steps protects the delicate underground components from cracking and saves you from a world of expensive landscape—and even foundation—damage come springtime.
Smart Habits for Cold Snap Protection
Prevention isn't just a one-and-done seasonal task. When you see a freeze warning in the forecast, it's time to switch gears and adopt a few smart, temporary habits.
These simple actions are often the difference between a quiet winter night and a frantic, middle-of-the-night call for emergency restoration. They work by either keeping water moving or by helping your home's own heat reach the pipes that need it most.
When temperatures are expected to drop below 32°F, the easiest and most effective trick in the book is to let your faucets drip. You don't need a full stream—just a slow, steady drip is enough, especially from faucets connected to pipes in high-risk areas like exterior walls.
Why Dripping Faucets Work
There's a twofold logic behind this old-school advice. First, moving water has a much harder time freezing than still water. A constant drip keeps the molecules agitated, preventing ice crystals from getting a chance to form and expand.
More importantly, an open faucet acts like a pressure release valve. The real danger isn't the ice itself, but the incredible pressure that builds up between a blockage and the faucet. A burst pipe is the result of that pressure having nowhere to go. A small drip gives it an escape route, dramatically lowering the risk of a rupture.
Think of it like shaking a soda can. If you pop the top immediately, the pressure makes a huge mess. But if you slowly crack it open to release that pressure first, you avoid disaster. A dripping faucet does the exact same thing for your plumbing.
Simple Adjustments for Big Protection
Beyond the faucet drip, a few other zero-cost habits can make a huge difference during a cold snap.
- Open Cabinet Doors: For kitchen and bathroom sinks, particularly those on outside walls, just open up the cabinet doors underneath. This lets the warm air from your house circulate around the plumbing, keeping the pipe temperature safely above freezing.
- Maintain a Consistent Thermostat: Never turn your heat completely off in the winter, even if you're leaving for the day or heading out on vacation. Set the thermostat to a consistent temperature, no lower than 55-60°F. That small energy cost is cheap insurance against a catastrophic pipe burst.
- Keep the Garage Door Closed: If you have water lines running through your garage for a washing machine, utility sink, or water heater, keep that garage door shut. It's a simple way to trap any residual warmth and block the cold wind.
These habits are your go-to measures when a freeze is imminent. Of course, if the worst happens, you need to shut your water off fast. It’s critical to know where your main valve is before an emergency. We have a full guide on where to find your main water shut-off valve to help you locate it.
What to Do When a Pipe Freezes or Bursts
Even with the best preparation, a sudden deep freeze can catch you off guard. When that happens, you’re facing a potential disaster. Here’s your emergency guide for what to do the moment you suspect a pipe has frozen—or worse, already burst.
Knowing the signs and acting fast is everything. Your response in the first few minutes can mean the difference between a simple fix and catastrophic water damage that requires a full-scale restoration.
Finding and Safely Thawing a Frozen Pipe
The first clue you have a frozen pipe is usually simple: you turn on a faucet and nothing comes out. If water is running fine elsewhere in the house but one tap is completely dry, you’ve likely found the problem area.
Sometimes, you might even see a patch of frost or a slight bulge on an exposed section of the pipe itself.
If you find a frozen pipe, don't panic. The key is to thaw it slowly and gently.
- Open the Faucet: Before you do anything else, open the faucet connected to that frozen pipe. As the ice plug melts, this gives the water somewhere to go, relieving the massive pressure building up inside.
- Apply Gentle Heat: Grab a hairdryer and use it on a low setting. A heating pad or towels soaked in warm water also work well. Start applying heat near the faucet and slowly work your way back toward the blockage.
- Never Use an Open Flame: This is non-negotiable. Do NOT use a blowtorch, propane heater, or any kind of open flame. It's an extreme fire hazard and can cause the pipe to rupture violently.
Keep applying that gentle heat until you see full water pressure return. Once it does, let a small trickle of cold water run for several minutes just to be sure the line is completely clear.
The Worst-Case Scenario: What to Do for a Burst Pipe
A burst pipe isn't a problem—it's a full-blown emergency. Time is your enemy, and every second counts. You need to act immediately to minimize the damage to your Los Angeles home.
Follow these steps right away, in this order:
- Shut Off the Main Water Supply: This is the single most critical step. Find your main water shutoff valve and turn it off to stop the flood at its source.
- Turn Off Nearby Electricity: If water is spraying anywhere near electrical outlets, appliances, or your breaker box, kill the power to that area. Only do this if you can access the breaker box safely without standing in water.
- Call for Professional Help: Your very next call should be to a 24/7 restoration company.
A burst pipe is not a DIY job. It demands immediate, professional water extraction and structural drying to head off secondary damage like mold growth and permanent harm to your home's structure.
At Onsite Pro Restoration, we specialize in rapid response for exactly these kinds of emergencies. Call us at (818) 336‑1800 the moment you have a burst pipe. Our team is on call 24/7 to get onsite and mitigate the damage immediately.
If a frozen pipe leads to major damage, navigating the insurance claim can get tricky, and you might need extra help fighting a denied offer. Resources like Frozen Pipe Plumber Claim Help can offer valuable guidance. The bottom line is to stop the water, make the area safe, and get expert help on the way.
FAQs: How to Prevent Frozen Pipes in Winter
Even after you've taken all the right steps, it's normal to have a few lingering questions. Here are some of the most common things we hear from Los Angeles homeowners about keeping their pipes safe from the cold.
Q: At what temperature should I worry about my pipes freezing in Los Angeles?
A: Water starts to freeze at 32°F, but the real danger zone for your pipes is when the temperature outside drops to 20°F or below and stays there for a while. The big issue for us in Southern California is that our homes just aren't built for serious cold. Most lack the heavy-duty insulation you’d find in colder climates. That’s why it's smart to start taking precautions anytime the forecast calls for an overnight dip near freezing. Pipes in uninsulated spots like garages, attics, and crawl spaces are especially at risk and can freeze even when the thermometer reads slightly above 32°F.
Q: Is it expensive to winterize my home's plumbing?
A: Not at all—especially when you think about the alternative. A single water damage claim can easily run you over $12,000. DIY winterization, on the other hand, is a tiny fraction of that. You can get all the basic materials you need for under $100. We're talking about things like foam pipe sleeves, outdoor faucet covers, and caulk or spray foam for sealing up those little gaps and cracks where cold air sneaks in around your pipes. Even if you opt for something more heavy-duty like heat tape, it’s a tiny investment compared to the nightmare of replacing floors and tearing out drywall.
Q: Will my homeowner's insurance cover damage from a burst pipe?
A: Most of the time, yes. A standard homeowner's policy usually covers sudden and accidental water damage, and a burst pipe from freezing fits that description. But there's a huge catch: negligence. If your insurance company can argue that you didn't take reasonable steps to prevent the freeze, they could deny your claim. A classic example is going on vacation during a cold snap and turning the heat completely off. They’ll see that as a preventable mistake. This is exactly why it's a good idea to document your winterization efforts. Taking proactive steps not only protects your house, but it also strengthens your case if you ever have to file a claim.
Q: Can I just leave my faucets dripping all winter to be safe?
A: A slow drip is an incredibly effective emergency tactic, but it’s definitely not a permanent fix. You should only let your faucets drip when a freeze warning is in effect and you know the temperature is about to plummet overnight. Leaving a tap running 24/7 wastes a massive amount of water and will show up on your utility bill. The best long-term strategy will always be good old-fashioned insulation and sealing up every air leak you can find.
Don't let a sudden LA cold snap turn into a water damage disaster. If you need a hand winterizing your home or you're already dealing with a burst pipe emergency, the experts at Onsite Pro Restoration are here to help 24/7.