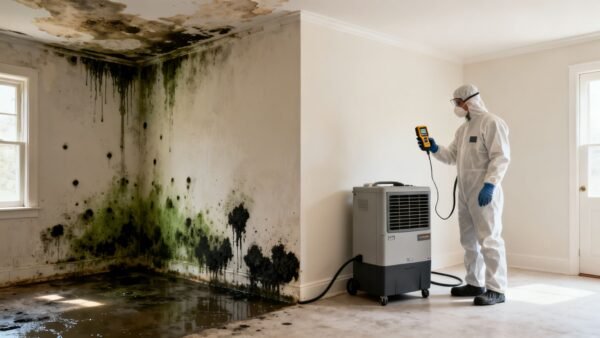
The first step in checking for mold inside your walls is trusting your senses. A persistent musty or earthy odor that won't go away, no matter how much you clean, is the most common giveaway. This is especially true in areas like Sherman Oaks or the San Fernando Valley after a rare rainy season. Visually, you're looking for subtle clues—faint discoloration, old water stains, or paint that’s starting to peel and bubble. These are classic signs that moisture is trapped behind the drywall, creating the perfect environment for mold to thrive.
If you suspect mold, don't wait for it to become a bigger problem. Our IICRC-certified team provides thorough mold inspections across Los Angeles to give you peace of mind.
Learning to Spot the First Signs of Hidden Mold
Before you cut into drywall, a careful walkthrough of your home can tell you almost everything you need to know. Your eyes and nose are your best initial tools. Mold colonies love the dark, damp space behind your walls, but they often give themselves away long before you see them. This is your preliminary investigation to pinpoint high-risk areas.
The most undeniable clue is that distinct smell. When mold is actively growing, it releases microbial volatile organic compounds (mVOCs), which create that classic musty, damp odor. People often say it smells like wet soil or rotting leaves. You'll usually notice it's stronger in places with poor ventilation—closets, basements, or rooms that once had a water leak, a common issue in homes with flat-roof leaks in Sherman Oaks. If you walk into a room and get hit with that earthy smell, that’s a major red flag for hidden mold growth.
Visual and Structural Clues
Beyond the smell, your walls themselves might be trying to tell you something. Keep an eye out for these subtle but significant changes:
- Discoloration and Stains: Yellowish or brownish stains on walls or ceilings are dead giveaways of water intrusion, even if they feel completely dry now. These spots are prime real estate for mold growth.
- Paint and Wallpaper Changes: When moisture seeps through drywall, it can cause paint to bubble, crack, or peel right off. You might also see wallpaper starting to warp or pull away from the wall.
- Structural Shifts: In more advanced cases, the drywall itself might start to change. If you press on it and it feels soft, spongy, or looks like it's bulging, you’re dealing with significant moisture saturation. This almost always means there's a serious mold problem hiding in the wall cavity.
These symptoms all point back to one root cause: moisture. Recognizing the common signs of water damage is the single most important skill in finding hidden mold. And while you're looking, remember that other hidden issues can cause similar damage; it's smart to also know the early signs of termites you can't ignore. Spotting these clues early helps you narrow down exactly where to focus your investigation.
Quick Checklist: Early Warning Signs of Hidden Mold
This table summarizes the key sensory and structural clues that often point to mold growing inside your walls. Use it as a quick reference during your initial walkthrough.
| Indicator Type | What to Look For or Smell | Where It's Often Found |
|---|---|---|
| Smell | A persistent musty, damp, or earthy odor. | Basements, bathrooms, laundry rooms, closets, near plumbing. |
| Visual (Paint) | Bubbling, peeling, or cracking paint or wallpaper. | Anywhere moisture can get in—near windows, under sinks, on ceilings. |
| Visual (Stains) | Yellowish or brownish discoloration on walls/ceilings. | Ceilings below bathrooms or attics; walls with plumbing inside. |
| Structural | Warped, bulging, or soft spots on the drywall. | Near the source of a known leak or in areas with high humidity. |
Paying attention to these subtle signals is the key to catching a hidden mold problem before it becomes a major remediation project. If you notice any of these signs, it's time to investigate further.
Investigating Without Tearing Down Walls
So, you've got that musty smell or a weird stain on the wall, but you aren't thrilled about tearing into your drywall. The good news is, you don't have to. You can get a clear picture of what's happening inside your walls with a couple of affordable tools, no demolition required.
Your first move should be to grab a moisture meter. This gadget is your best friend for figuring out if there's a problem without making a mess. You just press the probes against the drywall, and it gives you a moisture reading. For standard drywall, a normal reading should be well under 1%. If that number starts creeping up over 15%, you've got a serious red flag—that's more than enough moisture to support a thriving mold colony.
Peeking Behind the Drywall
If the moisture meter confirms a hotspot, the next step is to get eyes on the situation. This is where an inspection camera, also called a borescope, is invaluable. All you have to do is drill a tiny hole in an out-of-the-way spot, like inside a closet or behind a baseboard. You can then snake the camera into the wall cavity for a live look. It’s a simple trick that’s easy to patch up later.
When you're investigating, focus your energy on the usual suspects for hidden moisture:
- Directly under windows, especially if you suspect the seals are old.
- Around plumbing lines in the kitchen and bathrooms.
- Along any exterior walls that take a beating from the weather.
This targeted approach helps you pinpoint the source of the problem without turning your home into a construction zone. We cover more of this in our guide to the signs of hidden mold behind walls.
This flowchart gives you a quick rundown of what to do when you first suspect you might have a mold issue.
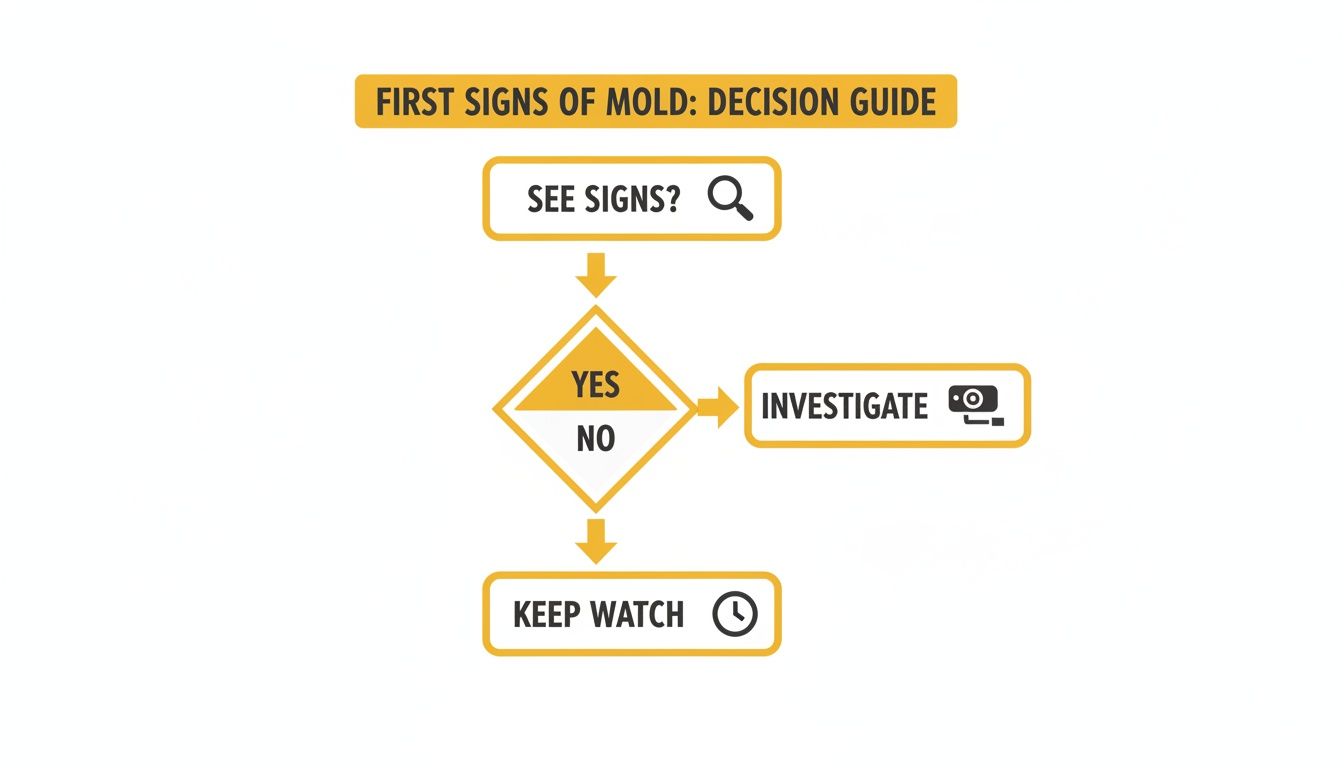
The main takeaway is that even a small sign of trouble is worth a closer, non-destructive look. These problems almost always trace back to a water source. As you look for moisture, it never hurts to learn how to fix leaky pipes yourself—it can prevent a small issue from turning into a massive headache down the road.
Using DIY Mold Tests for Concrete Evidence
Sometimes, that musty smell or a weird-looking stain on the drywall just isn't enough to go on. You need something more definitive before you decide what to do next. This is where a good DIY mold test kit comes in.
Think of it as a solid middle ground between just eyeballing a suspicious spot and calling in professionals for a full-blown inspection. These kits can help you confirm whether you’re actually dealing with a mold problem lurking behind the scenes.
There are really two main types you'll find: air sampling and surface sampling.
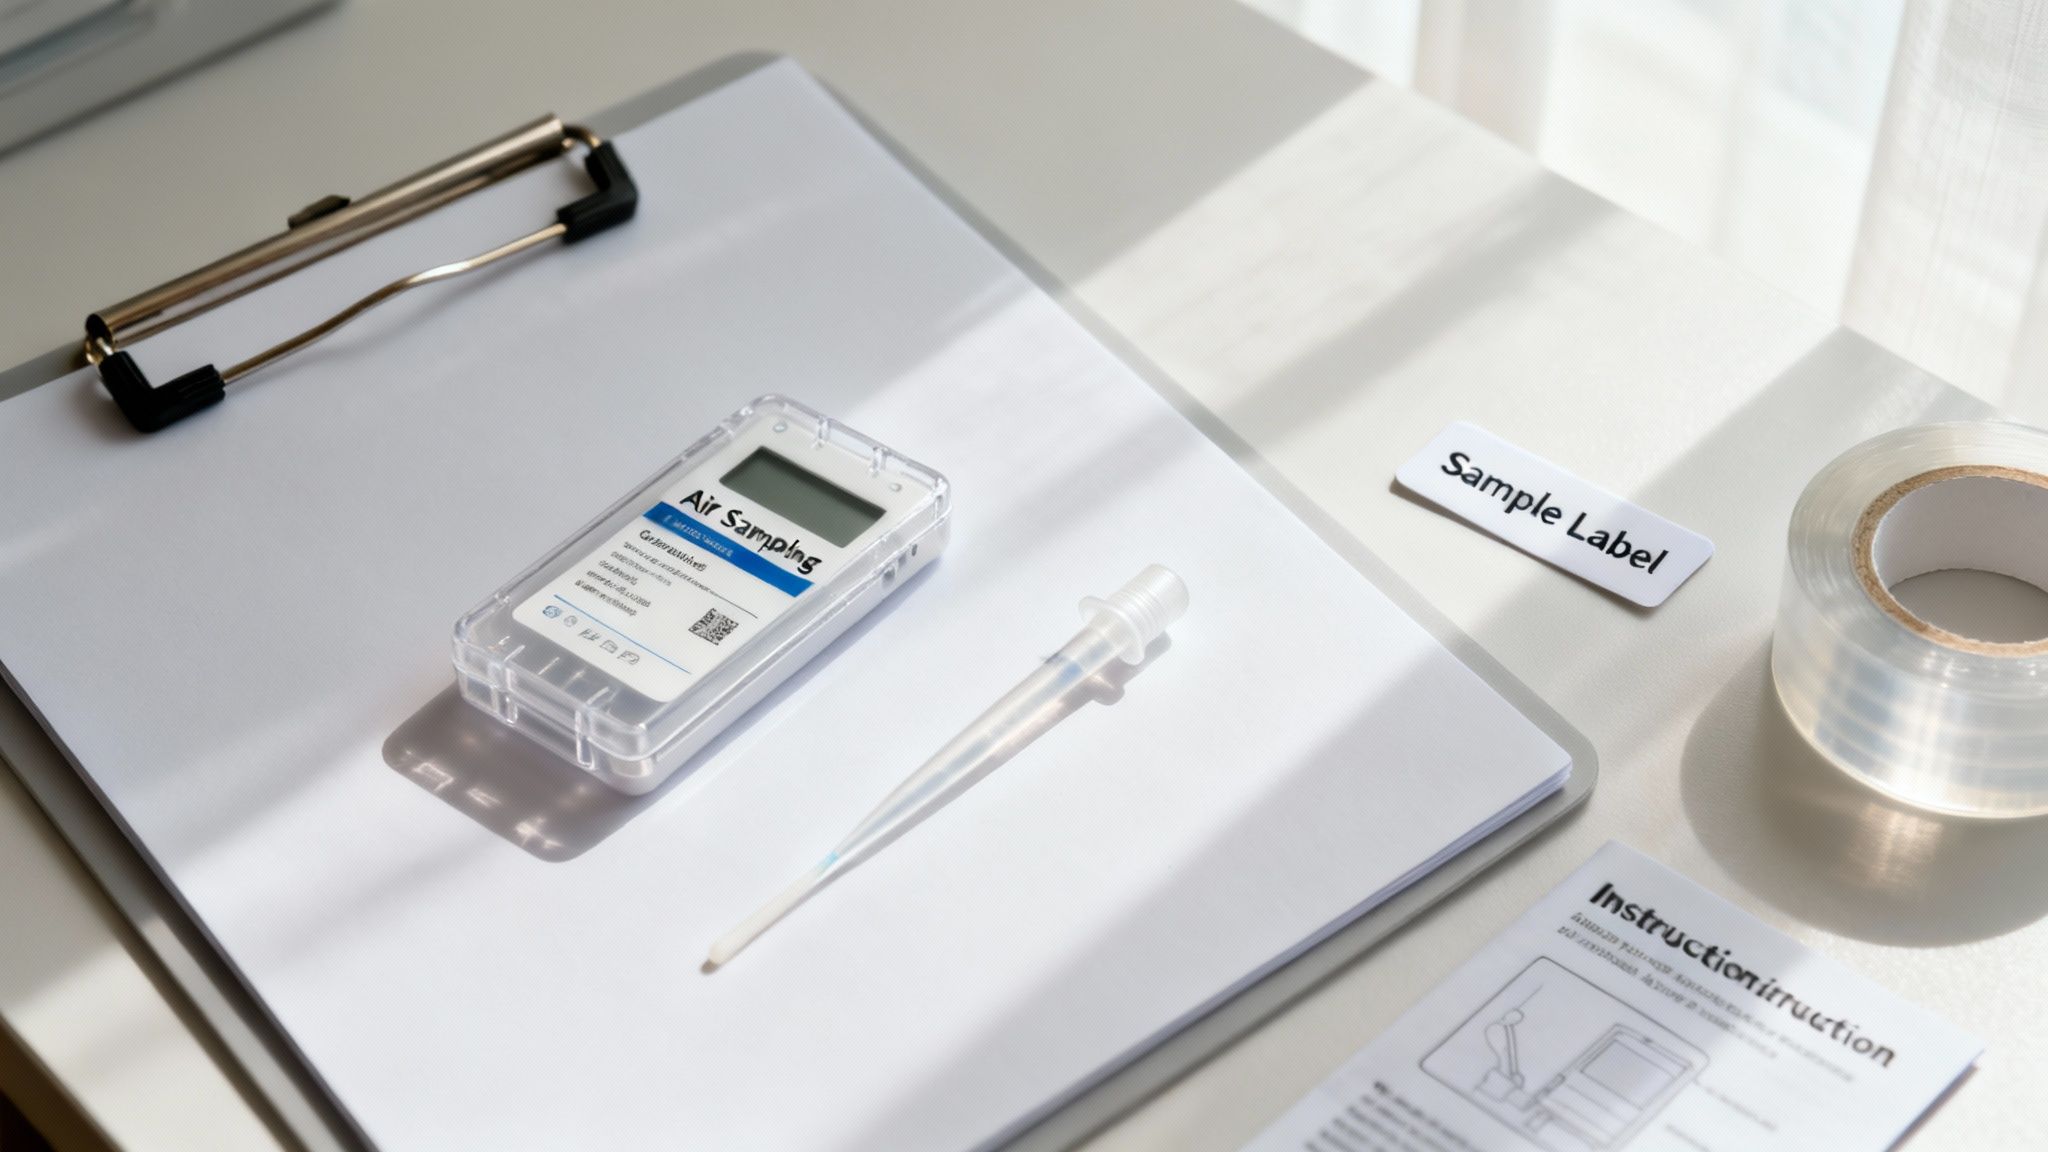
Air Sampling for Problems You Can't See
I always recommend air sampling when you suspect mold but can't find a visible source. Even hidden mold colonies release microscopic spores into the air, and these kits are designed specifically to catch them.
Most of these kits work by pulling a measured amount of air through a special collection cassette. You run the test, seal it up, and send that cassette off to a lab for analysis. The key is to take one sample inside the room that smells off and a second sample outside your home to act as a baseline or "control."
A critical part of understanding how to check for mold in walls is comparing those two samples. A healthy home's indoor air should have a similar or even lower spore count than the air outside. If your indoor count is significantly higher, it's a huge red flag that you've got an active mold source somewhere inside.
Surface Sampling for Visible Clues
Now, if you can actually see a discolored patch or a fuzzy stain, surface sampling is the way to go. It’s much more direct. These kits give you a swab or a piece of special tape to collect a physical sample right from the affected area.
Like the air sample, this gets mailed to a lab where they can identify the specific type of mold you're up against. This can be pretty important information, as some mold species are far more hazardous to your health than others.
Between the two, air sampling is often the most accurate non-invasive method, giving you insights that are surprisingly close to professional-grade. Some advanced spore traps use lasers to count particles, achieving an accuracy similar to lab tests that can cost $150-$200—a fraction of a full inspection.
The accepted industry standard is to compare indoor vs. outdoor spore counts. If your indoor level is 2-10 times higher, it’s a clear sign of a problem.
While these DIY tests give you incredibly valuable data, remember that professional LA mold testing is often the necessary final step. An expert can interpret the lab results in the context of your home and build a smart, effective plan to get rid of the mold for good.
Knowing When to Call a Mold Professional
While it’s great to be proactive, there are clear lines you shouldn't cross on your own. Honestly, knowing when to put down the tools and bring in a certified professional is the most important part of learning how to check for mold in walls.
The moment you uncover a patch of mold larger than a dinner plate—or roughly 10 square feet—it’s time to stop what you're doing and pick up the phone. Disturbing a large colony without proper containment gear can release a massive cloud of spores, turning a localized problem into a whole-house contamination nightmare.
Signs You Need an Expert Immediately
Some situations just aren’t cut out for a DIY approach. Calling for backup isn't a sign of failure; it's the smartest move you can make to protect your home and your family's health. You should call a professional immediately if:
- The musty odor is overwhelming and seems to be everywhere, not just in one spot. This often points to a widespread or deeply embedded issue.
- Family members have persistent allergy-like symptoms—coughing, sneezing, or headaches—that mysteriously get better when they leave the house.
- The mold is a result of a major water event, like a flood or sewage backup. These situations introduce other dangerous contaminants that require specialized cleanup.
- You suspect "black mold" (Stachybotrys chartarum) is present. This type of mold requires very specific handling procedures to be removed safely.
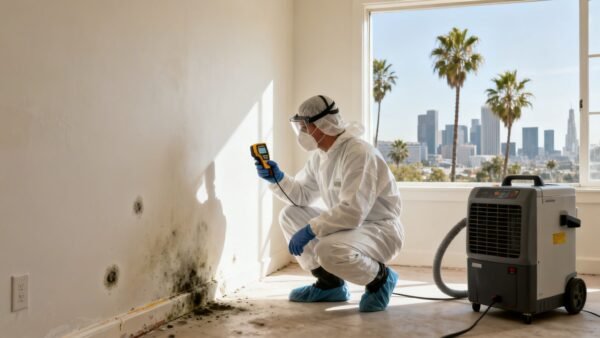
Professionals don't just guess. They use advanced equipment like thermal imaging cameras to see moisture inside walls without tearing them apart and HEPA air scrubbers to contain spores during the inspection. This level of precision and safety is something you just can't replicate with tools from the hardware store.
What Advanced Professional Testing Can Reveal
A professional assessment is worlds away from what a store-bought test kit can tell you. Experts can use scientifically validated methods to get a definitive answer, often without needless destruction.
For example, one of the most reliable, non-invasive techniques is quantitative PCR (QPCR) analysis of simple house dust. Research has shown this method can identify a home with abnormal mold levels with 95% probability. By analyzing dust samples, an expert can detect mold hidden in wall cavities and HVAC systems, giving you a crystal-clear picture of the problem. You can learn more about the findings from this environmental study. This approach provides hard data to guide an effective and targeted remediation plan.
If your own investigation points to a serious issue, scheduling a professional mold inspection service near you is the safest and most effective next step you can take.
How to Make Sense of a Professional Mold Report
So you’ve had a professional mold inspection, and now you’re staring at a report that looks like it’s written in a different language. I get it. They’re packed with scientific terms, acronyms, and data that can feel completely overwhelming. But figuring out this document is the last crucial step in knowing how to check for mold in walls properly. It’s what turns guesswork into a clear, effective cleanup plan.

Let's demystify the two most common tests you’ll see on that report: surface sampling and bulk sampling.
Surface vs. Bulk Sampling
Surface sampling is just what it sounds like. An inspector will use a special swab or a piece of clear tape to lift a sample directly from a visible stain or discolored spot. It’s a fantastic way to identify the exact species of mold growing right there on the surface.
Bulk sampling is a bit more direct. For this, the inspector physically removes a tiny piece of the material itself, like a one-inch square of drywall. This gives the lab a complete cross-section, showing them not just what is growing but how deep the contamination goes.
These tests create a precise map of the contamination. They identify the specific mold species and how concentrated they are in different spots. This data allows for a surgical remediation plan that avoids tearing out more than is absolutely necessary, which saves you a ton of money and hassle.
Understanding the Numbers and Terms
Your report will almost certainly have terms like CFU/cm². It looks complicated, but it just means "Colony Forming Units per square centimeter." Think of it as a simple measurement of mold density in a specific area.
You should also see a “control sample” listed. This is a baseline sample taken from a clean, unaffected part of your home. If the sample from the problem area shows a count of 1,000+ CFU/cm² while your control sample is under 100, that’s the hard evidence of a significant mold problem. These direct sampling methods are invaluable, and I’ve seen them save homeowners 40-60% by preventing remediation crews from over-remediating based on vague air tests alone.
Once you understand what the report is telling you, you're empowered to ask the right questions and move forward with a solid plan. Professional mold testing and removal services use this exact data to make sure the problem is solved for good.
FAQs: Checking for Mold Inside Los Angeles Walls
Q: What does mold inside a wall actually smell like?
A: That distinct musty, earthy smell—kind of like damp soil or old, wet socks—is a dead giveaway. The odor from hidden mold is persistent, and you'll often notice it gets stronger in rooms with poor ventilation or during humid weather, a common occurrence with the coastal fog in Santa Monica.
Q: Can I just use mold-killing paint on drywall?
A: Absolutely not. Painting over mold is one of the worst mistakes a homeowner can make. While some specialty paints are designed to inhibit future growth on a clean surface, they do nothing to kill existing mold colonies or address the moisture feeding them. The mold will simply continue to grow underneath the new paint.
Q: What's the typical cost for a professional mold inspection in Los Angeles?
A: A professional mold inspection in the LA area typically costs between $300 and $1,000. A basic visual assessment is at the lower end, while a comprehensive inspection with air and surface samples for lab analysis will be at the higher end. Always get quotes from certified inspectors.
Q: Is mold growing in walls always visible?
A: Not at all—in fact, it's usually the opposite. Mold thrives in the dark, damp space inside a wall cavity, often growing for months or even years without any outward signs. By the time you see a dark stain or bubbling paint, the hidden problem is often far more extensive than that small spot suggests.
Q: How does Southern California's climate affect mold in walls?
A: While LA is known for being dry, our "May Gray" and "June Gloom" can trap moisture, especially in coastal areas like Malibu and Santa Monica. Also, many homes have poor under-floor ventilation or flat roofs prone to leaks, creating perfect pockets of humidity where mold can thrive unseen.
Don't let the uncertainty of hidden mold put your home or health at risk. The team at Onsite Pro Restoration offers professional, IICRC-certified mold inspections and testing to give you definitive answers. We use advanced tools to pinpoint the source and scope of the problem, providing you with a clear path forward for a safe, mold-free home.