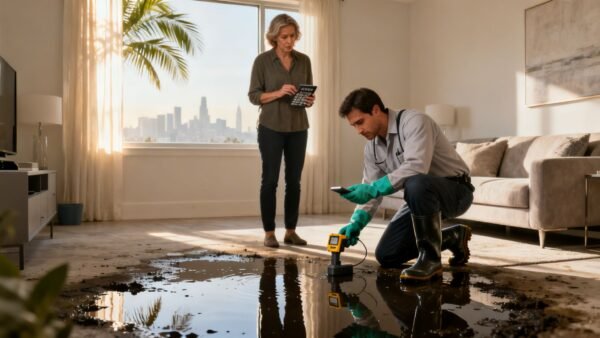
When you find yourself standing in water inside your home, the clock starts ticking. Those first 30 minutes are absolutely critical. What you do right then and there can dramatically reduce the long-term damage and make your insurance claim go a whole lot smoother. Acting fast is the key to a successful emergency water cleanup.
Your game plan has three immediate priorities: shut off the water, kill the power, and document everything before you even think about moving a single thing.
What to Do in the First 30 Minutes of a Water Emergency
It’s completely natural to panic when you see water creeping across your floors. But taking a deep breath and following a clear, methodical plan can save you thousands. Think of this as your first-response playbook—it’s not about fixing the whole problem yourself, but about stopping it from spiraling out of control before the pros arrive.
Quickly figuring out the source of the water, like from common sewer or water pipeline issues, is your first mission. Once you know where it's coming from, you can take decisive action.
To help you stay focused, here's a quick checklist for those critical first moments.
Your 30-Minute Emergency Action Checklist
This table is your quick-reference guide. Run through these steps immediately to ensure safety and set the stage for a successful cleanup.
| Action Item | Why It's Critical | Pro Tip |
|---|---|---|
| Stop the Water Source | Prevents more water from entering, limiting the total damage. | Find your main water shutoff valve before an emergency happens. It’s usually in the basement, crawl space, or on an exterior wall. |
| Cut the Electricity | Water + electricity = lethal hazard. This step is non-negotiable for safety. | If the breaker box is in a wet area, DON'T touch it. Call an electrician or your restoration company immediately. |
| Document the Scene | Creates undeniable proof for your insurance claim, showing the initial extent of damage. | Use your phone to take a slow video walkthrough. Narrate what you see, capturing water lines on walls and damaged items. |
| Gear Up with PPE | Protects you from contaminants, bacteria, and hidden debris in the water. | At a minimum, wear waterproof boots and heavy-duty gloves. Even "clean" water gets dirty fast. |
| Move Valuables | Gets important documents, electronics, and sentimental items out of harm's way. | Focus on what's irreplaceable first. Furniture can wait if it means saving photos or laptops. |
Remember, this checklist isn't about solving the problem—it's about managing the crisis until professional help arrives.
Secure the Area for Safety
Your absolute first priority is safety. Water and electricity are a deadly mix, and murky floodwater can hide all sorts of hazards.
- Shut Off the Main Water Valve: Find your home's main shutoff valve and turn it clockwise until it's completely closed. This stops any more water from flooding your property.
- Turn Off the Electricity: Head to your circuit breaker box and switch off the power to every affected room. If you have to walk through standing water to get to the breaker, stop. Do not proceed. Call an electrician or your emergency cleanup crew right away.
Document Everything for Insurance
Before you touch, move, or clean a single thing, pull out your phone. This is a non-negotiable step for a successful insurance claim.
Pro Tip: Take way more photos and videos than you think you need. Record a video walkthrough, explaining what you're seeing. Get close-ups of damaged furniture, the water level on the walls, and the source of the leak if you can see it. This evidence is your best friend when you're talking to an insurance adjuster.
This documentation creates a clear "before" picture that proves the full extent of the damage. Without it, you're risking a denied claim. Once you've recorded everything, you can start moving anything salvageable to a dry, safe spot.
Protect Yourself with PPE
Never walk into a flooded area without the right Personal Protective Equipment (PPE). Even water from a supposedly "clean" source, like a burst supply line, will quickly pick up contaminants from flooring, insulation, and building materials.
Here’s the essential PPE you’ll need:
- Waterproof Boots: Keeps your feet safe from contaminated water and any hidden debris.
- Gloves: Heavy-duty rubber gloves are a must to avoid skin contact with nasty materials.
- Safety Glasses: Protects your eyes from splashes.
Taking these steps immediately puts you back in control. While this initial response is vital, a full recovery almost always requires professional expertise. Knowing what's involved in professional water damage restoration services near you will help you make a smart decision once the immediate crisis is under control.
How to Assess the Full Scope of the Water Damage
With the immediate chaos under control, your next job is to play detective. A proper assessment of the water damage is more than just looking at wet floors; it's about understanding the type of water you're dealing with and uncovering hidden problems before they evolve into major structural issues or mold infestations.
This step is crucial. It helps you figure out whether this is a manageable DIY cleanup or a situation that requires calling in professional emergency water cleanup services right away.
Understanding Water Contamination Categories
Not all water is created equal. The source dictates the risk, and the Institute of Inspection, Cleaning and Restoration Certification (IICRC) classifies water into three categories. Knowing the difference is a matter of safety, pure and simple.
-
Category 1: 'Clean Water'
This is water from a sanitary source—think a burst supply line or an overflowing sink with no soap or other contaminants. While it’s the least hazardous, don't get complacent. If left standing for too long, it can quickly degrade to Category 2. -
Category 2: 'Gray Water'
This water is significantly contaminated and can cause sickness if you come into contact with it. Common sources are overflowing washing machines, dishwasher discharge, or a toilet bowl with urine but no feces. -
Category 3: 'Black Water'
This is grossly contaminated water that can cause severe illness or death. It includes all sewage backups, rising floodwaters from rivers, and seawater. Any contact with Category 3 water requires professional intervention and full PPE.
A common mistake is underestimating how quickly clean water turns nasty. Once it soaks into building materials like drywall or insulation, it picks up bacteria and dirt, quickly becoming Category 2.
Identifying Hidden Moisture and Damage
Water is incredibly sneaky. It travels behind walls, under floorboards, and seeps into the subfloor, creating hidden pockets of moisture that are perfect breeding grounds for mold. You need to look for subtle clues that point to a bigger problem. Our guide on the signs of water damage can help you spot these issues before they get out of hand.
Keep an eye out for these red flags:
- Discoloration: Dark or wet-looking spots on ceilings or walls.
- Texture Changes: Peeling paint or bubbling wallpaper are classic signs of moisture trapped just beneath the surface.
- Musty Odors: A persistent damp, earthy smell often means hidden mold growth, which can start in just 24-48 hours.
Knowing When to Evacuate
Some signs of water damage are more than just cosmetic—they're serious structural warnings. If you spot any of the following, your safety becomes the top priority.
- Sagging Ceilings: This is a major warning sign. It means the weight of trapped water is compromising the structural integrity of the drywall or plaster, and the area is at risk of imminent collapse.
- Buckling Floors: When you see warped or bulging floorboards, it suggests the subfloor is completely saturated and potentially weakened.
If you observe these structural red flags, get everyone out of the immediate area and call a professional restoration company without a second thought. The scale of these events often reflects larger, more serious issues.
This is a fact underscored by global disaster trends. In one recent year, the world saw 393 natural hazard-related disasters that caused over $241 billion in economic losses, highlighting just how immense the impact of widespread water events can be. You can discover more about how these incidents are tracked in the full 2024 EM-DAT report.
The Hands-On Process of Water Extraction and Removal
Once you've managed the initial crisis and have a clear picture of the damage, it's time to get to work. This is the stage where you shift from defense to offense, physically removing the water that’s threatening your home's structure and your family's health. Your success here really boils down to using the right tools for the job.
For a minor mess, like an overflowing sink on a tile floor, a powerful wet/dry vacuum can usually do the trick. Those machines are great for sucking up standing water from hard surfaces. But when you’re facing significant flooding—like from a burst water heater or a storm that soaked an entire room—you’ll need to bring in the heavy hitters.
Choosing the Right Extraction Tools
Your standard shop vac just isn’t going to cut it when you're dealing with several inches of water. In those situations, the best first move is to rent a commercial-grade submersible pump. These pumps are workhorses, designed to move huge volumes of water out of your home quickly through a discharge hose.
After the pump has removed the bulk of the water, you can then go back in with a wet/dry vac to handle the remaining puddles and get into those tricky corners. It’s best to work methodically from one side of the room to the other, making sure no pools of water are left behind. Pay close attention to corners and the areas under cabinets, as that’s where water loves to hide. The goal is to get every last drop of standing water out to prepare for the critical drying phase.
Removing Saturated and Unsalvageable Materials
Water extraction isn’t just about the water you can see—it's also about what’s soaked into your home's materials. Porous items like carpet, padding, insulation, and drywall act like giant sponges. Once they’re saturated, especially with contaminated Category 2 or 3 water, they are almost always a lost cause.
Letting saturated materials sit is a guaranteed invitation for mold. Mold spores can begin to colonize damp surfaces in as little as 24 to 48 hours, turning a water problem into a serious health hazard.
Tearing out these items is tough, messy work, but it's a non-negotiable part of the process.
- Carpet and Padding: Waterlogged carpet is incredibly heavy. You’ll probably need to cut it into smaller, more manageable strips with a utility knife to haul it out. The padding underneath is almost never salvageable and has to be pulled up and thrown away.
- Drywall: Water has a nasty habit of wicking up drywall. A standard professional practice is to make a "flood cut" about 12-24 inches above the visible waterline. This removes the damaged section and, just as importantly, opens up the wall cavity so air can circulate and dry the framing.
- Insulation: Once most types of insulation (especially fiberglass and cellulose) get wet, they lose their R-value and become a perfect breeding ground for mold. It all has to be pulled out and disposed of correctly.
This part of the job is incredibly labor-intensive. If the scope feels overwhelming, it’s a good idea to call in professionals who specialize in emergency water extraction services. They have the right equipment and training to clear out damaged materials safely and efficiently, which is absolutely critical for preventing long-term structural problems and keeping your home healthy.
The Science of Structural Drying and Dehumidifying
Getting the standing water out is a great first step, but it's really only half the battle. The real, persistent threat after an emergency water cleanup is the enemy you can't see—the moisture that has soaked into your drywall, wood framing, and subfloors.
This hidden dampness is the perfect breeding ground for mold, which can start its destructive takeover in as little as 24-48 hours.
Drying a home properly is a science. A pro doesn't just point a few fans at a wet spot and call it a day. They create a carefully controlled drying environment using a strategic combo of high-velocity air movers and industrial-grade dehumidifiers. These tools work together to pull moisture out of the materials and then strip it from the air for good.
This infographic breaks down the basic steps of water extraction, which sets the stage for everything that comes next.
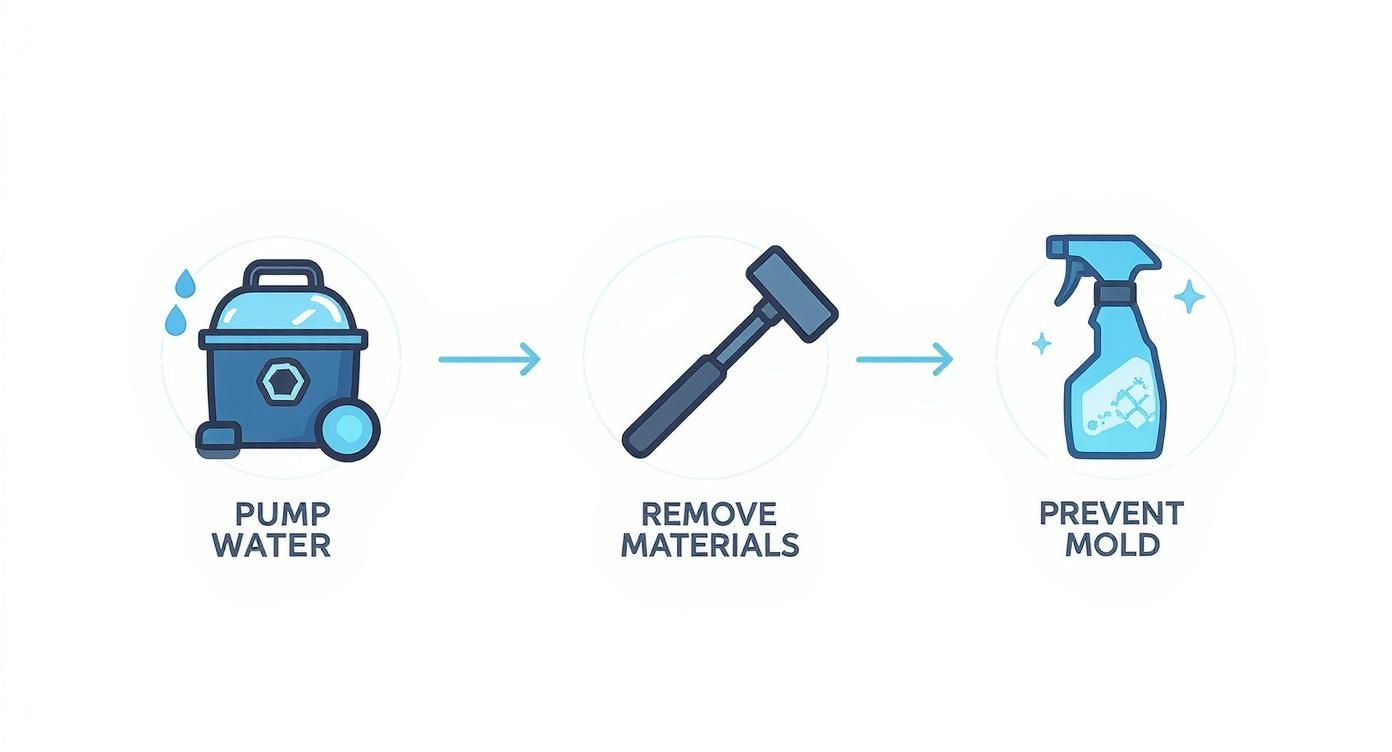
As you can see, pumping out water and removing soaked materials has to happen before you can even think about mold prevention. This is why that initial cleanup phase is so urgent.
Creating a Drying Vortex
The whole point of structural drying is to maximize evaporation. We do this by creating what restoration pros call a "drying vortex"—a powerful, circulating airflow that hits every single affected surface.
Here’s a look at how that works:
- High-Velocity Air Movers: These are not your typical box fans from the hardware store. They're built to blast a concentrated sheet of air at a low angle across wet surfaces, like your floors and the bottom of your walls. This airflow literally breaks the water's surface tension, speeds up evaporation, and pushes all that moisture up into the air.
- Strategic Placement: To create that vortex, we place fans every 10-16 linear feet along the wet walls. By angling them just right, we create a circular airflow that keeps the humid air moving and ensures no corner is left damp.
The Critical Role of Dehumidifiers
Once the air movers have pushed all that moisture into the air, you have to get it out of there. That's the dehumidifier's job. A single industrial dehumidifier can pull dozens of gallons of water from the air in a day, which is way more than any residential unit could ever handle.
Pro Tip: For this to work, the space has to be contained. We close all the doors and windows to create a sealed "drying chamber." This lets the dehumidifier process the air in the room efficiently instead of fighting a losing battle against new, moist air coming in from outside.
Monitoring Your Progress
So, how do you know when it’s actually dry? Guessing is a recipe for disaster. You might think it feels dry, but there could still be enough hidden moisture to cause serious problems down the road.
The only way to be certain is by using a professional moisture meter or hygrometer.
These tools give us exact readings of the moisture content inside materials and the relative humidity of the air. A restoration team will take readings every single day to track the progress. We don't pull the equipment until every material is back to its normal, pre-loss moisture level. It’s a data-driven approach, and it’s the only way to be sure. For a deeper dive, check out our complete guide on structural drying for homeowners.
Nailing this stage is what ensures your home isn't just visually dry—it's structurally sound and safe from future mold.
Cleaning, Sanitizing, and Preventing Future Mold
So, the last fan has been switched off and your home is finally feeling dry again. It's tempting to breathe a sigh of relief and declare the job done. But hang on—this final stage is where you win or lose the long-term battle for your family's health.
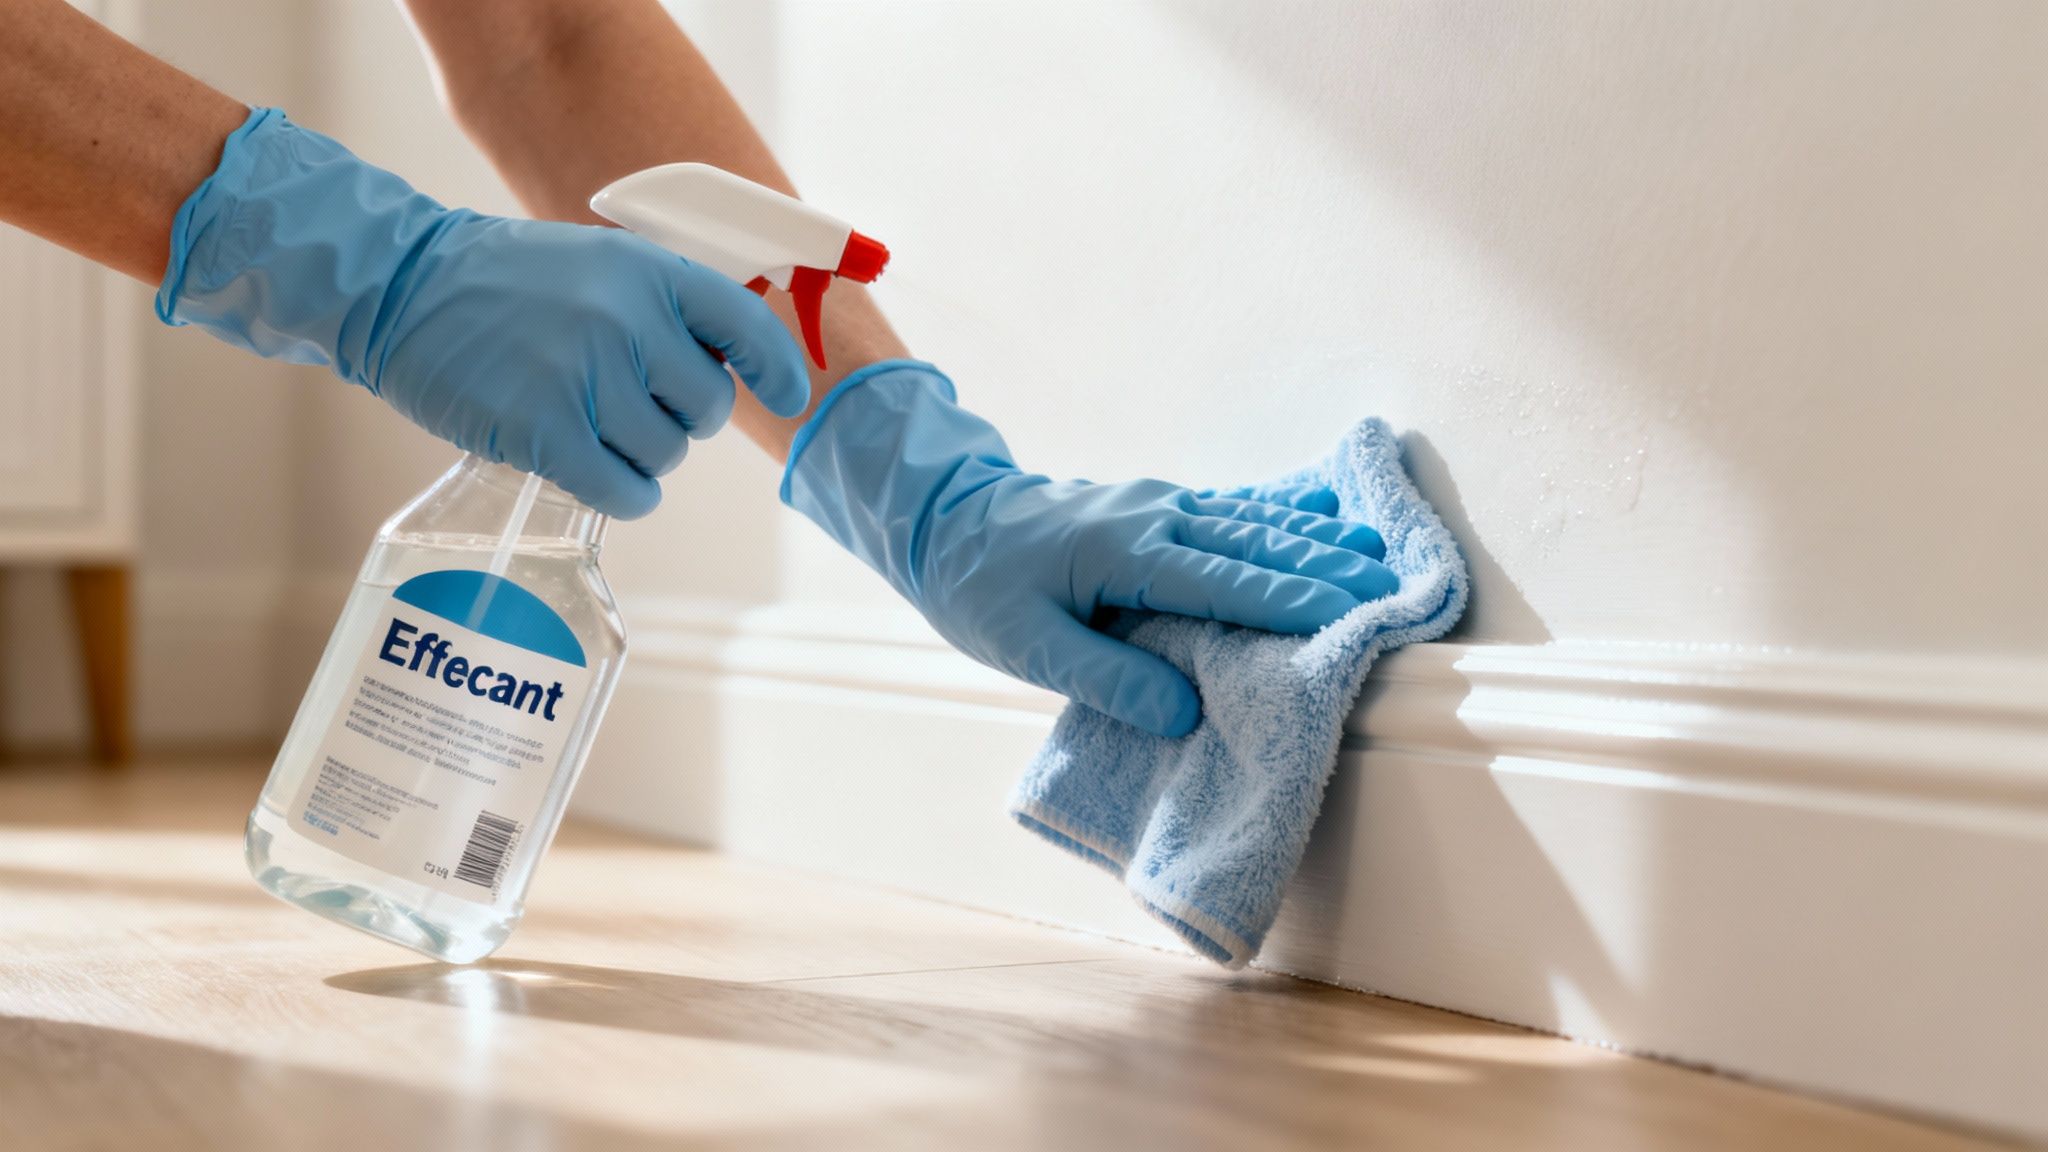
Just drying out a surface that got soaked, especially with gray or black water, isn't nearly enough. You have to meticulously clean and sanitize every affected area to kill off the bacteria, viruses, and mold spores left behind.
This isn’t about a quick wipe-down. It’s a methodical process that separates the true pros from the amateurs. Cutting corners here is a surefire way to turn a resolved water problem into a chronic, hidden mold issue that plagues your home for years.
Knowing the Difference: Cleaning vs. Sanitizing
It’s easy to use these terms interchangeably, but in the restoration world, they mean two very different things. Both are non-negotiable after an emergency water cleanup.
- Cleaning: This is the physical grunt work—removing dirt, grime, and muck. You're scrubbing surfaces with soap or detergent to get rid of the visible mess. This step always comes first because disinfectants can't work properly if they're applied to a dirty surface.
- Sanitizing: This is the knockout punch. After cleaning, you apply a disinfectant (like a specific bleach solution or an EPA-registered antimicrobial) to kill the microscopic threats that cleaning alone can't touch.
This two-step process is crucial for preventing disease. On a global scale, poor sanitation is a massive health crisis. In 2022, over 1.5 billion people still didn’t have access to safely managed sanitation, leading to hundreds of thousands of preventable deaths. You can dig deeper into this via the World Health Organization's detailed fact sheet.
Practical Steps for Different Materials
You can't just spray the same cleaner on everything. Different materials demand different approaches to avoid causing more damage.
Treating Wood Studs and Subfloors
Once the exposed wood framing and subfloor are bone dry, it's time to treat them with a professional-grade antimicrobial agent. This simple step helps ensure any dormant mold spores that survived the drying process can't wake up and cause trouble later if the humidity spikes.
Key Takeaway: Never, ever seal up a wall or cover a subfloor until you are 100% certain it's completely dry and has been treated. Trapping even a tiny bit of moisture behind fresh drywall is like handing mold a written invitation to move in.
Cleaning Concrete and Hard Surfaces
Concrete might seem solid, but it's porous and can trap contaminants deep inside. First, scrub it with a strong detergent to remove surface grime. Then, apply a disinfectant solution—a simple mix of one cup of household bleach per gallon of water works well. Let it sit on the surface for at least 10 minutes to give it time to work before you rinse it off.
Preventing Future Mold Growth
Ultimately, the best way to handle mold is to stop it before it even gets a chance to start. After significant water damage, the risk of a secondary mold problem is incredibly high. Those invisible spores are just waiting for an opportunity.
If you’ve dealt with extensive damage or you're just worried about moisture hiding where you can't see it, calling in professional mold remediation services is the smartest move. Professionals use advanced tools and techniques to hunt down and eliminate any remaining threats, giving you true peace of mind. This final, thorough sanitization is what really brings your home back to being a safe, healthy place to live.
Frequently Asked Questions About Emergency Water Cleanup
When you're standing in a flooded room, your head is spinning with questions. Even with a plan, the uncertainty is one of the worst parts. Here are the straight-up answers to the most common concerns we hear from homeowners in the middle of a water crisis.
How Quickly Does Mold Grow After Water Damage?
You've got a window of about 24 to 48 hours before mold starts to grow on damp surfaces. That’s it. It’s an incredibly short timeline, which is why moving fast is everything.
Spores are always in the air, just waiting for moisture and a food source like drywall or wood. Wait an extra day, and what was a straightforward water removal job can quickly spiral into a full-blown mold remediation project. That means containment zones, specialized cleaning, and a much bigger headache.
Can I Clean Up a Sewage Leak Myself?
Absolutely not. You should never try to clean up a sewage backup on your own. This is what we in the industry call Category 3 "black water," and it's a serious biohazard. It’s teeming with bacteria, viruses, and other pathogens that can make you incredibly sick.
Professionals use full Personal Protective Equipment (PPE), specialized sanitizers, and follow strict disposal protocols for a reason. Without that gear and training, you're putting your family's health at risk. For anything involving sewage, you need to call a certified restoration company. Period.
A Quick Note on Safety: Our technicians are trained to handle biohazardous materials according to strict industry standards. We don't just "clean" the area; we sanitize and verify it's safe for you to live in again.
Does Homeowner's Insurance Cover Water Damage Cleanup?
It really depends on why the water is there. Most standard policies will cover damage from a "sudden and accidental" event, but they draw a hard line on issues caused by neglect or poor maintenance.
- What's Usually Covered: Think of things that happen out of the blue, like a burst pipe, a washing machine hose that suddenly lets go, or a toilet that overflows unexpectedly.
- What's Usually Not Covered: Gradual problems are almost always excluded. This includes slow drips under a sink you ignored, damage from deferred maintenance, or groundwater flooding from a storm. For overland flooding, you need a separate flood insurance policy.
Your best first step is to document everything with photos and videos, then call your insurance agent right away. They can pull up your specific policy and tell you what to do next.
What Are the Signs of Hidden Water Damage?
Water is sneaky. It can travel behind walls and under floors, far from where the initial leak occurred. You have to look for the subtle clues that point to a bigger problem hiding out of sight.
Keep an eye out for these tell-tale signs:
- A musty, earthy smell you just can't seem to track down.
- Dark stains or discoloration appearing on your walls or ceilings.
- Paint or wallpaper that has started peeling, bubbling, or blistering.
- Wood floors that are warping, cupping, or buckling.
- Baseboards that feel soft to the touch or are pulling away from the wall.
If you spot any of these, it's a red flag that you've got trapped moisture that needs to be dealt with before it causes even more damage.
When water damage strikes, you need a team that responds fast and gets the job done right. At Onsite Pro Restoration, our IICRC-certified technicians are available 24/7 to handle any water emergency. Get a free assessment now.