The best way to clean up drywall dust isn't just one magic trick. It's a systematic process that combines professional containment, the right kind of vacuum, and smart wiping techniques. Unlike regular household dust, these ultra-fine particles are a different beast entirely. Just grabbing a broom or a dry rag will backfire, spreading the mess throughout your Los Angeles home and tanking its air quality.
For informed homeowners and property managers in Southern California, understanding how to manage this specific type of contamination is key to a successful renovation.
Why Drywall Dust Is So Hard to Get Rid Of
If you've ever dealt with a renovation, you know the feeling. You clean everything, and the next day, a fine white powder has coated every surface. It’s more than just a nuisance; that dust is a unique cleaning challenge because standard methods just don't work. The best way to clean up drywall dust involves understanding why it's so persistent.

A Deceptive Contaminant
The root of the problem is the dust's composition. It’s made of incredibly fine particles of gypsum and sometimes crystalline silica—far smaller and lighter than typical dust bunnies. This allows them to hang in the air for hours, or even days, before finally settling.
I saw this firsthand with a homeowner in Sherman Oaks recently. After a small remodel, they spent an entire day vacuuming and wiping until the house looked perfect. But within 48 hours, a thin layer of white dust was back on everything. The dust they thought was gone had just been floating in the air, slowly resettling on their furniture, floors, and counters.
This story is incredibly common in Los Angeles County. Because the particles stay suspended for so long, they travel far beyond the work area, turning a small project into a whole-house contamination event.
The HVAC System: Your Home's Super-Spreader
One of the biggest culprits in spreading drywall dust is your home's HVAC system. As soon as the heat or AC kicks on, it sucks the airborne particles into the return vents. From there, it's a fast track to every room in your house.
This turns a localized mess into a frustrating, never-ending cycle of cleaning. You can wipe down a table in the living room, only to have the HVAC system deposit a fresh layer an hour later.
Key Takeaway: Drywall dust in your HVAC system doesn't just spread the mess—it clogs your filters, kills your system's efficiency, and continuously degrades your indoor air quality long after the project is "done."
This is exactly why professionals insist on sealing off all vents before the first cut is made. It’s a non-negotiable step in proper containment that saves countless hours of cleanup and protects the air you breathe. To get your home truly clean, you have to understand the nature of this dust first.
Preparing Your Space and Yourself for Cleanup
Before you even think about cleaning up drywall dust, you have to get the prep work right. Honestly, the secret to a good cleanup is stopping the dust from spreading in the first place. I’ve seen it a hundred times: someone rushes this stage and turns a simple one-room job into a whole-house disaster. Proper containment and personal safety gear are absolutely non-negotiable.
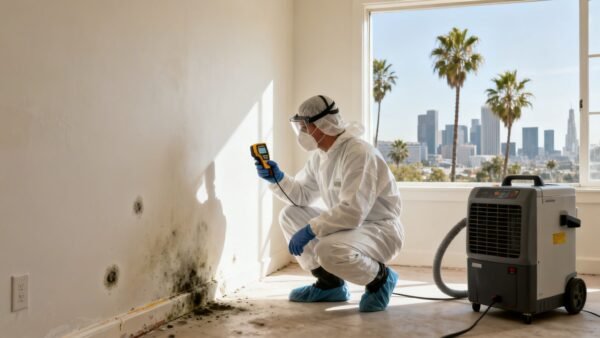
First things first, protect yourself. Drywall dust is nasty stuff—it’s full of fine particulates like gypsum and silica that you do not want in your lungs. A standard paper or cloth mask won’t do the job. You need an N95-rated respirator to really protect yourself. Pair it with wrap-around safety goggles to keep that airborne dust out of your eyes.
Creating a Containment Zone
Once you’re geared up, it’s time to isolate the work area. This is a critical technique our IICRC-certified professionals use on every single job, whether it’s a small patch-up in a Beverly Hills home or a major commercial project.
Your HVAC system is the number one culprit for spreading dust everywhere. Before you do anything else, shut the system off completely at the thermostat. This stops it from sucking in dust and blasting it into every other room. Then, go around and seal every air vent—both supply and return—with painter's tape and plastic sheeting.
- Seal Doorways: Cover the doorway with plastic sheeting to create a solid barrier. If you know you'll need to go in and out, a zippered plastic dust door is a great investment. It lets you get through without breaking the seal every time.
- Protect Flooring: Lay down heavy-duty plastic drop cloths, running them a few inches up the baseboards. Tape them down securely. This makes the final cleanup so much easier.
- Remove Furnishings: Get all the furniture, rugs, and decor out of the room. If something is just too big to move, wrap it completely in plastic and tape all the seams shut.
Here’s a simple pro tip we use all the time: create a "walk-off" mat at the exit. Just place a damp towel or a sticky construction mat right outside your contained area. Wiping your feet each time you leave traps a huge amount of dust and stops you from tracking it through the rest of your home.
This level of prep might feel like overkill, but it’s the foundation for a clean and healthy job. It’s the same logic we apply when we teach people how to wash soot off walls after a fire; preventing cross-contamination is half the battle. Taking these steps ensures the mess stays right where it belongs.
How Professionals Remove Drywall Dust for Good
Once you’ve prepped and contained your space, the real work begins. The best way to clean up drywall dust isn’t about scrubbing harder—it's about working smarter with a proven, systematic process. Professionals rely on a top-down, multi-stage method to ensure they capture every last particle without just pushing it around, which is a common mistake that leads to endless re-cleaning.
This is more than just a cosmetic issue; it's a critical health and safety measure. A study on sanding methods found that traditional pole sanding kicked up respirable dust levels averaging a staggering 1.686 mg/m³. When they switched to a sander with a vacuum attachment, that number plummeted to just 0.073 mg/m³—a massive 96% reduction. Since drywall dust can contain silica and OSHA has strict exposure limits, using the right tools isn't a suggestion, it's a necessity for protecting your air quality.

This systematic approach, which we call the "Three-Pass Method," is what separates an amateur cleanup from a professional restoration job. It ensures dust is progressively captured and removed, not just relocated.
The Professional Three-Pass Drywall Dust Cleanup Method
This table breaks down the systematic, multi-stage cleaning process used by restoration professionals to ensure thorough dust removal without re-contaminating the space.
| Pass | Tool | Technique and Purpose |
|---|---|---|
| Pass 1 | HEPA Vacuum | Initial Bulk Removal. A top-down dry vacuuming of all surfaces to capture the vast majority of loose dust before it can be disturbed. |
| Pass 2 | Damp Microfiber Cloths | Fine Particle Capture. A methodical damp-wipe of all surfaces to trap the stubborn, statically charged dust that the vacuum couldn't lift. |
| Pass 3 | HEPA Vacuum | Final Clearance. A final, detailed vacuuming of floors and horizontal surfaces to capture any dust dislodged during the damp-wiping phase. |
Let's dive into how each pass works in the real world.
The First Pass: Dry HEPA Vacuuming
The first stage is a meticulous dry cleanup, and your choice of tool here is non-negotiable. You absolutely must use a vacuum with a HEPA (High-Efficiency Particulate Air) filter.
Grabbing a standard shop vac or your household vacuum is one of the worst mistakes you can make. They’ll suck up the bigger particles, sure, but the finest, most hazardous dust will sail right through the filter and shoot out the exhaust. You're effectively turning your vacuum into a dust-spreading machine and making the air quality worse.
A true HEPA filter is engineered to capture 99.97% of airborne particles down to 0.3 microns, trapping that nasty drywall dust for good.
Always start from the highest point in the room and work your way down. Using a brush attachment, carefully go over:
- Ceilings and the tops of ceiling fan blades
- Tops of all window and door frames
- Light fixtures, sconces, and high ledges
- The upper sections of the walls
This top-down strategy ensures any dust you knock loose falls onto surfaces you haven't cleaned yet. It's simple but effective, preventing you from having to constantly redo your work. Move slowly and deliberately to give the vacuum time to do its job.
The Second Pass: The Damp-Wipe Takedown
Even after a thorough vacuuming, a thin layer of stubborn, statically charged dust will still be clinging to everything. This is where the second pass—a meticulous damp wipe—comes in. The goal here is to trap the remaining residue, not smear it into a pasty mess.
Forget paper towels or old cotton rags. Microfiber cloths are your best friend for this job. Their fibers are specifically designed to grab and hold onto fine particles like a magnet.
Here’s the pro-level technique:
- Get two buckets. Fill one with clean, cool water and leave the second one empty.
- Dip a microfiber cloth in the clean water, then wring it out until it’s just damp. You don't want it dripping wet.
- Wipe down surfaces, again starting from the top and working your way down. Hit the walls, baseboards, window sills, and any remaining fixtures.
- After wiping a small section, rinse the now-dirty cloth in the empty bucket first to get the gunk off. Then you can re-dampen it in the clean water. This two-bucket system is crucial—it keeps your clean water from turning into a muddy soup.
Don't be afraid to change your water frequently. As soon as it looks cloudy, it's time for a fresh batch.
The Final Pass: A Second HEPA Sweep
Once all the surfaces you wiped have had time to dry completely, it's time for the final pass. This last step might feel redundant, but it's what truly separates a professional job from an amateur one. The process of wiping and drying inevitably dislodges the last of those ultra-fine particles, which then settle on the floor.
This final HEPA vacuuming of the floor, baseboards, and any other horizontal surfaces is your insurance policy. It guarantees you capture every last bit of dust that tried to escape.
For homeowners taking on major renovations, understanding the full scope of professional techniques is invaluable. You can see how this fits into the bigger picture by exploring our detailed guide to post-construction cleaning services. This comprehensive, three-pass approach is the only way to be certain the dust is gone for good.
Tools That Deliver a Truly Dust-Free Finish
While the three-pass method is the gold standard for removing drywall dust, professionals use specialized equipment to take their results from clean to pristine. These are the tools that separate a decent DIY job from a flawless, healthy restoration.
They ensure even the microscopic airborne particles are captured long after the last wipe and vacuum pass is complete.

This level of technology isn't just for show; it's rooted in health and safety. According to the CDC's NIOSH database, vacuum sanding systems can slash dust exposure by 80% to 97%. This is critical because uncontrolled sanding can generate dust levels hundreds of times over OSHA's permissible exposure limit.
It's precisely why pros never sweep. We always use tools that capture dust at the source, keeping the air safe to breathe.
Capturing Airborne Particles With HEPA Air Scrubbers
Even with perfect containment, some dust will inevitably go airborne. This is where a HEPA air scrubber becomes an absolute game-changer. Think of it as a powerful, portable air filtration system that pulls contaminated air from the room, runs it through a series of filters (including a true HEPA filter), and exhausts clean, purified air back out.
On our job sites, we run these machines continuously throughout the cleanup process and for several hours after we’ve finished. It’s the only way to guarantee the capture of those fine, lingering particles that would otherwise resettle hours later.
For larger projects or homes with allergy sufferers, this tool is indispensable. If you're tackling a major renovation, understanding the benefits of an air scrubber rental can make a huge difference in your final air quality.
The Final Touch With Tack Cloths
For that perfect, detailed finish on surfaces like trim, window sills, and built-in shelving, we always turn to tack cloths. A tack cloth is a specialized, slightly sticky cheesecloth designed to pick up the very last specks of fine dust without leaving any residue behind.
After your final HEPA vacuum pass, a gentle wipe with a tack cloth lifts any remaining microscopic particles. It leaves a completely dust-free surface that’s perfectly prepped for painting or finishing.
Negative Air Pressure for Ultimate Containment
In large-scale renovations or sensitive environments, like a commercial space in North Hollywood, we often establish a negative air pressure environment. This advanced technique involves using an air scrubber or a high-powered fan to continuously exhaust air from the contained workspace directly to the outside.
This creates a gentle, inward-flowing vacuum that prevents any airborne dust from escaping the work area, even when a door is opened. It's the ultimate form of containment and ensures that no cross-contamination occurs in the rest of the property.
Pro Insight: The real magic of these dust extractors is in the quality of their filters. Getting into the specifics, like understanding the science behind a 0.22 micron filter, shows you exactly why professional gear is so effective at capturing the finest, most hazardous particles that cheaper equipment just recirculates.
Wrapping Up the Cleanup and Knowing When to Call an Expert
You’ve done the heavy lifting, but these last few steps are what separate a decent job from a truly professional finish. This is where you transform that dusty work zone back into a clean, healthy living space.
First, let's talk disposal. You need to get all that collected dust and debris out of your house for good. Securely bag everything—used plastic sheeting, dirty tack cloths, and the contents of your HEPA vacuum—in heavy-duty trash bags. Seal them up tight with tape. Make sure to dispose of them according to your local Los Angeles County regulations, as some areas have specific rules for construction waste.
The All-Important System Check
Now for a step you absolutely cannot skip: the HVAC system. You carefully shut it down and sealed the vents for a reason. Turning it back on without a final check will just blow all that fine dust you worked so hard to capture right back into the air.
- Change That Filter: Your old HVAC filter is guaranteed to be clogged with fine drywall particles. Pull it out and throw it away.
- Install a Fresh Filter: Replace it with a new, high-quality filter. This is your first line of defense for indoor air quality.
- Wipe Down Vents: Before you turn the system back on, carefully remove the plastic from your vents and give them one last wipe-down.
Once that's handled, it's time for one last visual sweep. Grab a bright flashlight and shine it at a low angle across the walls and floors. This little trick is amazing for revealing any fine layer of dust you might have missed.
Knowing When the Job Is Too Big for DIY
While these cleanup methods are solid for most contained projects, some situations just scream for professional help. The best way to clean up drywall dust might just be picking up the phone.
You should seriously consider calling in the pros if you're facing:
- Large-Scale Renovations: If the dust has migrated and settled throughout your entire home.
- Health Concerns: If anyone in your house suffers from asthma, severe allergies, or other respiratory conditions.
- Complex Damage: If the drywall work was part of a larger restoration from a fire or flood. In these cases, drywall dust can mix with dangerous contaminants like soot or mold spores.
When the cleanup feels like more than you can handle, finding a reliable cleaning service is a smart move. For those in the Los Angeles area dealing with a complex mess, professional help isn't just a convenience—it's the safest bet. Learn more about why hiring a restoration pro is often the best decision for your property and your peace of mind.
FAQs: Drywall Dust Cleanup in Los Angeles
After helping countless Los Angeles homeowners through post-renovation cleanups, I've noticed the same questions pop up time and again. Getting these answers straight from the start not only builds confidence but also makes it clear why we insist on doing things a certain way.
Here are the most common things people ask about getting rid of that ultra-fine drywall dust for good.
Can I just use my regular vacuum to clean it up?
This is, without a doubt, the number one question I hear. The answer is a hard no. Your standard household vacuum, or even a basic shop vac, simply isn't built for this job.
The filters can't handle the microscopic size of drywall dust particles. So, what happens? The vacuum sucks the dust off the floor and shoots it right back into the air through its exhaust. You end up making the air quality much, much worse.
You absolutely must use a vacuum equipped with a true HEPA (High-Efficiency Particulate Air) filter. These are engineered to capture 99.97% of airborne particles as small as 0.3 microns, which means the dust gets trapped and stays trapped.
Is drywall dust actually harmful to breathe?
Yes, it can be. While drywall is mostly gypsum, it often contains other additives, including crystalline silica. Inhaling these fine particles is a surefire way to irritate your lungs and throat, triggering coughing and serious discomfort, especially for anyone with asthma or allergies.
According to OSHA, long-term or heavy exposure to respirable crystalline silica is a serious health risk that can lead to permanent lung damage. This is precisely why wearing an N95 respirator is non-negotiable during the entire cleanup process.
How do I know when the walls are clean enough to paint?
A perfectly clean wall is the secret to a professional-looking paint job. If you try to paint over a layer of dust—even one you can't see—the paint won't stick properly. You'll be dealing with peeling and bubbling in no time.
Here's a simple way to check your work: the "white glove" test. Once you've finished all your cleaning steps and the walls are completely dry, take a dark-colored microfiber cloth and wipe it across a section of the wall.
If the cloth comes away clean, you’re ready for primer. If you see a white, chalky residue, you need to do another round of damp wiping. Another pro tip is to shine a bright flashlight at a sharp angle against the wall; it will instantly reveal any dust you missed. Recognizing the right cleanup approach is crucial for any type of damage, including water-related issues, as we cover in our guide on how to dry wet carpet fast.
Why does drywall dust keep reappearing after I clean?
This is a common frustration for homeowners in the Los Angeles area. The dust reappears because the particles are so incredibly fine and light that they can remain suspended in the air for hours or even days. If your HVAC system was running at any point, it likely circulated the dust throughout the house. A professional cleanup addresses this by using HEPA air scrubbers to capture these lingering airborne particles, preventing them from resettling after the initial cleaning is done.
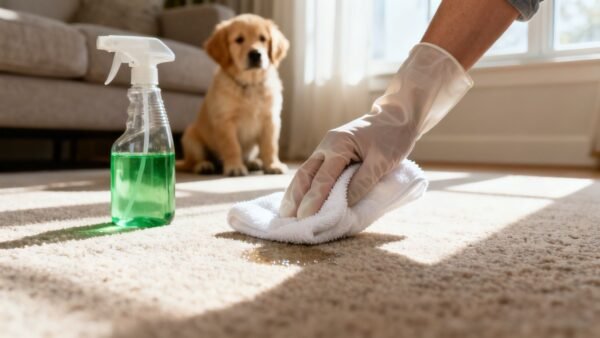
What is the best way to clean drywall dust from carpet?
Cleaning drywall dust from carpet requires a meticulous approach. Start by vacuuming slowly with a HEPA-filtered vacuum, making multiple passes in different directions. Do not use a standard vacuum as it will just exhaust the fine particles back into the air. If residue remains, a professional carpet cleaning service that uses hot water extraction may be necessary to fully lift the fine gypsum particles from the carpet fibers.
How much does professional drywall dust cleanup cost in Los Angeles?
The cost for professional post-construction cleanup in Los Angeles can vary based on the square footage of the area, the level of contamination, and the services required (e.g., air scrubbing, duct cleaning). For a standard room, you might expect to pay a few hundred dollars, while a whole-home cleanup after a major renovation could cost significantly more. It's always best to get a detailed quote from a reputable restoration company.
When a renovation project leaves behind more dust than you can handle, Onsite Pro Restoration is here to ensure your Los Angeles home is returned to a pristine, healthy state. Call us for a professional post-construction cleanup assessment. https://onsitepro.org