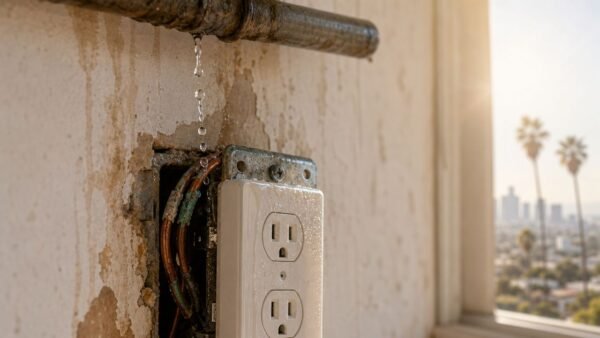
When that dreaded water stain appears on your wall or ceiling, the first question on your mind is always the same: “What’s this going to cost me?”
Understanding the water damage drywall repair cost is the first step toward reclaiming your home after a leak or flood. Nationally, the average repair runs between $600 and $1,550. But for Los Angeles homeowners, that number can change in a hurry. The cost for a minor leak from a flat-roof in Sherman Oaks is vastly different from recovering from a burst pipe that floods a multi-story home in Beverly Hills.
This guide breaks down the real costs for 2026, helping you understand what to expect from a professional restoration project.
Worried about a water stain? Don't wait for the problem to get worse. Onsite Pro Restoration offers fast, reliable assessments across Los Angeles.
Get Your Free Restoration Assessment Now
Why Your 2026 Drywall Repair Isn't Just a Patch Job
Getting a handle on the financial side of drywall repair is the first step toward taking back control of your home. This isn’t a simple cosmetic patch-up. Real water damage restoration is a multi-step process to get your home safe, dry, and structurally sound again.
The price isn't just for spackle and paint. It covers finding the source of the water, preventing dangerous mold growth, and ensuring the problem is gone for good. A small, contained leak you catch right away is one thing. A wall that’s been quietly soaking for days? That's a completely different project that will involve demolition, structural drying, and a full rebuild.
Let's break down what goes into that final bill. To give you a quick idea, here are some common scenarios and their typical costs.
Quick Look At Water Damage Drywall Repair Costs (2026)
| Repair Scenario | Typical Cost Range (National Average) | Key Factors |
|---|---|---|
| Small, Contained Leak | $350 – $800 | Single room, small section of drywall, no mold, clean water. |
| Medium Sized Damage | $800 – $2,500 | Large wall section or small ceiling, minor structural drying needed. |
| Large-Scale Damage | $2,500 – $7,000+ | Multiple rooms, ceiling replacement, significant drying, possible mold. |
| Contaminated Water (Cat 3) | $7,000 – $15,000+ | Sewage or floodwater, requires biohazard cleanup, full demolition. |
These numbers are a starting point. Your final invoice will depend on the specifics of your situation in the Los Angeles area.
Key Factors Influencing Your Bill
Several critical factors determine what you'll actually pay. These are the main cost drivers we see on every job:
- Size of the Affected Area: It’s simple math. Patching a small 2'x2' section in a Glendale garage will always be cheaper than replacing an entire ceiling in a Beverly Hills master bedroom.
- Location of the Damage: Ceilings are just plain harder to fix. They fight gravity, often require scaffolding, and take more labor, making them more expensive than wall repairs. A common issue we see is damage from coastal fog in Santa Monica homes, which often affects ceilings and upper walls.
- Source and Type of Water: A leak from a clean supply line is straightforward. A backup from a sewer line, however, is a biohazard situation requiring specialized cleanup and safety protocols.
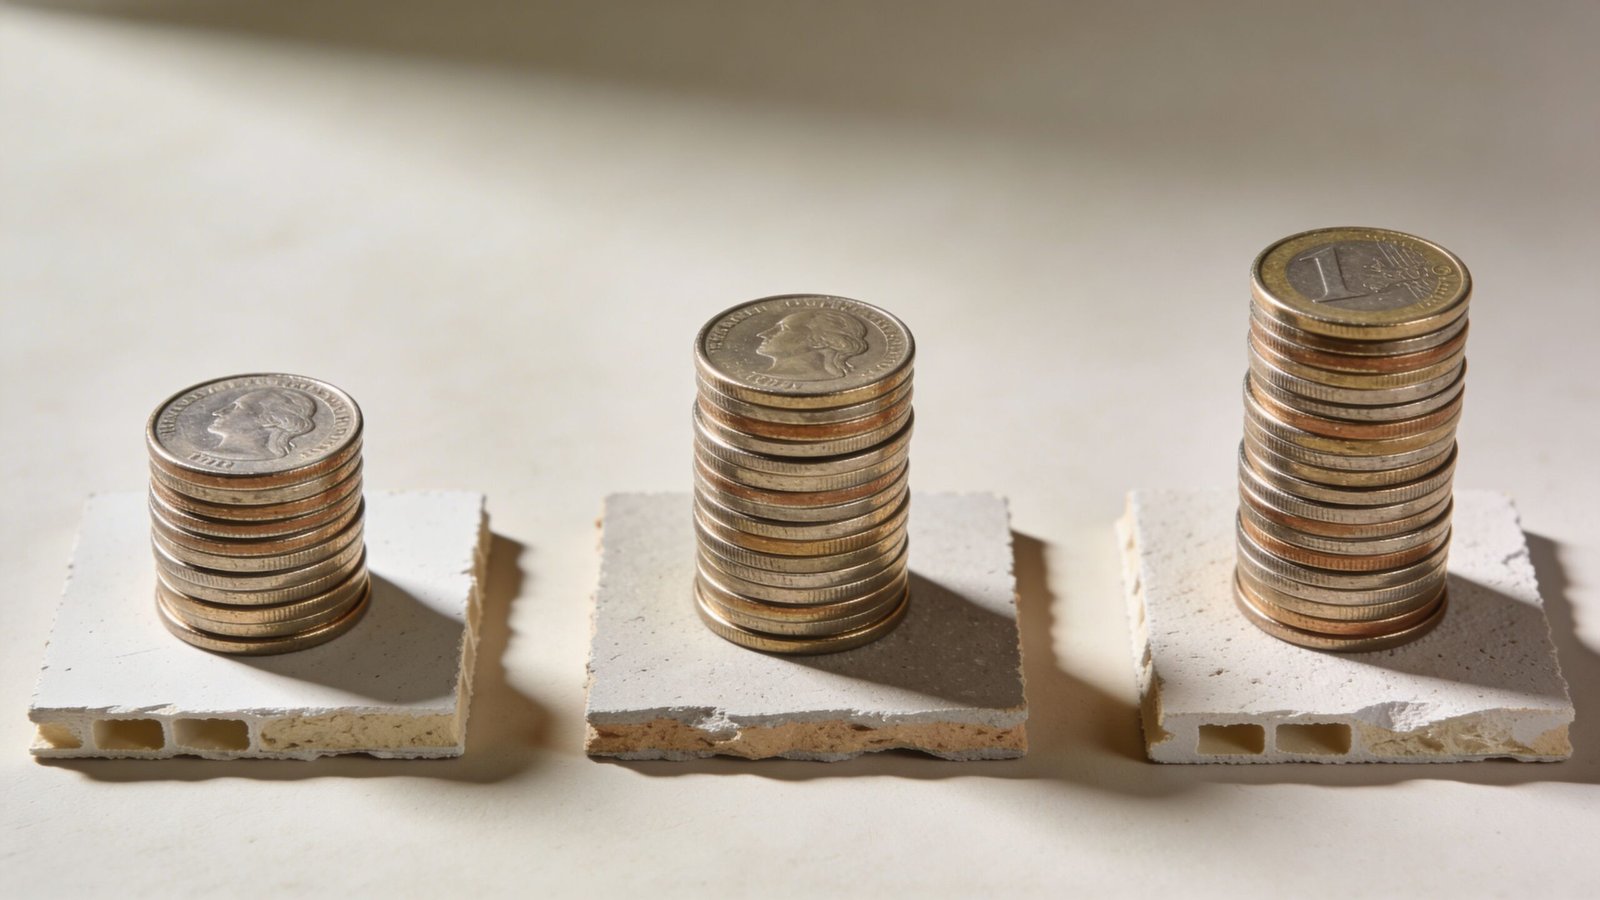
A Closer Look at the Numbers
Of all drywall repairs, those involving water are consistently the most expensive. In fact, industry data shows the average claim for home water damage can easily top $12,000, which is exactly why a fast, professional response is so important.
Labor is a significant part of that cost. Most certified restoration contractors in the L.A. market charge between $60 and $90 per hour for their technicians. This rate reflects the specialized equipment, training, and standards required to do the job right and prevent future issues.
It also helps to look at the bigger picture. Plumbing failures are a leading cause of water intrusion, so understanding why plumbing repairs cost more in 2026 gives you valuable context. The main takeaway here is that the drywall repair is just one piece of a much larger restoration puzzle.
Deconstructing the Water Damage Drywall Repair Cost
Every water damage drywall repair cost estimate is a roadmap, and knowing how to read it is the key to feeling confident about the price you’re paying. Think of it less like a single price tag and more like a list of ingredients, where each item contributes to the final cost.
Let’s break down exactly what goes into that final number.
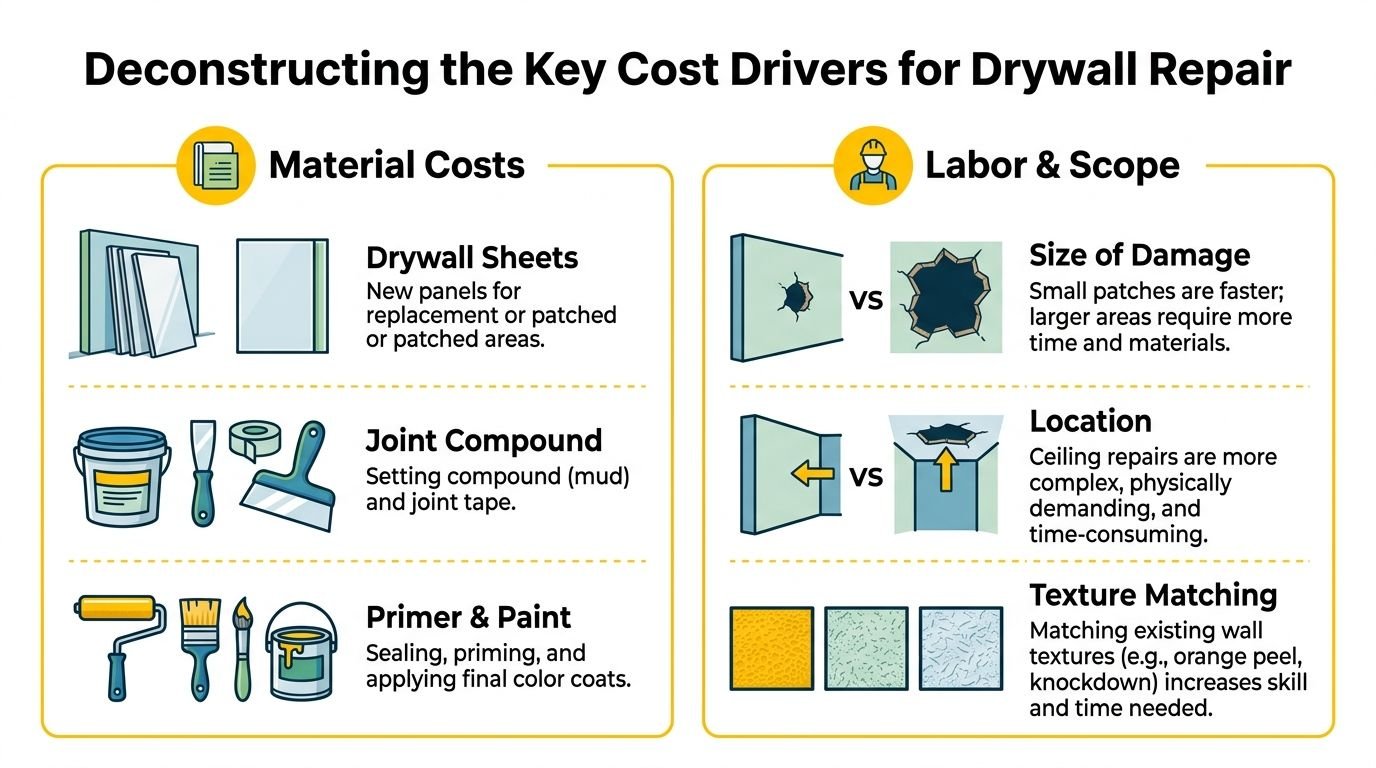
The most basic costs are for the raw materials. These are the non-negotiables for any drywall job, from a small patch-up to replacing an entire wall.
- Drywall Sheets: The core building block. A standard 4×8-foot panel will typically run you $13 to $24. For moisture-prone areas like bathrooms or basements, we always use water-resistant drywall (the "green board"), which costs a bit more but is essential for preventing future issues.
- Joint Compound & Tape: This is the "mud" used to create smooth, invisible seams. While a gallon is cheap—around $5—the real cost comes from the skill needed to apply it perfectly.
- Primer & Paint: This is the finishing touch. A good gallon of paint costs between $20 and $40, but the real hero is a high-quality, stain-blocking primer. Without it, that old water stain will eventually bleed right through your new paint job.
Of course, material costs are just the starting point. The factors that really drive the final bill up are the size of the job, the labor involved, and any hidden complexities.
The Impact of Size and Location
The most obvious driver is the sheer size of the damaged area. Patching a small 2'x2' section from a tiny leak is a relatively quick job. But if a pipe bursts in an upstairs bathroom and soaks the entire living room ceiling below, you’re looking at a multi-day project that involves demolition, replacement, and a whole lot of finishing work.
Key Insight: A repair on a ceiling will always cost more than the exact same size repair on a wall. Working against gravity requires more prep, often scaffolding, and significantly more labor to get that perfectly smooth, flat finish. That added difficulty goes straight into the labor costs.
For instance, a simple wall patch in a Los Angeles home might be a few hundred dollars. But replacing just a 10-foot section of a water-damaged ceiling in Sherman Oaks could easily climb into the thousands, even before we talk about texturing or paint.
Labor Rates and Finishing Work
Labor is almost always the biggest ticket item on a drywall repair bill, especially in a market like Los Angeles. You're not just paying for someone's time; you're paying for certified expertise. The difference between a shoddy patch and a professional repair is a seamless finish you’ll never notice was there.
This process involves several critical steps:
- Demolition and Removal: Carefully tearing out all the wet, compromised drywall and any saturated insulation behind it.
- Installation: Precisely cutting and securely hanging the new drywall sheets.
- Taping and Mudding: Applying multiple, paper-thin coats of joint compound to hide seams. This is a true art form that separates the pros from the amateurs.
- Texture Matching: This is where many jobs fail. Whether your walls have a smooth finish, orange peel, or a knockdown texture, a pro has to skillfully blend the new patch into the old. A mismatched texture is a dead giveaway of a bad repair.
- Priming and Painting: First, applying a stain-blocking primer, then perfectly matching the paint color so the repair disappears.
To get a feel for how these different elements contribute to the bottom line, this plaster cost calculator guide is a great resource. Many of the principles for estimating plaster and drywall jobs are very similar.
The Complexity Factor
Finally, there are always the unknowns that can add to the cost. Is the damage located around tricky electrical outlets or a light fixture? Is it on a curved wall, a vaulted ceiling, or in a tight stairwell? These situations demand more time and precision, which will be reflected in the quote.
A simple repair on a flat, empty wall is one thing, but water damage rarely happens in convenient spots. Each of these factors—materials, size, location, labor, and complexity—builds on the others to determine the final water damage drywall repair cost.
How Water Contamination Levels Dictate Your Repair Bill
Not all water damage is the same. Far from it. The single biggest factor driving your final water damage drywall repair cost is the source of the water itself.
Think of it like this: spilling a glass of clean tap water is a minor cleanup. A toilet overflowing with raw sewage? That's a full-blown hazardous materials situation.
Restoration professionals, following standards from the Institute of Inspection, Cleaning and Restoration Certification (IICRC), classify water into three distinct categories. Understanding them is key, as they determine the safety gear, procedures, and sanitization required—all of which directly hit your wallet.
Category 1: Clean Water
This is the most straightforward type of water loss. Category 1 water comes from a sanitary source and poses no immediate health risk upon contact.
- Common Sources: Broken water supply lines, overflowing sinks or tubs (without soap or waste), or appliance leaks involving clean water.
- Repair Approach: The job is all about speed. The primary goals are immediate water extraction and rapid, aggressive drying. While it still demands professional equipment, the sanitization process is minimal.
- Cost Impact: This is the least expensive scenario. Repairs focus on drying the structure and replacing only the drywall that can't be saved.
But here’s the catch: time is your enemy. If a Category 1 loss isn't addressed within 24-48 hours, it can quickly degrade. As clean water sits and soaks into building materials, it picks up contaminants and morphs into a more dangerous category.
Category 2: Gray Water
This is where things get more serious. Gray water is significantly contaminated and can cause illness or discomfort if you come into contact with it. It contains microorganisms or chemical contaminants.
- Common Sources: Overflows from dishwashers or washing machines, toilet overflows with urine but no feces, or a failed sump pump.
- Repair Approach: The restoration becomes much more involved. Technicians must wear personal protective equipment (PPE). Crucially, any porous material that soaked up gray water—like carpet padding, insulation, and the drywall itself—must be removed and discarded.
- Cost Impact: The cost to repair Category 2 damage jumps up. The need for more intensive sanitization and mandatory removal of materials adds significant labor and disposal fees to the bill.
Category 3: Black Water
This is the most dangerous and expensive category. Black water is grossly contaminated and teeming with harmful pathogens, toxins, and other biohazards. Exposure can lead to severe illness.
- Common Sources: All sewage backflows, water from toilets containing feces, and any water that enters from outside the building, like floodwater from rivers or streams.
- Repair Approach: This is a full-scale biohazard remediation project. We establish containment barriers to stop cross-contamination. Every porous material touched by the water—drywall, insulation, flooring, often cabinets—is removed and disposed of under strict regulations. The entire area then undergoes aggressive, multi-step cleaning and disinfection.
- Cost Impact: Black water damage is, by a huge margin, the most expensive to fix. The demolition, safety protocols, and intensive sanitization work dramatically increase both labor and material costs. You can learn more in our detailed guide on what is Category 3 water damage.
Crucial Warning: Never, ever try to handle a black water situation yourself. It requires specialized training, containment, and professional biohazard equipment to manage safely.
The cost difference between these categories is stark. The IICRC's classification system directly correlates to the work required and, therefore, the final invoice.
Here is a breakdown to put the financial impact in perspective.
Water Contamination Category Cost Comparison
| Water Category | Description & Common Sources | Estimated Cost Per Sq. Ft. | Required Actions |
|---|---|---|---|
| Category 1 | Clean Water: Sanitary source posing no immediate health risk. (e.g., sink overflow, supply line break) | $3.00 – $4.00 | Rapid extraction and drying. Minimal material removal if addressed quickly. |
| Category 2 | Gray Water: Significantly contaminated; can cause illness. (e.g., dishwasher overflow, toilet with urine) | $4.00 – $7.00 | Extraction, removal of all affected porous materials (drywall, carpet pad), and disinfection. |
| Category 3 | Black Water: Grossly contaminated with pathogens; highly hazardous. (e.g., sewage backup, flooding) | $7.00 – $7.50+ | Full biohazard remediation: containment, extensive demolition, regulated disposal, and intensive disinfection. |
As the table and infographic show, the type of water is a primary driver of cost. The numbers confirm a clear price escalation across the categories.
The bottom line is simple: the quicker you act, the better your chances of preventing a simple Category 1 leak from becoming a costly and hazardous Category 3 biohazard event.
Don't guess what kind of water damage you have. Call (818) 336-1800 for immediate, professional assessment.
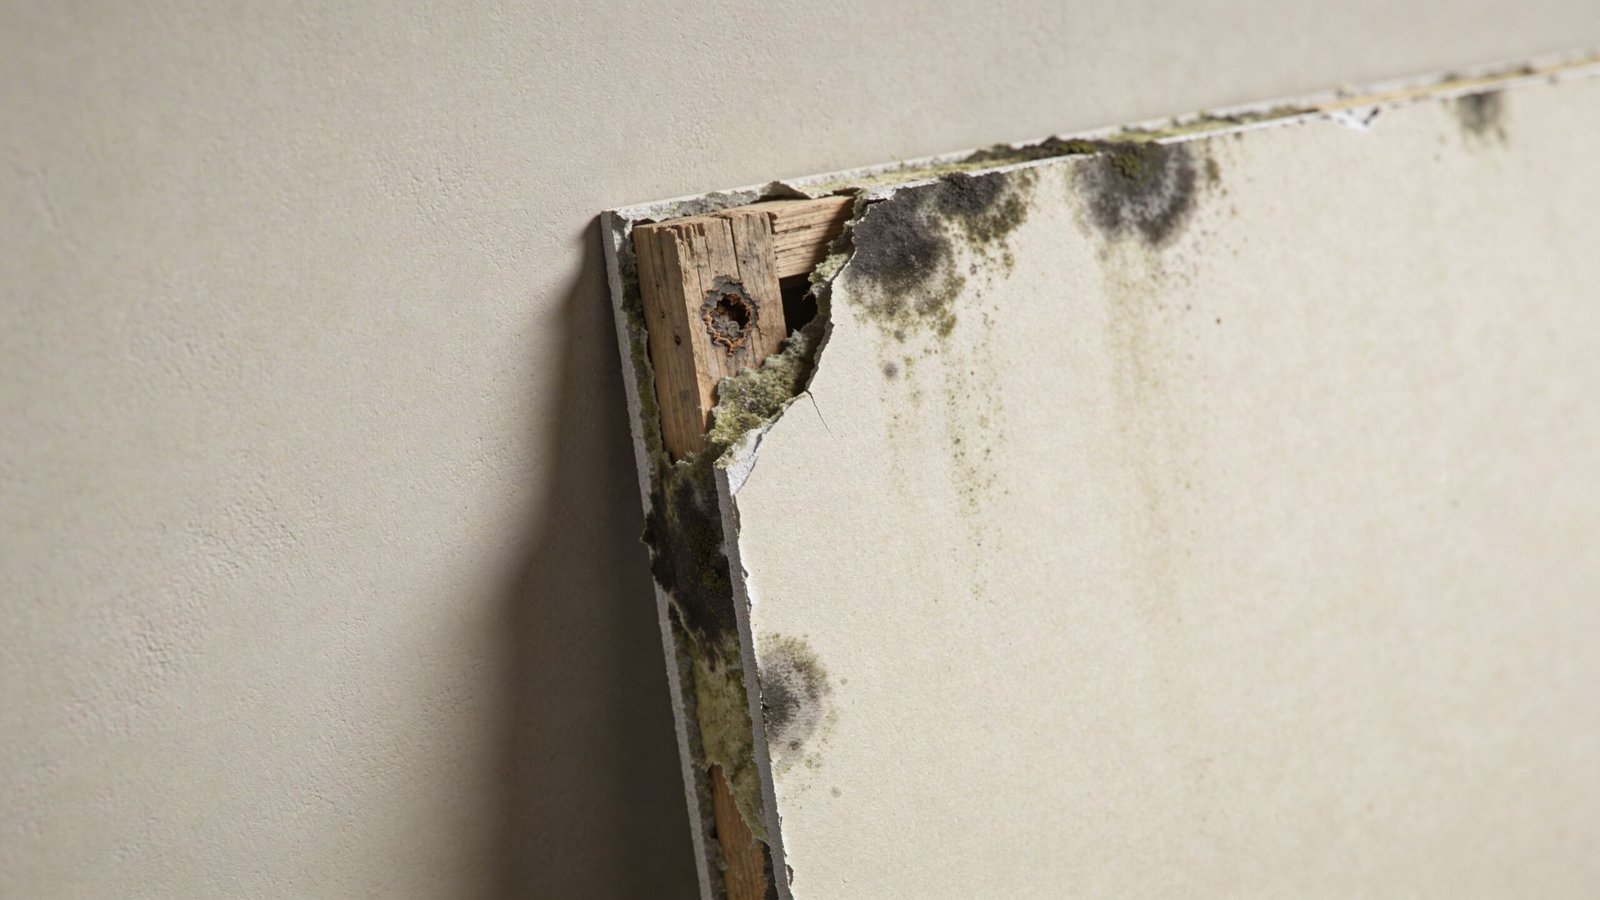
The Hidden Expenses of Mold and Structural Damage
That initial quote for a water damage drywall repair cost? It's often just the starting point. Think of it as the price for what you can see. The real costs, the ones that can turn a small repair into a major project, are lurking behind the wall: mold and structural damage.
Drywall is basically a paper-faced sponge. Once it gets wet, it becomes a perfect breeding ground for mold spores, which are always floating in the air. If that drywall stays damp for more than 24-48 hours, you’re no longer just fixing a water problem. You’ve got a potential mold problem on your hands.
This is a critical turning point. Mold remediation isn't just extra scrubbing; it's a completely different, specialized process from drywall repair. It takes a whole other set of skills, equipment, and safety protocols to handle correctly.
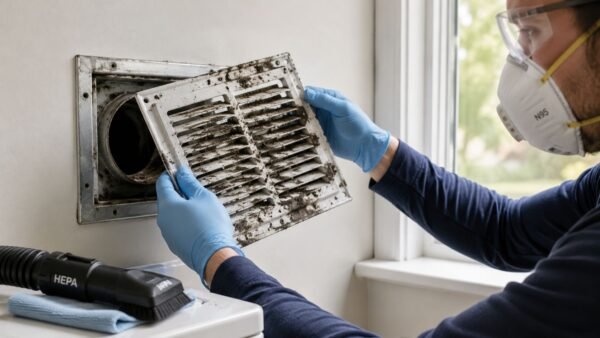
When Mold Enters the Equation
Finding mold means the job just got a lot more serious. Professional mold remediation is a regulated, step-by-step process designed to protect your home and your health. If a restoration crew finds significant mold, the project immediately gets bigger.
Here’s what professional mold remediation actually involves:
- Containment: We seal off the entire area with plastic sheeting and set up negative air pressure machines. This stops spores from spreading to the rest of your home.
- Removal of Porous Materials: Any material with visible mold—drywall, insulation, sometimes carpeting—has to be carefully bagged and thrown out according to regulations.
- HEPA Filtration: We use High-Efficiency Particulate Air (HEPA) vacuums and air scrubbers to pull microscopic mold spores from every surface and even the air itself.
- Antimicrobial Treatment: All remaining materials, like the wood studs inside the wall, are cleaned and treated with an EPA-approved antimicrobial agent to kill any lingering mold.
- Third-Party Clearance Testing: After the cleanup, an independent industrial hygienist is often brought in. They test the air quality to confirm the area is completely safe before any rebuilding can start.
Every one of these steps adds to the final bill. While a standard water damage repair might run from $600 to $1,550, tackling mold can tack on another $10 to $20 per square foot just for the remediation work. For a complete breakdown, check out our guide on what mold remediation costs.
The Silent Threat of Structural Damage
Even more serious than mold is the risk to your home's skeleton. Water doesn’t just stop at the drywall. It seeps into the wood framing, subfloors, and ceiling joists. When that wood gets soaked, it starts to soften, rot, and lose its ability to support your house.
Key Insight: A sagging ceiling or a spongy floor isn’t just a cosmetic problem. It's a huge red flag that the structure of your home could be compromised. This is never a DIY fix; it demands an immediate professional assessment to ensure your home is safe.
Fixing structural damage is a completely different ballgame from drywall replacement. It can involve serious work, such as:
- Replacing rotted wood studs inside the walls.
- Tearing out and rebuilding entire sections of the subfloor.
- Reinforcing or replacing weakened ceiling joists.
These repairs require a skilled carpenter or even a structural engineer, and they can easily add thousands of dollars to the project. It’s another reason why a professional inspection with moisture meters and thermal cameras is so crucial. It’s the only way to know what’s really going on behind the scenes.
The numbers back this up. While patching a tiny drywall hole might cost less than $100, the average professional water damage job starts in the $550-$1,550 range—and that’s before finding mold or structural rot. This shows that true water-damaged drywall restoration costs 5-13 times more than a simple cosmetic patch, a gap that gets much wider when these hidden issues come to light.
Deciding Between DIY Repair and Hiring a Professional
So you've found a water stain on your drywall. The urge to grab a putty knife and call it a weekend project is real. It seems like a quick, easy way to manage your water damage drywall repair cost, but the reality is rarely that simple.
Making the call between a DIY patch and bringing in a professional is a crucial decision. It’s one that directly impacts your home's long-term health, safety, and value.
A DIY repair is tempting, but it’s only a safe bet in one very specific scenario: a tiny, single spot (smaller than a dinner plate) caused by Category 1 clean water that you found almost immediately. Anything outside of that narrow window, and you're rolling the dice. What feels dry on the surface can easily hide moisture deep inside the wall cavity, creating a perfect breeding ground for mold that will cost you far more to fix down the road.
The Risks of a DIY Drywall Repair
Trying to fix water-damaged drywall without the right training or tools is a recipe for bigger, more expensive problems. We see the aftermath of failed DIY jobs all the time.
These are the most common mistakes that turn a small issue into a major headache:
- Incomplete Drying: Pointing a household fan at the wall just doesn't cut it. Without commercial-grade air movers and dehumidifiers, moisture gets trapped in the wood studs and insulation. It’s not a matter of if problems will arise, but when.
- Hidden Mold Growth: This is the biggest danger. That trapped moisture creates a dark, damp haven for mold. What you can't see will absolutely hurt you, contaminating your home’s air quality and forcing a much more complex and costly remediation project later.
- Poor Finishing: Let's be honest, a bad patch job is an eyesore. Achieving a perfectly smooth, invisible repair that matches your wall's existing texture is a true professional skill. A lumpy, uneven patch or paint that doesn't quite match will stick out like a sore thumb and cheapen the look of your entire room.
Key Takeaway: The money you think you're saving with a DIY repair is often just a down payment on a much larger professional fix. The risk of hidden mold and structural issues is simply not worth the small initial savings.
The Value of Hiring a Certified Professional
Calling a certified restoration company like Onsite Pro Restoration isn't just about paying for a clean patch job. It’s an investment in certainty, safety, and a job done right the first time. A true professional brings a scientific, methodical approach and specialized equipment that no homeowner has sitting in their garage.
Here’s what you’re actually paying for when you hire a pro:
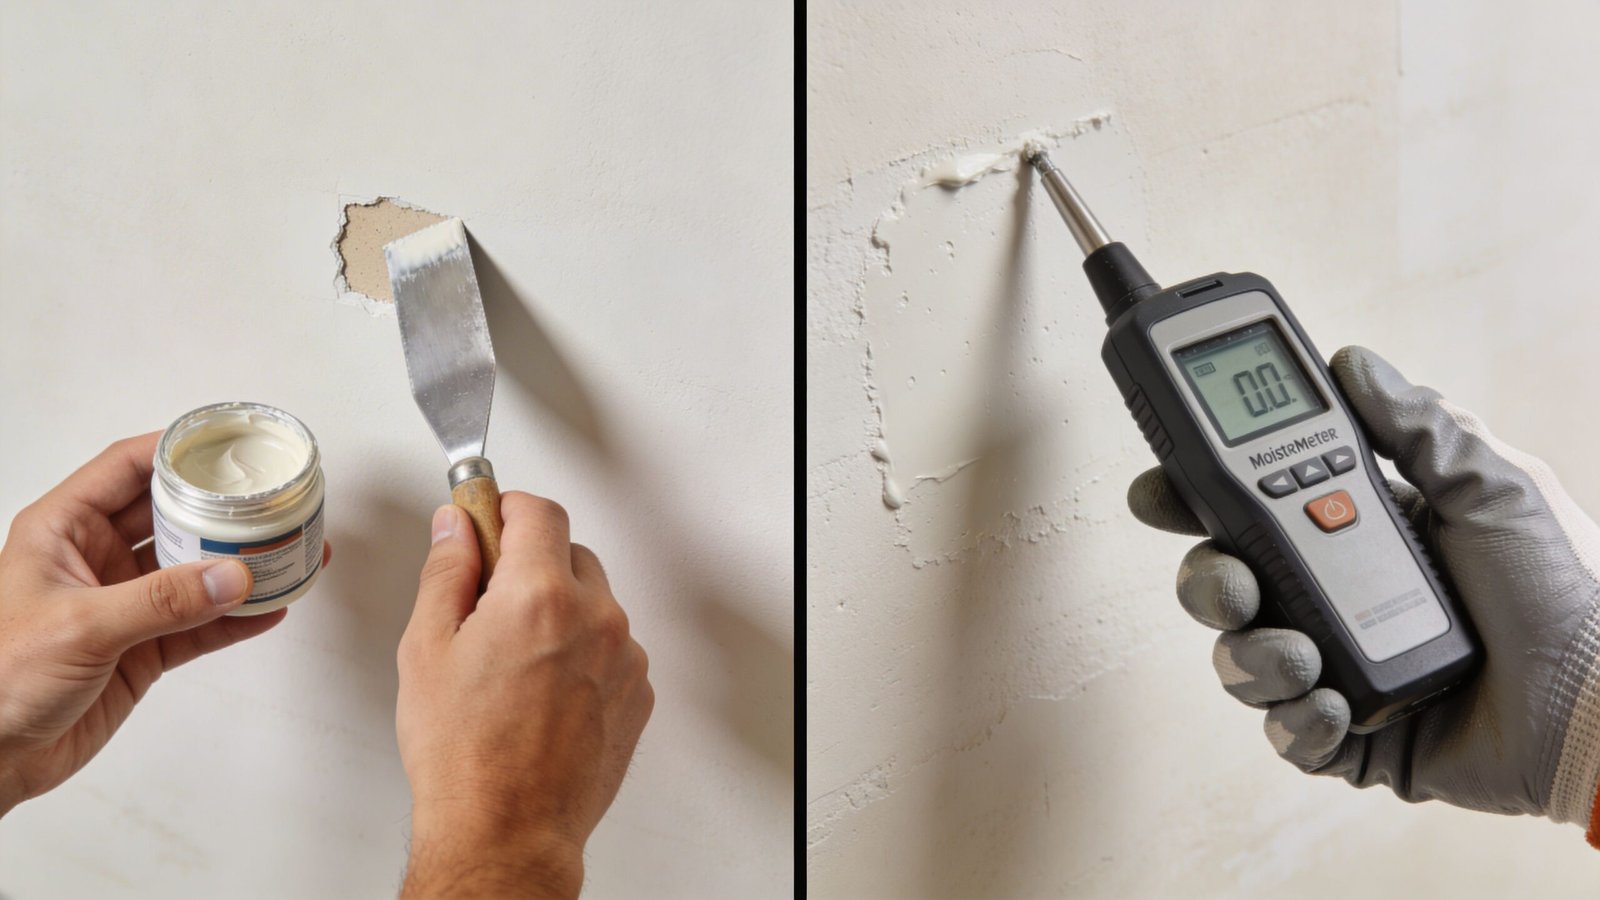
- Accurate Moisture Detection: We use thermal imaging cameras and professional moisture meters to find every last pocket of water. We can literally "see" inside your walls to guarantee the wood framing and insulation are bone-dry before any repairs begin.
- Industrial-Grade Equipment: High-velocity air movers, commercial dehumidifiers, and HEPA air scrubbers dry out the entire structure fast. This rapid drying is what stops mold in its tracks before it ever has a chance to take hold.
- Guaranteed Results: A professional job is backed by a guarantee. The work is done correctly to industry standards, the finish is seamless, and you get complete documentation for your insurance company.
The tipping point for calling in a pro is pretty clear. If the water damage is larger than a small plate, if the water wasn't clean, or if it sat for more than 24 hours, it's time to put down the tools. You can learn more about the qualifications that set apart a top-tier restoration pro to see why that expertise is so critical.
In the end, hiring a professional saves you from the stress, hidden dangers, and future costs of a job done wrong.
Navigating Insurance Claims for Water Damaged Drywall
When you find a spreading water stain on your drywall, your first thought is usually about the mess. Your second is probably about the cost. The idea of tackling an insurance claim can feel just as daunting as the repair itself, but understanding the process is the key to getting the coverage you're paying for.
The biggest rule to remember is that homeowners insurance is designed for damage that is sudden and accidental. Think of a pipe that bursts behind a wall or a washing machine hose that suddenly lets go. These are the classic events where your policy is meant to step in and help cover the water damage drywall repair cost.
On the flip side, insurers almost always deny claims for gradual problems. A slow, dripping leak from a bad faucet seal or moisture seeping in from a crack in the foundation is considered a maintenance issue, not an accidental event. Likewise, widespread flooding from a storm requires a separate flood insurance policy.
Key Steps in the Claims Process
From the moment you spot the water, every action you take matters. Your insurance company will want to see that you acted fast to stop things from getting worse. A quick, organized response can make all the difference.
Here’s what you need to do immediately:
- Stop the Water Source: If you can do it safely, find your home’s main water shut-off valve and turn it off. This is your first and most critical move.
- Document Everything: Before moving a single thing, pull out your phone. Take videos and plenty of photos of the damage. Get wide shots of the room and close-ups of the soaked drywall, wet floors, and the leak’s source, if visible. This visual proof is gold for your claim.
- Call Your Insurance Company: Report the damage right away. They’ll give you a claim number and connect you with an adjuster who will manage your case.
- Mitigate Further Damage: This is insurance-speak for "prevent more harm." You can use a shop vac to remove standing water, move furniture to a dry spot, and get some fans running to circulate the air. It shows the insurer you're being responsible.
Working With Your Adjuster and Restoration Company
The insurance adjuster's job is to verify the cause of the loss and determine the cost of covered repairs. This is where having a professional restoration company like Onsite Pro Restoration on your side becomes a game-changer. We speak the adjuster's language because we work with them every single day.
Expert Insight: We provide the detailed documentation adjusters need to approve a claim quickly. This includes moisture meter readings, thermal imaging reports to find hidden water, and a precise line-item estimate using the same software most insurers use. This level of professional reporting justifies the full scope of work and dramatically speeds up the approval process.
We can guide you through the entire claim, making sure every bit of damage is properly documented. Our in-depth guide on how to file an insurance claim for water damage breaks it down even further. When you partner with a certified pro, you're not just fixing a wall—you're ensuring your claim accurately reflects the true cost of getting your home back to the way it was.
Answering Your Top Questions About Water Damaged Drywall
Even after a thorough breakdown, you’re bound to have a few more specific questions. It's natural. We get these all the time from homeowners across Los Angeles, so let's tackle the most common ones head-on with clear, straightforward answers.
Q: How long does it take for drywall to dry after water damage?
A: While drywall might feel dry to the touch in as little as 24 hours, the real danger is the hidden moisture soaked into the wood studs and insulation inside your wall. To properly dry these saturated materials requires professional-grade equipment. Using a combination of commercial air movers and dehumidifiers, the process typically takes 3 to 5 days, sometimes longer. We only consider the job done after using specialized moisture meters to confirm all materials are back to a safe, dry standard.
Q: Can I just paint over a water stain on my drywall?
A: Absolutely not. This is one of the most common and costly mistakes a homeowner can make. Painting over a damp spot traps moisture inside the wall, which guarantees mold will grow. The new paint will eventually bubble and peel, the stain will bleed through, and you'll face a much bigger, more expensive problem. The only correct way is to fix the leak, have the area professionally dried, and then prime and paint.
Q: Is it cheaper to repair or replace water damaged drywall?
A: When it comes to water damage, replacing the affected drywall is the only safe choice. Once drywall is saturated, it loses structural integrity and becomes a prime food source for mold. Trying to patch or repair it is not a viable professional solution. A restoration team will always cut out and remove the damaged section plus a margin of dry material around it to ensure all compromised material is gone before installing fresh drywall.
Q: Does homeowners insurance cover water damaged drywall?
A: It depends entirely on the cause. Most policies cover damage from "sudden and accidental" events, like a burst pipe. However, they almost always exclude damage from slow leaks, poor maintenance, or regional flooding (which requires a separate flood policy). Document everything with photos and contact your agent immediately to understand your coverage and start the claims process.
Don't let water damage put your home’s safety and value at risk. If you're seeing stains, smelling musty odors, or dealing with a leak in the Los Angeles area, the certified team at Onsite Pro Restoration is ready to help 24/7.
Call us for a fast, free assessment. We'll give you a clear plan to get your property—and your life—back to normal.