Trying to make sense of a moisture meter can feel like deciphering a secret code. But for Los Angeles homeowners, cracking that code is the single most important thing you can do to stop a small water issue from turning into a full-blown disaster. Learning how to read moisture meter readings is your first line of defense.
To get a useful reading, you can't just look at the number on the screen. You have to compare it to what's called a "dry standard"—a baseline for that specific material. What's perfectly fine for a wood stud might be a red flag for drywall. This guide will walk you through how to interpret these numbers like a pro and protect your property.
Get a Free Moisture Inspection
Why Accurate Moisture Readings Are Your First Defense
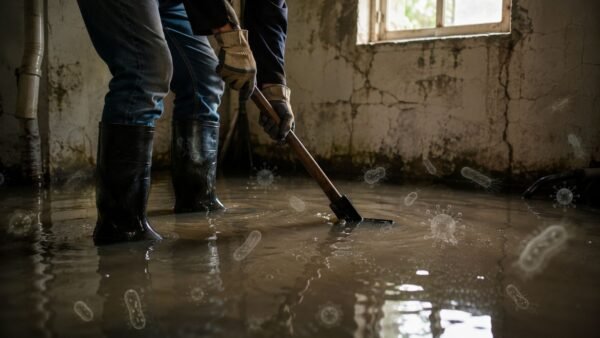
Imagine a tiny, slow leak behind a wall in your Sherman Oaks home. You can't see it, you can't hear it, but it's silently causing thousands of dollars in damage. That subtle drip from a bad pipe fitting or a slow leak from the last storm doesn't announce itself with a flood; it quietly soaks your home’s bones.
This is where a moisture meter becomes your best friend. It’s your first line of defense against the kind of long-term damage that wrecks homes.
Understanding these readings isn't just about finding water. It's about protecting your home's value and keeping your family healthy. Hidden moisture is the number one ingredient for mold, which can start growing in as little as 24-48 hours. Learning to use one of these devices lets you pinpoint problem areas long before you see or smell the trouble.
The True Cost of Ignored Moisture
A lot of homeowners think the initial water intrusion is the main problem. It's not. The real financial pain comes from all the secondary damage that follows:
- Structural Rot: Constant moisture just eats away at wood framing, subfloors, and joists, eventually compromising the integrity of your entire house.
- Mold Infestations: Damp drywall and insulation are a five-star resort for toxic mold. This leads to expensive remediation and can cause serious health problems.
- Damaged Finishes: Water ruins everything it touches. It can destroy expensive flooring, warp your kitchen cabinets, and make paint bubble and peel.
- Pest Infestations: Nothing invites termites and other wood-destroying pests like damp, decaying wood.
A professional-grade moisture reading provides undeniable data. It transforms a vague suspicion of dampness into a concrete fact that can be acted upon, preventing a small issue from becoming a full-blown restoration project.
Gaining Control with Data
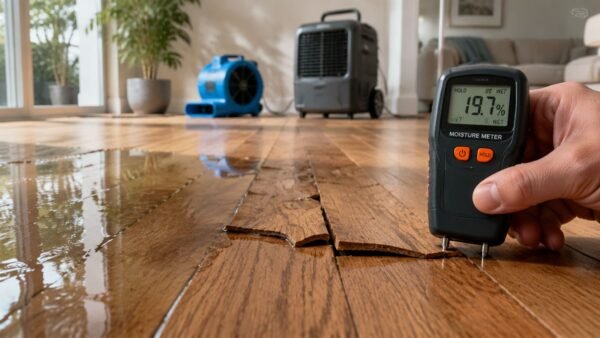
Taking control of a potential water damage situation starts with gathering good, hard data. Instead of guessing if a wall feels damp, a moisture meter gives you a precise percentage. It tells a clear story about what's really happening inside your walls and under your floors.
This knowledge empowers you to make smart decisions, whether that means keeping an eye on a small spill or realizing it's time to call in an emergency water damage professional for a serious look. Of course, before you start taking readings, it helps to know where to look. Getting familiar with the common signs of water damage will give you a great head start on where to focus your meter.
Choosing the Right Tool: Pin vs. Pinless Meters

When you’re hunting for hidden water damage, not all moisture meters are created equal. Getting data you can actually trust starts with picking the right tool for the job. The two main players are pin-type and pinless meters, and they serve very different, but equally important, purposes.
A pin-type meter is like a surgical tool. It uses two small metal probes that you physically push into a material to measure electrical resistance. Since water conducts electricity, less resistance means more moisture. This gives you an incredibly precise moisture content percentage inside the material.
In contrast, a pinless meter is more like a scout. It uses an electromagnetic sensor pad that you just press against a surface. It scans for moisture below without leaving a single mark, which is perfect for quickly assessing large areas or delicate, finished surfaces.
The Precision of Pin-Type Meters
Pin-type meters are the gold standard when you absolutely need a definitive, invasive reading at a specific point. They're the go-to tool for confirming the depth of saturation in porous materials like wood and drywall.
You’d grab a pin meter when:
- Confirming Subfloor Damage: After a dishwasher leak in a Beverly Hills kitchen, you need to know if the plywood subfloor is truly saturated. Pins can get past the surface to give you an exact moisture content reading.
- Checking Structural Beams: If you suspect a slow roof leak is affecting the wooden beams in your attic, pin meters can assess the core of the wood for hidden rot.
- Testing Thick Materials: They are essential for getting accurate readings deep inside dense materials like hardwood flooring or thick plaster walls.
The main drawback is obvious: they leave small holes. While they’re often unnoticeable on rough materials, this makes them less than ideal for finished surfaces where aesthetics really matter.
The Convenience of Pinless Meters
Pinless meters give you speed and convenience, letting you scan huge areas quickly without causing any damage. They work by sending out an electromagnetic signal and measuring the density of the material below. Because wet materials are denser than dry ones, the meter can infer the moisture content.
A pinless meter is your best choice for:
- Initial Wall Scans: Think a pipe is leaking behind a historic wall in a West Hollywood home? A pinless meter lets you sweep the entire surface to find the general "wet zone" without leaving a trace.
- Checking Behind Tile and Grout: You can scan a shower wall to find out if water has seeped behind the tile—a really common problem in many Los Angeles properties.
- Quickly Mapping a Ceiling Stain: A pinless meter helps you quickly trace the boundaries of a ceiling leak, showing you exactly how far the water has spread.
Keep in mind, pinless meters are highly sensitive to what's behind the surface. Metal studs, pipes, or even certain types of mesh tape for drywall can cause a false high reading, so it's important to be aware of the underlying structure.
From years of experience, I can tell you the best approach almost always involves using both. You start with a pinless meter to quickly identify potential problem zones, then switch to a pin meter to get precise, confirmative readings at the wettest spots.
This two-step process gives you the complete picture needed for effective structural drying in your home. Getting the right data from the start ensures the drying process is targeted and thorough, stopping much bigger problems before they start.
Interpreting The Numbers: What's a Safe Moisture Reading?

This is where the real work begins. Getting a number on your meter is easy, but translating that number into a smart decision about your home's health is what really matters. Knowing how to read moisture meter readings isn’t just about spotting a high number; it’s about understanding what that number means for that specific material.
A reading that’s perfectly fine for a wood stud could be a five-alarm fire in a sheet of drywall. The key is context, and that starts with establishing a proper baseline.
First, Establish Your "Dry Standard"
Before you go hunting for a suspected leak, you need to find out what "normal" looks like in your house. This is what we in the industry call a "dry standard" or a baseline reading.
It's simple: find an identical material in a completely different part of your home that you know is dry and take a reading there. If you think the wall behind your dishwasher is wet, go take a reading from an interior wall in an upstairs bedroom first.
This step is non-negotiable. Ambient humidity plays a huge role, especially here in Los Angeles. A home in Santa Monica will have a different baseline moisture level than a home in the dry San Fernando Valley. Your dry standard accounts for your home’s unique environment.
A "dry standard" is your control group. Without it, any reading you take is just a number without context. You have no way of knowing if you're looking at a real problem or just normal conditions for your area.
How to Make Sense of The Scales and Numbers
Most meters will show results as either a wood moisture equivalent (WME) or on a relative scale. For wood, the WME percentage is pretty straightforward. For everything else, you're looking for a significant difference between your reading and your dry standard. A big jump is your red flag.
In the restoration world, we live by certain thresholds. For wood framing, anything above 16% moisture content is a problem, and if it hits 20%, it needs immediate, aggressive drying to prevent rot. For drywall, we get concerned when readings climb over 1%, because anything higher suggests water intrusion.
If you're getting consistently high numbers, that’s a clear sign of trapped moisture. At this point, you should start thinking about how to check for mold in walls, because moisture is the number one ingredient for a mold problem.
Material-Specific Moisture Thresholds
Different materials handle moisture very differently. What's considered "saturated" for drywall might be perfectly acceptable for a piece of lumber. Having a quick reference guide makes it much easier to interpret what you’re seeing on the ground.
Here is a quick reference table with the moisture content thresholds we use for common building materials.
Moisture Content Thresholds for Common Building Materials
| Material | Acceptable/Dry (%) | At-Risk/Elevated (%) | Saturated/Wet (%) |
|---|---|---|---|
| Wood (Framing, Subfloor) | 5–12% | 13–16% | 17% and above |
| Drywall/Gypsum Board | <1% (Ideal) | 1–16% | 17% and above |
| Plaster | 5–12% | 13–18% | 19% and above |
| Concrete | Below 4% | 4–5% | Above 5% |
Always remember to note what material you're testing. A reading of 18% on a wood stud is a serious red flag demanding action. That same number on a plaster wall is still a concern, but perhaps slightly less urgent. Combining these benchmarks with your home's unique dry standard gives you the full picture.
Mastering Your Technique for Accurate Readings
Owning a good moisture meter is just the start. The real skill—what separates a pro from a homeowner guessing about hidden damage—is knowing how to use it right. A bad reading is actually worse than no reading at all. It gives you a false sense of security while moisture is still silently causing rot, mold, and structural problems.
Getting your technique down isn't rocket science, but it absolutely requires paying attention to the details. From quick pre-checks to understanding how different materials can fool your meter, adopting a few professional habits makes all the difference. It ensures the numbers you see are reliable and, more importantly, actionable.
Non-Negotiable Prep Steps Before You Begin
Before you even think about touching the meter to a wall, a few simple checks can save you from getting completely bogus readings. Skip these, and you might as well be guessing. Your readings could be off by several points, making your entire effort a waste of time.
- Check Your Batteries: This is the number one rookie mistake. A weak battery will throw off your meter's accuracy every single time. Always start with a fresh set to make sure the device has the power it needs to work correctly.
- Do a Calibration Check: Most quality meters come with a calibration block or have a built-in test function. Make this a daily habit. It literally takes five seconds and confirms your meter is reading true.
- Let It Acclimate to the Room's Temperature: If your meter has been sitting in a cold truck or a hot garage, give it at least 15-20 minutes to adjust to the temperature of the room you're testing. Big temperature swings between the meter and the surface will mess with the sensors.
Perfecting How You Handle the Meter
The way you physically hold and press the meter against a surface has a direct impact on the numbers you get. Both pin and pinless models have their own quirks you need to respect to get consistent results.
For pinless meters, the secret is steady, firm pressure. Don't just tap it against the wall. You need to press the sensor pad flat and firmly against the surface. This ensures the electromagnetic field penetrates the material properly, giving you a stable, accurate reading.
With a pin-type meter, it’s all about getting the pins in correctly. The goal is to push the pins to the depth you want to measure without poking all the way through. When you're testing dense materials like hardwood, always drive the pins parallel to the wood grain for the most reliable measurement.
Pro Tip: Never, ever jam or force the pins into a material. You’ll bend or break them, for one. But you might also push them deeper than you realize, accidentally measuring the material behind your target surface instead.
Common Pitfalls That Can Ruin Your Data
Even with perfect technique, plenty of things in a home can trick your meter and give you a false positive. Knowing how to read moisture meter readings also means knowing what’s likely to fool it.
The biggest culprit for pinless meters is hidden metal. If you get a reading that spikes to the maximum, it's almost certainly not water. Metal studs, drywall corner bead, screws, plumbing pipes, and even foil-backed insulation will make a pinless meter scream. The fix is simple: move the meter a few inches to the left or right. If the number drops back to normal, you've found metal, not moisture.
Other common interferences to watch out for include:
- Surface Condensation: On a humid day, moisture can form on cool surfaces like exterior walls or pipes, giving you a false high reading. Always wipe the surface completely dry before you test it.
- Certain Materials: Some materials just don't play nice with pinless meters. Certain types of vinyl flooring and paints with metallic flecks can throw off the signal.
- Salt Contamination: In older buildings with plaster or masonry, you might find salt deposits (efflorescence). These salts pull moisture from the air and conduct electricity, which can cause a pin-type meter to give a falsely high reading.
By keeping these prep steps, handling techniques, and potential curveballs in mind, your moisture meter goes from being a simple gadget to a powerful diagnostic tool. This methodical approach is exactly how professionals quickly and accurately map out the true extent of water damage, which is the first and most critical step in any successful restoration plan.
Creating a Moisture Map to Document and Track Damage
Once you get the hang of taking good readings, it's time to put that data to work. In the restoration world, our secret weapon isn't just a list of numbers—it's a moisture map. This simple sketch transforms your readings from a random collection of data into undeniable proof of where the water went and how bad the damage is.
Think of a moisture map as a floor plan of the affected room where you plot every single reading. For an insurance adjuster, this visual evidence is gold. It instantly shows the scope and severity of the water intrusion, eliminating guesswork and giving them the hard data needed to approve a claim without a lot of back-and-forth.
Sketching Your Room and Creating a Grid
You don’t need to be an architect for this. Just start with a basic, top-down sketch of the room. Be sure to note where the doors, windows, and any fixtures like sinks or toilets are located. It’s a simple floor plan.
Next, you'll want to overlay a simple grid on your sketch. This is how pros make sure they don't miss anything. For walls, imagine a grid that starts at the floor and goes up. Plan to take readings at a few key intervals:
- Floor Level: Take readings right along the base of the wall.
- Mid-Wall: Measure about 2 feet up the wall, and then again at 4 feet.
- Ceiling Level: Get a reading near the top of the wall where it meets the ceiling.
Do the same for the floor, breaking it up into a simple grid of about 2-foot by 2-foot squares. This systematic approach ensures you cover the entire area and find any hidden pockets of moisture that might be hiding.
Plotting and Tracking Your Readings
With your grid ready, you can start taking and plotting your measurements. Move through the room methodically, taking a moisture reading at each point on your grid. Write the number from your meter directly onto the corresponding spot on your map. As you do this, you’ll start to see a clear picture of the water’s path.
This is where consistent technique is so important. Every reading you take needs to be done the same way to ensure your data is reliable.

Following these three core steps—Calibrate, Press, and Avoid—for every single data point is non-negotiable. It’s what makes the information you plot on your map accurate and defensible.
Your first moisture map is your baseline—it's a snapshot of the damage at its worst. Make sure you date it clearly. As the drying process moves forward, you'll create a new map each day to document your progress and show the structure is drying out.
The Power of a Moisture Map in Insurance Claims
For homeowners in places like Los Angeles County, creating a solid moisture map can be a game-changer. It directly impacts how quickly your claim gets approved and how smoothly the restoration goes. To create a map that holds up to scrutiny, you need to be precise. Calibrate your meter to ±0.1% accuracy and record specific readings, like 22% on a floor joist or 18% on the subfloor.
We often use a pin-type meter for deep precision in wood and a pinless meter for sweeping drywall. This helps generate a color-coded map showing severity: red for readings over 20%, yellow for 13-19%, and green for under 12%. A 2022 industry analysis found that jobs documented with detailed moisture maps resulted in 30% higher insurance reimbursements—a huge deal when you're facing a high deductible.
When you can show an adjuster a series of dated maps that clearly illustrate moisture levels dropping day after day, it provides irrefutable proof that the drying process is working. It justifies the equipment on site, the time spent, and the overall scope of the job. This type of documentation is a cornerstone of the professional water damage restoration process and is absolutely critical for a successful insurance claim. It removes all ambiguity and helps get your claim approved much faster.
When Your Readings Signal It’s Time to Call a Pro
A moisture meter is an incredible tool for spotting trouble early. But I've seen too many homeowners rely on it for too long, letting a manageable issue spiral into a major restoration project. The meter is for diagnostics, not a replacement for professional drying equipment.
Knowing when to put the meter down and pick up the phone is the most important skill. Certain readings are clear-cut signs that the water damage has gone beyond a simple DIY fix. Ignoring them is a costly mistake that often leads to secondary damage like mold and structural rot.
Think of it this way: if your DIY drying efforts—a few fans and a small dehumidifier—aren't making a dent in the numbers after a day or two, it means the water is trapped deep inside the materials where your equipment can't reach it.
Clear Signs You Need an Expert
From my experience in the field, there are a few non-negotiable moments when you need to call for help immediately. Don't hesitate if you see any of these:
- Widespread High Readings: You're not just finding one damp spot. Your meter is lighting up with high readings across multiple walls or a huge section of flooring. This signals a significant water intrusion that needs a professional response.
- Stagnant Numbers: You’ve had fans and a dehumidifier running for 24-48 hours, but the moisture levels are barely moving. This is a classic sign that the saturation is too deep for consumer-grade equipment to handle.
- Inaccessible Moisture: The meter is screaming with high readings from inside a wall cavity, underneath kitchen cabinets, or below tile flooring. These are areas you can't dry without specialized tools.
- Musty Odors or Visible Mold: This is the ultimate red flag. If you can smell that tell-tale earthy, musty odor or see visible mold spots, the problem has already progressed. It’s no longer a water issue; it's a potential health hazard that requires professional remediation.
When your readings point to a major problem, like water intrusion from a damaged roof, it's time to bring in the pros for identifying and addressing roof leaks effectively. A certified restoration pro doesn't just guess; we use advanced gear like thermal imaging cameras to see exactly where the water is and commercial-grade dehumidifiers to pull it out fast, drying your home to strict IICRC standards.
Answering Your Top Questions About Moisture Meters
When homeowners grab a moisture meter for the first time, a handful of questions almost always come up. Getting straight answers from someone in the field can make all the difference between a minor fix and a major headache.
Q: Can a moisture meter find mold?
A: No, a moisture meter cannot directly detect mold. However, it excels at finding the primary condition mold needs to grow: moisture. If your meter shows elevated moisture levels (e.g., over 17% in drywall or 20% in wood), it's a major red flag indicating a high-risk environment for mold growth. It acts as a crucial early warning system.
Q: Are cheap moisture meters from hardware stores accurate?
A: While inexpensive meters can indicate if a material is very wet or very dry, their accuracy can be questionable, often with a margin of error of 10% or more. This can be dangerously misleading. Professional-grade meters are calibrated for specific materials, providing reliable data essential for making informed decisions about repairs and insurance claims.
Q: Why do I get different moisture readings on the same wall?
A: This is normal and expected. Water rarely spreads evenly. It follows the path of least resistance, often soaking a single wall stud while leaving the adjacent one dry. Different materials within the wall, like wood versus insulation, absorb water at different rates. This is why professionals take numerous readings to create a "moisture map" to understand the full extent of the water's path.
Q: What does it mean if the meter reads high but the wall feels dry?
A: This is a critical warning sign of trapped moisture. A high reading on a surface that looks and feels dry almost always indicates water is lurking behind it—inside a wall cavity, under flooring, or soaking insulation. This hidden moisture is the most dangerous kind, as it fuels hidden mold growth and structural rot. If you encounter this, it is essential to contact a professional restoration company immediately.
Don't let hidden moisture compromise your property. If your moisture meter readings are pointing to a problem you can't solve, the IICRC-certified team at Onsite Pro Restoration is ready to help 24/7. Call us for a free, no-obligation assessment. https://onsitepro.org