More than just sweeping up, professional post construction cleaning is the critical final step that protects your health, safety, and brand-new investment. It’s a specialized service that goes after invisible dangers—like fine silica dust and VOCs—that linger long after building is done, transforming a hazardous job site into a pristine, move-in-ready space. This guide covers the essential phases, tools, and strategies for a flawless post construction cleanup.
Ready to transform your construction site into a pristine, move-in-ready property? The experts at Onsite Pro Restoration have the tools, training, and attention to detail to handle any post construction cleaning project. Schedule your free assessment today.
Why Post Construction Cleaning is Non-Negotiable

After the final nail is hammered and the last coat of paint has dried, a construction site is still a long way from being truly finished. A fine layer of dust settles on every single surface, from the insides of cabinets to the tracks of your new windows.
This isn't just dirt. It's often a nasty mix of drywall dust, sawdust, and microscopic silica particles that can cause serious respiratory problems. This is where a dedicated cleanup becomes essential, using techniques that go far beyond what standard janitorial services can offer.
Health and Air Quality Protection
The number one reason for a thorough cleanup is to safeguard indoor air quality. That lingering construction dust can trigger allergies, asthma, and other respiratory issues for anyone who walks through the door.
Proper cleaning isn't just about wiping things down; it requires specialized equipment to capture and filter these tiny airborne particles. For a closer look at what that involves, you can check out details on specialized new construction cleaning services.
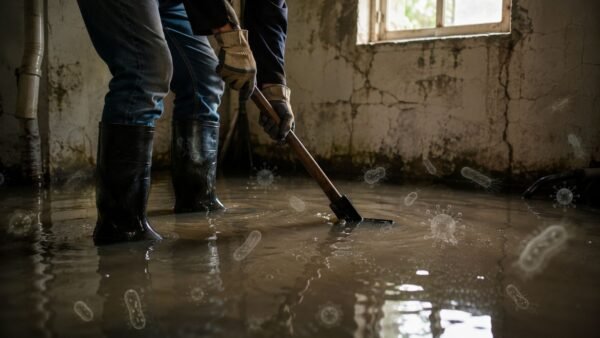
Construction dust isn’t just an eyesore; it’s a health hazard. Fine particulate matter can linger in the air for weeks, posing risks to anyone entering the space. Professional cleaning directly addresses this by removing contaminants at the source.
Preserving Your Investment
Think about all those new materials—hardwood floors, custom cabinetry, stone countertops. They are incredibly vulnerable to damage from abrasive construction debris. Trying to scrape away dried paint or grout haze with the wrong tools can leave permanent scratches.
Professionals know exactly how to treat these new surfaces with care, making sure they look their best without causing unintended damage. This meticulous attention to detail is why the global post construction cleaning market is projected to hit $12.8 billion by 2035. It’s not a luxury; it’s a necessity.
A huge part of this process is managing airborne dust. You need the right tools for the job, and that often means bringing in heavy-duty equipment. To see what the pros use to purify the air during these final cleaning phases, Learn more about air scrubber rental.
The Essential Toolkit for Post Construction Cleaning
Trying to tackle a post construction cleaning project with the wrong gear is like trying to paint a masterpiece with a toothbrush. You might make a mark, but you won't get a professional finish, and you could easily damage brand-new surfaces. The real difference between an amateur attempt and a pro-level clean comes down to having the right tools and, just as importantly, the right safety equipment.
This is worlds away from a simple mop-and-bucket job. We're talking about a specialized arsenal built to handle the unique mess left behind by construction—everything from stubborn adhesive on new floors to that nearly invisible film of drywall dust that gets everywhere.
Using regular household cleaners or your home vacuum isn't just a bad idea; it's a recipe for disaster. At best, it's ineffective. At worst, you could permanently damage new materials or kick hazardous dust right back into the air you're breathing.
The Right Tools for a Flawless Finish
The absolute cornerstone of any serious post-construction cleanup is a powerful, commercial-grade vacuum fitted with a HEPA (High-Efficiency Particulate Air) filter. This isn't just a fancy feature. While a standard vacuum might just blow the finest, most harmful particles back into the room, a HEPA system is engineered to capture 99.97% of airborne particles as small as 0.3 microns.
This is the only way to truly get rid of silica and drywall dust, which are notorious for causing respiratory problems. Without a HEPA filter, you're just moving the mess around, not actually removing it.
Before you start any post-construction cleaning project, it's crucial to have the right gear on hand. Here’s a breakdown of the essential toolkit that separates a quick wipe-down from a professional, move-in-ready clean.
Essential Post Construction Cleaning Toolkit
| Category | Essential Items | Purpose |
|---|---|---|
| Dust & Debris Removal | Commercial Vacuum with HEPA Filter | Captures fine particulates like drywall and silica dust without exhausting them back into the air. |
| Microfiber Cloths & Duster Heads | Electrostatically attract and trap fine dust instead of just pushing it around. Essential for all surfaces. | |
| Soft-Bristled Brushes & Broom | Dislodging dust from corners, vents, and textured surfaces before vacuuming. | |
| Surface Cleaning | Industrial-Grade Cleaning Agents | Specific solvents for removing paint overspray, adhesive, caulk, and grout haze without damaging finishes. |
| pH-Neutral Floor Cleaner | Safely cleans delicate surfaces like natural stone, LVP, and hardwood without etching or stripping sealants. | |
| Glass Cleaner | A professional-strength, ammonia-free formula to leave windows and mirrors streak-free. | |
| Detailing & Scraping | Plastic Scrapers & Putty Knives | Gently removes dried mud, caulk, and paint splatters from glass, tile, and fixtures without scratching. |
| Utility Knife with Fresh Blades | For carefully cutting away plastic sheeting, protective films, and stubborn tape residue. | |
| Safety & PPE | N95 or P100 Respirator Masks | Protects lungs from inhaling fine dust, silica, and airborne chemical vapors. |
| Safety Goggles | Shields eyes from flying debris, dust, and chemical splashes. | |
| Heavy-Duty Gloves | Protects hands from harsh chemicals, abrasive surfaces, and sharp debris. |
Having these items ready to go ensures you can work efficiently and, most importantly, safely, delivering a truly pristine result.
Personal Protective Equipment (PPE) is Non-Negotiable
Safety has to be your top priority on a post-construction site. The air is often thick with particulates and chemical residues that pose a serious, long-term health risk. Gearing up with the proper Personal Protective Equipment (PPE) isn't just a suggestion—it's an absolute must for you and your team.
Never underestimate the unseen dangers. The fine dust from materials like concrete and drywall can linger in the lungs long after exposure, making proper PPE a critical line of defense for your long-term health.
Here’s the absolute minimum you should be wearing:
- N95 or P100 Respirator Masks: These are critical for filtering out the fine particulate matter that is everywhere on a construction site.
- Safety Goggles: Protect your eyes from airborne dust, falling debris, and any splashes from cleaning solutions.
- Durable Gloves: Nitrile or heavy-duty latex gloves are your first line of defense, protecting your skin from harsh chemicals and rough, abrasive surfaces.
Sometimes, a site has more than just dust and debris. If you encounter significant chemical residues or spills, proper containment and disposal become critical. For those tougher jobs, our guide on hazardous waste and spill cleanup offers deeper insight into managing these complex situations safely.
Building the right toolkit is your first step. It’s what transforms a chaotic, dusty worksite into a clean, safe, and welcoming space.
The Three Phases of Professional Construction Cleanup
A professional post construction cleaning job isn't a free-for-all where everyone just starts scrubbing. It’s a systematic process that transforms a chaotic worksite into a polished, move-in-ready space. We break it down into three distinct phases, each with its own mission. Knowing how this works helps set expectations and guarantees nothing gets missed.
Think of it as deconstructing the mess in reverse. You start with the big, obvious problems—the lumber scraps and heaps of drywall—and slowly refine your work until you’re polishing fingerprints off a light switch. Each phase builds on the one before it, creating a logical flow that’s both efficient and incredibly thorough.
This infographic lays out the essential workflow for any post-construction cleanup, from the initial safety checks to hauling away the last bit of debris.

As you can see, a successful cleanup is all about sequence. Safety comes first, always. Then comes targeted cleaning and a final, thorough removal of all waste, leaving behind a safe and pristine environment.
Phase 1: The Rough Clean
The first push is what we call the "rough clean." This is all about brute force and getting the big stuff out of the way. This stage usually kicks off right after the main construction work wraps up but before the finishing crews, like painters or flooring installers, arrive. The goal isn't perfection; it's to clear the decks so everyone else can work safely.
During the rough clean, crews are focused on:
- Hauling out large debris: This means grabbing leftover lumber, drywall cutoffs, empty caulk tubes, and all the other building materials left behind.
- Initial sweep and vacuum: We do a first pass to get the bulk of the sawdust, dirt, and other heavy particulates off the floors.
- Trash disposal: All construction-related garbage is bagged up and tossed, which almost always requires a large on-site dumpster.
Getting this initial stage right means implementing smarter construction waste management strategies from the get-go. A well-run rough clean sets the entire project up for success.
Phase 2: The Light Clean
Once the construction is officially done and the heavy debris is gone, we move into the "light clean," sometimes called the "prep clean." This is where the real magic happens and it's easily the most labor-intensive part of the job. The focus shifts from bulk removal to a detailed, top-to-bottom cleaning of every single surface.
This is our chance to hunt down the fine layer of dust that has settled on everything. Armed with HEPA-filter vacuums and an army of microfiber cloths, our technicians meticulously work their way from the ceiling down to the floor.
The top-down cleaning method is non-negotiable in post-construction cleaning. It ensures that dust dislodged from high surfaces like light fixtures and ceiling fans is captured as it falls, preventing the need to re-clean lower surfaces.
Tasks during this phase include:
- Deep cleaning rooms: Kitchens and bathrooms get special treatment. We're talking inside and out of every cabinet, plus scrubbing all countertops, sinks, and fixtures.
- Washing surfaces: Walls are spot-cleaned, baseboards are wiped down, and window sills, frames, and tracks are cleared of all dust and grime.
- Detailing fixtures: Every light fixture, switch plate, outlet cover, and piece of door hardware gets wiped clean.
This is the phase that truly separates a professional job from a quick broom-pushing. We’re preparing every surface for the final polish. This kind of deep cleaning is a cornerstone of all professional pro restoration services, ensuring the property is not just clean, but brought back to a pristine state.
Phase 3: The Final Clean
The last stage is the "final clean," which you might hear called a "punch list" or "touch-up" clean. This usually happens right before the client or property owner does their final walkthrough. Sometimes we even wait a day or two after the light clean to let any lingering dust settle. This is the final polish that delivers that showroom-quality finish.
During this phase, our cleaners go through the property with a fine-toothed comb, hitting any last imperfections. This means wiping away fingerprints from glass and shiny fixtures, running the vacuum one last time, and making sure every surface is absolutely spotless. The final clean is what gives a new space that "wow" factor the moment you walk in the door.
A Room-by-Room Post Construction Cleaning Strategy
Applying a phased approach to post construction cleaning is the foundation, but the real work happens when you tailor that strategy to each room. A newly built kitchen has completely different cleaning needs than a renovated master bedroom, and treating them the same is a recipe for disaster.
This area-by-area playbook breaks down the specific tactics you'll need to handle the unique materials and challenges you'll find in different parts of a property.

This detailed approach is all about protecting delicate new finishes while completely eliminating construction residue. After all, using the wrong chemical on a marble countertop or an abrasive sponge on a stainless steel appliance can cause irreversible damage before the owner even moves in. It's a high-stakes game.
Kitchens: The Heart of the Mess
The kitchen is almost always the epicenter of construction dust and debris. New cabinets, countertops, and appliances create a complex environment that demands meticulous attention.
Your main focus here is the fine dust that settles inside every nook and cranny. Start by vacuuming the interiors of all cabinets and drawers with a soft brush attachment. Then, follow up by wiping them down with a damp microfiber cloth, making sure you get into all the corners where sawdust loves to hide.
For new appliances, the goal is to remove all protective films and sticker residues without scratching the surfaces.
- Stainless Steel: Gently peel back the protective film. For any leftover adhesive, use a small amount of mineral oil or a specialized stainless steel cleaner on a soft cloth, always wiping with the grain.
- Glass Cooktops: Remove any debris with a plastic scraper before cleaning with a dedicated cooktop cleaner to avoid scratching that delicate surface.
Bathrooms: Tackling Grout Haze and Fixtures
Bathrooms present their own unique set of challenges, most notably grout haze on new tile and fine dust on shiny chrome fixtures. Grout haze is that milky white film left behind after tiling, and if you don't remove it properly, it can permanently dull the look of beautiful new tile.
Stick to a pH-neutral cleaner designed specifically for grout haze removal and follow the manufacturer’s instructions carefully. A common mistake I see is people reaching for acidic cleaners like vinegar, which can etch natural stone tiles and damage the grout itself.
Always test your cleaning solution on an inconspicuous spot first, like a tile inside a closet. This simple step can prevent widespread damage to expensive new materials.
After tackling the tile, turn your attention to the fixtures. Every sink, faucet, and showerhead needs to be wiped down to remove dust and water spots, leaving a streak-free shine. While you're in there, keep an eye out for potential moisture issues. Lingering dampness in a new bathroom can create problems down the road. For more information on that, our guide on how to get rid of black mold in a shower provides valuable tips.
Living Areas and Bedrooms: The Final Polish
Living areas, bedrooms, and hallways are typically less complex but require a systematic top-to-bottom approach to capture every last bit of dust. This is where the true final polish happens.
Start high. We're talking light fixtures, ceiling fans, and the tops of window casings. From there, work your way down, wiping walls, baseboards, and window sills. One of the most frequently missed spots is the window tracks, which are often packed with drywall dust and debris. Use a vacuum crevice tool to clear them out before wiping them clean.
The sustained activity in residential renovation is a major driver of this specialized cleaning sector. In fact, the global market for these services is estimated at $1.71 billion and is expected to grow as more homeowners invest in property upgrades. This final, detailed phase is what ensures the space is not just clean, but truly ready for living.
The Final Inspection and Handover Checklist
This is it—the moment of truth. The final walkthrough is where your hard work pays off, but only if you get it right. It’s far more than just a quick glance around; it's a systematic, top-to-bottom inspection that proves every detail meets professional standards before you hand back the keys.
Think of this final check as your last line of defense against frustrating client callbacks. A meticulous checklist turns a subjective "looks clean" into an objective, verifiable confirmation of quality. It helps you catch the little things that are so easy to miss, like a fine layer of dust on top of a door frame or faint smudges on a window that only show up in the afternoon sun.
Key Areas for Final Inspection
Before you even think about signing off, you need to do a thorough walkthrough, ideally with the client or project manager right there with you. My pro tip? Always bring a powerful flashlight. By shining it across surfaces at a low angle, you’ll reveal fine dust and streaks that are completely invisible in normal overhead lighting.
Your checklist absolutely must include these areas:
- High and Low Surfaces: It's a classic rookie mistake to forget what's out of direct sight. Get your eyes on the tops of cabinets, door frames, and ceiling fan blades. Then, get low and check every inch of the baseboards and floor corners where dust loves to settle.
- Glass and Reflective Surfaces: Inspect every window, mirror, and polished metal fixture for streaks, smudges, or leftover adhesive. Look at them from multiple angles to be sure.
- Fixtures and Hardware: Double-check that all protective films and manufacturer labels have been peeled off appliances, faucets, and hardware. Make sure everything is polished and totally free of fingerprints.
- Cabinetry and Drawers: Open every single one. Seriously. Dust from drywall sanding has a nasty habit of settling inside drawers and cabinets, and it’s one of the most commonly missed spots.
Nailing this final quality check is what solidifies your reputation. The cleaning industry is a huge part of the economy—the North American sector is projected to hold a 45% global revenue share by 2037. Delivering a perfect job every single time is what keeps you in the game. You can dig into this more by exploring these cleaning industry trends.
The final handover is your last opportunity to make a great impression. A flawless finish doesn't just satisfy the client; it acts as a powerful testament to your team's professionalism and sharp eye for detail.
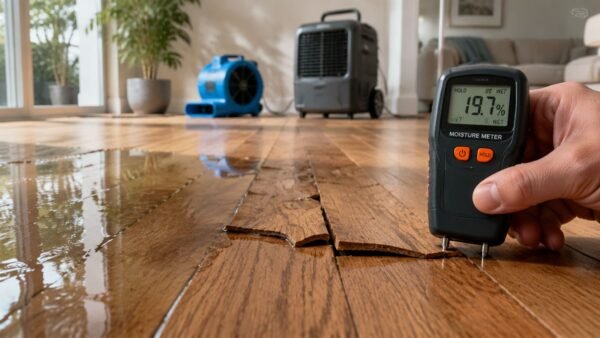
Even with the best cleaning, surprises can pop up. Sometimes a small, hidden leak during construction can leave moisture trapped behind a wall. Knowing how to handle discoveries like that is crucial. Our guide on the water damage restoration process offers essential advice for exactly these kinds of situations.
Common Questions About Post Construction Cleaning
Wrapping up a construction or renovation project always brings up a flurry of questions. When the dust finally settles (literally), knowing what comes next with the cleanup is crucial. Here are some of the most common things people ask us about post construction cleaning, with straightforward answers from our years of experience.
How Long Does This Type of Cleaning Take?
The timeline for a post construction cleanup can vary wildly depending on the size and messiness of the job. For a typical 2,000 sq ft home renovation, you can expect a skilled team of two or three cleaners to need a full 8-hour day to get everything truly move-in ready. But for something like a new commercial building, we're often looking at a multi-day project with a larger crew. The big variables are always the sheer amount of dust, the types of new surfaces that need special care, and just how perfect the space needs to be for the final handover.
Rough Clean vs. Final Clean: What Is the Difference?
These two terms get thrown around a lot, but they mean very different things. Think of them as two distinct stages of the cleanup game. A rough clean is the first pass, the heavy-lifting phase. The only goal here is to get rid of the big stuff—piles of debris, leftover materials, and general trash. This makes the site safe and clear for the finishing trades, like painters or flooring installers, to come in and do their work without tripping over junk. A final clean is the white-glove service that happens after every single construction task is done. This is where we go top-to-bottom, tackling the fine dust that has coated every imaginable surface. We clean fixtures, polish finishes, and get the property ready for someone to walk in and start living or working there immediately.
Is Hiring Professionals for Construction Cleanup Worth It?
Honestly, for any project bigger than a single-room DIY job, hiring a pro team isn't just "worth it"—it's a necessity. Professionals show up with specialized equipment that a homeowner or standard cleaning service just won’t have, like commercial-grade HEPA vacuums and industrial air scrubbers that trap microscopic dust.
Hiring a professional team is an investment in safety and quality. They are trained to handle hazardous construction dust and know which specific cleaning agents to use on delicate new surfaces, preventing costly damage.
They know exactly which cleaning products to use on brand-new, expensive surfaces without causing damage, and they're trained to handle potentially hazardous materials safely. Their efficiency and thoroughness mean the job gets done right the first time, protecting your investment and the health of the people who will be using the space.
Does the Service Include Exterior Windows?
Most standard post construction cleaning packages focus strictly on the building's interior. That's where the bulk of the fine dust and debris ends up. However, many professional companies, including us, offer exterior services as an add-on. This could be anything from washing the outside of the windows to power washing walkways or removing paint overspray from siding. The key is to have this conversation upfront. Make sure you confirm the full scope of work with your cleaning provider beforehand so there are no surprises.
Ready to transform your construction site into a pristine, move-in-ready property? The experts at Onsite Pro Restoration have the tools, training, and attention to detail to handle any post construction cleaning project. Schedule your free assessment today.