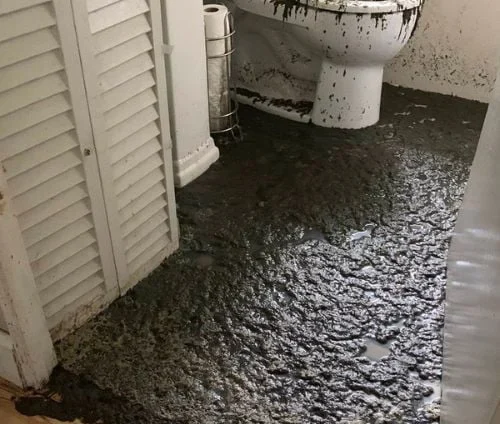
Discover the essential steps mold specialists take to inspect your home for mold. From initial assessments to advanced techniques, learn how these experts keep your home safe from mold-related issues.
Introduction to Mold Inspections
Mold can be a pesky intruder in any home, thriving in damp, dark environments. But how do mold specialists detect and deal with it? This blog post delves into the meticulous process of mold inspections, shedding light on how professionals ensure your living space remains mold-free.
What is Mold and Why Inspect for It?
Mold is a type of fungus that grows in moist environments. It can cause various health issues, including respiratory problems and allergic reactions. Inspecting for mold is crucial to maintaining a healthy living environment.
The Initial Consultation: Setting the Stage for Mold Inspection
The first step in any mold inspection is the initial consultation. This involves a detailed discussion with the homeowner to understand the extent of the problem.
- Understanding the Symptoms: Homeowners often report visible mold, musty odors, or health issues. Specialists use this information to prioritize inspection areas.
- Historical Context: Knowing the history of water damage or previous mold issues in the home helps in pinpointing potential problem areas.
- Setting Expectations: Clear communication about the inspection process and potential outcomes prepares homeowners for what to expect.
Visual Inspection: The First Line of Defense
A visual inspection is the most straightforward method to detect mold. Specialists meticulously examine the property, looking for visible signs of mold growth.
- Common Areas of Concern: Kitchens, bathrooms, basements, and attics are prime locations for mold due to their high moisture levels.
- Hidden Spots: Mold can grow behind walls, under carpets, and in HVAC systems. Specialists know where to look.
- Documenting Findings: Photographs and notes are taken to document visible mold, aiding in the development of a remediation plan.
Moisture Mapping: Tracking the Source
Moisture is a key factor in mold growth. By mapping moisture levels throughout the home, specialists can identify areas at risk.
- Tools of the Trade: Moisture meters and infrared cameras detect hidden moisture that might not be visible to the naked eye.
- Analyzing Patterns: By understanding the moisture distribution, specialists can predict where mold is likely to grow.
- Addressing Moisture Issues: Identifying and fixing the source of moisture is crucial to preventing future mold growth.
Air Quality Testing: The Invisible Threat
Mold spores are microscopic and can be present in the air even if mold isn’t visible. Air quality testing helps detect these hidden dangers.
- Sampling Techniques: Specialists use air pumps to collect air samples from different areas of the home.
- Laboratory Analysis: Samples are sent to a lab for analysis, identifying the types and concentrations of mold spores.
- Interpreting Results: The findings help determine the severity of the mold problem and guide remediation efforts.
Surface Sampling: Getting Up Close and Personal
Surface sampling involves collecting samples from suspected mold growth areas to confirm its presence and type.
- Swab Tests: Cotton swabs are used to collect samples from surfaces with visible mold.
- Tape Lift Samples: Adhesive tape is pressed against surfaces to collect mold spores.
- Analyzing Samples: Like air samples, these are sent to a lab for detailed analysis.
HVAC Inspection: The Hidden Culprit
Heating, ventilation, and air conditioning (HVAC) systems can harbor mold, spreading spores throughout the home.
- Ductwork Examination: Specialists inspect ductwork for signs of mold and moisture.
- Filter and Vent Checks: Filters, vents, and coils are checked, as these areas can accumulate mold.
- System Cleaning: If mold is found, the HVAC system may need professional cleaning to prevent spore distribution.
The Role of Infrared Technology in Mold Detection
Infrared cameras are invaluable tools in mold inspections, revealing hidden moisture and potential mold growth.
- Detecting Hidden Moisture: Infrared technology can spot moisture behind walls, under floors, and in other concealed areas.
- Preventive Measures: By identifying moisture before mold grows, preventive steps can be taken.
- Detailed Reporting: Infrared images provide visual evidence of problem areas, aiding in remediation planning.
Creating a Mold Remediation Plan
Once the inspection is complete, specialists develop a comprehensive remediation plan to address the mold problem.
- Customized Solutions: Each plan is tailored to the specific needs of the home based on inspection findings.
- Preventive Steps: Recommendations for preventing future mold growth are included in the plan.
- Detailed Steps: The plan outlines the steps for removing mold, repairing damage, and restoring the home.
The Importance of Follow-Up Inspections
After remediation, follow-up inspections ensure that the mold problem has been resolved and preventive measures are effective.
- Verification: Specialists verify that all mold has been removed and moisture issues have been addressed.
- Monitoring: Periodic inspections help catch any recurring issues early.
- Peace of Mind: Knowing that the home is mold-free provides homeowners with peace of mind.
Conclusion: Ensuring a Mold-Free Home
Mold inspections are a critical component of maintaining a healthy living environment. By understanding the steps involved, homeowners can appreciate the thoroughness and expertise required to keep their homes safe from mold. Trust in professional mold specialists to ensure your home remains a sanctuary, free from mold and its associated health risks.


